
Are you interested in drying your own herbs? I just love fresh herbs and I grow many on my farm in Bucks County, Pennsylvania. If you are interested in how I do that, please read this blog post: Herbs, and how to grow, harvest, and dry your own.
I use lots of fresh herbs in everything, my floral designs, my cooking, and even my baking. Having a large herb garden is great in the summer, but I soon realized I needed to dry much of my harvest because they were growing so fast and I just couldn’t eat them fast enough. Drying is a great way to have plenty of herbs throughout the winter.
Herb Drying Racks
As I began searching for herb drying racks I came to discover I did not care for the many options out there because they reminded me of large, round, mesh butterfly cages and I knew they would not fit well in my rectangular pantry -where I wanted to dry the herbs. So instead of buying one, I created my own.
How I Created My Own
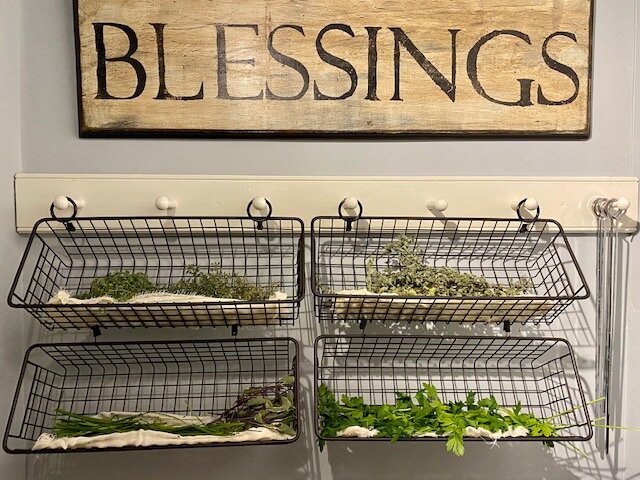
First, I started with an existing peg rack that was already hanging in my pantry. If you don’t have one, you can easily find stylish pegs or hooks to add to any wall with this link.
I then hung simple curtain ring clips on four of the pegs and attached these simple metal baskets to the clips. You can find metal baskets in all shapes and sizes depending on what works best for you.
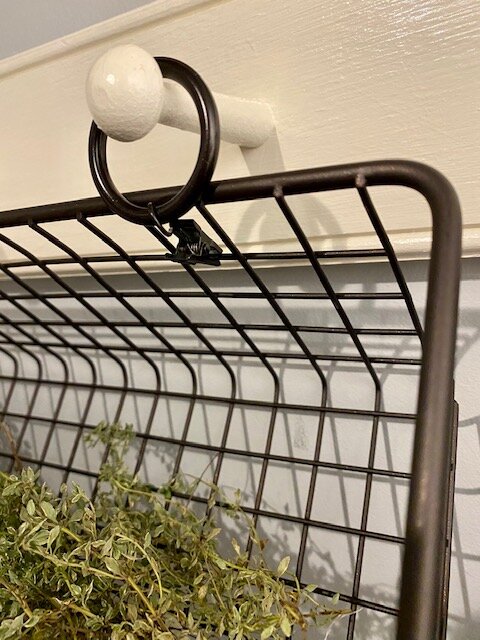
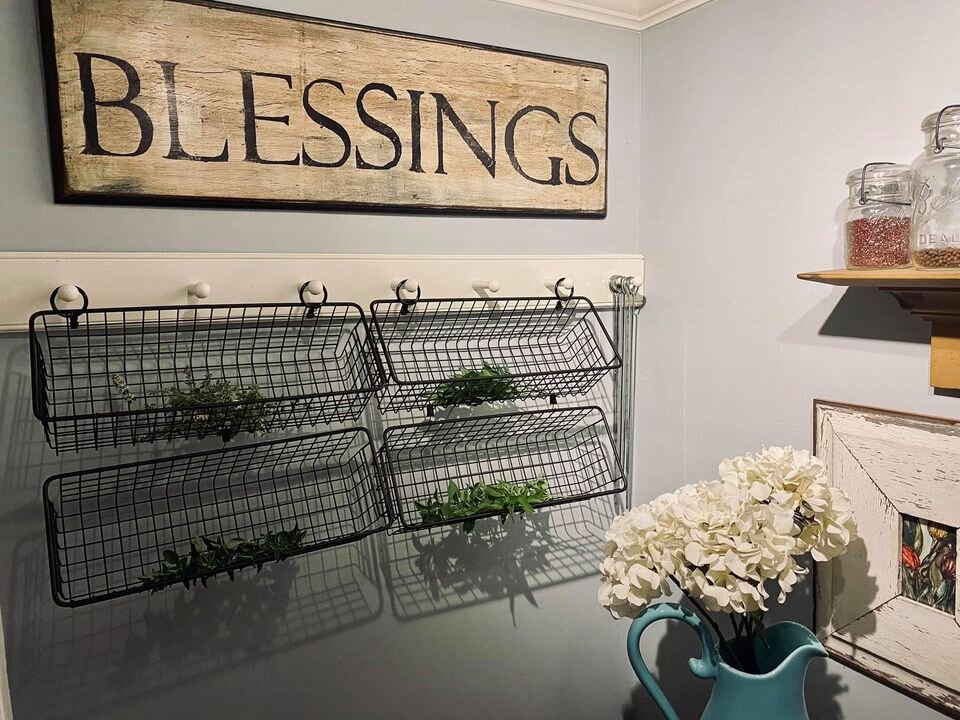
Next, I removed the rings from the clips and used just the clips to connect basket to basket, creating a cascading effect. I hung two columns of baskets, two deep, but you can create any configuration that works in your space.
Lastly, I lined the baskets with a small cutting of cheesecloth in case the herbs were damp from washing and needed to drip.
Now, the aroma in my pantry is always wonderful and it’s also a pleasant sight when I walk in -as it takes up the entire back wall. The great thing about this herb drying rack is that I can add to it and go all the way down the wall if I wish. If you have a large wall to cover, you can always intersperse framed herbal artwork or framed herbal photos taken from a calendar. You can also use your own custom photos or paintings and design a unique “Herbal Wall”. To help, I have included a list with links below where you will find some of the materials I used.


I’m always here to help you with your creative journey. Please sign up to receive blog post notifications and follow Studio Sprig on Instagram, Facebook, and Pinterest. I look forward to connecting. If you’re a blogger, what’s your favorite SEO Tool? I’ve had much keyword success with RankIQ. Learn more here. Kim
This post contains affiliate links. As an amazon associate, I make a small commission at no further cost to you. Thank you.