
Easter is just around the corner, and it’s time to start thinking about easy-to-do spring decor ideas. Sentimental eggs that tell a story are a great way to add interest to the season. Creating a decoration that you can display every year is a meaningful way to enjoy a happy memory, and reusing something worn and weathered is a great way to honor the environment too.
Why maKE sentimental eggs?
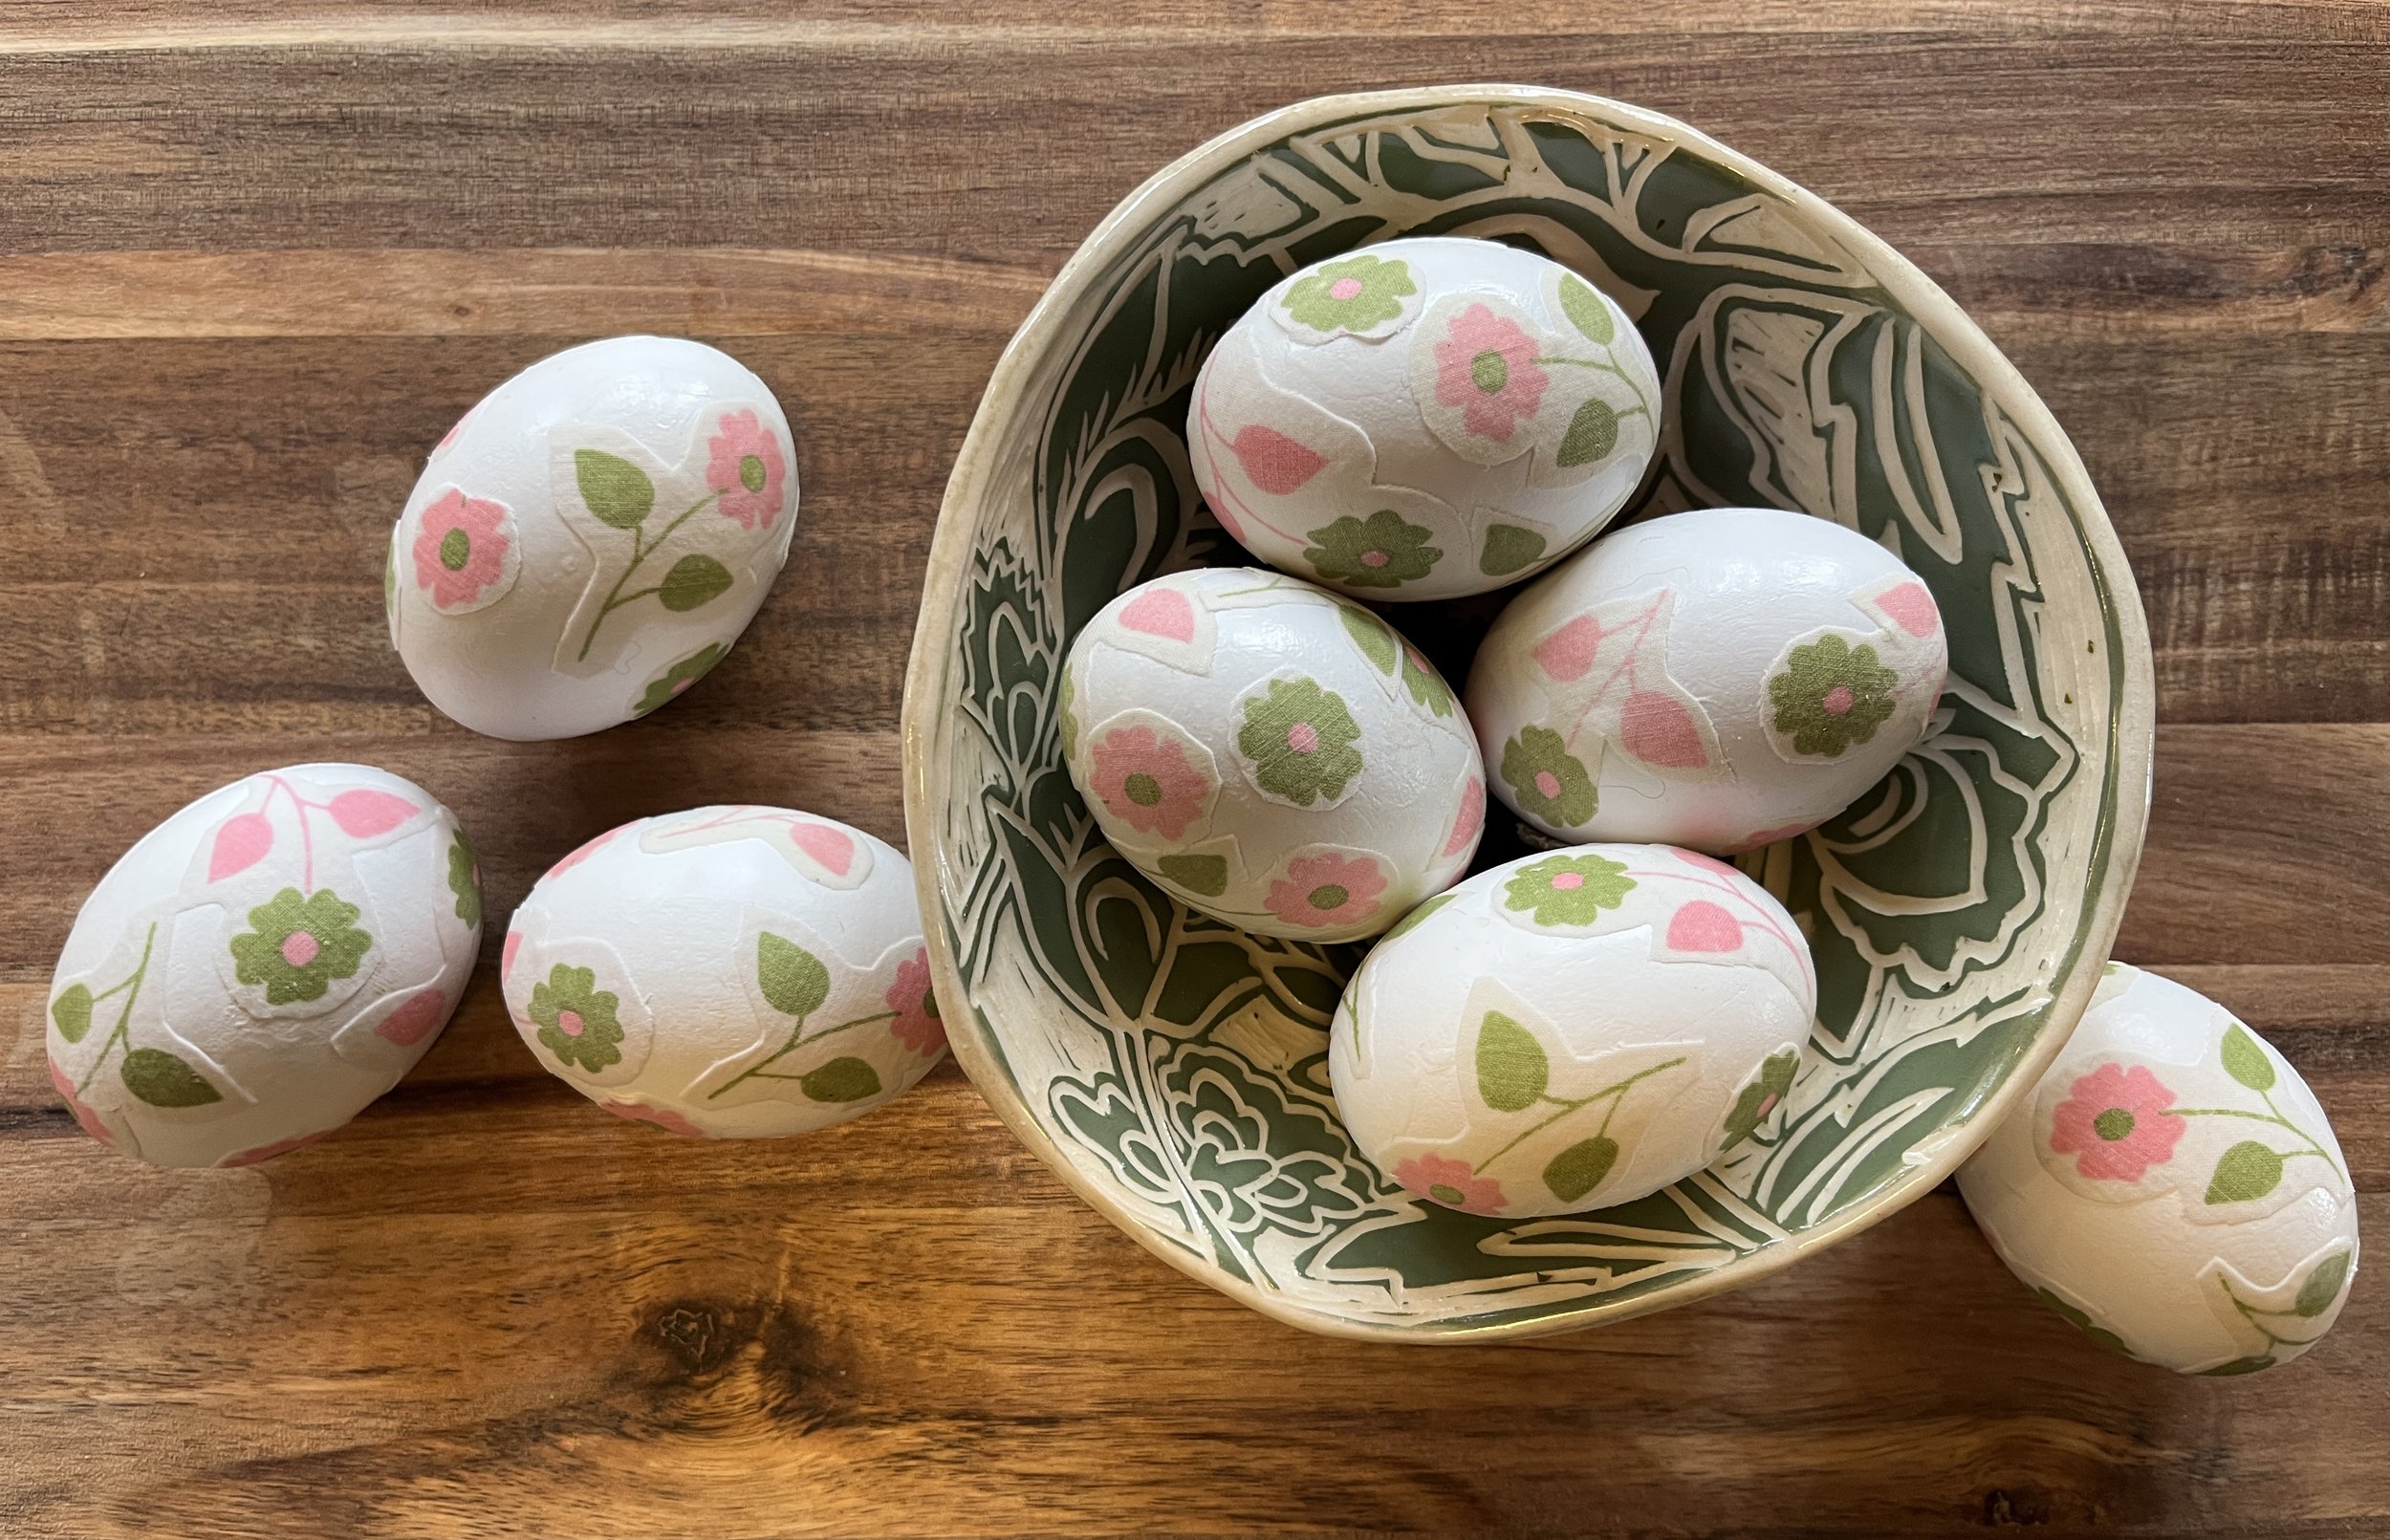
Last year I created these pretty floral eggs with a vintage pillowcase that has a story. This particular pillowcase was part of a set of vintage sheets my mother chose for me when I was a child. When my children were small I hired a seamstress to design clothing using some of my hand-me-down vintage sheet sets (don't worry, I will blog about that soon because they were awesome!). But this time I made eggs instead.

This particular pink and green pillowcase above was an outlier that I was mixing in here and there with my other linens. I used it for many years and always took great care of its delicate nature, however, as expected over time it wore very thin. One day, my washing machine completely shredded it and I was sad because it reminded me of my mother. So instead of throwing it in the garbage, I wondered what I could do to preserve it. I decided since Easter was my favorite holiday, that I'd try to create a few decorative eggs so that I could enjoy this childhood memory every year going forward. The samples I created tell a story, so they are now the first set of what I am calling my Story Eggs.

the BEST FABRIC FOR MAKING story eggs
I used floral, vintage sheets from my childhood, but you can also use any scrap of sentimental fabric you can find. Maybe it is a small clipping from your grandmother’s wedding dress or a cutting from your child’s favorite cotton onesie. I would recommend hunting for thin cotton as it's much easier to work with. For reference, thin, vintage pillowcases are the perfect texture and work very well.
Estate sales and thrift shops are great places to hunt for fun and fabulous vintage cloth. You don't need much fabric for this project so if you go to a fabric shop ask if they have quilting squares, as that's another great source that won’t cost a lot. If you’ve never heard of Spoonflower, they also have the option to order an 8”x8” square swatch for just $5 with any pattern you choose, and better yet you can even upload your own pattern designs and create your own custom fabrics. Imagine uploading your child’s artwork, creating a pattern, and having spoonflower print it on fabric. I’ll put a link at the bottom for you to see what I am talking about. I have also included more links for pillowcases and trims at the bottom of this post. Use your imagination and gather what works best for you to create your own memorable Story Eggs.

WHAT TYPE OF EGGs SHOULD I USE?
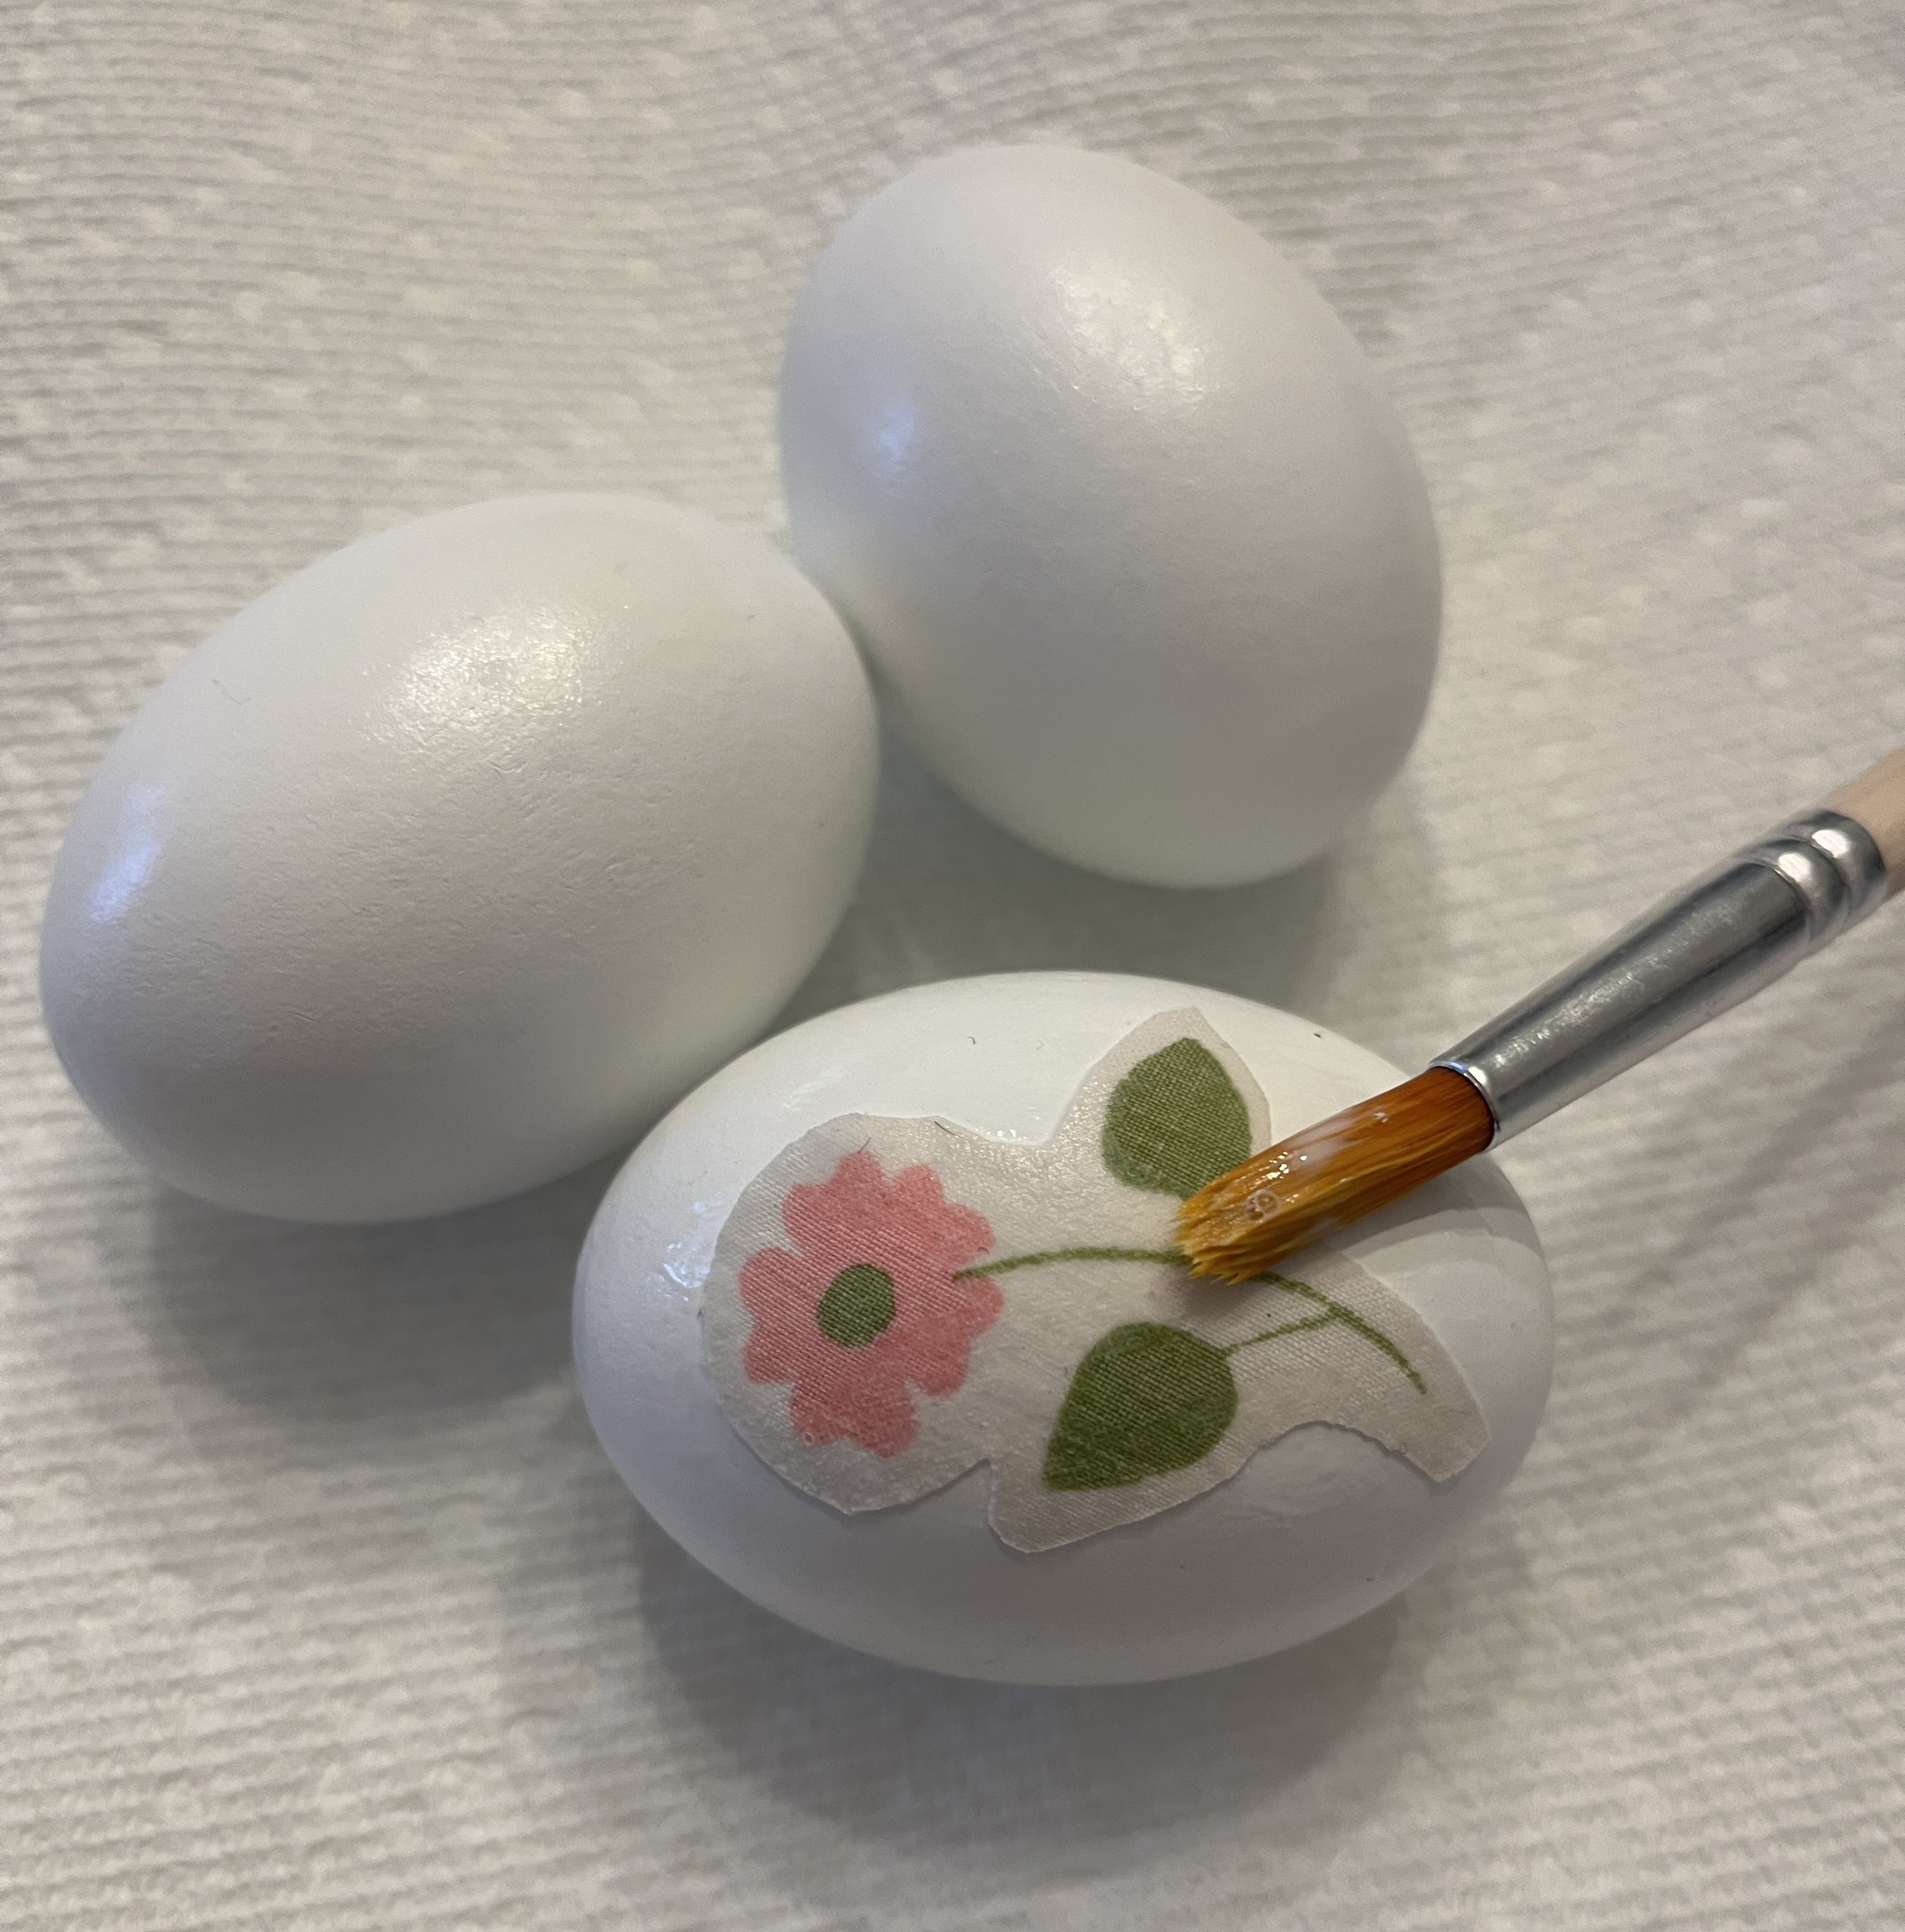
I don't like to use real eggs because they are hard to work with and they can crack and spoil over time. I also don't recommend plastic eggs because they aren’t substantial enough. Instead, I recommend using an assortment of really nice wooden eggs.
Here I used very inexpensive white wooden eggs, but you can also order brown wooden eggs. And I also found a collection of white, brown, and pale green wooden eggs which closely resemble the chicken eggs I buy from my neighbor.
Creating a Story Egg with your own sentimental vintage fabric is an easy and fun DIY project that is sure to reignite happy memories. Even children can create these eggs using the simple directions below. With just a few supplies and your creativity, you can make beautiful eggs that will make your Easter and Spring celebrations even more special. When finished, pop them into a child’s easter basket, or present them as a housewarming gift in a simple pottery bowl as I did. They can just be little decorations complimenting your larger Easter Table Ensemble or let the creation of your Story Eggs be an “egg painting alternative” for a family gathering. Either way, I hope these eggs spark many sentimental conversations. Whether your creations are used to decorate for the holiday, become a new family craft, or are given as gifts, try to come up with a new Story Egg idea each year so that this can become a cherished part of your traditions.
To create a story egg you will need:
SUPPLIES:
Fabric Scissor
Small Paint Brushes
White wooden eggs
Mod Podge (Matte Finish)
Fabric
OPTIONAL SUPPLIES:
Brown wooden eggs
White, brown, and pale green wooden eggs
Mod Podge (Gloss Finish)
Pink Vintage Inspired Pillowcases
Blue and Green Vintage Inspired Pillowcases
Purple Floral Inspired Pillowcases
Rick Rack Trim various colors
Egg Cups for drying
Translucent Bags
CREATE YOUR OWN FABRIC WITH SPOONFLOWER:
Spoonflower Custom Fabric Squares

FOLLOW THESE STEPS:
Step 1: Prep wooden eggs
With a slightly damp cloth, clean your wooden eggs to make sure they are free of any dust and debris.
Step 2: Cut fabric designs and patterns into small pieces
Use a fabric scissor to cut around your designs and patterns, breaking them into small portions. Smaller sections, not larger than 2” work best. I simply cut around each flower and stem.
Step 3: Decoupage your eggs
Break out a roll of paper towels to cover your work surface, then use a small paint brush and a small amount of decoupage glue (I use Mod Podge) on the egg (only in the area you'll be adhering your first piece). Then place the piece on that glue. Let dry.
Once you've gone around the entire egg and placed all of your pieces, you are ready to paint Mod Podge over all the fabric pieces and all bare egg surfaces as well. If you choose a matte finish they will dry like mine. A gloss finish is another option. All links are below.
Step 4: Dry your Eggs
This is a great time to pull out your mini egg cups or deviled egg dishes if you have some. The eggs need a place to dry so they do not roll around. You can also use the underside of an egg carton.
Step 5: Display or Package Your Story Eggs
Once your eggs are completely dry, find a pretty bowl or basket for display. If your eggs are created from a sentimental fabric you may want to place each one into a special little translucent bag as I did below and give them to members of your family. You may also choose to add painted polka dots, stripes, or a wedding date or name to complete the memory. This is completely optional.

I’d love to see your Story Eggs or hear about other ways you’ve made sentimental eggs from things you love. If you are enjoying my blog, please share it with friends and subscribe here so you can read the next one.

If you’re a blogger, what’s your favorite SEO Tool? I’ve had keyword success with RankIQ. Learn more here. If you enjoyed this Creative Inspiration you may also like this: DIY HERB DRYING RACK: HERB DRYING AT HOME