• HOME
    • Meet Kim
    • WINDY HILL FARM
  • Sprig Finds
    • Studio Sprig Products
    • Studio Sprig Wallpaper
    • Studio Sprig Sheet Sets
    • Studio Sprig Throw Blankets
    • Studio Sprig Throw Pillows
    • Studio Sprig Duvet Covers
    • Studio Sprig Fabric Designs
    • Bridal Watercolor Portraits
    • Bloom Bars
    • Wedding Flowers
    • Dried & Pressed
    • My Favorite Floral Books
    • Flower Art for Cakes
    • FORMALS & PROMS
    • Flower Farm Tours
  • Stay in The Artist Cottage
  • BLOG
  • CONTACT
Menu

Studio Sprig

Studio Sprig at Windy Hill
  • HOME
  • About
    • Meet Kim
    • WINDY HILL FARM
  • Sprig Finds
  • Shop
    • Studio Sprig Products
    • Studio Sprig Wallpaper
    • Studio Sprig Sheet Sets
    • Studio Sprig Throw Blankets
    • Studio Sprig Throw Pillows
    • Studio Sprig Duvet Covers
    • Studio Sprig Fabric Designs
  • Floral Paintings
    • Bridal Watercolor Portraits
  • Floral Design
    • Bloom Bars
    • Wedding Flowers
    • Dried & Pressed
    • My Favorite Floral Books
    • Flower Art for Cakes
    • FORMALS & PROMS
    • Flower Farm Tours
  • Stay in The Artist Cottage
  • BLOG
  • CONTACT

Creating a Pressed Flower Frame

November 3, 2025

I really enjoy creating pressed flower frames, especially when I am making art from a beautiful bouquet.

Start with Fresh flowers

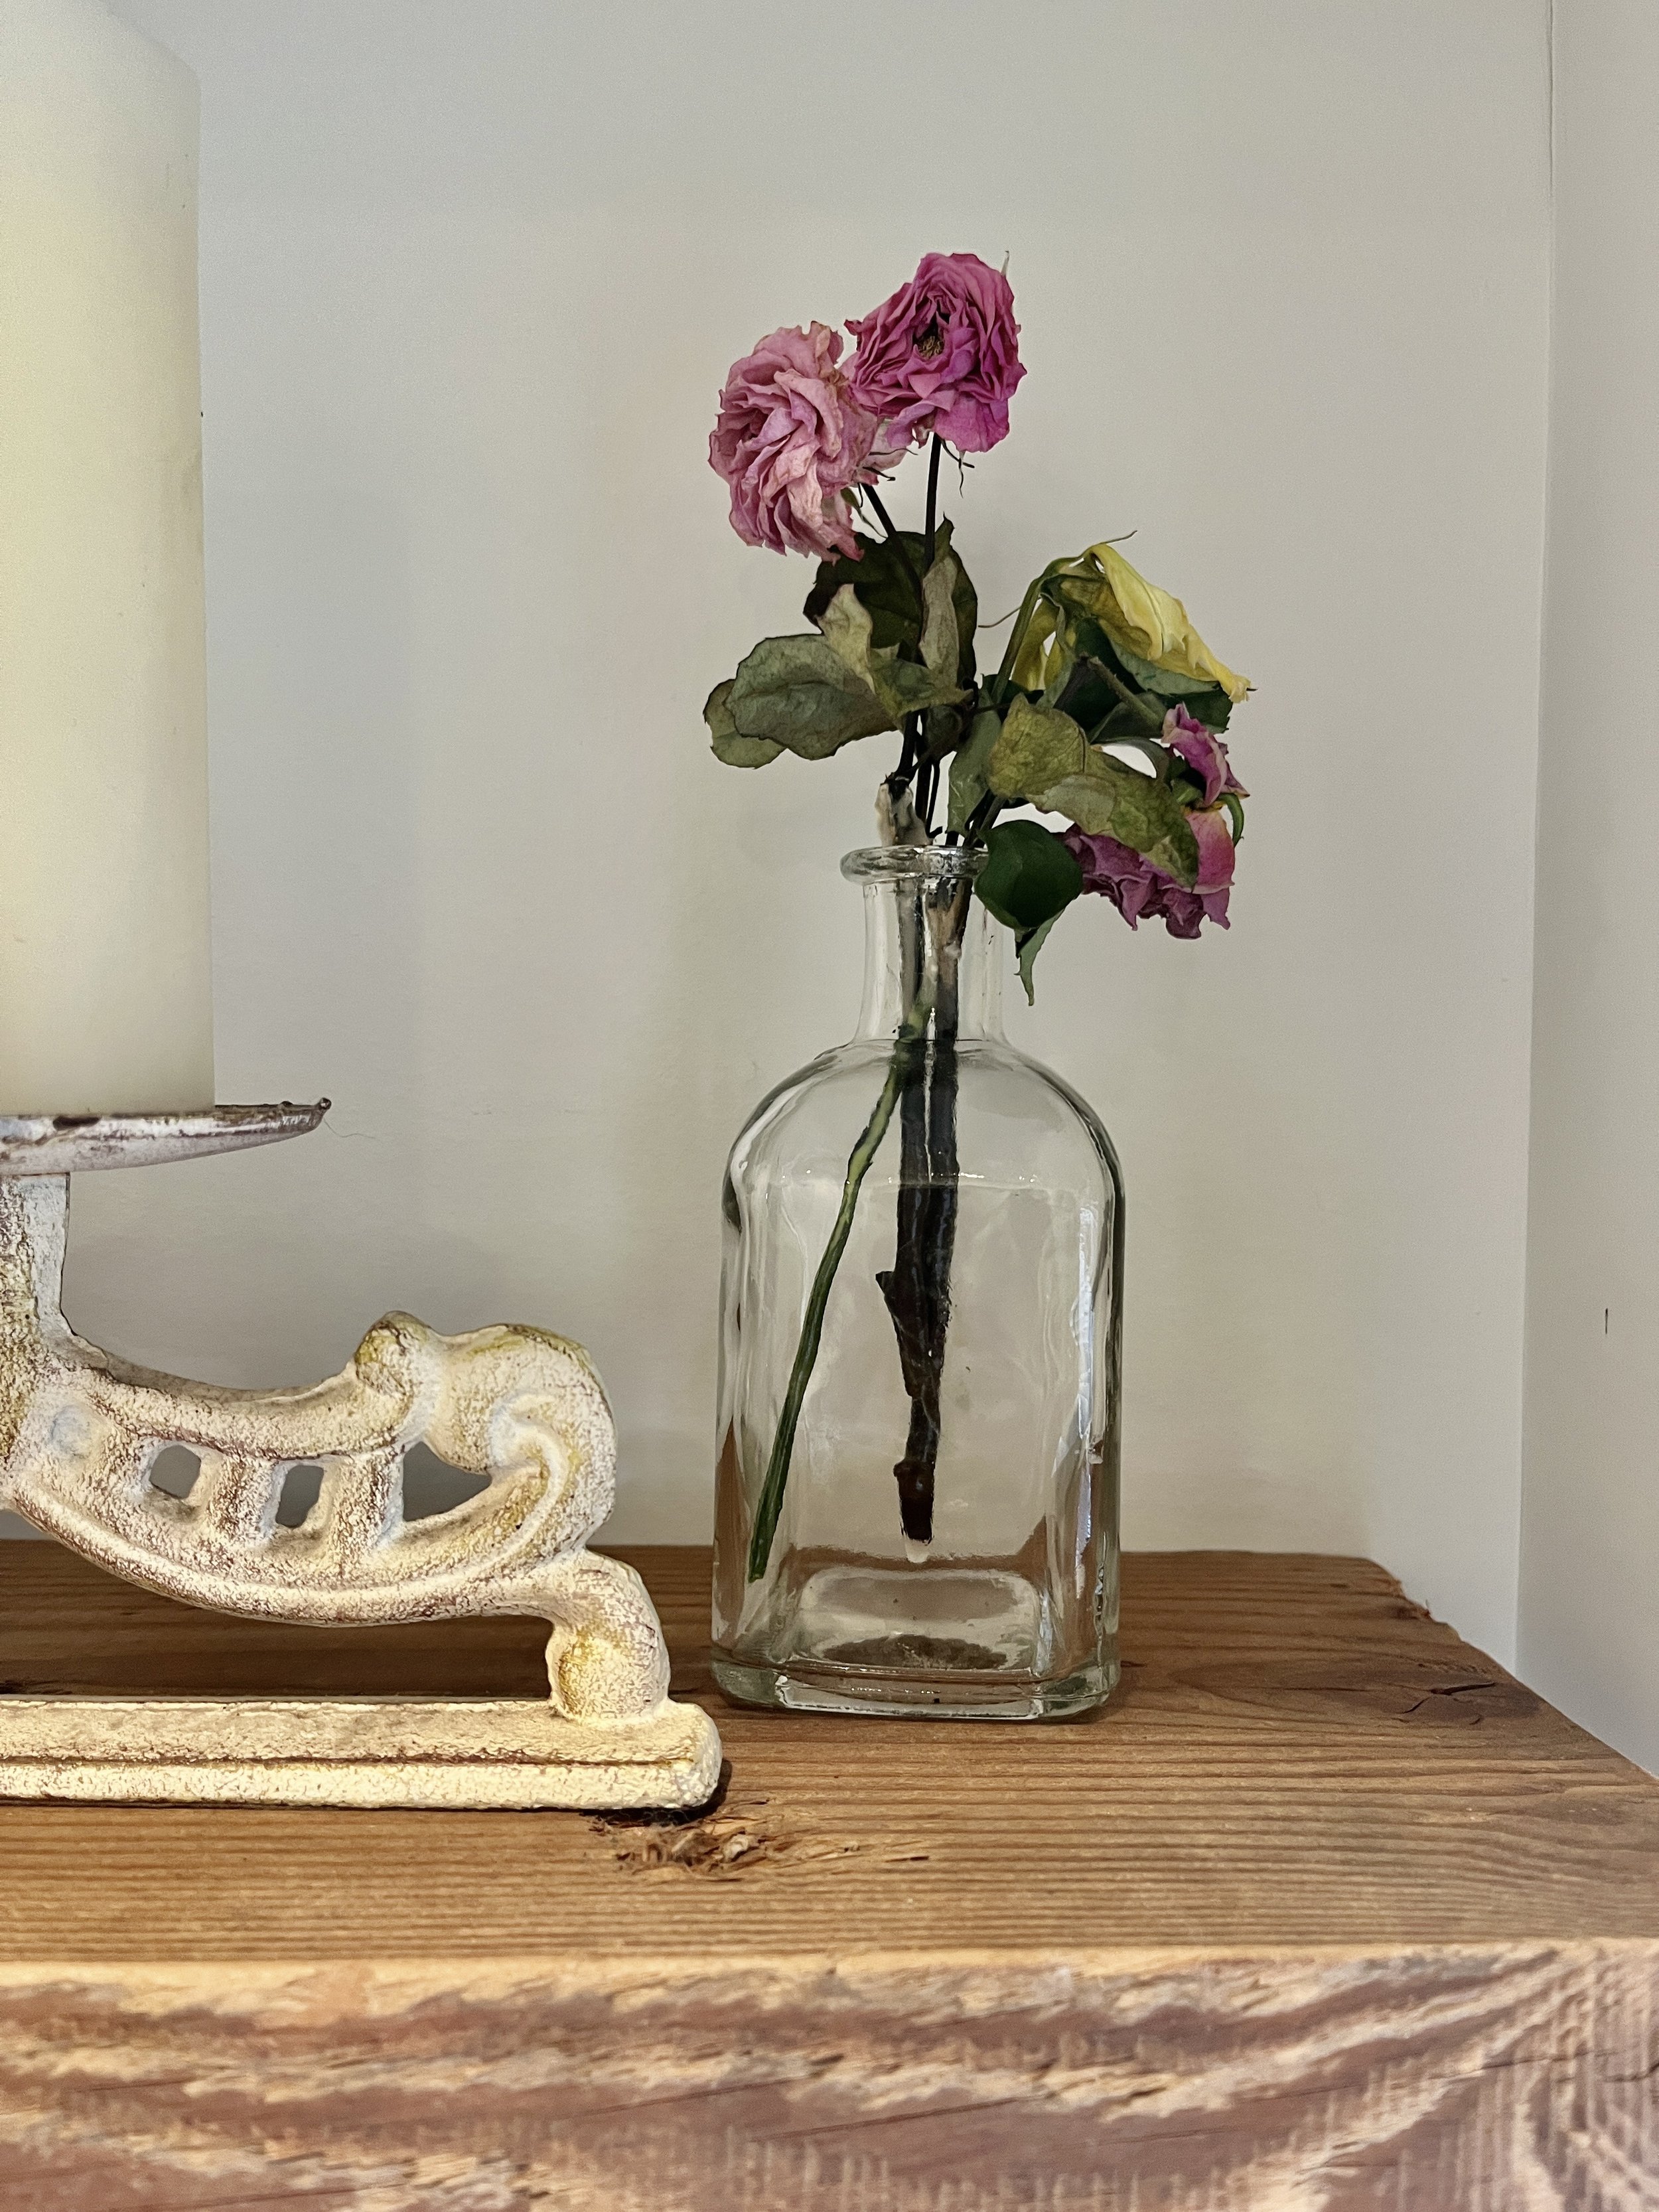
Nothing beats a stunning bridal bouquet as a starting point, but it’s critically important to keep the bouquet as fresh as possible after the wedding. Plan to keep the bouquet in water and refrigerated, or at least in a cool, dark spot, until you are ready to press. I gathered this bouquet 2 days after the wedding and began pressing immediately.
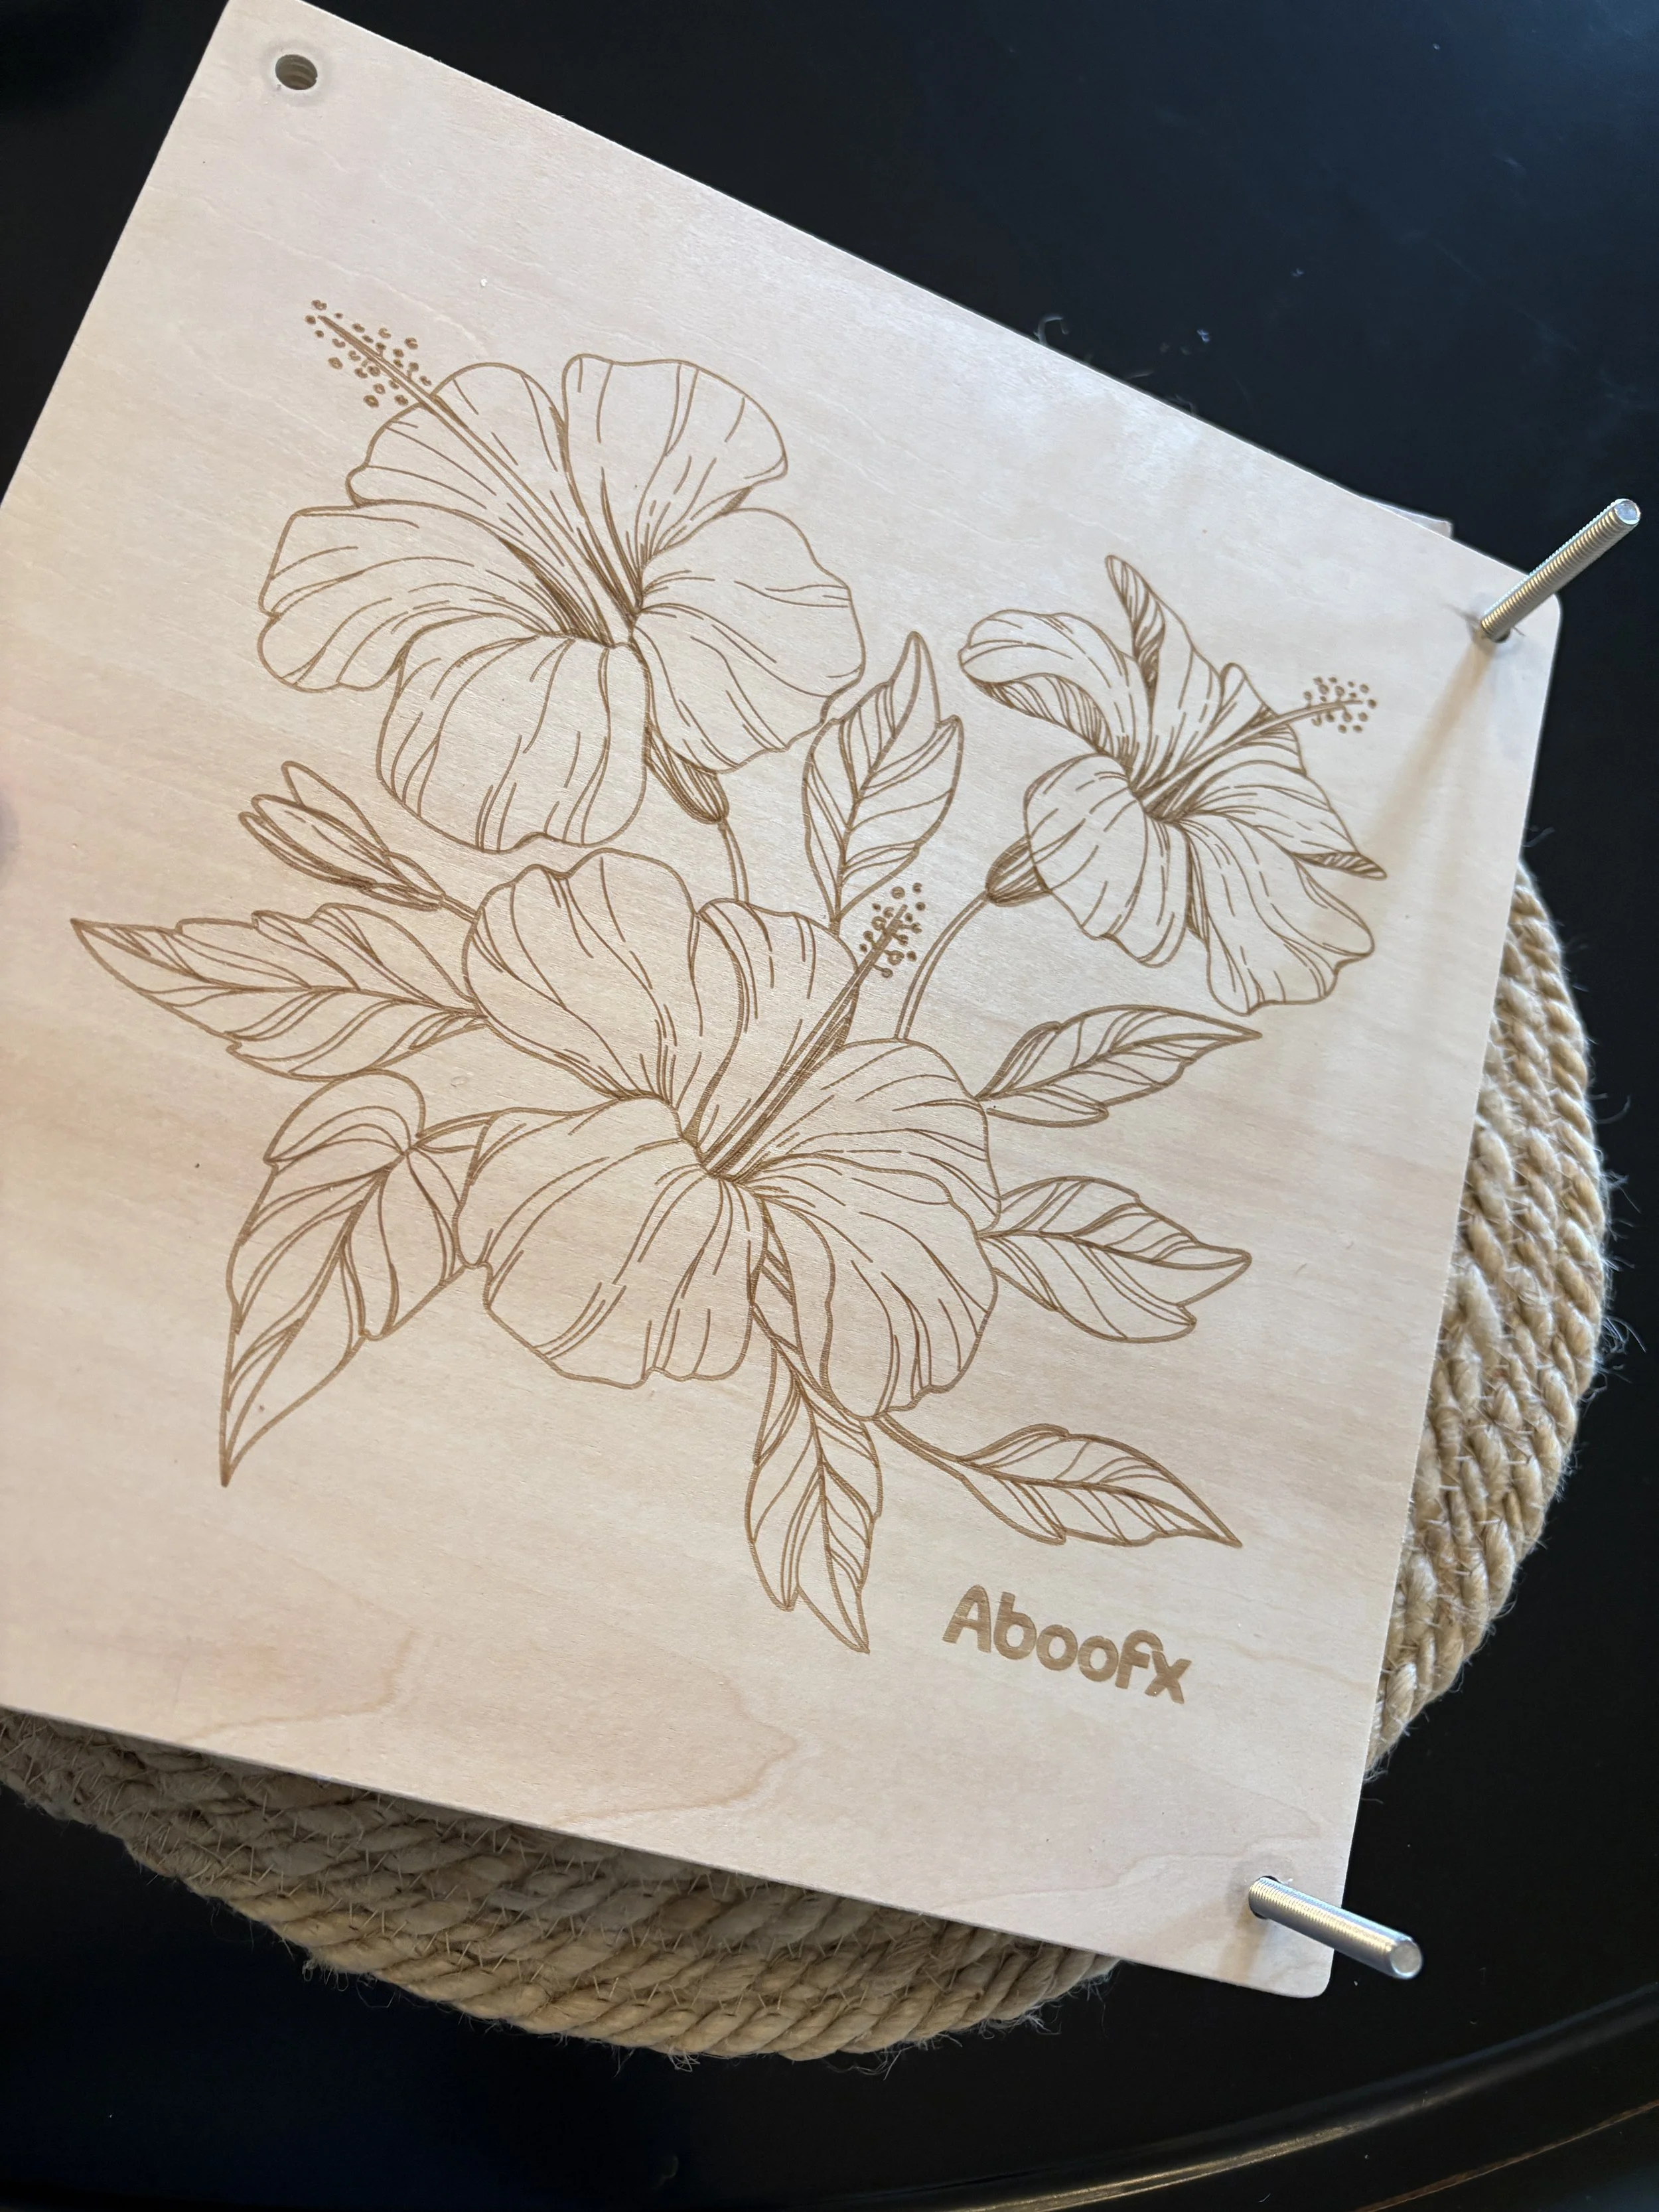
The Flower Press

I use this attractive wooden flower press from Aboofx. This wooden flower press not only looks appealing on a desk or counter, but it also comes with plenty of blotter paper, screws, and washers that allow me to easily apply ample pressing pressure. For a less expensive option, just buy loose sheets of Blotter Paper and press your flowers under several heavy books.

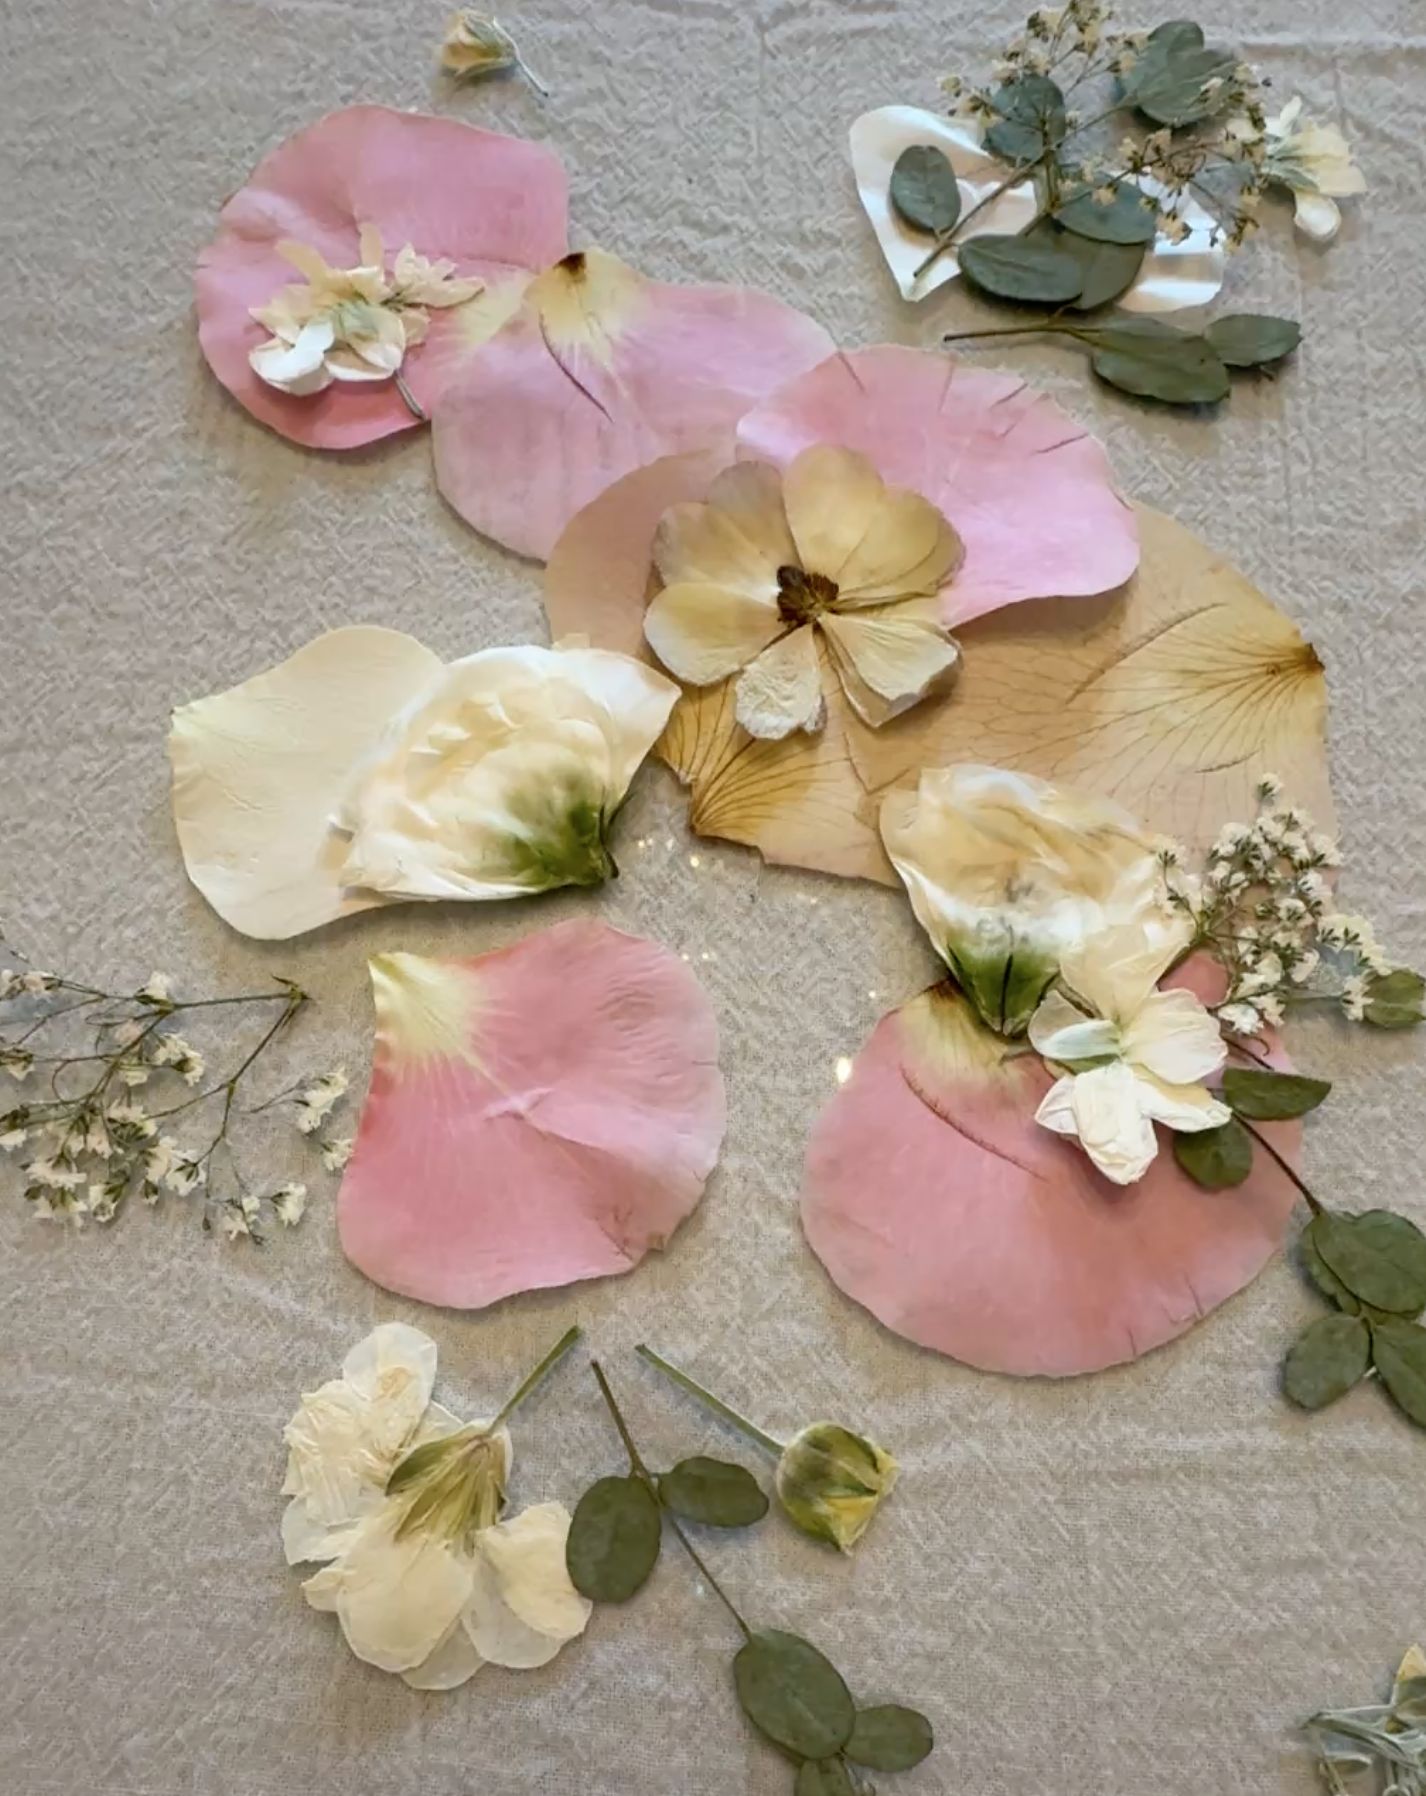
Press single Petals, Greens, and whole Flowers

Remember, it takes 4-6 weeks to press fresh flowers properly, but during that time, you can collect all the supplies you’ll need for your farmed art and rehearse the design you’d like to create.

Follow these steps when preparing the press:

  • Eliminate all moisture from petals and flowers (air drying is best while the flowers are still on the stem, but in water)

  • Cut off all thick stems as close to the flower as possible

  • Pull apart the petals from thick, round flowers like roses and press the petals individually

  • Take tiny cuttings from the greens and filler flowers like statice and baby’s breath

  • Separate leaves for pressing if you choose to include them in the final design

  • Use your best judgment when pressing small buds. If they seem too thick and full of moisture, do not try to press them

Layering the Blotter Sheets:

  • Lay each flower, green leaf or petal, individually, and try not to touch other pieces

  • When the blotter sheet is full, place another sheet on top and continue (be careful not to shift the sheets underneath)

  • When all of the flowers, greens, and petals are positioned, cover the stack with one final piece of blotter paper before placing the press’s wood cover or your pile of heavy books on top

  • Secure screws and washers, twist until tight, and the sheets cannot shift (only if using the flower press)

    *Pro tip: If you are pressing WHITE flowers, place the entire press, including the books, into a refrigerator for the duration of the press. This will keep the white flowers white. But if you want an antiqued, tea-stained look, then keep them at room temperature.

Choose A Nice Frame

The frame choice is very important because you want the finished piece to hold up and look wonderful. I always choose floating frames with glass, not plastic, because I think they showcase the flowers well. You can decide between white, black, metal, or wood finishes, and of course, there are many sizes. This bouquet was large, and I wanted to represent all of the flowers, so I chose the Americanflat 11x14 Floating Frame in Oak with Polished Glass.

Designing the Flowers and Petals

This is the fun part. Only after 4-6 weeks have passed and your flowers have had enough time to dry and press, should you begin designing. Test each layer of your press to make sure everything is ready. I like to lay each sheet on my table so that I can clearly see everything before I begin arranging.

Lay out your design

To begin, place one piece of the frame’s glass onto a soft work surface. I used a plain, white dish towel so nothing could scratch the glass.

Start by laying out your preliminary design to get an overall sense of where you want to place each flower. I like to use a tweezer to carefully lift each petal or leaf, remembering that everything is very delicate at this stage and the petals tear easily. Sometimes I create using a lot of white space, allowing the flowers to breathe, while other times I like to bunch items together. Design is really personal preference.

Once you have your vision in place, carefully place small glue dots behind each flower or leaf and lightly press them into place. Some layering is aesthetic, but be sure not to create too many layers; otherwise, your double-layered glass will not slide into the frame.

Assemble the Frame

When you are happy with your design, pick up the glass and make sure none of the pieces fall. If they do, just secure them with some more glue dots until everything stays in place. At this final stage, go over the entire design and make sure you do not see any glue from the front. If you do, place a small flower to cover it or remove the glue dot with your tweezers. Once everything is secure, slowly place the second piece of glass on top and assemble the frame.

I hope you enjoyed this blog

Have fun creating your pressed flower frames. Here is a short list of supplies you might like, including several unique press options for your convenience.

In STYLE Tags weddingflowerpreservation, flowerdesign, pressedflowers, floralarrangements, floraldesign, flowerart, roses, bridal shower, weddinggifts
Comment
Dried flower wreath with green ribbon

Dried flower & Dried Lime Grapevine Wreath. This wreath features some Wooden Flowers.

Preserve Flowers for Creative Projects

December 4, 2023

After designing and creating something special with flowers, I always hate to see them whither and eventually die. Recently I began preserving the flowers I love so that I can use them again in the future. This autumn I’ve been practicing a lot with the beloved Dahlia Flower and I’ve had fantastic results. I’ve even been known to disassemble a bouquet and create a small everlasting wreath with its components to help better commemorate the event.

Various Methods of Drying Flowers

Sometimes, when I have abundant, hearty stems like lavender, I dry traditionally by hanging small bunches upside down. Other times, with flowers like hydrangea and tiny spray roses, I find I can just place them in a vase without water and wait. Often they’ll even dry with a lovely sculpture-like essence, creating art without any effort at all.

Dried pink spray roses

Dried spray roses in simple vase.

Preserving Flowers with Silica crystals

Another method for preserving flowers is to cover them in Silica Crystals and allow the crystals to extract the moisture from the flowers.

I like to use my favorite Micro Pruning Snips to remove foliage and stems unless you want the stems for your project. I then sprinkle about 1” of Silica Gel Crystals into the bottom of a Rubbermaid container so that it evenly covers the whole surface. I then carefully place the flowers either face up or face down on that layer of Silica Crystals, spacing them tightly, being sure they are not touching. Once the flowers are laid out in the container go ahead and pour more Silica Crystals over them and completely cover every part of the flower. Next, cover the container tightly with the matching lid and place it in a cool, preferably dark, area for about a week. Some flowers take less than a week to dry, so feel free to experiment.

Preserved Dahlia Flowers

Delicate dried Dahlia Flowres.

Removing preserved flowers

For this, I recommend buying a small, slotted spatula similar to the one below so you can retrieve the smaller flowers one at a time. I gently scoop under each flower and lift allowing the Silica Crystals to fall back into the container. I lightly tap each flower on all sides to release any remaining crystals. I place all the newly preserved flowers onto a tray side by side and when I am sure there is no moisture, I store them in a container with air vents as a last measure to ensure they don’t get moldy.

Gently scooping dried Dahlia Flowers out of the Silica Gel Crystals.

Creating with Dried Flowers

Once you’ve preserved enough flowers have fun creating wreaths, flower branches, or even small pieces of wood (pictured below) and use them as table cards or gift toppers. Or do as I do and just place small dried groupings in a pretty vase and enjoy them for a long time. If you do want to create wreaths or toppers, I recommend buying a quality glue gun. I do a lot of designing so I purchased a professional-grade (cordless) Ryobi Glue Gun and I love it. It does get very hot so be careful when gluing, but honestly not having a cord to deal with is so nice. The battery and charger are included.

Pink spray roses on wood

Mini spray roses glued to a tiny piece of wood.

I hope you enjoy preserving all the pretty flowers you encounter. Feel free to drop me a line and share your creations. -Kimberly

Your Supply list:

Hearty Fresh Flowers (without a lot of delicate & loose petals)
Micro-Tip Pruning Snips
Rubbermaid Storage Containers with Lids
Silica Gel Crystals
Mini Slotted Spatula
Professional-grade Glue Gun

In STYLE, HOME Tags driedflowers, flowers, preservedflowers, everlastingflowers, createwithflowers, creativeflowers, flowercreations, freshflowers, driedflowerwreaths, wreaths, driedherbs, driedflowercrafts, flowercrafts, florals, driedflorals, DIYdriedflowers, Perservingflorals, weddingflowerpreservation, weddingflowers
Comment

Hi, I’m Kim. Welcome to Studio Sprig.

As seen in Southern Bride

Kim Bensing’s original watercolors and designs are now available on wallpaper and fabric. To order visit Studio Sprig’s design library on Spoonflower. Contact me if you need assistance.

  • EVENTS 17
    • May 23, 2025 Decorating Cakes with Fresh Flowers May 23, 2025
    • May 18, 2025 How to Make DIY Bouquets for Prom May 18, 2025
    • May 7, 2025 How to Preserve and Use Your Spring Flowers - All Year Long May 7, 2025
    • Feb 27, 2025 Get Excited for The Flower Show Feb 27, 2025
    • Feb 14, 2025 Historic Castles. What are they used for? Feb 14, 2025
    • Jan 31, 2025 Creative Ideas For Your Valentine Jan 31, 2025
    • Jan 28, 2025 How An Invitation Can Tell Your Love Story Jan 28, 2025
    • Jan 23, 2025 How to Design a Valentine Tree Jan 23, 2025
    • Jan 16, 2025 Host a Fabulous Bouquet Bar for Valentine's Day Jan 16, 2025
    • Apr 4, 2023 Why Choose Seasonal Flowers for Your Special Occasion? Apr 4, 2023
    • Feb 1, 2023 10 Ideas for an Eco-Friendly Event or Wedding Feb 1, 2023
    • Jan 20, 2023 How to Host A Beautiful Bloom Bar Jan 20, 2023
    • Nov 14, 2022 A Family Tree Inspired Wedding Invitation Nov 14, 2022
    • Oct 16, 2022 How to Create Cake Crowns and Mini Wreaths from Herbs and Flowers Oct 16, 2022
    • Oct 3, 2022 How to choose flowers that have sentimental meaning Oct 3, 2022
    • Nov 9, 2020 Simplified Wedding Ceremony during Covid Nov 9, 2020
    • Apr 2, 2019 Why You Should Choose Seasonal Prom Flowers Apr 2, 2019
  • HOME 22
    • Apr 22, 2025 How We Painted our Barn Apr 22, 2025
    • Apr 16, 2025 What to Plant for Mesmerizing Spring Blooms Apr 16, 2025
    • Apr 8, 2025 Narcissus AKA Daffodil - What's Blooming at Studio Sprig Apr 8, 2025
    • Apr 1, 2025 Glory-of-the-Snow - What's Blooming at Studio Sprig Apr 1, 2025
    • Mar 19, 2025 How we turned an Artist Studio into a Weekend Retreat Mar 19, 2025
    • Mar 12, 2025 The Mighty Crocus - First to Bloom - What's Blooming at Studio Sprig Mar 12, 2025
    • Jan 23, 2025 How to Design a Valentine Tree Jan 23, 2025
    • Jan 16, 2025 Host a Fabulous Bouquet Bar for Valentine's Day Jan 16, 2025
    • Jan 9, 2025 How to Make Your Own Mint Tea Jan 9, 2025
    • Jan 7, 2025 How To Create A Courtyard Jan 7, 2025
    • Jan 2, 2025 How to Create a Stunning Centerpiece Jan 2, 2025
    • Dec 4, 2023 Preserve Flowers for Creative Projects Dec 4, 2023
    • Mar 27, 2023 How We Transformed Our Farmhouse Kitchen by Reusing, Updating, and Thrifting: (Coffee Bar) Mar 27, 2023
    • Mar 27, 2023 How We Transformed Our Farmhouse Kitchen by Reusing, Updating, and Thrifting Mar 27, 2023
    • Mar 1, 2023 How and Why We Love Historic Homes Mar 1, 2023
    • Jan 3, 2023 Eliminate Sneaky Sugars Jan 3, 2023
    • Dec 14, 2022 How to Create a Pretty Mini Bar with Items You Already Own Dec 14, 2022
    • Nov 30, 2022 How To Name A Farm With A Story Nov 30, 2022
    • Nov 21, 2022 Friendsgiving At Our Farm Nov 21, 2022
    • Nov 9, 2022 Herbs: How to Grow, Harvest and Dry Your Own Nov 9, 2022
    • Nov 9, 2022 DIY Herb Drying Rack: Herb Drying at Home Nov 9, 2022
    • Oct 12, 2022 Have you ever thought about creating a beautiful water feature? Oct 12, 2022
  • STYLE 24
    • Nov 3, 2025 Creating a Pressed Flower Frame Nov 3, 2025
    • May 7, 2025 How to Preserve and Use Your Spring Flowers - All Year Long May 7, 2025
    • Jan 28, 2025 How An Invitation Can Tell Your Love Story Jan 28, 2025
    • Jan 23, 2025 How to Design a Valentine Tree Jan 23, 2025
    • Jan 6, 2025 How to Create Oyster Shell Necklaces Jan 6, 2025
    • Jan 2, 2025 How to Create a Stunning Centerpiece Jan 2, 2025
    • Dec 4, 2023 Preserve Flowers for Creative Projects Dec 4, 2023
    • Mar 14, 2023 How to Make Sentimental Easter Eggs Mar 14, 2023
    • Mar 6, 2023 How to Enjoy The PHS Philadelphia Flower Show Mar 6, 2023
    • Feb 13, 2023 Let's Save The Bees Feb 13, 2023
    • Feb 1, 2023 10 Ideas for an Eco-Friendly Event or Wedding Feb 1, 2023
    • Jan 20, 2023 How to Host A Beautiful Bloom Bar Jan 20, 2023
    • Jan 12, 2023 A Great Way to Help Kids with Cancer (PENN STATE) Jan 12, 2023
    • Dec 14, 2022 How to Create a Pretty Mini Bar with Items You Already Own Dec 14, 2022
    • Nov 29, 2022 Lunch and Dinner -Studio Sprig Style Micro Blog Nov 29, 2022
    • Nov 14, 2022 A Family Tree Inspired Wedding Invitation Nov 14, 2022
    • Nov 9, 2022 DIY Herb Drying Rack: Herb Drying at Home Nov 9, 2022
    • Oct 30, 2022 Lambertville, Nj , A Funky, Cool Rivertown You Must Visit on Halloween. Oct 30, 2022
    • Oct 19, 2022 How to choose an interesting place to stay when you travel or go on vacation Oct 19, 2022
    • Oct 16, 2022 How to Create Cake Crowns and Mini Wreaths from Herbs and Flowers Oct 16, 2022
    • Oct 12, 2022 Have you ever thought about creating a beautiful water feature? Oct 12, 2022
    • Oct 3, 2022 How to choose flowers that have sentimental meaning Oct 3, 2022
    • Feb 1, 2021 How to design marketing materials for your small business Feb 1, 2021
    • Oct 29, 2020 Surprise the bride when you can't come to her wedding Oct 29, 2020

Powered by Squarespace