
How to Preserve Flowers for Creative Projects

Dried flower & Dried Lime Grapevine Wreath. This wreath features some Wooden Flowers.
After designing and creating something special with flowers, I always hate to see them wither and eventually fade away. Recently, I began preserving the flowers I love so I can enjoy and use them again in future creative projects. This year, I’ve been experimenting with one of my favorites—the beloved dahlia—and the results have been wonderful.
I’ve even been known to disassemble a special bouquet and transform its individual flowers into a small everlasting wreath, creating a meaningful keepsake that helps commemorate a beautiful occasion.
Preserving flowers this way gives them a second life, turning something fleeting into a lasting piece of art.
Different Methods for Drying and Preserving Flowers
There are several simple ways to dry and preserve flowers, and the best method often depends on the type of flower. When I have abundant, sturdy stems like lavender, I typically use the traditional method of hanging small bunches upside down to air dry.
For flowers such as hydrangeas and tiny spray roses, I’ve found that an even easier method works beautifully: simply place them in a vase without water and let them dry naturally. As they lose their moisture, many flowers take on a wonderfully sculptural quality, creating a beautiful piece of dried-flower art with almost no effort at all.
Experimenting with different flower-preservation methods is part of the fun. With a little patience, flowers that might otherwise be discarded can become lasting materials for wreaths, arrangements, crafts, and other creative projects.
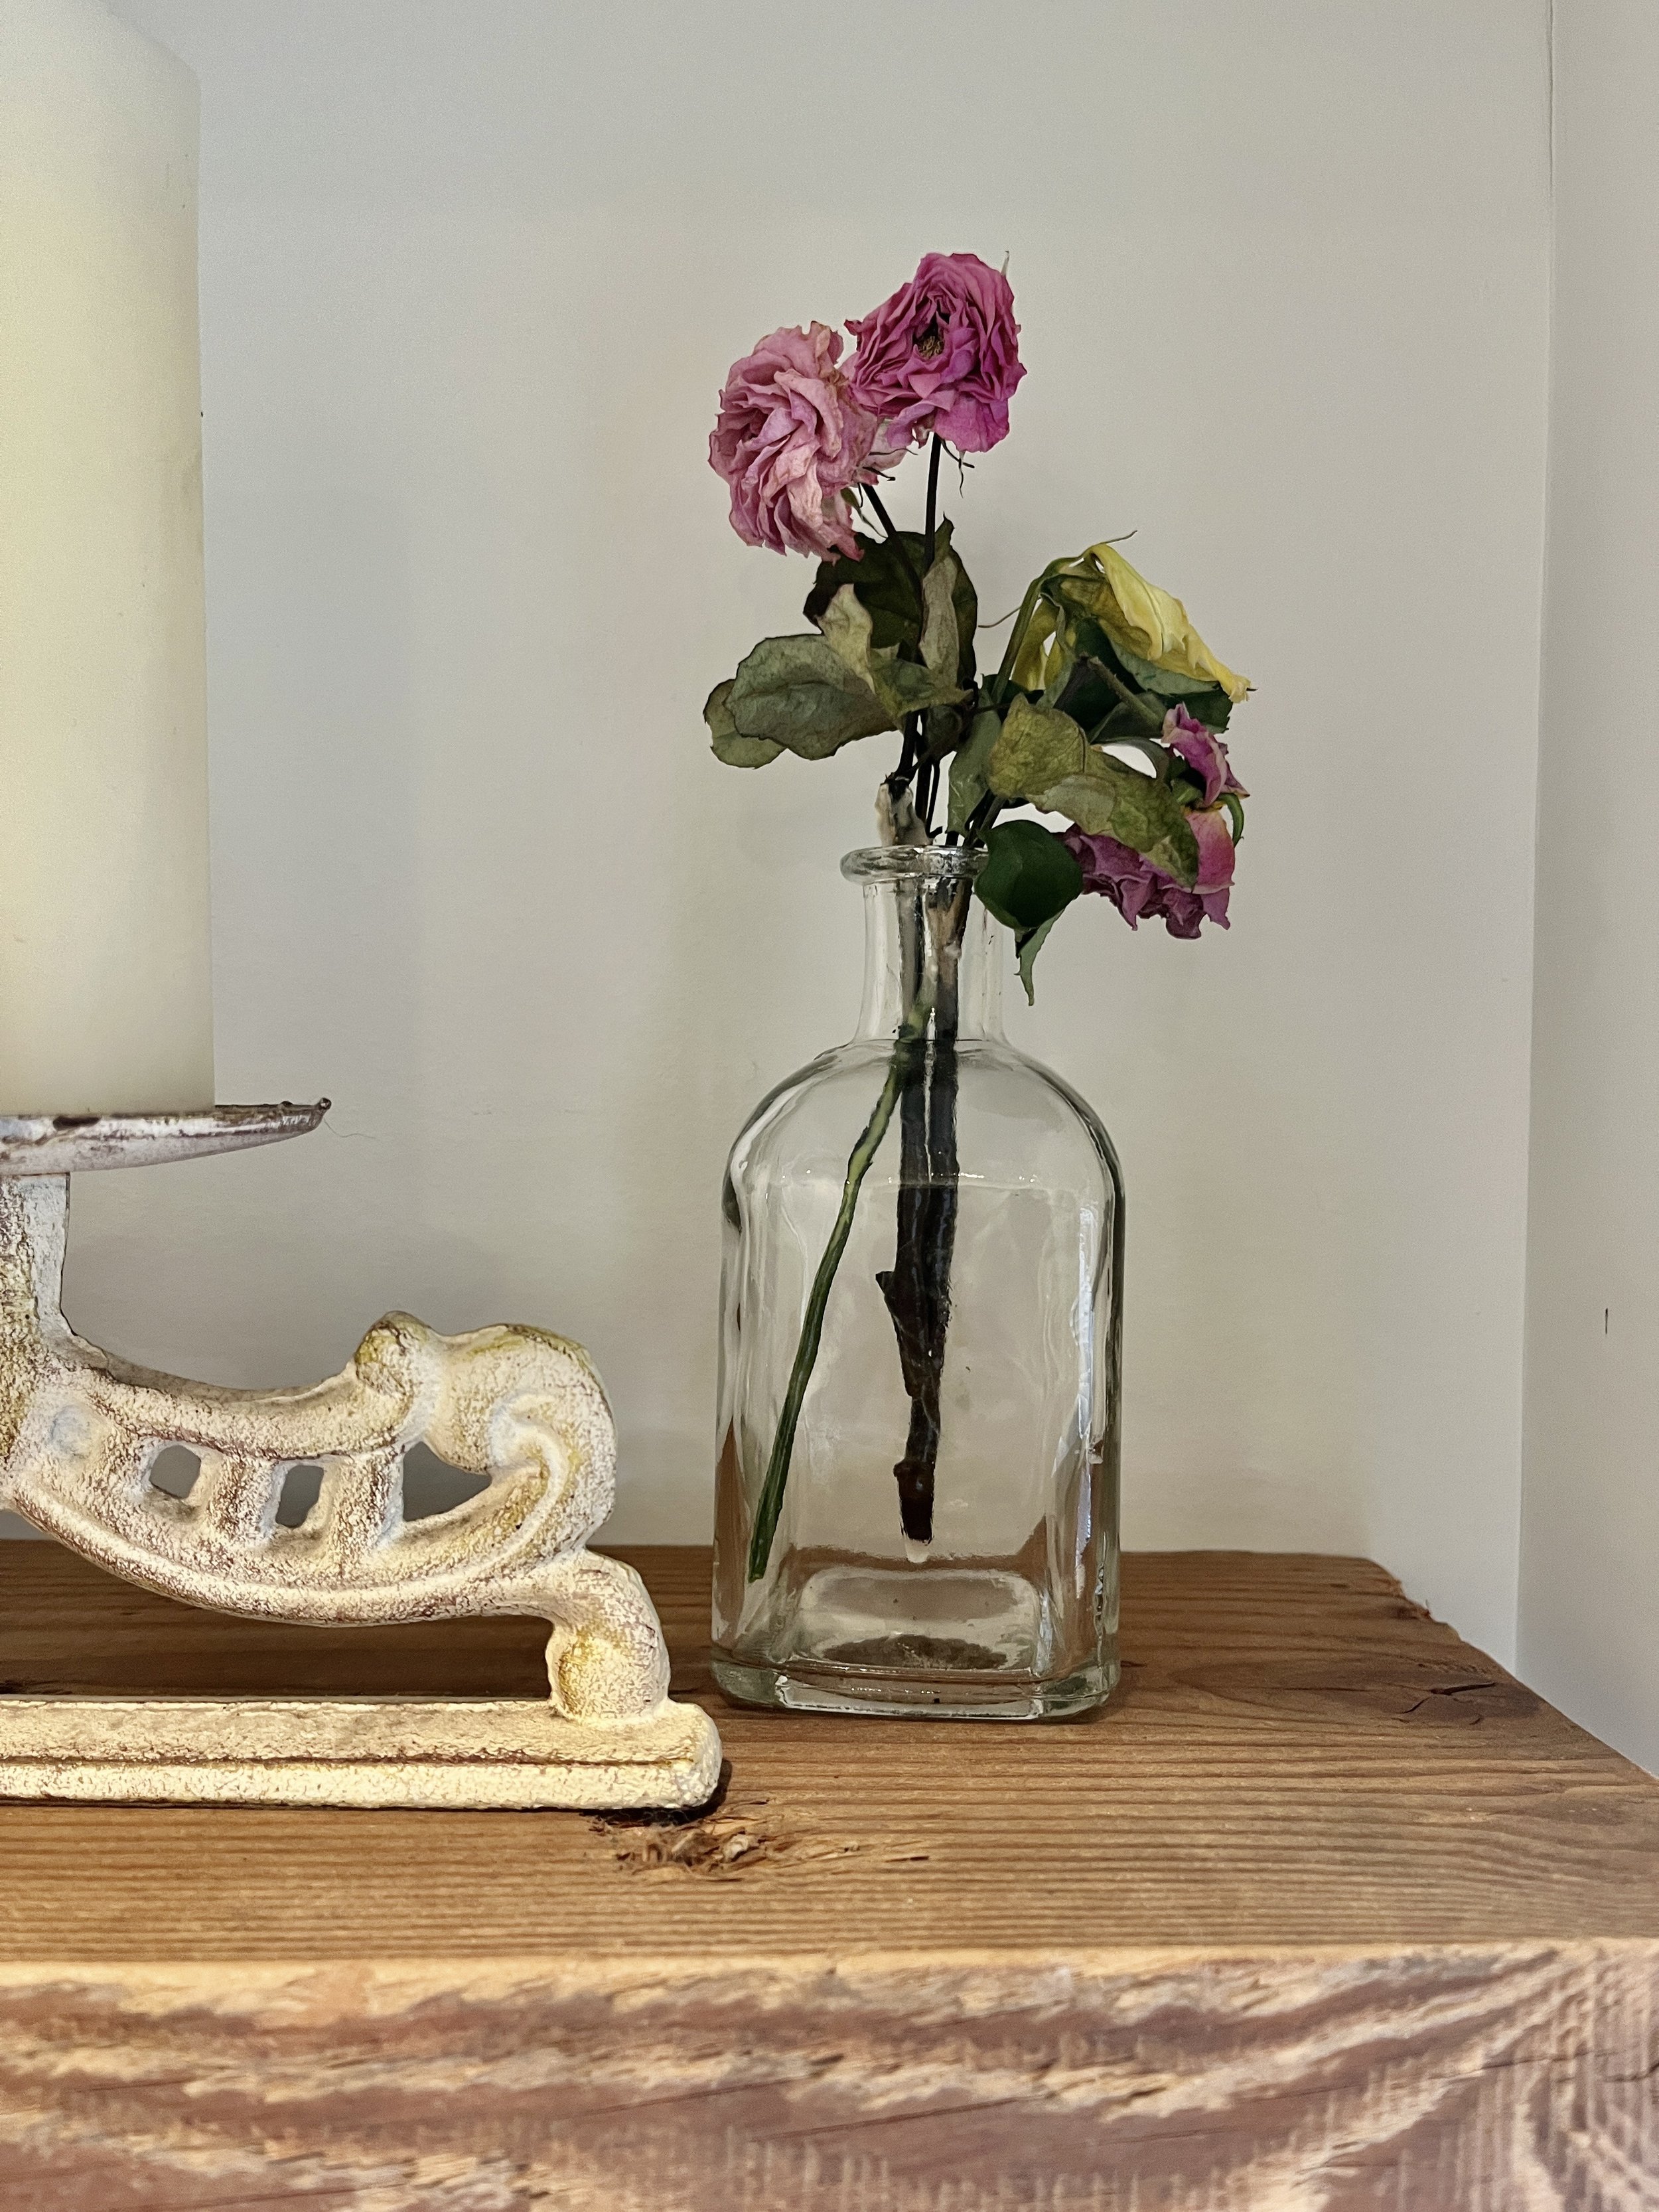
Dried spray roses in simple vase.
How to Preserve Flowers with Silica Gel Crystals
One of my favorite methods for preserving flowers is drying them with silica gel crystals. Silica gel gently draws moisture from the flowers, helping them retain much of their original shape, color, and delicate details. It’s an especially effective method for preserving flowers for wreaths, floral arrangements, crafts, and other creative projects.
I like to begin by removing any excess foliage and stems using my favorite Micro Pruning Snips. If you’re planning a project that requires the stems, you can certainly leave them intact.
Next, add about 1 inch of Silica Gel Crystals to the bottom of a Rubbermaid container, making sure the crystals create an even layer across the entire surface. Carefully place your flowers on top of the silica gel, either face up or face down, depending on the shape and type of flower. Arrange them closely together, but make sure the flowers aren’t touching one another.
Once all of your flowers are arranged, slowly pour more Silica Gel Crystals over the top. Continue adding crystals until each flower is completely covered and the silica gel has gently filled in around every petal and detail.
Secure the lid tightly and place the container in a cool, preferably dark location for approximately one week. The exact drying time will vary depending on the type and size of the flower. Some delicate flowers may be completely dry in just a few days, while larger, moisture-rich flowers can take longer.
The wonderful thing about drying flowers with silica gel is that you can experiment with different varieties and drying times to see what produces the best results. With a little trial and error, you’ll discover which flowers preserve beautifully—and you’ll have a wonderful supply of everlasting blooms ready for your next creative project.

Delicate dried Dahlia Flowres.
How to Remove and Store Flowers Preserved with Silica Gel
Once your flowers have finished drying, it’s time to carefully remove them from the silica gel. For this step, I recommend using a small slotted spatula, which makes it much easier to gently retrieve smaller, delicate flowers without damaging the petals.
I carefully slide the spatula underneath each flower and lift it slowly, allowing the Silica Gel Crystals to fall back into the container. Once the flower is removed, I gently tap it on all sides to release any crystals that may still be tucked between the petals.
I then arrange all of my newly preserved flowers side by side on a tray and allow them to sit for a little while longer, making sure they are completely dry before storing them. This extra step is important because any remaining moisture can lead to mold.
Once I’m confident the flowers are completely dry, I store them in a container with air vents to allow for some circulation. Properly dried and stored flowers can last for a long time, giving you a beautiful collection of everlasting blooms to use in wreaths, floral arrangements, crafts, and other creative projects.

Gently scooping dried Dahlia Flowers out of the Silica Gel Crystals.
Creative Ideas for Dried Flowers
Once you’ve preserved a beautiful collection of flowers, the fun really begins! There are so many creative things to make with dried flowers, from everlasting wreaths and floral branches to small decorative pieces that can be used as table cards, place settings, or gift toppers.
I especially love turning little pieces of wood into unique dried flower decorations. They make charming table cards or thoughtful gift toppers and are a wonderful way to give preserved flowers a second life. Another favorite in autumn are dried flower pumpkins. Hot gluing your dried bounty to the top of a pumpkin is simple and it makes a great centerpiece.
Or, you can keep it wonderfully simple. I often arrange small groupings of dried flowers in a pretty vase and let their natural beauty speak for itself. Unlike fresh flowers, dried floral arrangements can be enjoyed for months or even years, making them a lovely way to preserve a special moment, bouquet, or season.
If you’re planning to make dried flower wreaths, floral decorations, or gift toppers, I highly recommend investing in a quality glue gun. Because I do quite a bit of designing, I purchased a professional-grade, cordless Ryobi Glue Gun, and I absolutely love it. It gets very hot, so be careful when working with it, but not having a cord to maneuver around makes creating so much easier. The battery and charger are included, too.
With a collection of preserved blooms and a few simple supplies, you can turn dried flowers into beautiful, lasting pieces for your home, entertaining, gift wrapping, and creative projects.

Mini spray roses glued to a tiny piece of wood.
I hope this inspires you to start preserving all the beautiful flowers you encounter and turn them into something you can enjoy for years to come. I’d love to see what you create, so feel free to drop me a line and share your dried flower projects!
Your Supply list:
Hearty Fresh Flowers (without a lot of delicate & loose petals)
Micro-Tip Pruning Snips
Rubbermaid Storage Containers with Lids
Silica Gel Crystals
Mini Slotted Spatula
Professional-grade Glue Gun
How to Design a Valentine Tree

Why I Designed a Tree FIlled with Love
As the Christmas season was coming to an end, I decided I wanted to enjoy our pretty tree a little longer. I knew I could get away with keeping our faux Balsam Hill Pine up through January dressed in its wintery guise, but what excuse did February have? That’s why, this year, I created a Valentine's Tree. Read on to see how I did it.

Transitioning a Christmas Tree
We created a pretty simple Christmas tree this year so the transition was easy. I first removed all of the Christmas balls but kept all the white lights and icicles. This step was very quick and with a semi-bare tree, I was able to then plan for February-appropriate decor.
Making a Valentine's Tree Topper
I considered keeping our glowing Moravian Star tree topper but decided that a Valentine's tree needed to better reflect Valentine’s Day. I considered a grapevine heart wreath covered in dried flowers but decided I’d like to just use found materials and make my own. This is how I did it.

Start with a basic shape
I took an old cardboard box and cut two identical free-form hearts. I then hot-glued a 10” doubled-up piece of floral wire about 4” deep inside the two panels and extended it out the bottom, so that I’d have something to wrap around the tree’s top branch. If I do it again, I will also extend the wire from each side so the heart has more stability when topping the tree.
Once the wire is secured, hot glue the hearts together. This step helps the topper to be more ridged and stable.

Designing the front of your heart topper
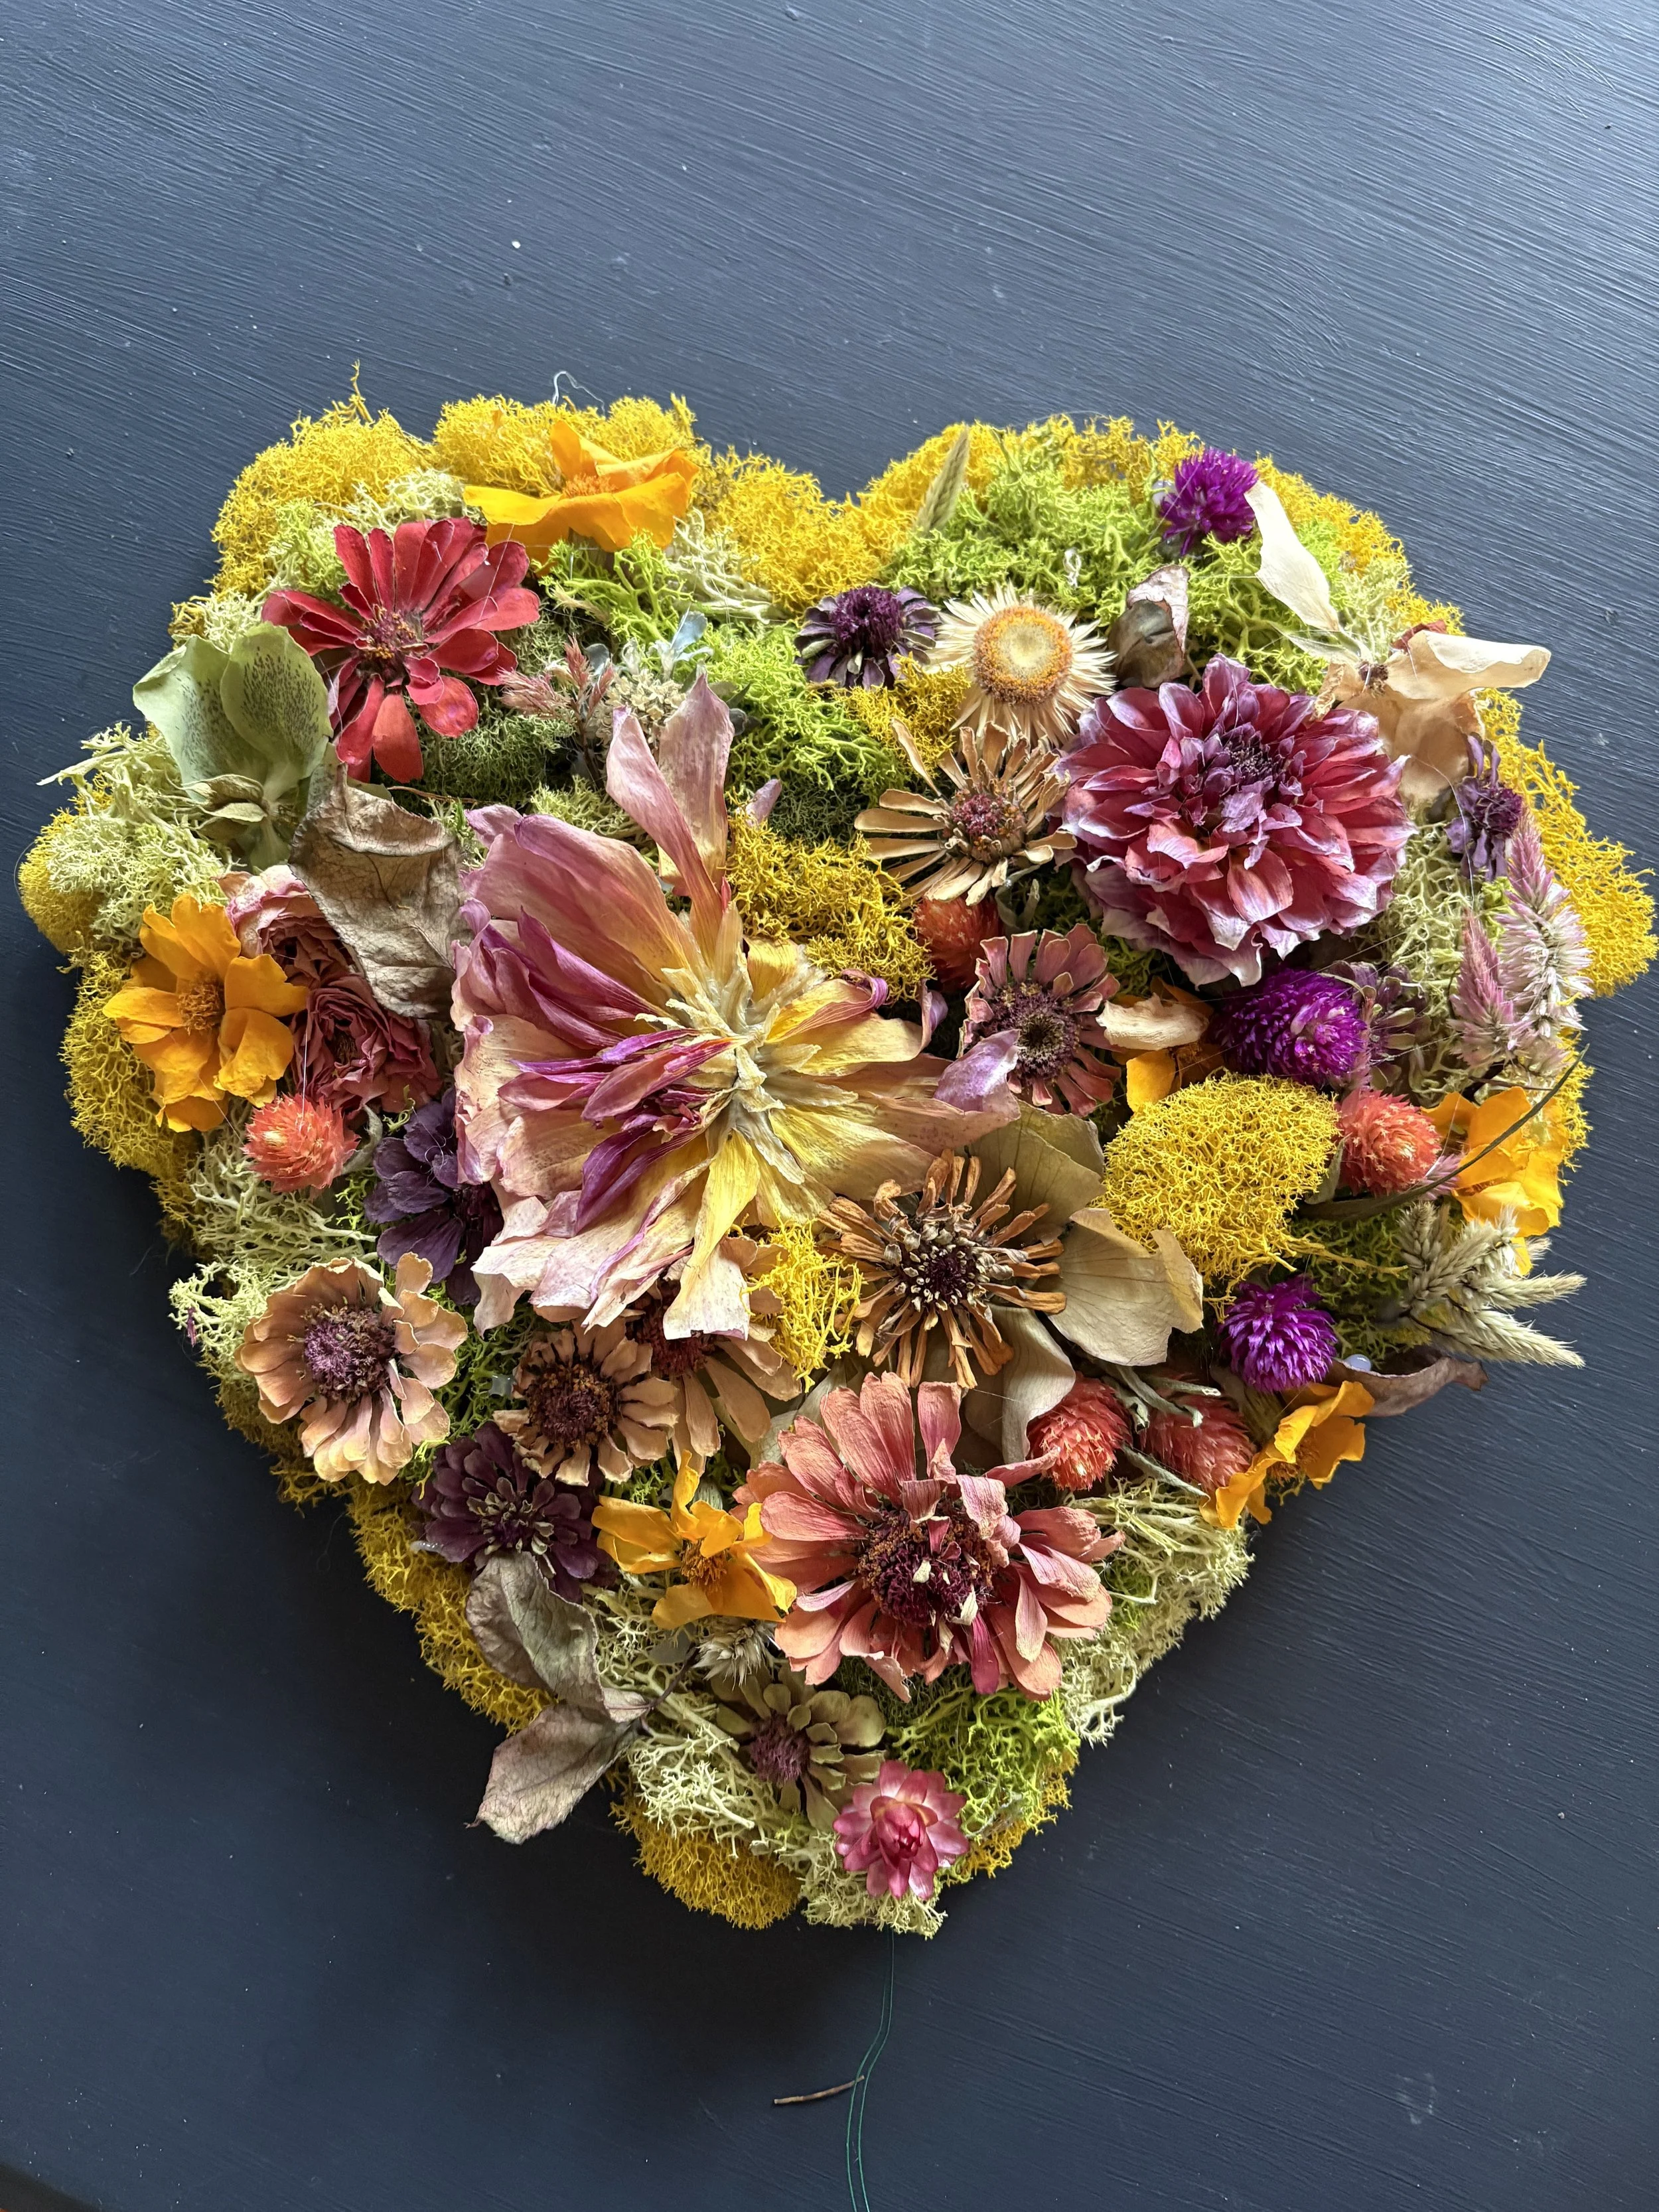
Start by designing one side of the heart with your dried flowers and moss. I used my professional-grade Ryobi glue gun, some reindeer moss, and the dried flowers I harvested this year. If you want to learn how to dry your own flowers, see my blog: Learn how to dry your own garden flowers. I didn’t have much of a design or plan, but I just kept filling in the cardboard as I went around the heart and eventually, one side of my heart was completely covered.

Designing side 2
When I finished side 1, I realized leaving the second side of the heart blank wouldn’t look very nice from the side view, so I cut up a coloring book, quickly glued it to the surface of the heart, and glued some leftover moss around the edges to finish it off. In retrospect, I would cover this side first with contact paper or something simple to make the job easier. You could also fill the back side with moss if you have it.

The Heart-Shaped Tree Topper
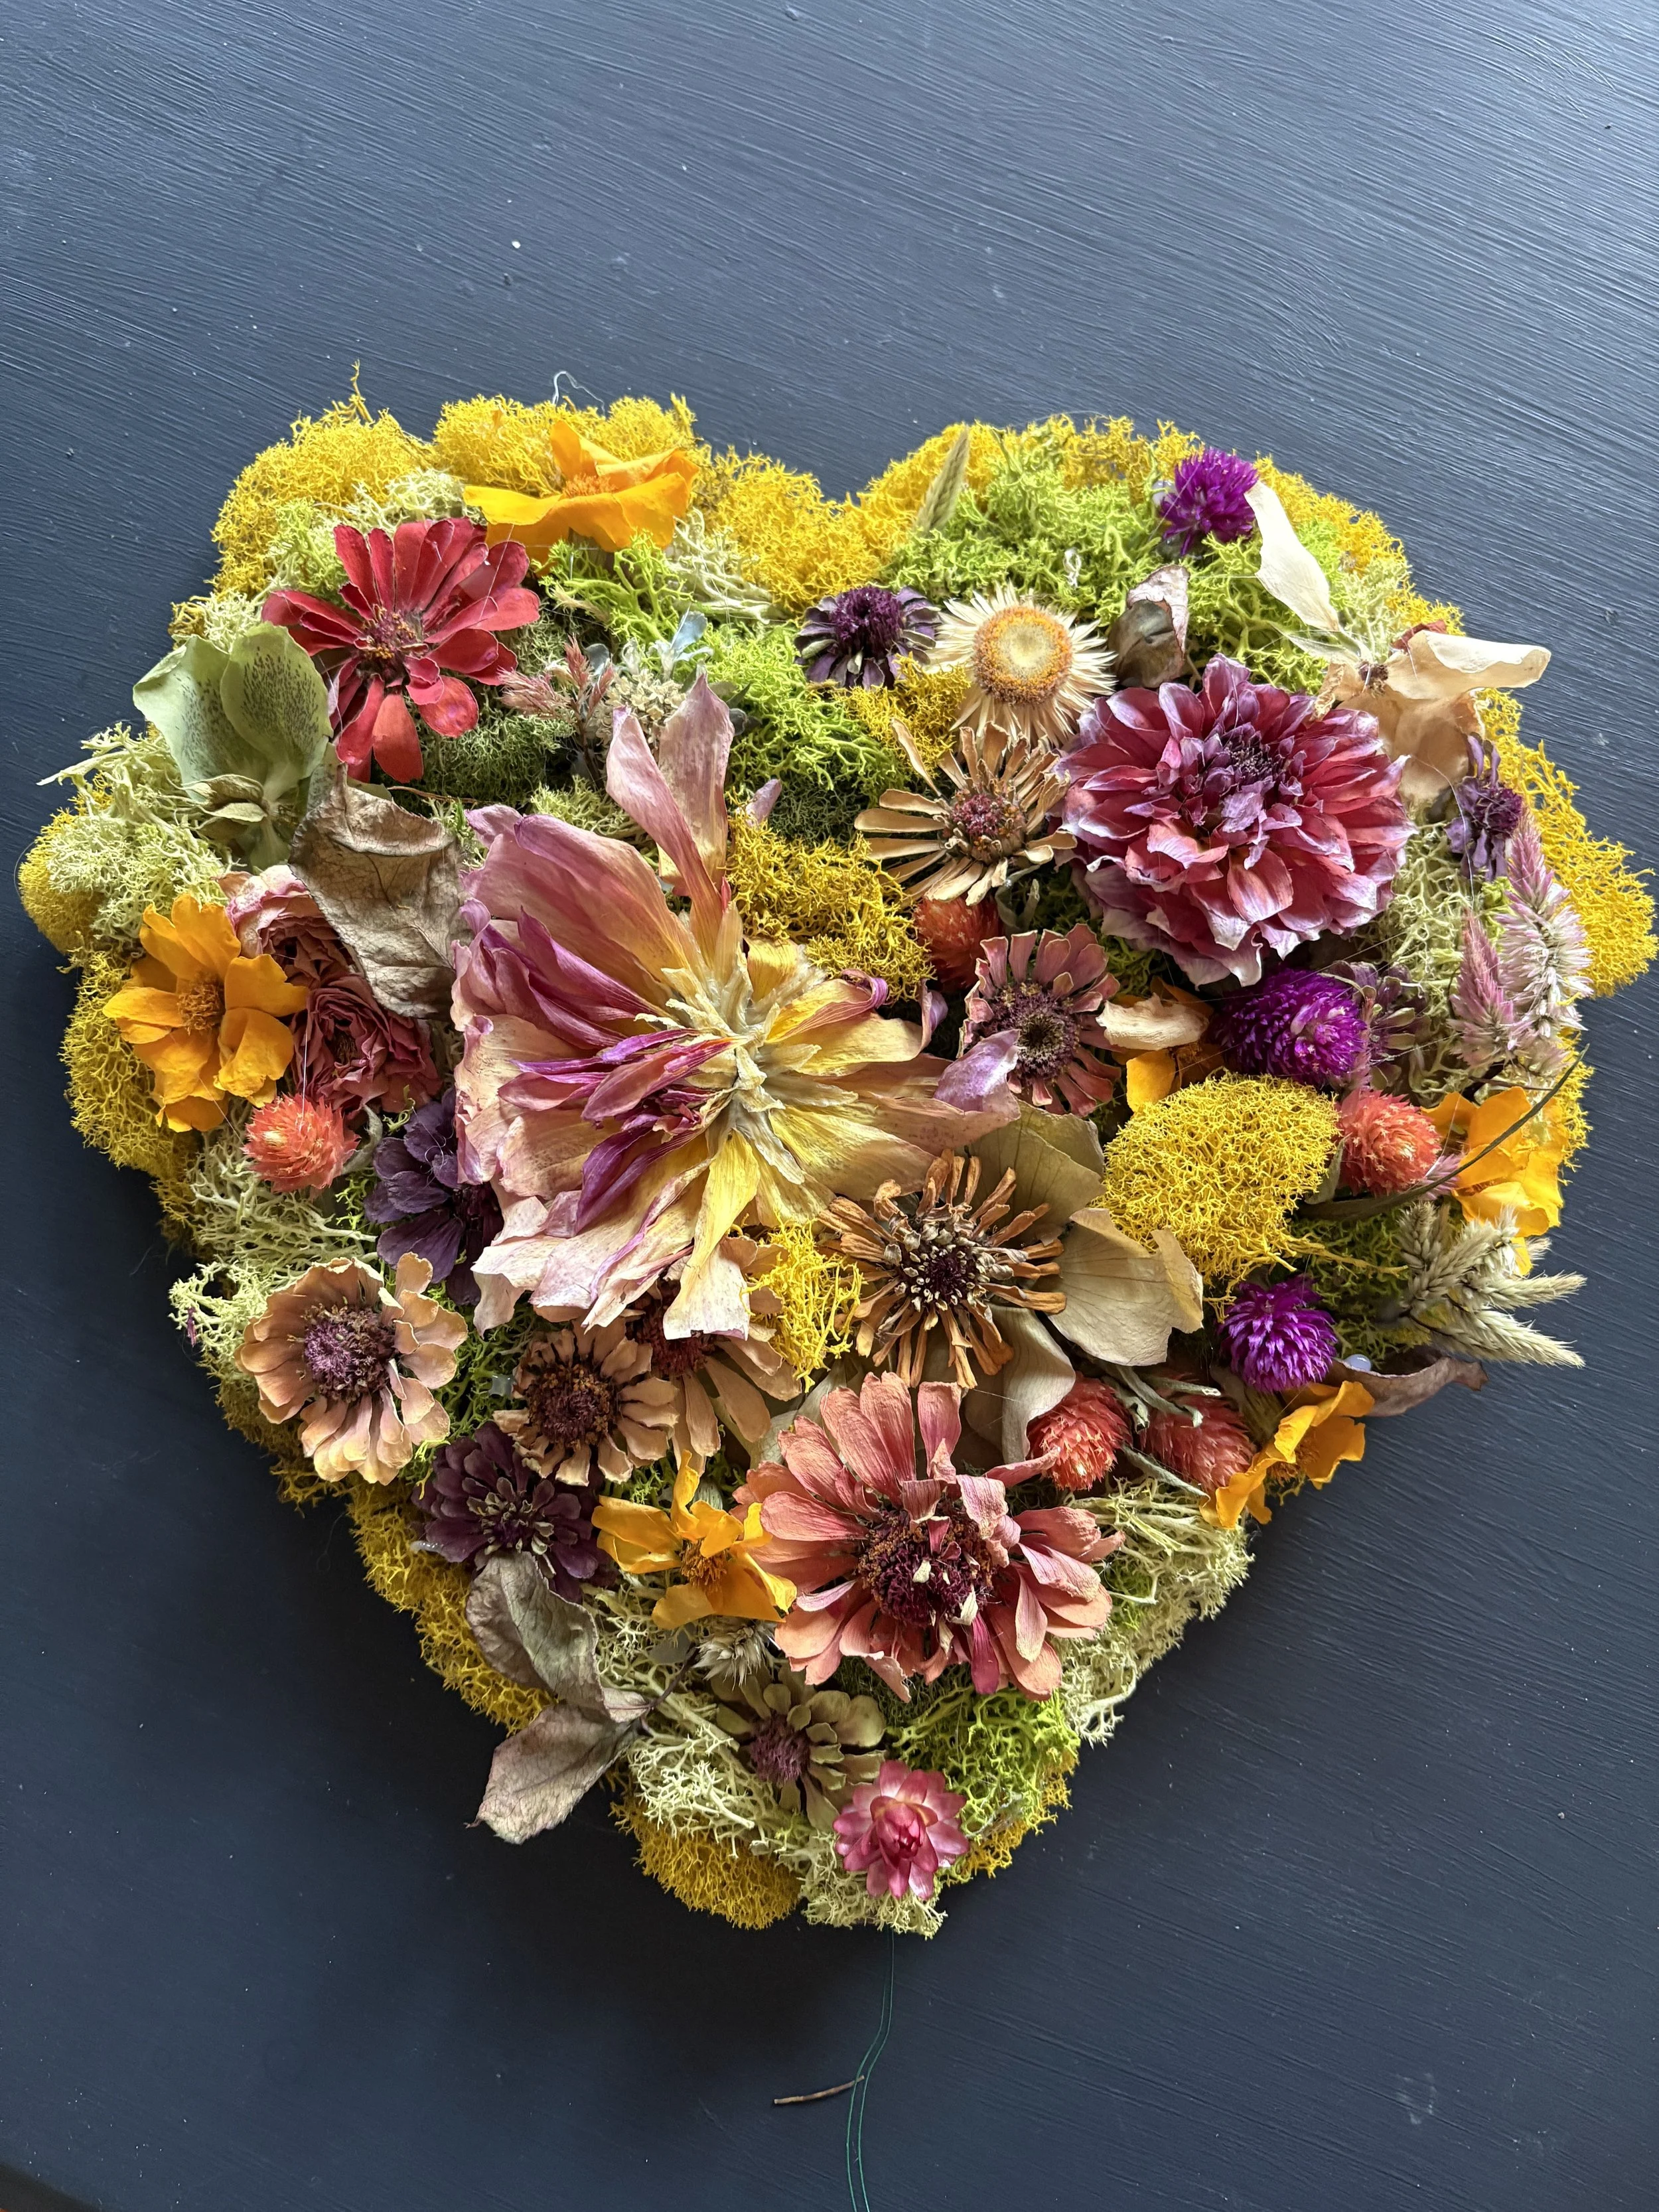
Here is the result. Not bad for a trial run. Later I’ll show you how it looks on the tree.
Hanging hearts on the Tree
Now the rest of the tree needed some LOVE-ly decor. I found these pretty heart ornaments in rose gold online. They are sold in sets of 45 so I only ordered one set. You can also get them in silver, pink, gold, red, and a pink, red & white combo.

Accenting with Vintage Valentine Cards
I also found some vintage Valentine ornaments to add some character to my tree. There are many types of interesting card ornaments to choose from on Amazon, so look around. Some are more childish which would be nice if you are creating this for your children or grandchildren.

The Unveiling
When all the little rose gold hearts and vintage Valentines were hung, I added a few large dried flowers and some colorful felt ball garlands that I had lying around.
I am very pleased with how this turned out and I’m happy I started a new tradition for our home. Don’t worry, if you’ve already removed your Christmas tree this year, you can plan for next February or grab some fallen branches from outside and place them in a garden pot to make a smaller Valentine’s Branch Tree. Anything is possible. Please share your thoughts in the comments below.

Hi, I’m Kim. Welcome to Studio Sprig.
Kim Bensing’s original watercolors and designs are now available on wallpaper and fabric. To order visit Studio Sprig’s design library on Spoonflower. Contact me if you need assistance.
-
EVENTS
22
- Oct 23, 2026 Wrapped in Wonder: The Art of Giving a Gift Oct 23, 2026
- Sep 26, 2026 Homecoming Flowers: A Beautiful Tradition Then and Now Sep 26, 2026
- Sep 23, 2026 Choose Wedding Flowers With Meaning: How to Create a Bouquet That Tells Your Love Story Sep 23, 2026
- Sep 21, 2026 The Pre-Prom Tradition Every Mom Should Try: Host a Backyard Bouquet Party Sep 21, 2026
- Sep 18, 2026 Lambertville’s Halloween Magic: A Funky, Creative Rivertown Comes Alive Sep 18, 2026
- Aug 20, 2026 How to Host a Beautiful Flower Bar: The Ultimate DIY Flower Bar Party Guide Aug 20, 2026
- Aug 19, 2026 How to Decorate Cakes with Fresh Flowers: Floral Wreaths, Crowns & More Aug 19, 2026
- Aug 19, 2026 Decorating Cakes with Fresh Flowers Aug 19, 2026
- May 18, 2025 How to Make DIY Bouquets for Prom May 18, 2025
- May 7, 2025 How to Preserve and Use Your Spring Flowers - All Year Long May 7, 2025
- Feb 27, 2025 Get Excited for The Flower Show Feb 27, 2025
- Feb 14, 2025 Historic Castles. What are they used for? Feb 14, 2025
- Jan 31, 2025 Creative Ideas For Your Valentine Jan 31, 2025
- Jan 28, 2025 How An Invitation Can Tell Your Love Story Jan 28, 2025
- Jan 23, 2025 How to Design a Valentine Tree Jan 23, 2025
- Jan 16, 2025 Host a Fabulous Bouquet Bar for Valentine's Day Jan 16, 2025
- Apr 4, 2023 Why Choose Seasonal Flowers for Your Special Occasion? Apr 4, 2023
- Feb 1, 2023 10 Ideas for an Eco-Friendly Event or Wedding Feb 1, 2023
- Nov 14, 2022 A Family Tree Inspired Wedding Invitation Nov 14, 2022
- Oct 3, 2022 How to choose flowers that have sentimental meaning Oct 3, 2022
- Nov 9, 2020 Simplified Wedding Ceremony during Covid Nov 9, 2020
- Apr 2, 2019 Why You Should Choose Seasonal Prom Flowers Apr 2, 2019
-
HOME
23
- Sep 9, 2026 How to Name a Farm: 10 Meaningful Ideas for Creating a Name With a Story Sep 9, 2026
- Sep 1, 2026 How to Preserve Flowers for Creative Projects Sep 1, 2026
- Jul 2, 2026 How to make your own flower confetti Jul 2, 2026
- Apr 22, 2025 How We Painted our Barn Apr 22, 2025
- Apr 16, 2025 What to Plant for Mesmerizing Spring Blooms Apr 16, 2025
- Apr 8, 2025 Narcissus AKA Daffodil - What's Blooming at Studio Sprig Apr 8, 2025
- Apr 1, 2025 Glory-of-the-Snow - What's Blooming at Studio Sprig Apr 1, 2025
- Mar 19, 2025 How we turned an Artist Studio into a Weekend Retreat Mar 19, 2025
- Mar 12, 2025 The Mighty Crocus - First to Bloom - What's Blooming at Studio Sprig Mar 12, 2025
- Jan 23, 2025 How to Design a Valentine Tree Jan 23, 2025
- Jan 16, 2025 Host a Fabulous Bouquet Bar for Valentine's Day Jan 16, 2025
- Jan 9, 2025 How to Make Your Own Mint Tea Jan 9, 2025
- Jan 7, 2025 How To Create A Courtyard Jan 7, 2025
- Jan 2, 2025 How to Create a Stunning Centerpiece Jan 2, 2025
- Mar 27, 2023 How We Transformed Our Farmhouse Kitchen by Reusing, Updating, and Thrifting: (Coffee Bar) Mar 27, 2023
- Mar 27, 2023 How We Transformed Our Farmhouse Kitchen by Reusing, Updating, and Thrifting Mar 27, 2023
- Mar 1, 2023 How and Why We Love Historic Homes Mar 1, 2023
- Jan 3, 2023 Eliminate Sneaky Sugars Jan 3, 2023
- Dec 14, 2022 How to Create a Pretty Mini Bar with Items You Already Own Dec 14, 2022
- Nov 21, 2022 Friendsgiving At Our Farm Nov 21, 2022
- Nov 9, 2022 Herbs: How to Grow, Harvest and Dry Your Own Nov 9, 2022
- Nov 9, 2022 DIY Herb Drying Rack: Herb Drying at Home Nov 9, 2022
- Oct 12, 2022 Have you ever thought about creating a beautiful water feature? Oct 12, 2022
-
STYLE
27
- Oct 6, 2026 Where Flowers Become Art, Experiences & Memories Oct 6, 2026
- Sep 1, 2026 How to Preserve Flowers for Creative Projects Sep 1, 2026
- Aug 20, 2026 How to Host a Beautiful Flower Bar: The Ultimate DIY Flower Bar Party Guide Aug 20, 2026
- Aug 19, 2026 How to Decorate Cakes with Fresh Flowers: Floral Wreaths, Crowns & More Aug 19, 2026
- Aug 19, 2026 Decorating Cakes with Fresh Flowers Aug 19, 2026
- Jul 2, 2026 How to make your own flower confetti Jul 2, 2026
- Nov 3, 2025 Creating a Pressed Flower Frame Nov 3, 2025
- May 7, 2025 How to Preserve and Use Your Spring Flowers - All Year Long May 7, 2025
- Jan 28, 2025 How An Invitation Can Tell Your Love Story Jan 28, 2025
- Jan 23, 2025 How to Design a Valentine Tree Jan 23, 2025
- Jan 6, 2025 How to Create Oyster Shell Necklaces Jan 6, 2025
- Jan 2, 2025 How to Create a Stunning Centerpiece Jan 2, 2025
- Mar 14, 2023 How to Make Sentimental Easter Eggs Mar 14, 2023
- Mar 6, 2023 How to Enjoy The PHS Philadelphia Flower Show Mar 6, 2023
- Feb 13, 2023 Let's Save The Bees Feb 13, 2023
- Feb 1, 2023 10 Ideas for an Eco-Friendly Event or Wedding Feb 1, 2023
- Jan 12, 2023 A Great Way to Help Kids with Cancer (PENN STATE) Jan 12, 2023
- Dec 14, 2022 How to Create a Pretty Mini Bar with Items You Already Own Dec 14, 2022
- Nov 29, 2022 Lunch and Dinner -Studio Sprig Style Micro Blog Nov 29, 2022
- Nov 14, 2022 A Family Tree Inspired Wedding Invitation Nov 14, 2022
- Nov 9, 2022 DIY Herb Drying Rack: Herb Drying at Home Nov 9, 2022
- Oct 30, 2022 Lambertville, Nj , A Funky, Cool Rivertown You Must Visit on Halloween. Oct 30, 2022
- Oct 19, 2022 How to choose an interesting place to stay when you travel or go on vacation Oct 19, 2022
- Oct 12, 2022 Have you ever thought about creating a beautiful water feature? Oct 12, 2022
- Oct 3, 2022 How to choose flowers that have sentimental meaning Oct 3, 2022
- Feb 1, 2021 How to design marketing materials for your small business Feb 1, 2021
- Oct 29, 2020 Surprise the bride when you can't come to her wedding Oct 29, 2020