
Creating a Pressed Flower Frame

I really enjoy creating pressed flower frames, especially when I am making art from a beautiful bouquet.
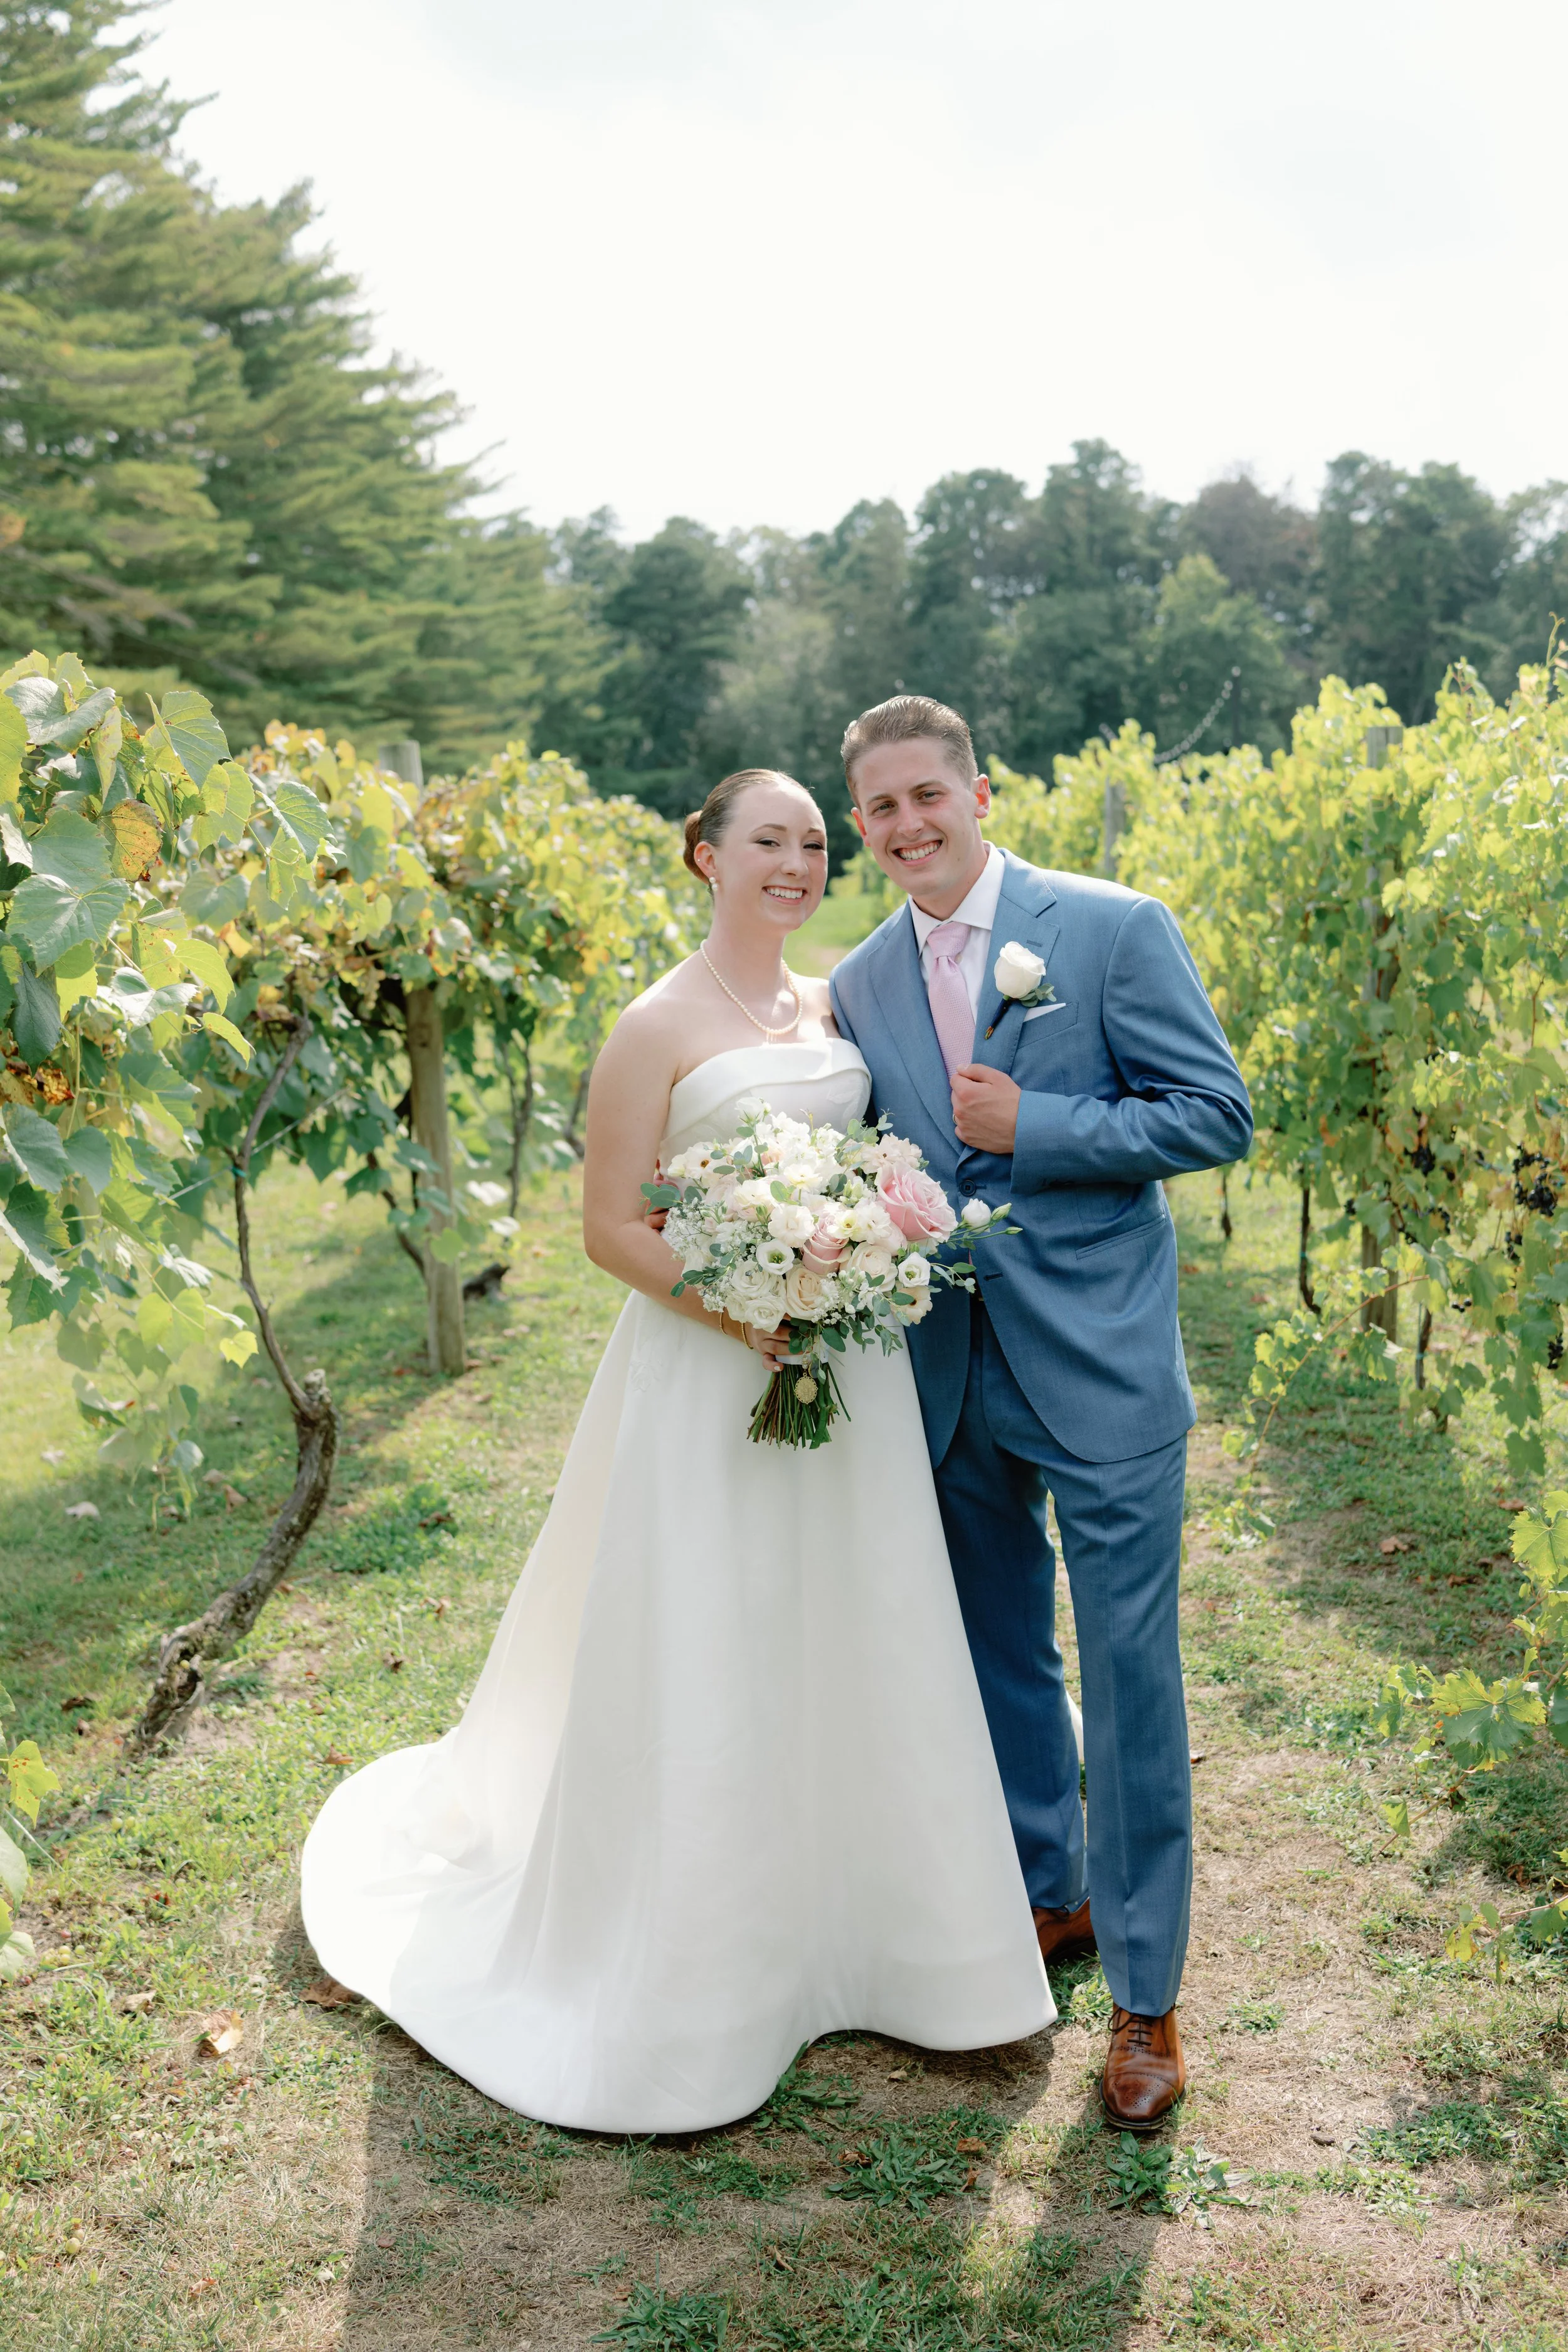
Start with Fresh flowers
Nothing beats a stunning bridal bouquet as a starting point, but it’s critically important to keep the bouquet as fresh as possible after the wedding. Plan to keep the bouquet in water and refrigerated, or at least in a cool, dark spot, until you are ready to press. I gathered this bouquet 2 days after the wedding and began pressing immediately.
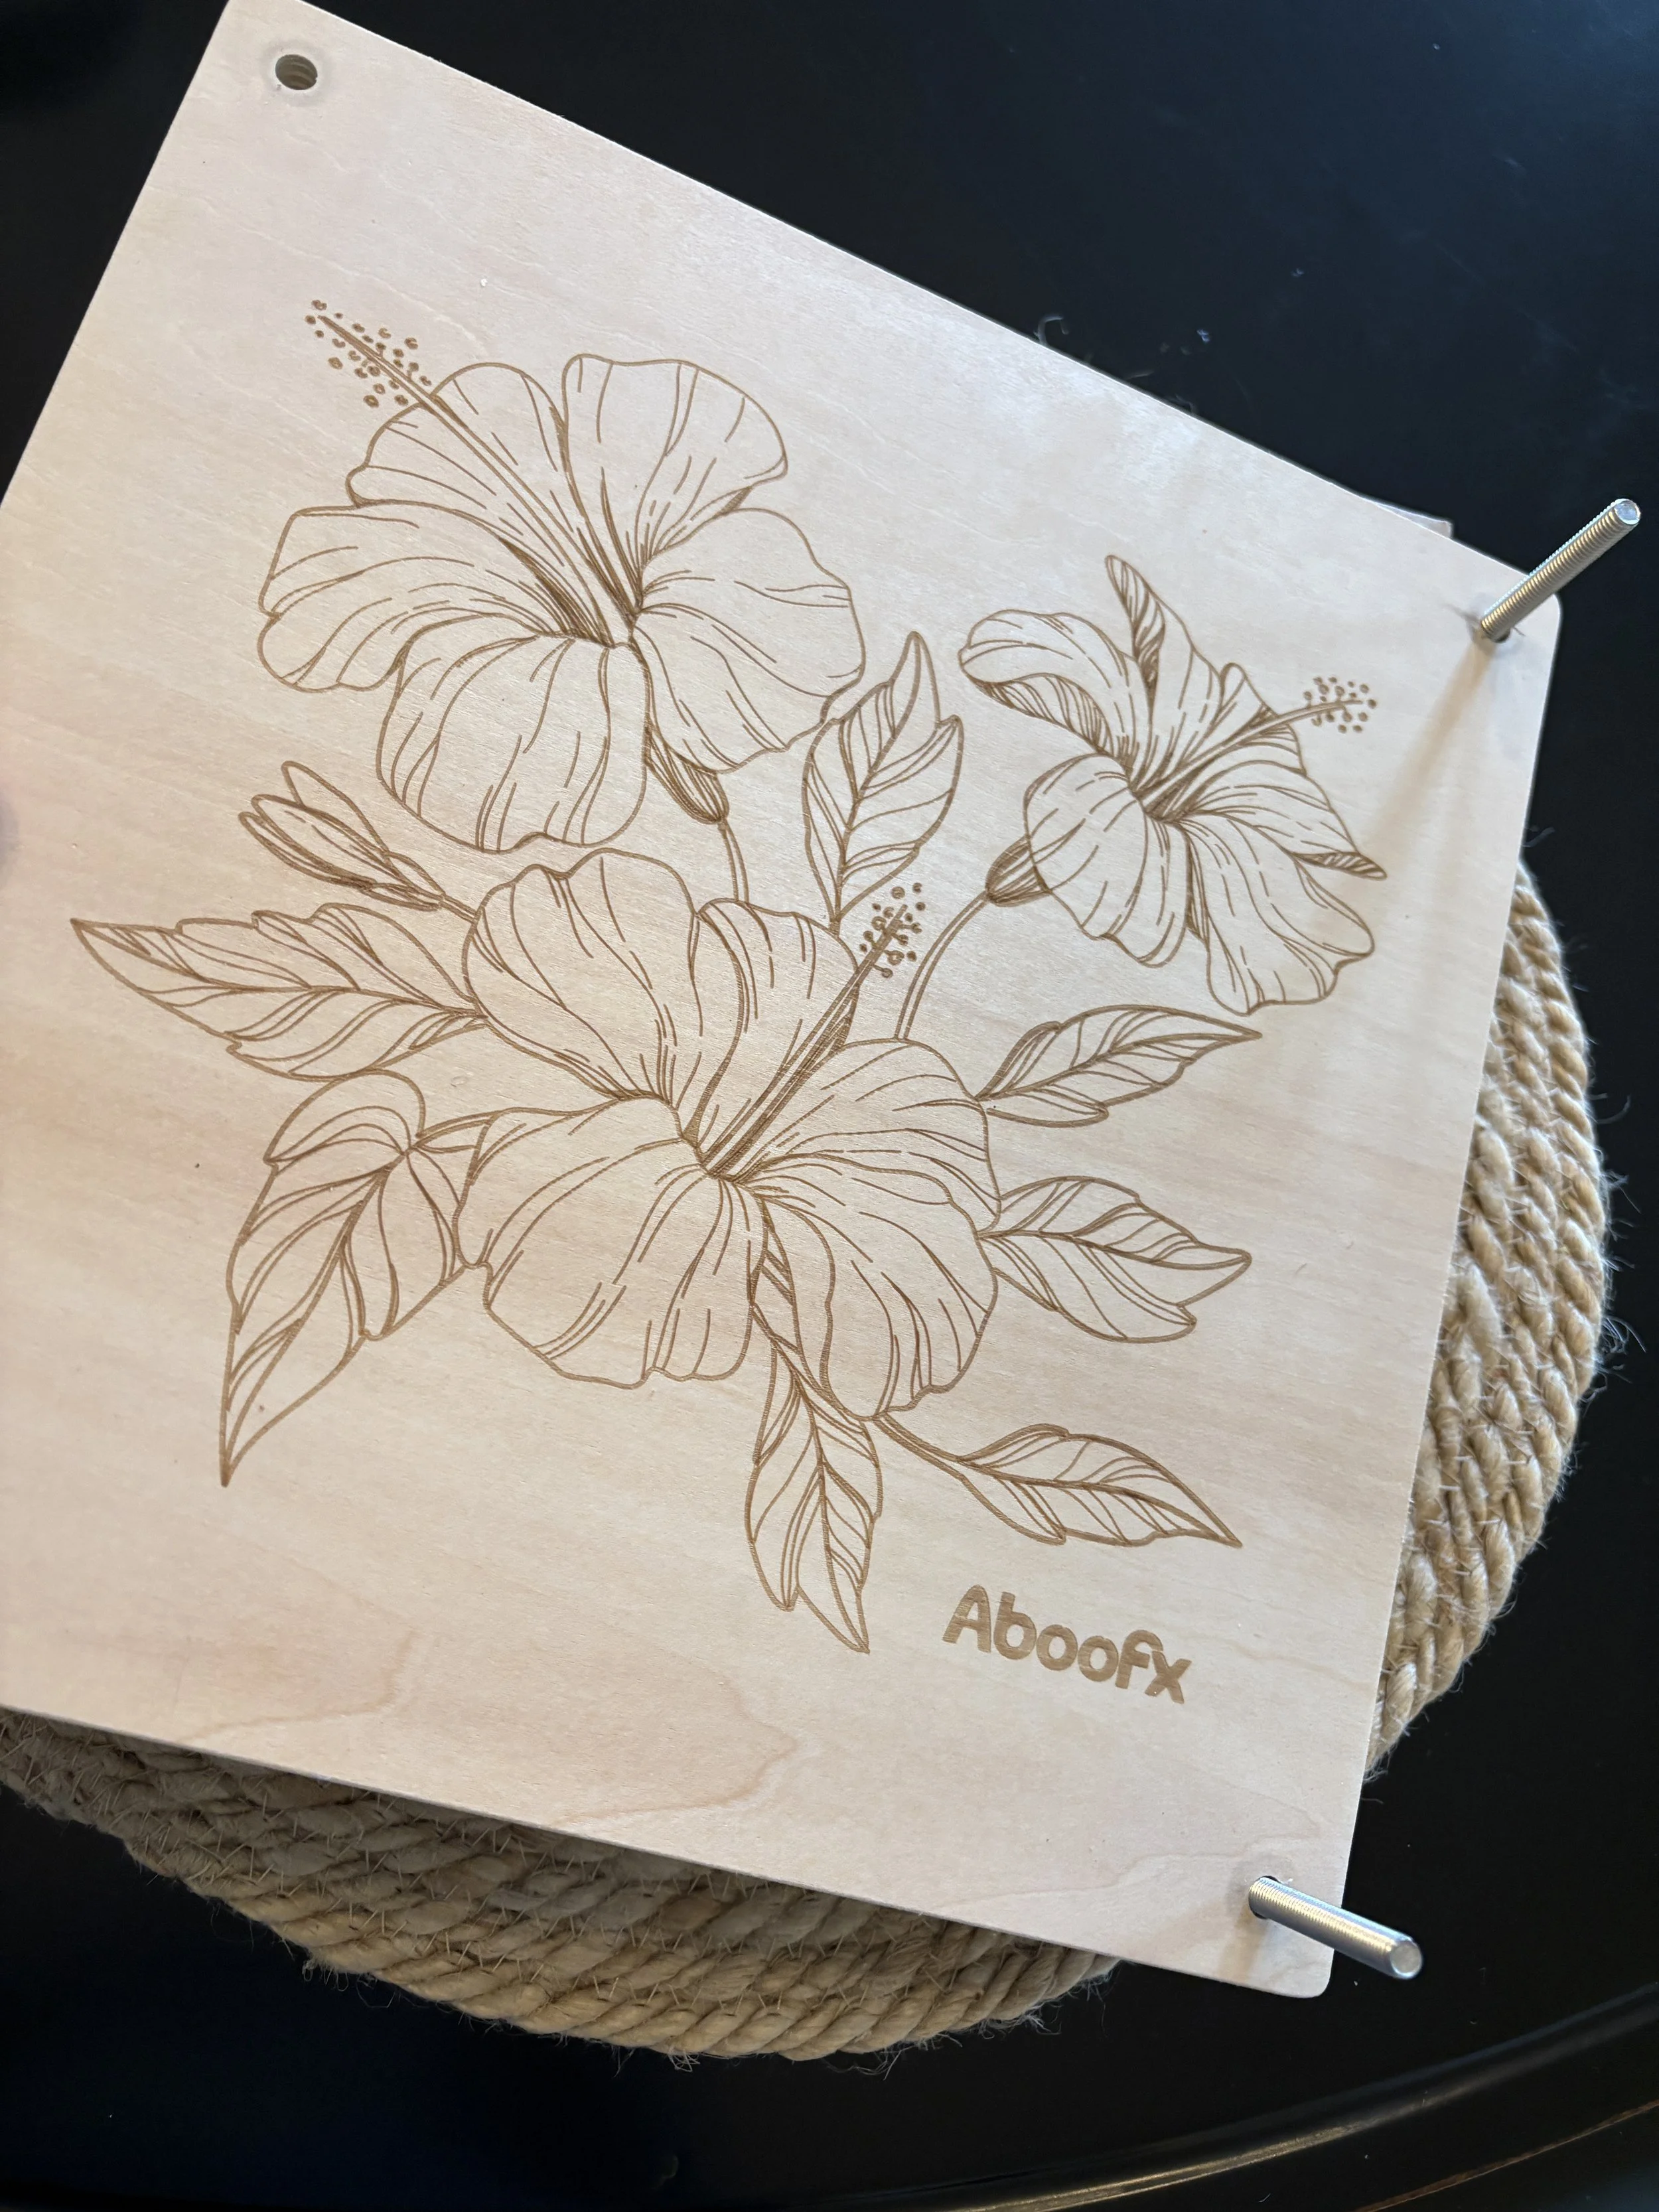
The Flower Press
I use this attractive wooden flower press from Aboofx. This wooden flower press not only looks appealing on a desk or counter, but it also comes with plenty of blotter paper, screws, and washers that allow me to easily apply ample pressing pressure. For a less expensive option, just buy loose sheets of Blotter Paper and press your flowers under several heavy books.

Press single Petals, Greens, and whole Flowers
Remember, it takes 4-6 weeks to press fresh flowers properly, but during that time, you can collect all the supplies you’ll need for your farmed art and rehearse the design you’d like to create.
Follow these steps when preparing the press:
Eliminate all moisture from petals and flowers (air drying is best while the flowers are still on the stem, but in water)
Cut off all thick stems as close to the flower as possible
Pull apart the petals from thick, round flowers like roses and press the petals individually
Take tiny cuttings from the greens and filler flowers like statice and baby’s breath
Separate leaves for pressing if you choose to include them in the final design
Use your best judgment when pressing small buds. If they seem too thick and full of moisture, do not try to press them

Layering the Blotter Sheets:
Lay each flower, green leaf or petal, individually, and try not to touch other pieces
When the blotter sheet is full, place another sheet on top and continue (be careful not to shift the sheets underneath)
When all of the flowers, greens, and petals are positioned, cover the stack with one final piece of blotter paper before placing the press’s wood cover or your pile of heavy books on top
Secure screws and washers, twist until tight, and the sheets cannot shift (only if using the flower press)
*Pro tip: If you are pressing WHITE flowers, place the entire press, including the books, into a refrigerator for the duration of the press. This will keep the white flowers white. But if you want an antiqued, tea-stained look, then keep them at room temperature.

Choose A Nice Frame
The frame choice is very important because you want the finished piece to hold up and look wonderful. I always choose floating frames with glass, not plastic, because I think they showcase the flowers well. You can decide between white, black, metal, or wood finishes, and of course, there are many sizes. This bouquet was large, and I wanted to represent all of the flowers, so I chose the Americanflat 11x14 Floating Frame in Oak with Polished Glass.
Designing the Flowers and Petals
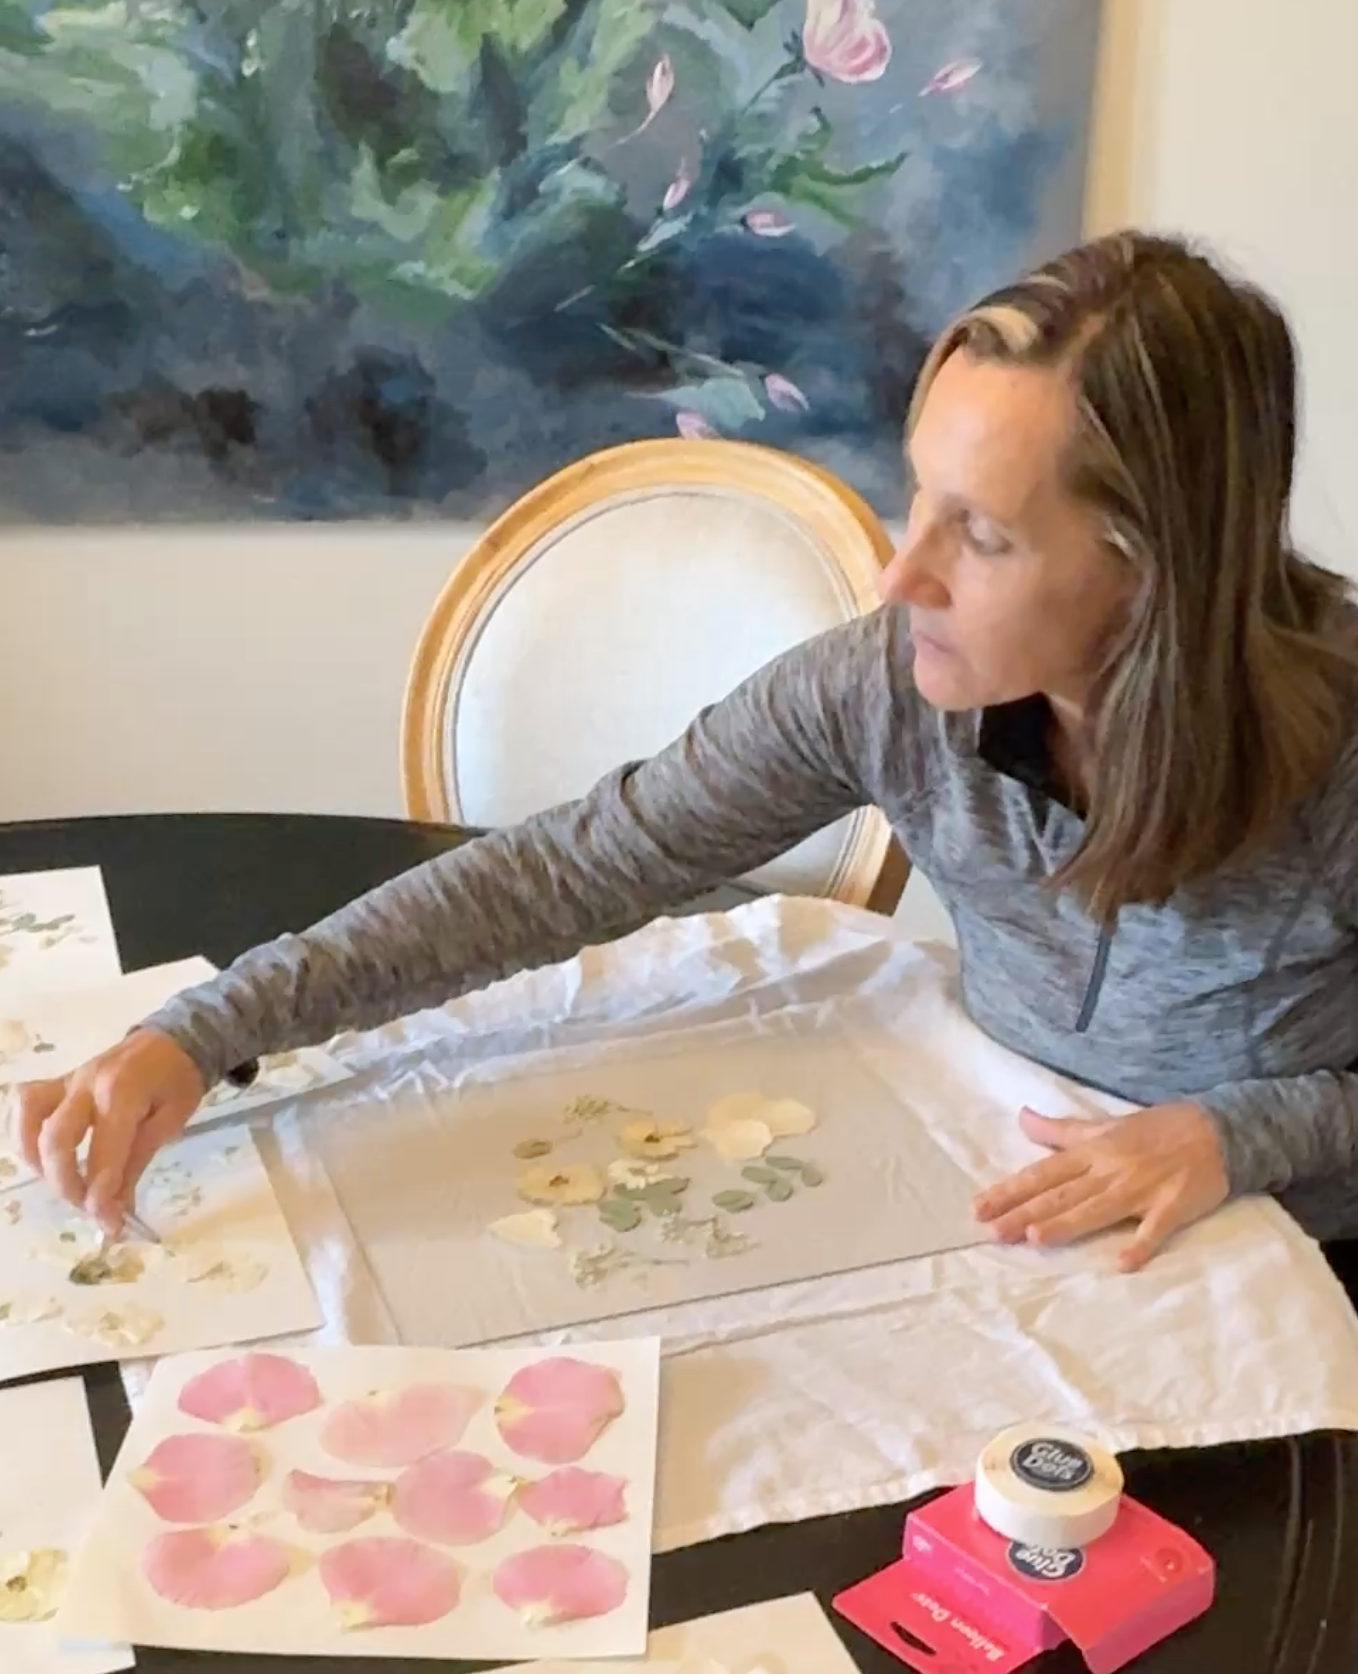
This is the fun part. Only after 4-6 weeks have passed and your flowers have had enough time to dry and press, should you begin designing. Test each layer of your press to make sure everything is ready. I like to lay each sheet on my table so that I can clearly see everything before I begin arranging.
Lay out your design
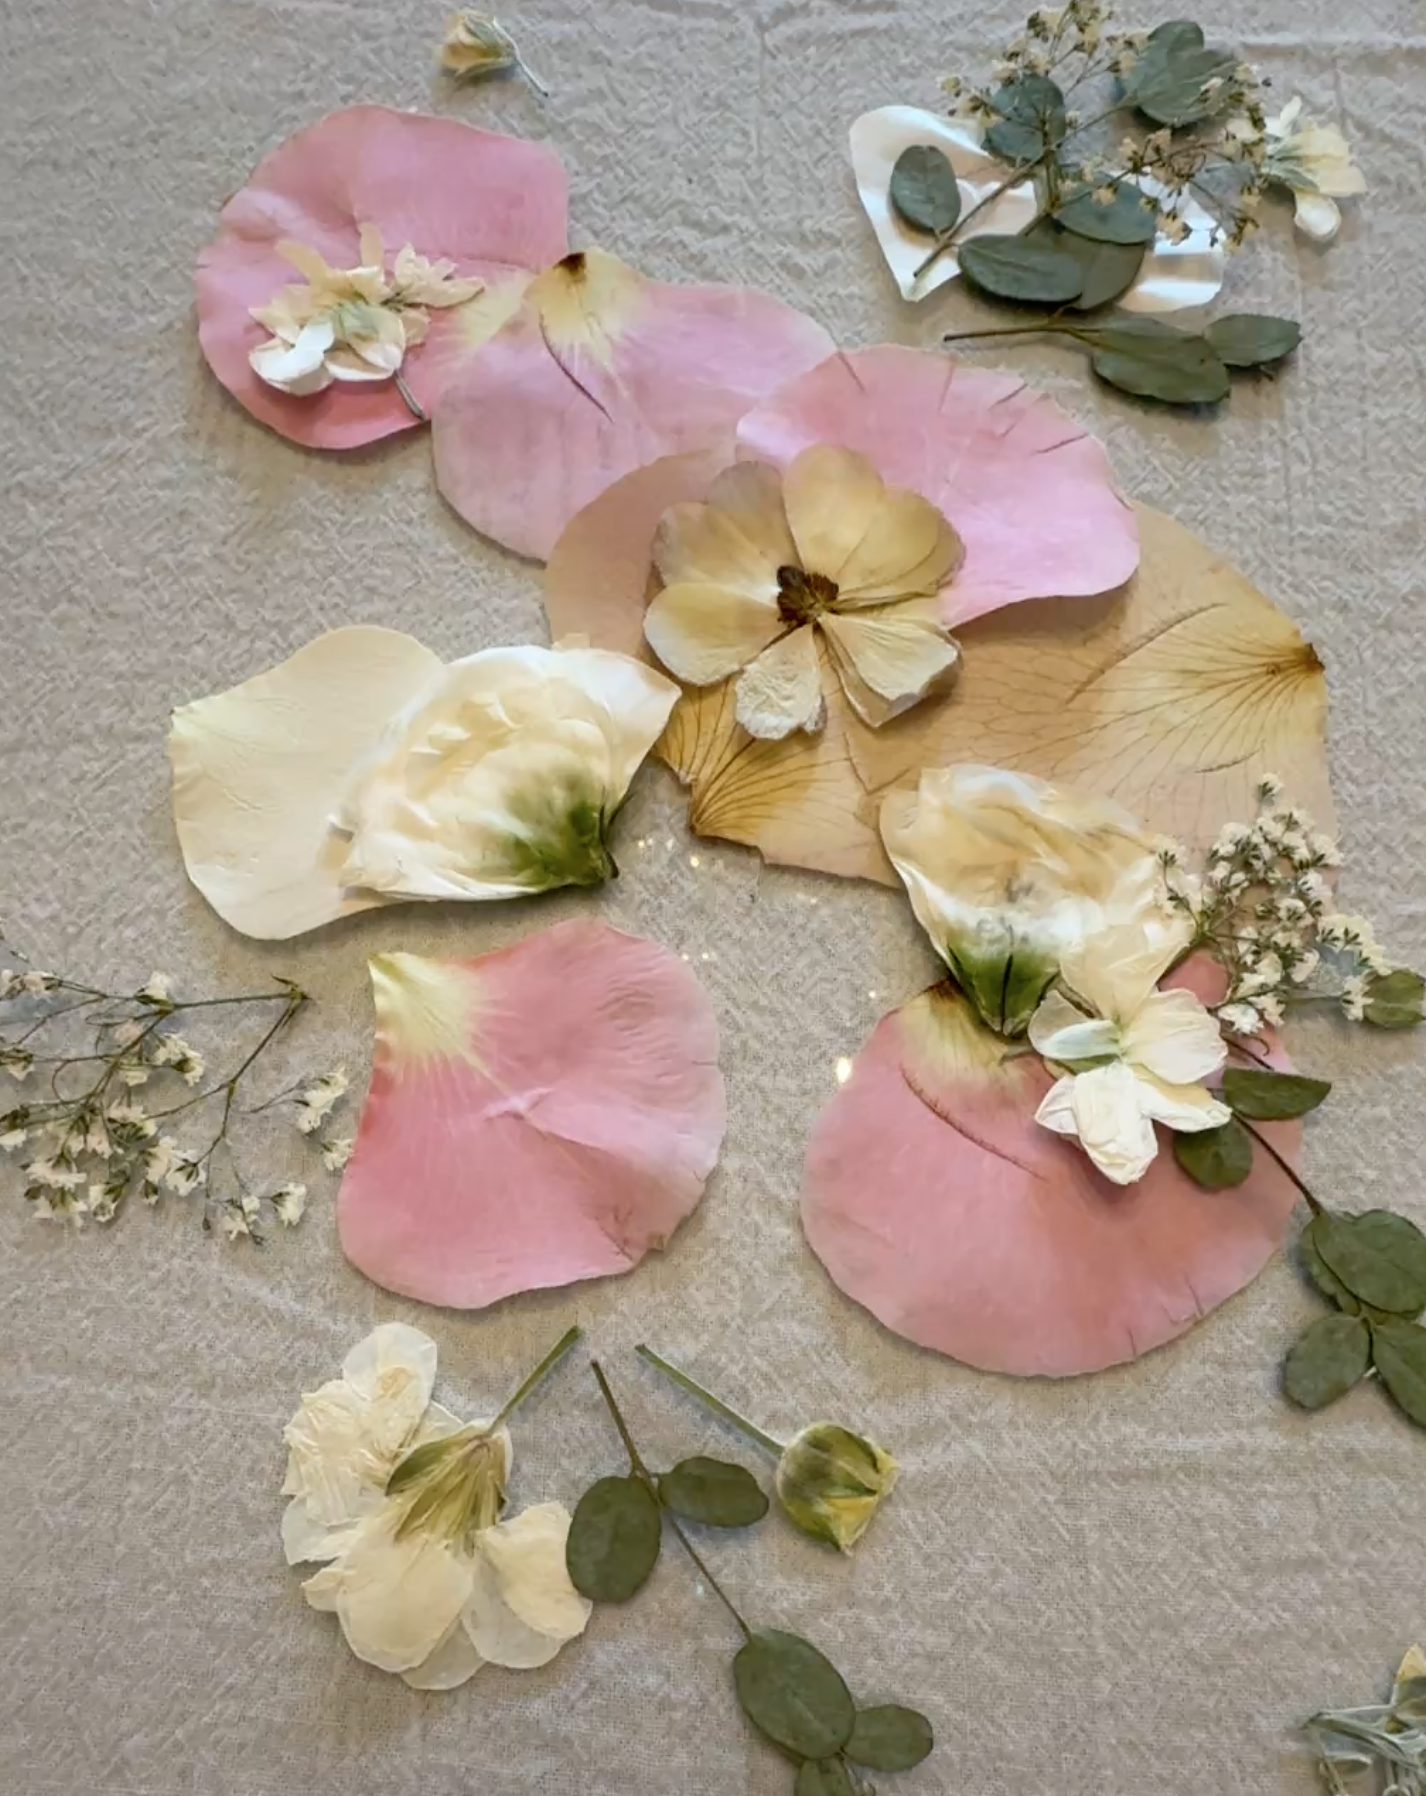
To begin, place one piece of the frame’s glass onto a soft work surface. I used a plain, white dish towel so nothing could scratch the glass.
Start by laying out your preliminary design to get an overall sense of where you want to place each flower. I like to use a tweezer to carefully lift each petal or leaf, remembering that everything is very delicate at this stage and the petals tear easily. Sometimes I create using a lot of white space, allowing the flowers to breathe, while other times I like to bunch items together. Design is really personal preference.
Once you have your vision in place, carefully place small glue dots behind each flower or leaf and lightly press them into place. Some layering is aesthetic, but be sure not to create too many layers; otherwise, your double-layered glass will not slide into the frame.
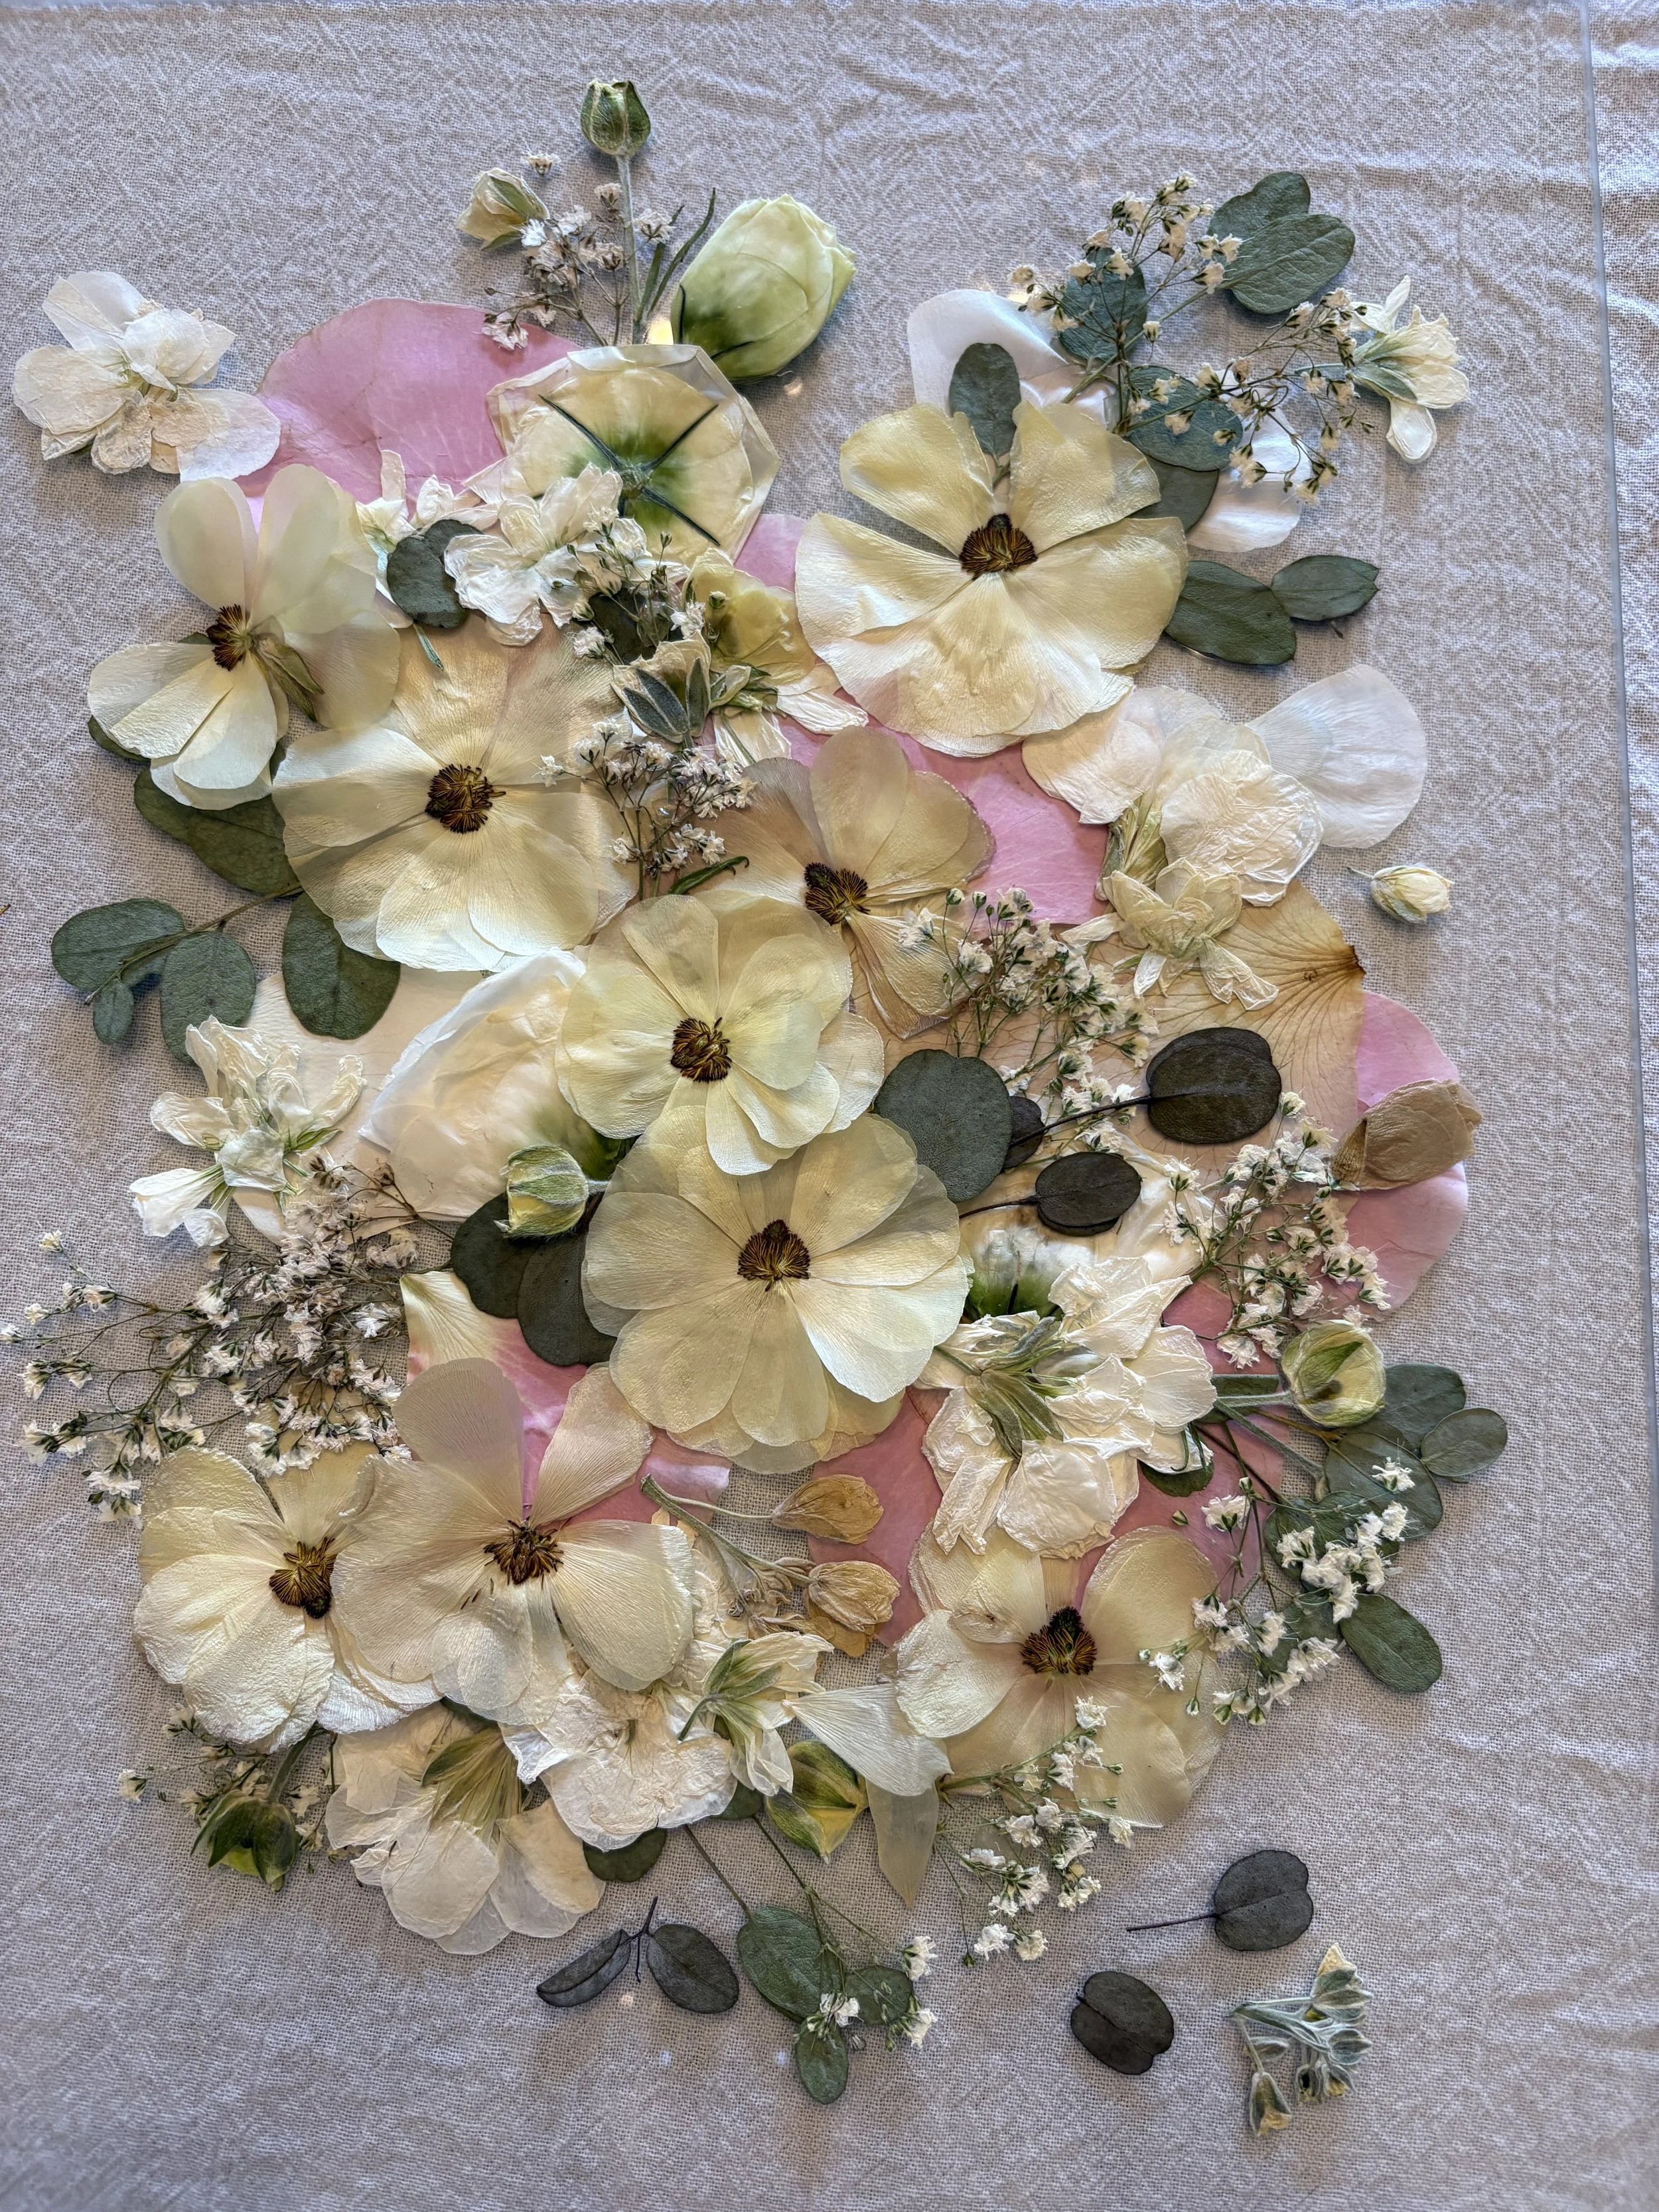
Assemble the Frame
When you are happy with your design, pick up the glass and make sure none of the pieces fall. If they do, just secure them with some more glue dots until everything stays in place. At this final stage, go over the entire design and make sure you do not see any glue from the front. If you do, place a small flower to cover it or remove the glue dot with your tweezers. Once everything is secure, slowly place the second piece of glass on top and assemble the frame.

I hope you enjoyed this blog
Have fun creating your pressed flower frames. Here is a short list of supplies you might like, including several unique press options for your convenience.

Creative Ideas For Your Valentine
I like to encourage giving flowers, but as you know, I try to support local growers and not many local Pennsylvania flower growers have blooms in frigid February. So I’ve written…

Valentines Gifts: Not Just Flowers & Candy
Fun fact: According to the National Retail Federation, Valentine's Day spending reached $25.8 billion overall — an average of $185.81 per person in 2024. I think this is because Valentine's gift-giving has evolved to include ALL THE LOVES of our lives: Spouses, Special Friends, Parents, Kids, Co-workers, Teachers, and even Pets. Therefore, it’s only fitting that our gift options evolve as well.
Alternative Valentine Gift Ideas
I like to encourage giving flowers, but as you know, I try to support local growers and not many local Pennsylvania flower growers have blooms in frigid February. So I’ve written a short list of sentimental alternatives that should help you think outside the candy box and express your Valentine LOVE more creatively.
Give A Pressed Flower Frame
Framing a sentimental piece with pressed flowers is a nice way to remember an event. Pressed flower frames can be propped on a small shelf, a mantle, or hung over a photo commemorating the actual experience. Wedding invitations, baby ultrasounds, engagement photos, and small mementos like rings become elevated keepsakes when surrounded by pretty flowers and a simple frame. And it’s even better if the flowers are unique to the event, so consider drying and pressing your own.

Shadow boxes are best for three-dimensional objects but floating frames work well for flat art and pressed flowers. If you are creating a three-dimensional frame and want dried flowers, learn how to dry your own here. And if you’d like to press your own fresh flowers, I recommend this flower press. It’s the one I use and it works nicely and looks even better sitting on the table.

Give A Flower Farm Tour or Photo shoot
Did you ever think about contacting a local farm and arranging a walking tour or photoshoot? This is more of a “for the future” gift and would be perfect for someone who loves gardens or summer strolls, has a special event coming up, or for someone who has everything tangible and needs nothing more.

I’ve teamed up with local flower growers here in Pennsylvania and hosted several pre-wedding flower farm tours. During the tours brides, grooms and their guests see all of the flowers that will be growing on or near the date of their wedding. They can choose a specialty flower to be grown especially for them or just ask questions and speak with the grower about the different varieties available. But this unique type of gift does not need to be reserved for newly engaged couples. Think about taking a friend and a bottle of wine for a tour of a local sunflower field or arranging a family photo shoot at a local lavender farm or vineyard. All of these ideas make wonderful Valentine's gifts that can be enjoyed well past February.

Give Something Evergreen and Unique
Did you ever receive a potted plant and think, this I so wonderful because it will live much longer than a week? That’s the joy an evergreen gift brings. An evergreen gift is a gift that keeps on giving long after its moment in the sun. There are so many evergreen ideas out there but here are a few that involve nature itself. Consider a Terrarium, Moss Wall or Nature Experience as a gift for your Valentine this year.

Terrariums can be assembled using a few small plants, some rocks that you find in your backyard, a little bit of soil, live moss, and some natural embellishments that you hunt for outside. And don’t think that you need to build yours in a glass bowl. Terrariums come in many shapes and sizes these days. I search thrift shops for large gravy boats and interesting pedestal compotes to make mine. Terrariums are great because they will last a really long time, are gender-neutral and they can be custom-built for your special someone. They are perfect for any space in the house, dormitory, or office and require very little care.

A Moss Wall is a popular nature wall hanging that uses preserved moss and requires no care at all. They are easily created with a base tray, some reindeer moss, hot glue, and nature embellishments of your choice. They are fun to make and will certainly make your Valentine smile if you gather supplies and arrange a Moss Wall Creation day just for them.

Another idea is to surprise your Valentine with a custom-designed Nature Experience. A Nature Experience is just as it sounds, an experience created around a nature workshop of some sort. There are so many workshops to consider. There are Bouquet Bars, Terraium or Plant Workshops, Dried Flower Workshops and Wreath Workshops to name just a few. But really, anything you can think up can be used to create a unique gift of a Nature Experience. This gift is fantastic because it allows the recipient to essentially build their own gift by doing something they enjoy with people they like, and it’s perfect for almost any time of year. So don’t rule out giving a practical and special Evergreen Gift. And if you need ideas, see this page.
I hope these ideas inspire you. Happy Valentine’s Day all! - Kim
Hi, I’m Kim. Welcome to Studio Sprig.
Kim Bensing’s original watercolors and designs are now available on wallpaper and fabric. To order visit Studio Sprig’s design library on Spoonflower. Contact me if you need assistance.
-
EVENTS
23
- Nov 3, 2026 Create a Winter Nature Bar to Entertain your Holiday Guests Nov 3, 2026
- Oct 23, 2026 Wrapped in Wonder: The Art of Giving a Gift Oct 23, 2026
- Sep 26, 2026 Homecoming Flowers: A Beautiful Tradition Then and Now Sep 26, 2026
- Sep 23, 2026 Choose Wedding Flowers With Meaning: How to Create a Bouquet That Tells Your Love Story Sep 23, 2026
- Sep 21, 2026 The Pre-Prom Tradition Every Mom Should Try: Host a Backyard Bouquet Party Sep 21, 2026
- Sep 18, 2026 Lambertville’s Halloween Magic: A Funky, Creative Rivertown Comes Alive Sep 18, 2026
- Aug 20, 2026 How to Host a Beautiful Flower Bar: The Ultimate DIY Flower Bar Party Guide Aug 20, 2026
- Aug 19, 2026 How to Decorate Cakes with Fresh Flowers: Floral Wreaths, Crowns & More Aug 19, 2026
- Aug 19, 2026 Decorating Cakes with Fresh Flowers Aug 19, 2026
- May 18, 2025 How to Make DIY Bouquets for Prom May 18, 2025
- May 7, 2025 How to Preserve and Use Your Spring Flowers - All Year Long May 7, 2025
- Feb 27, 2025 Get Excited for The Flower Show Feb 27, 2025
- Feb 14, 2025 Historic Castles. What are they used for? Feb 14, 2025
- Jan 31, 2025 Creative Ideas For Your Valentine Jan 31, 2025
- Jan 28, 2025 How An Invitation Can Tell Your Love Story Jan 28, 2025
- Jan 23, 2025 How to Design a Valentine Tree Jan 23, 2025
- Jan 16, 2025 Host a Fabulous Bouquet Bar for Valentine's Day Jan 16, 2025
- Apr 4, 2023 Why Choose Seasonal Flowers for Your Special Occasion? Apr 4, 2023
- Feb 1, 2023 10 Ideas for an Eco-Friendly Event or Wedding Feb 1, 2023
- Nov 14, 2022 A Family Tree Inspired Wedding Invitation Nov 14, 2022
- Oct 3, 2022 How to choose flowers that have sentimental meaning Oct 3, 2022
- Nov 9, 2020 Simplified Wedding Ceremony during Covid Nov 9, 2020
- Apr 2, 2019 Why You Should Choose Seasonal Prom Flowers Apr 2, 2019
-
HOME
23
- Sep 9, 2026 How to Name a Farm: 10 Meaningful Ideas for Creating a Name With a Story Sep 9, 2026
- Sep 1, 2026 How to Preserve Flowers for Creative Projects Sep 1, 2026
- Jul 2, 2026 How to make your own flower confetti Jul 2, 2026
- Apr 22, 2025 How We Painted our Barn Apr 22, 2025
- Apr 16, 2025 What to Plant for Mesmerizing Spring Blooms Apr 16, 2025
- Apr 8, 2025 Narcissus AKA Daffodil - What's Blooming at Studio Sprig Apr 8, 2025
- Apr 1, 2025 Glory-of-the-Snow - What's Blooming at Studio Sprig Apr 1, 2025
- Mar 19, 2025 How we turned an Artist Studio into a Weekend Retreat Mar 19, 2025
- Mar 12, 2025 The Mighty Crocus - First to Bloom - What's Blooming at Studio Sprig Mar 12, 2025
- Jan 23, 2025 How to Design a Valentine Tree Jan 23, 2025
- Jan 16, 2025 Host a Fabulous Bouquet Bar for Valentine's Day Jan 16, 2025
- Jan 9, 2025 How to Make Your Own Mint Tea Jan 9, 2025
- Jan 7, 2025 How To Create A Courtyard Jan 7, 2025
- Jan 2, 2025 How to Create a Stunning Centerpiece Jan 2, 2025
- Mar 27, 2023 How We Transformed Our Farmhouse Kitchen by Reusing, Updating, and Thrifting: (Coffee Bar) Mar 27, 2023
- Mar 27, 2023 How We Transformed Our Farmhouse Kitchen by Reusing, Updating, and Thrifting Mar 27, 2023
- Mar 1, 2023 How and Why We Love Historic Homes Mar 1, 2023
- Jan 3, 2023 Eliminate Sneaky Sugars Jan 3, 2023
- Dec 14, 2022 How to Create a Pretty Mini Bar with Items You Already Own Dec 14, 2022
- Nov 21, 2022 Friendsgiving At Our Farm Nov 21, 2022
- Nov 9, 2022 Herbs: How to Grow, Harvest and Dry Your Own Nov 9, 2022
- Nov 9, 2022 DIY Herb Drying Rack: Herb Drying at Home Nov 9, 2022
- Oct 12, 2022 Have you ever thought about creating a beautiful water feature? Oct 12, 2022
-
STYLE
27
- Oct 6, 2026 Where Flowers Become Art, Experiences & Memories Oct 6, 2026
- Sep 1, 2026 How to Preserve Flowers for Creative Projects Sep 1, 2026
- Aug 20, 2026 How to Host a Beautiful Flower Bar: The Ultimate DIY Flower Bar Party Guide Aug 20, 2026
- Aug 19, 2026 How to Decorate Cakes with Fresh Flowers: Floral Wreaths, Crowns & More Aug 19, 2026
- Aug 19, 2026 Decorating Cakes with Fresh Flowers Aug 19, 2026
- Jul 2, 2026 How to make your own flower confetti Jul 2, 2026
- Nov 3, 2025 Creating a Pressed Flower Frame Nov 3, 2025
- May 7, 2025 How to Preserve and Use Your Spring Flowers - All Year Long May 7, 2025
- Jan 28, 2025 How An Invitation Can Tell Your Love Story Jan 28, 2025
- Jan 23, 2025 How to Design a Valentine Tree Jan 23, 2025
- Jan 6, 2025 How to Create Oyster Shell Necklaces Jan 6, 2025
- Jan 2, 2025 How to Create a Stunning Centerpiece Jan 2, 2025
- Mar 14, 2023 How to Make Sentimental Easter Eggs Mar 14, 2023
- Mar 6, 2023 How to Enjoy The PHS Philadelphia Flower Show Mar 6, 2023
- Feb 13, 2023 Let's Save The Bees Feb 13, 2023
- Feb 1, 2023 10 Ideas for an Eco-Friendly Event or Wedding Feb 1, 2023
- Jan 12, 2023 A Great Way to Help Kids with Cancer (PENN STATE) Jan 12, 2023
- Dec 14, 2022 How to Create a Pretty Mini Bar with Items You Already Own Dec 14, 2022
- Nov 29, 2022 Lunch and Dinner -Studio Sprig Style Micro Blog Nov 29, 2022
- Nov 14, 2022 A Family Tree Inspired Wedding Invitation Nov 14, 2022
- Nov 9, 2022 DIY Herb Drying Rack: Herb Drying at Home Nov 9, 2022
- Oct 30, 2022 Lambertville, Nj , A Funky, Cool Rivertown You Must Visit on Halloween. Oct 30, 2022
- Oct 19, 2022 How to choose an interesting place to stay when you travel or go on vacation Oct 19, 2022
- Oct 12, 2022 Have you ever thought about creating a beautiful water feature? Oct 12, 2022
- Oct 3, 2022 How to choose flowers that have sentimental meaning Oct 3, 2022
- Feb 1, 2021 How to design marketing materials for your small business Feb 1, 2021
- Oct 29, 2020 Surprise the bride when you can't come to her wedding Oct 29, 2020