

How to Host a Beautiful Flower Bar: The Ultimate DIY Flower Bar Party Guide
How to host a DIY flower bar event in your home of event space.
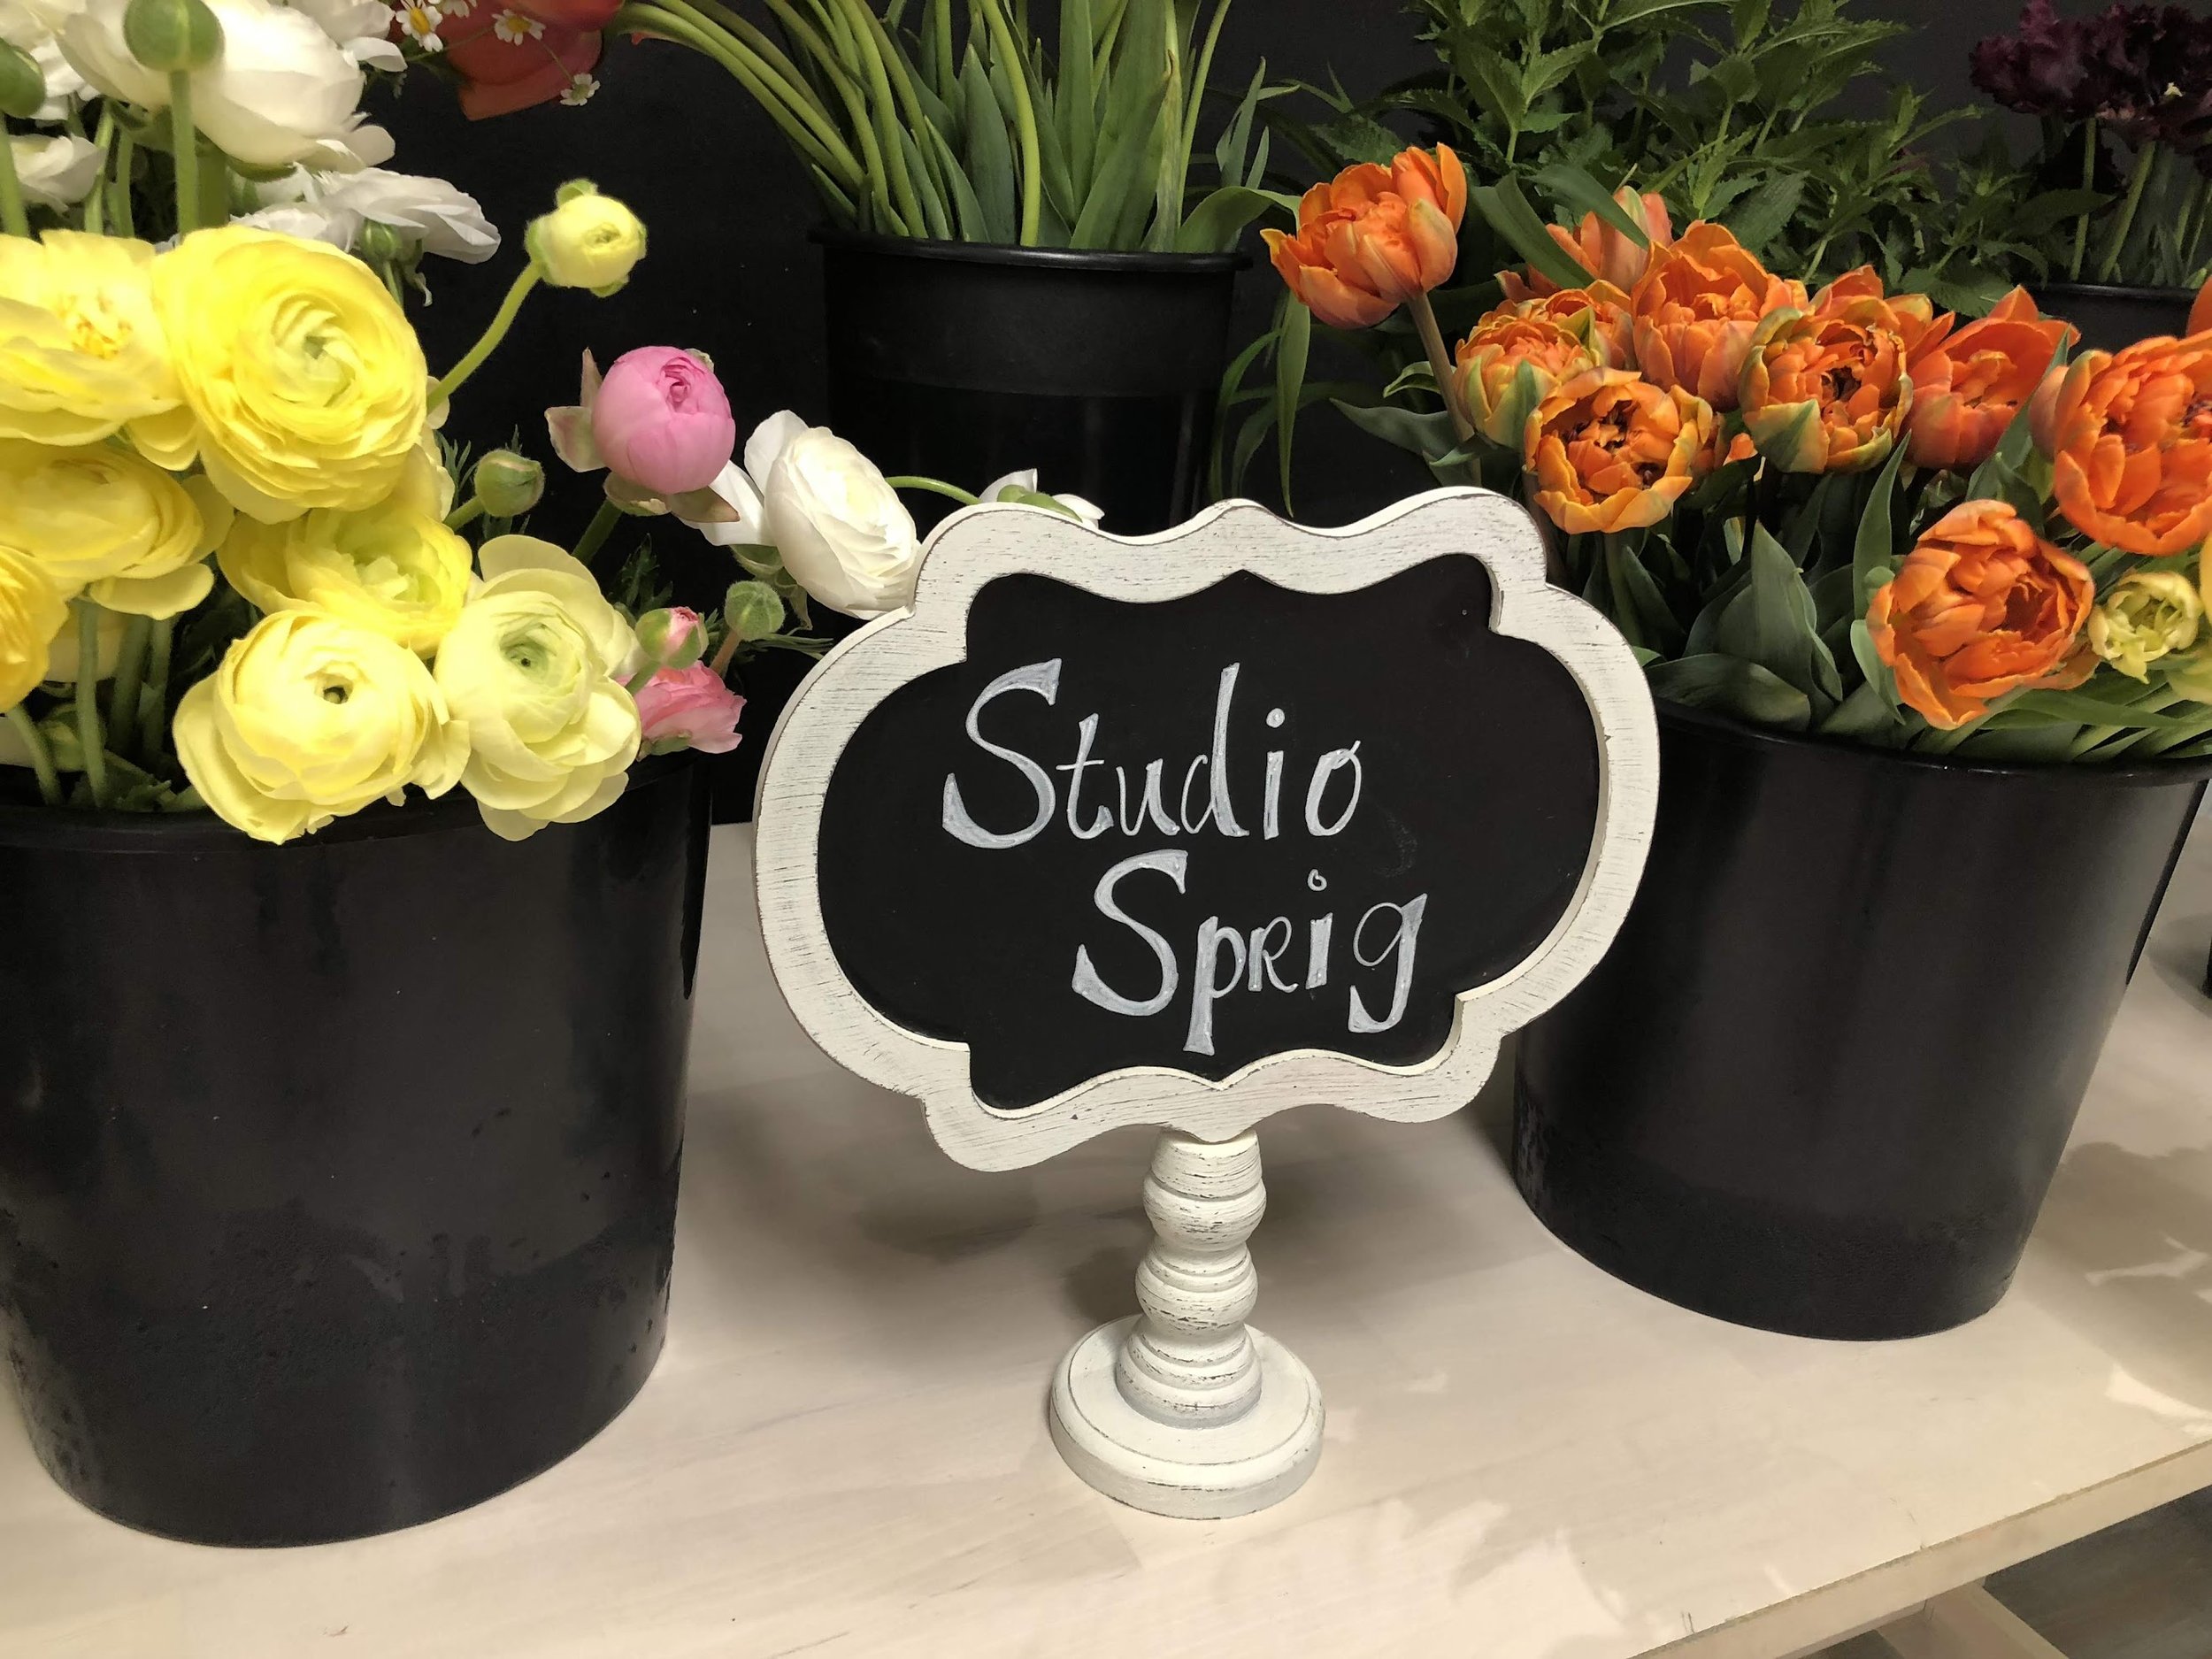
Sweet Occasions, Peddlers Village Flower Bar
A flower bar is one of the most beautiful and memorable ways to entertain guests. Whether you're planning a bridal shower, baby shower, birthday party, Galentine's Day gathering, corporate team-building event, or simply a creative afternoon with friends, a DIY flower bar gives everyone the opportunity to design their own fresh flower arrangement and take home something beautiful.
Also called a bouquet bar, bloom bar, or flower arranging party, this interactive experience transforms a table filled with fresh flowers and greenery into a creative gathering your guests won't soon forget.
I've hosted and designed Flower Bar experiences for everything from intimate gatherings to bridal showers, Mother's Day celebrations, and corporate team-building events. The beauty of a flower bar is that you can make it as simple or elaborate as you wish. You can hire a professional florist to handle every detail, work with a local flower farmer, or create your own DIY flower bar from start to finish.
Here's everything you need to know about how to host a beautiful flower bar party.

What Is a Flower Bar?
A flower bar is an interactive flower-arranging experience where guests choose from a curated selection of fresh flowers, foliage, and greenery to create their own bouquet or floral arrangement.
Typically, flowers are displayed in buckets or vessels and arranged by variety or color. Guests gather around a worktable, select their favorite blooms, and design an arrangement to take home.
A Flower Bar is a wonderful activity for:
Bridal showers
Baby showers
Birthday parties
Galentine's Day celebrations
Mother's Day events
Garden parties and brunches
Girls' nights
Family gatherings
Corporate team-building events
Wedding events and rehearsal dinners
The best part? Flowers naturally create a beautiful atmosphere. The moment your guests walk into a room filled with buckets of fresh, fragrant blooms, the experience already feels special. Here is a handy list of supplies to make it easy.

Gathering of Flowers
Should You Host a DIY Flower Bar or Hire a Professional?
You can absolutely create a beautiful DIY flower bar, but hiring a professional florist or floral designer can make hosting easier.
A professional can source the flowers, greenery, buckets, vessels, and supplies; prepare and process every stem; set up the flower bar; guide guests through the arranging process; and handle cleanup afterward.
For a more hands-on and budget-conscious event, you can create your own DIY bouquet bar. You'll simply need to plan ahead, source enough flowers, prepare your blooms properly, and create an inviting workspace for your guests.
Either option can result in a beautiful and memorable event.
Send Invitations and Build Excitement
Every special gathering deserves an invitation. For a casual flower-arranging party, a simple digital invitation works perfectly. For a bridal shower, baby shower, or more formal celebration, you might choose printed invitations with a beautiful design and envelope.
You can even decide whether to tell guests about the flower bar in advance.
Mentioning the activity builds anticipation, but keeping it a surprise can be equally fun. There is something magical about watching guests enter a room and suddenly discover a table overflowing with fresh flowers.
How to Set Up the Perfect Flower Bar Space
Choose a space where guests have plenty of room to move around, choose flowers, and create their arrangements comfortably.
A flower bar works beautifully on:
A patio or deck
A sunroom
A dining room
A garden or outdoor entertaining area
A large kitchen
A conference room or office
A private event venue
A flower farm
You'll need enough table space for everyone to work comfortably, plus a separate area for displaying buckets of flowers and greenery.
I love creating a flower market feeling by grouping flowers together in beautiful buckets where guests can easily see and reach everything. Think of your setup as a miniature Parisian flower market.

Mother’s Day Flower Bar, Peddlers Village
How to Choose Flowers for a DIY Flower Bar
One of the most important parts of planning a flower bar is choosing the right flowers.
For the best selection and value, consider purchasing flowers from a wholesale flower supplier or, even better, a local flower farmer. Locally grown flowers can be incredibly fresh, seasonal, and distinctive.
Ask your flower farmer what will be blooming around the date of your event. Working with seasonal flowers not only gives your Flower Bar a natural sense of place, but it can also help you discover varieties you may not find at a traditional flower shop.
For the best variety, include a mix of:
Greenery and Foliage
Choose several types of foliage to create structure and texture.
Filler Flowers
These smaller flowers help fill spaces between larger blooms. Baby's breath, small daisies, gomphrena, and flowering herbs can all work beautifully.

Private Bridal Shower Flower Bar
Focal Flowers
These are the stars of the arrangement—the larger, more dramatic flowers guests will naturally be drawn to. Depending on the season, consider tulips, peonies, dahlias, sunflowers, hellebores, ranunculus, or other statement blooms.
A beautiful flower bar should offer enough variety that every guest can create something unique.
How Many Flowers Do You Need for a Flower Bar?
Planning the right number of flowers is essential. I always recommend buying more than you think you'll need.
Start by choosing the vessels your guests will use. Create a sample arrangement using the size and style of container you plan to provide, then count the approximate number of stems you used.
Use that as your starting point, multiply it by the number of guests, and add extra flowers for variety and inevitable breakage.
Having too many flowers is much better than watching your last few guests arrive at a nearly empty flower bar.
Extra flowers also give guests more creative freedom—and you can always find beautiful ways to use the leftovers.

Mother’s Day Flower Bar at Sweet Occasions
Prepare Your Flowers the Day Before
Don't wait until the last minute to prepare your flowers. Ideally, purchase or collect your blooms the day before your event so you have plenty of time to process and hydrate them.
Start with Clean Buckets
Wash every bucket thoroughly with soap and water before filling it with fresh, cool water and flower food. Clean containers help keep your flowers fresher and healthier.


Remove Packaging and Ties
Carefully remove plastic sleeves, paper wrapping, and rubber bands. Handle delicate flowers gently and avoid excessive touching.
Process Each Stem
Remove any leaves that will sit below the waterline. Depending on the variety, you may also need to remove thorns or damaged foliage.
Give Every Stem a Fresh Cut
Using clean floral snips or a sharp floral knife, trim each stem before placing it in fresh water. Make sure no leaves remain submerged, as decaying foliage can make the water dirty and shorten the life of your flowers.
Let the Flowers Hydrate
Store your flowers in a cool, dark location overnight whenever possible. Giving blooms time to drink and hydrate before your event can make a tremendous difference.


Mother’s Day Flower Bar at Sweet Occasions
Set Up Individual Flower-Arranging Stations
Before your guests arrive, prepare a comfortable workspace for everyone.
You can provide matching vessels for a cohesive look, or invite guests to bring a favorite vase or container from home. If guests are bringing their own, give them guidance about the approximate size.
Cover your worktables with tablecloths or placemats to protect them from water and plant debris.
At each flower-arranging area, consider providing:
A vase or vessel
Floral snips
Towels for spills and drips
Fresh water
Flower food
Pre-cut chicken wire for floral structure, if needed
How to Create a Beautiful Flower Arrangement
One of the best things about hosting a flower bar is that there really are no wrong answers. This is an opportunity for your guests to relax, experiment, and create.
For beginners, however, a simple three-step approach can be helpful.

Vanguard team building Flower Bar
Step 1: Start With Greenery
Choose several stems of foliage and cut them to fit the vessel. Arrange them first to create the overall shape and structure.
Step 2: Add Filler Flowers
Use smaller flowers to begin filling the arrangement and adding softness, texture, and movement.
Step 3: Add Focal Flowers
Choose several of the larger, more dramatic blooms and place them throughout the arrangement. Odd numbers often create a natural, pleasing composition, so three, five, or seven focal flowers can work beautifully depending on the size of the vessel.
Then step back, look at the arrangement, and simply enjoy the creative process.
A flower-arranging party isn't about perfection. It's about flowers, creativity, conversation, and having fun together.
Add Refreshments to Your Flower Bar Party
Keep refreshments simple and easy to enjoy away from the flower-arranging tables.
A small cheese board and light refreshments can be perfect for an adult gathering. For children's events or daytime parties, consider cookies, lemonade, fruit, or infused water.
If you're serving a full meal, I recommend doing so before or after the Flower Bar activity. Guests need plenty of space to work, and large plates can quickly take over the table.

In-Home Flower Bar Setup
Create a Beautiful Atmosphere
Flowers are already beautiful, but a few thoughtful details can make your Flower Bar feel even more special.
Welcome guests with something sparkling, play a light playlist, and allow everyone a few moments to admire the flowers before beginning.
You may even want to make notes about the names of your flowers. Guests often become fascinated by unusual varieties and love learning what they're arranging.
The goal is to create an experience that feels relaxed, creative, and just a little magical.

Vanguard team building Flower Bar
Don't Forget to Take Photos
Before your first guest arrives, photograph the entire setup.
This is one of the biggest mistakes people make when hosting a beautiful event—they forget to capture the room before everyone begins.
Take photographs of the flower buckets, the workstations, the refreshments, and all the little details you worked so hard to create.
Then, as your guests begin designing their arrangements, keep taking pictures. The creative process is part of the memory.
For a brief moment, your home or event space may feel like a beautiful European flower market. Don't forget to enjoy it yourself.

Flower Bar at Sweet Occasions, Peddlers Village
What Should You Do With Leftover Flowers?
Having leftover flowers is a wonderful problem to have.
You can use extra blooms to:
Create one final arrangement and raffle it off
Tie miscellaneous stems into small "designer's choice" posies for guests
Make an arrangement for a friend who couldn't attend
Create a seasonal centerpiece for your home
Fill small vases with everyday flowers
Use extra blooms to decorate a cake or special table
Donate an arrangement to a nursing home or someone who could use a little beauty
Nothing needs to go to waste.

Leftover flowers


Host Your Own Beautiful Flower Bar
Whether you call it a Flower Bar, Bloom Bar, bouquet bar, or DIY flower-arranging party, this is one of my favorite ways to bring people together.
It's creative without being intimidating, beautiful without requiring perfection, and every guest leaves with something they made themselves.
All you really need is a beautiful collection of fresh flowers, a little preparation, and a group of people ready to have fun.
So gather your blooms, set the table, put on some music, and let everyone create their own little floral masterpiece.
After all, there are few things more joyful than spending an afternoon surrounded by flowers.

Vanguard team building Flower Bar

Mother’s Day & Girls Night Out Flower Bar at Sweet Occasions, Peddlers Village
Flower Bar Supplies
Here is a convenient list of supplies that you can browse through when planning your event.
I look forward to getting to know you. Sign up to receive blog post notifications and follow Studio Sprig on Instagram, and Pinterest.

Vanguard team building Flower Bar
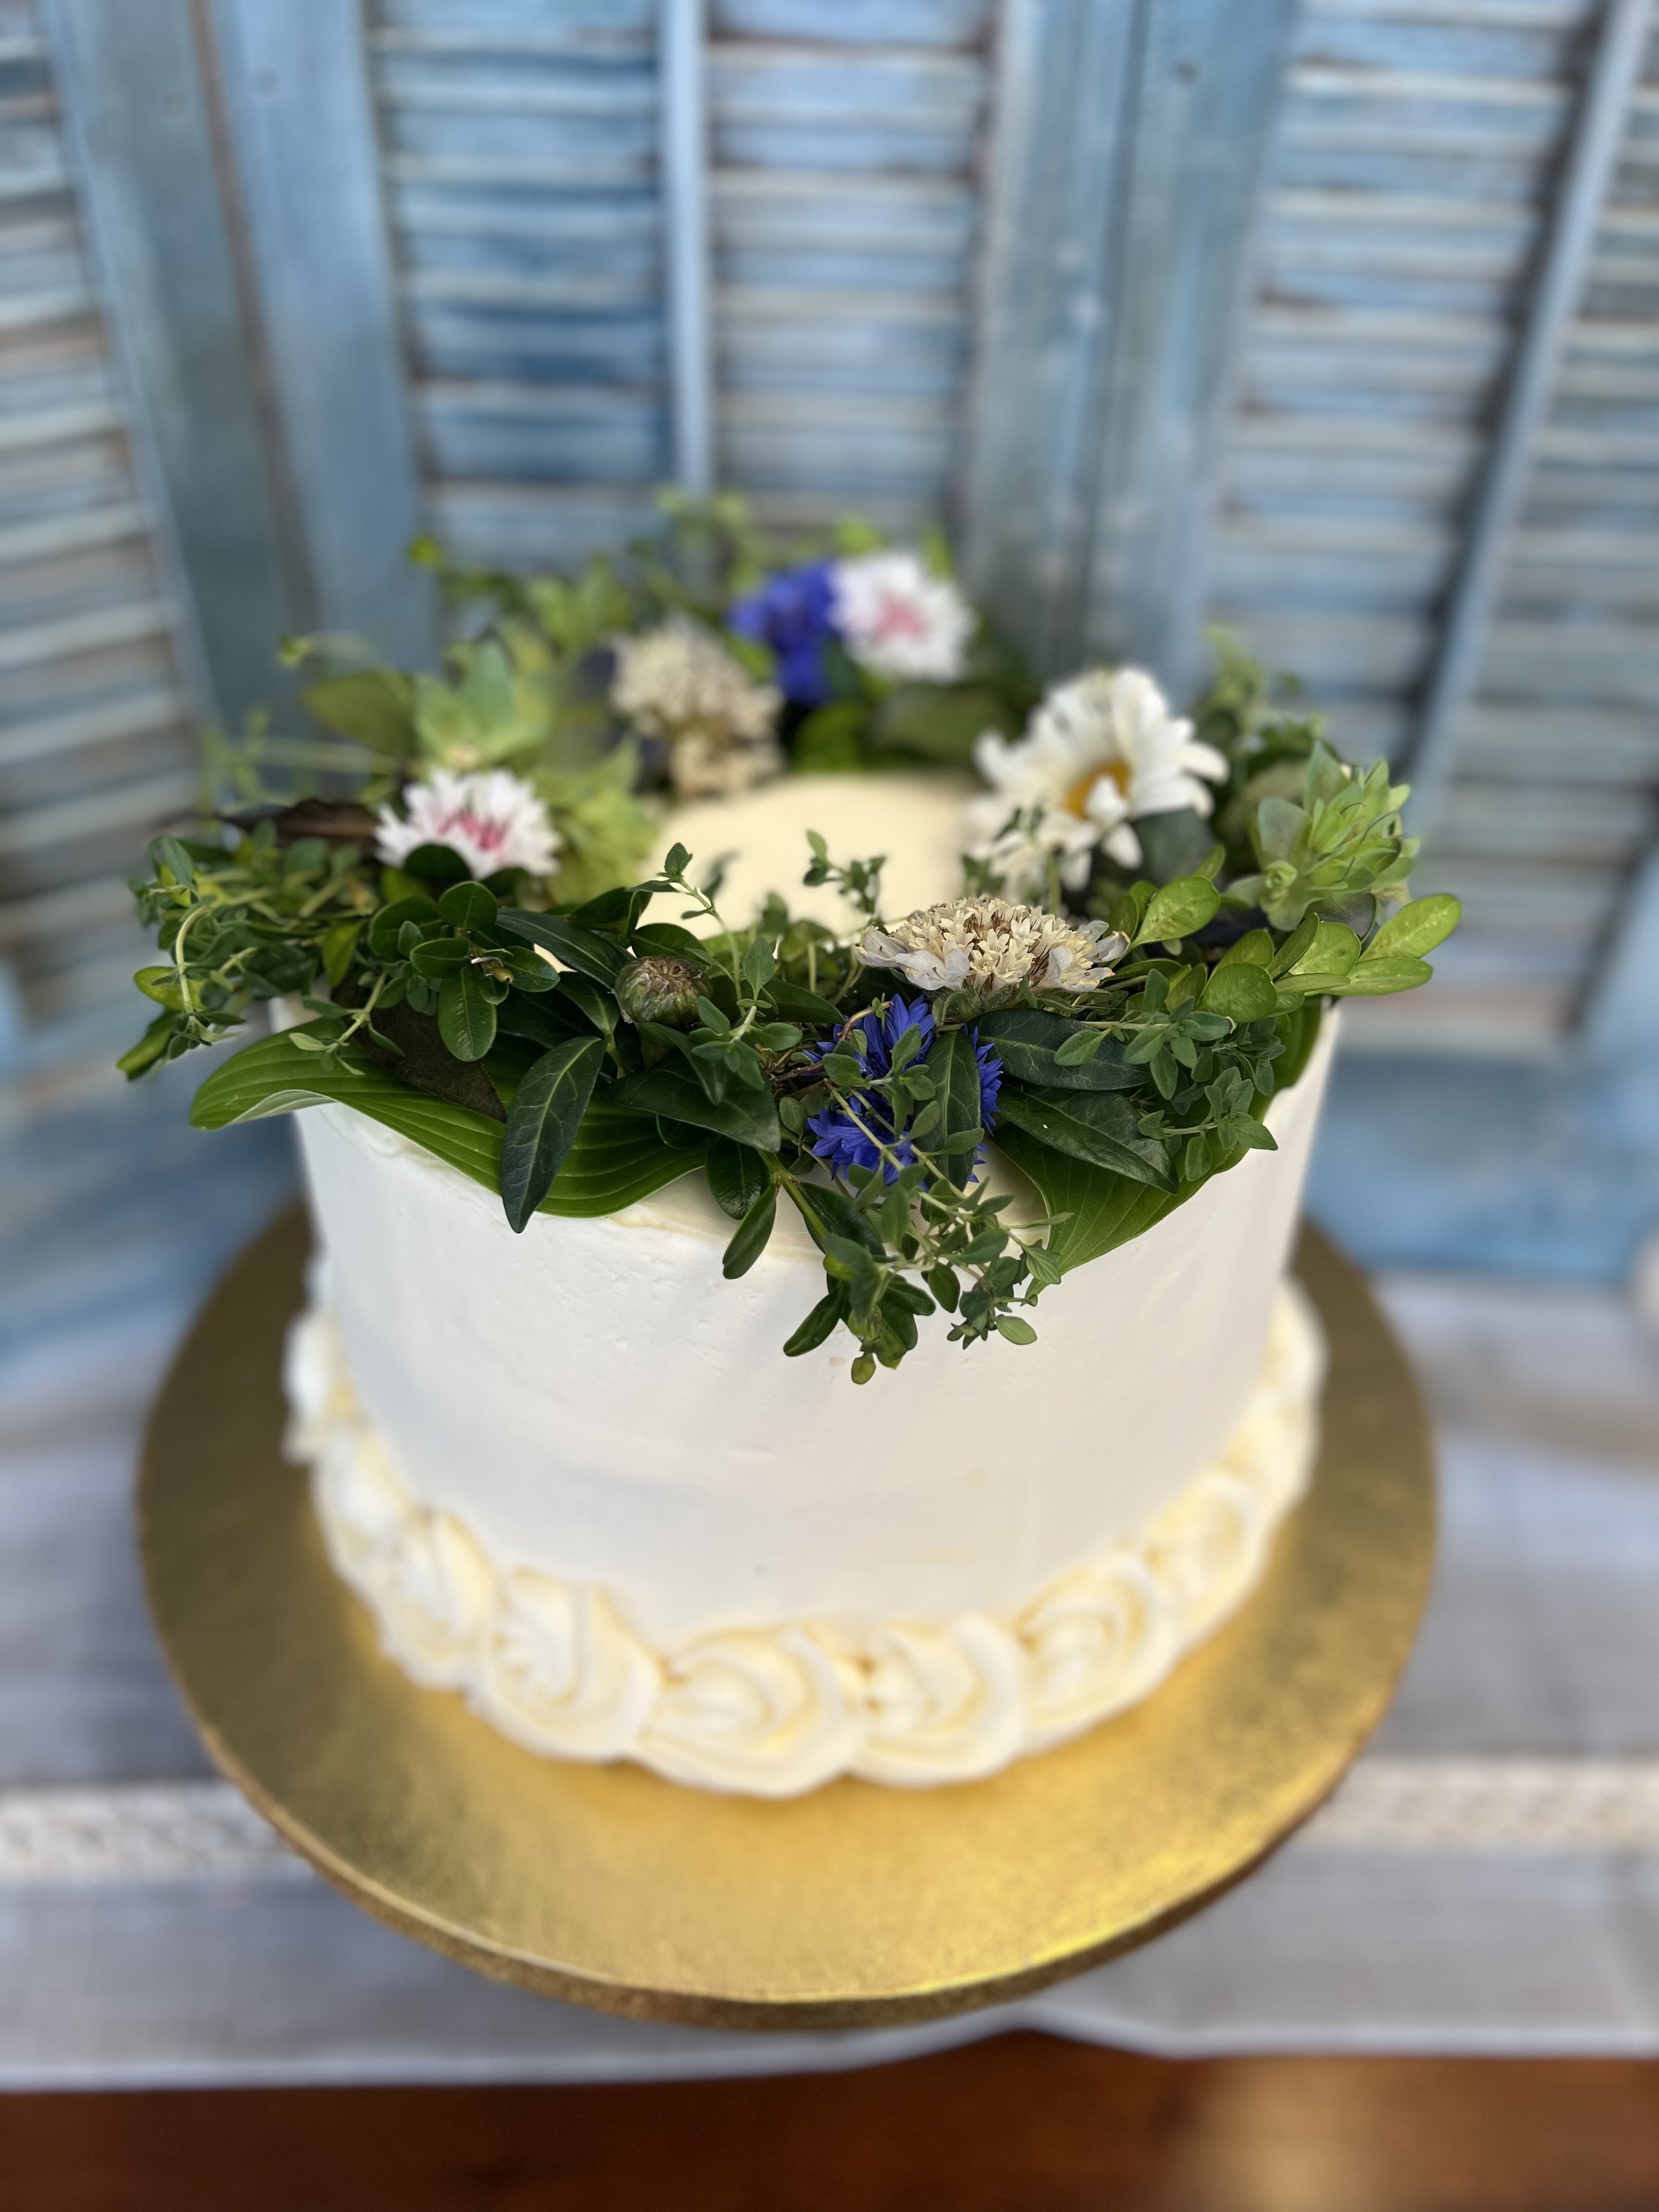
Decorating Cakes with Fresh Flowers
Learn how to decorate cakes with fresh flowers for weddings, showers, birthdays and special celebrations. Discover beautiful floral cake ideas, including loose flowers, flower wreaths, floral swags, herbs and garden-inspired cake designs.
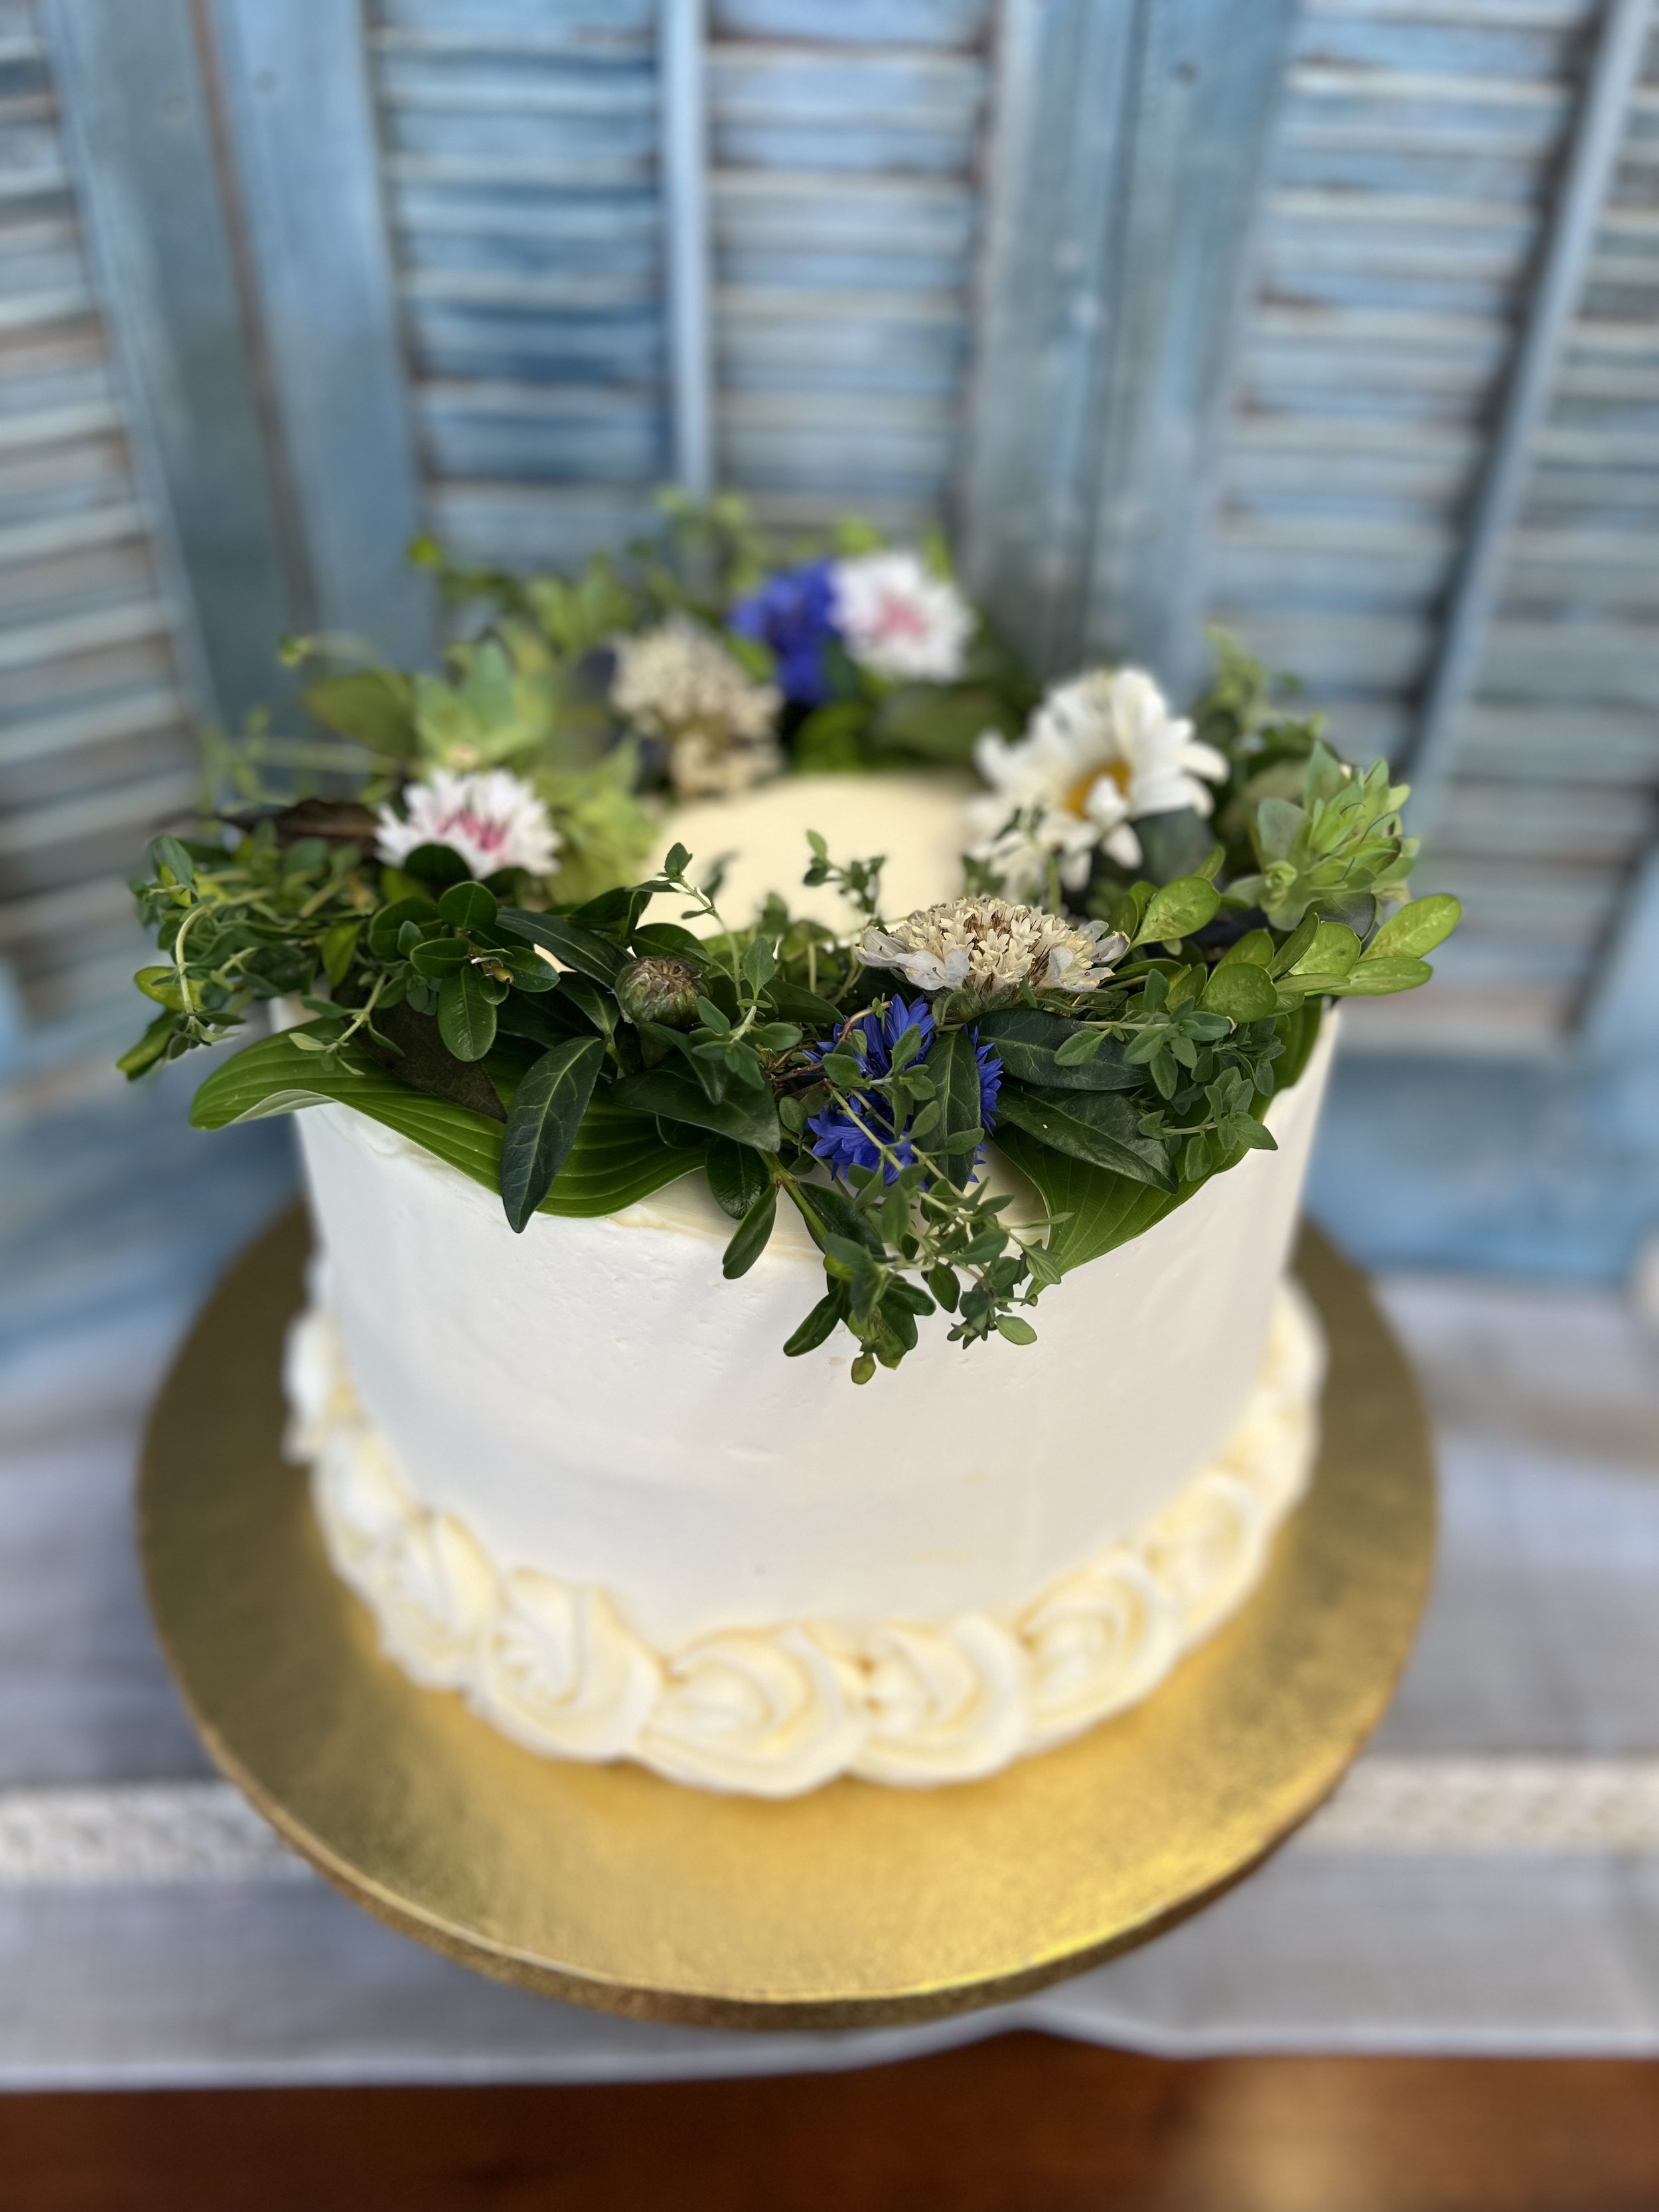
Florals: Studio Sprig Cake: Sweet Victory
Elevate your event with a Floral cake
A beautifully decorated cake can become one of the most memorable details of any celebration, and a floral cake decorated with fresh flowers is one of my favorite ways to make a wedding, shower, birthday, or special event feel truly personal. Whether you’re planning an elaborate wedding cake or a simple celebration cake, the right cake flowers and floral design can beautifully complement your overall event décor, color palette, and style. While there are countless ways to decorate a cake, I’m partial to the natural beauty of fresh flowers on cakes. They add an effortless, romantic touch that feels both elegant and organic.
There are several beautiful ways to use fresh flowers to decorate a cake. Below are three of my favorite floral cake decorating ideas, from simple and understated to lush and abundant. Choose the approach that works best for your cake, aesthetic, and timeframe.
Loose Flowers
Floral Wreaths
Floral Swags

Florals: Studio Sprig Cake: One Sweet Baking Co.
First, create a beautiful Palette
If you’re designing a cake decorated with fresh flowers, take a little extra time to create a beautiful setting that allows the cake and its floral design to shine. The cake itself is only part of the presentation—the cake stand, serving surface, and surrounding details can all contribute to the overall look.
You don’t necessarily need an elaborate cake pedestal or expensive display. Instead, focus on choosing a beautiful surface and setting that complements your floral cake design, wedding flowers, and event décor. A simple cake can feel instantly more special when it’s thoughtfully presented, allowing the fresh flowers and cake details to become a focal point of the celebration.
Cake Boards
Start with a simple but lovely cake board. A cake board sits underneath the cake, providing support and making it much easier to safely move and display your cake. You can find round, square, and rectangular cake boards in a variety of colors and finishes, from simple cardboard and classic white to elegant silver and gold.
For a floral wedding cake, choose a cake board that complements your cake design rather than competing with it. A beautiful board can provide a polished foundation while keeping the focus on the cake and its fresh flowers.
Pretty Pedestals
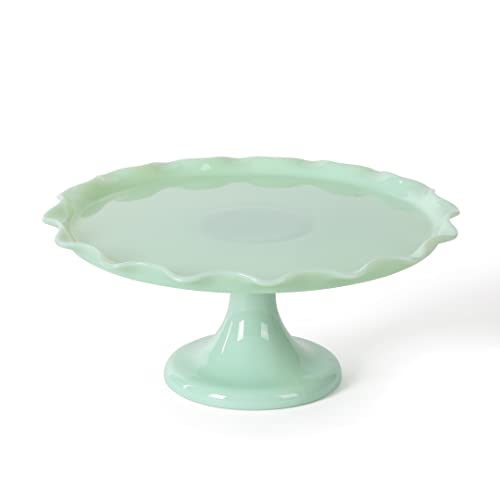
I especially love seeing fresh floral cakes displayed on cake pedestals. That little bit of extra elevation can completely transform the presentation, giving the cake more presence and making it feel like an intentional part of the overall event décor.
A pedestal cake stand is particularly beautiful for wedding cakes decorated with fresh flowers, where the added height allows the floral arrangement to be seen from every angle. Whether your style is romantic, elegant, rustic, or garden-inspired, the right cake pedestal can turn a simple cake into a beautiful focal point.
Simplify the Icing
When creating a cake decorated with fresh flowers, keep the frosting and icing design simple. A beautifully textured buttercream cake can provide the perfect backdrop for your floral arrangements without competing with them. The goal is to let the fresh flowers on the cake become the star of the design.
Palette knives are wonderful tools for creating subtle texture and movement in buttercream. You can also experiment with different icing colors to complement your wedding flowers, cake palette, and overall event décor. But when it comes to a floral cake, remember: less is often more.
If you’re ordering your floral wedding cake from a bakery, ask your cake designer to keep the icing relatively simple and understated. A clean buttercream finish, gentle texture, or soft color allows the fresh flowers to really shine and creates an elegant, cohesive cake design.


Florals: Studio Sprig Cake: One Sweet Baking Co.
Cake Design with Loose Flowers
One of my favorite ways to create a fresh flower cake is with loose flowers—simply arranging a few beautiful blooms and touches of greenery on and around the cake. This approach creates an effortlessly elegant floral cake design without making the cake feel overly decorated.
The key is restraint. Rather than covering the entire cake with flowers, choose a few intentional places for your blooms, such as an off-center arrangement on top, a delicate cluster along the side, or a few flowers tucked around the bottom edge. The goal is to create visual balance while allowing the cake itself to remain part of the design.
For a floral wedding cake, I also recommend keeping the icing and lettering simple. Too many decorative elements can compete with the natural beauty of the flowers. Let the fresh flowers on the cake be the focal point.
When it comes to floral cake decorating, simplicity is often the most beautiful choice. A handful of thoughtfully placed blooms can have far more impact than a cake overflowing with flowers.

The Best Loose Flowers for a cake
There are so many beautiful flowers you can use to decorate a cake, so choosing the right blooms can be a little overwhelming. The most important rule when creating a fresh flower cake is to make sure the flowers are appropriate for use around food.
Avoid using flowers that have been treated with pesticides, herbicides, or other chemicals that are not intended for use around food. Because commercially grown and grocery-store flowers may be treated with products that aren’t suitable for cake decorating, it’s best to know exactly how your flowers were grown.
For the safest and most beautiful floral wedding cake, consider sourcing blooms from a local flower farm or another grower who can tell you how the flowers were cultivated. You’ll have more confidence in what you’re placing near your cake, while also gaining access to beautiful, seasonal flowers that can make your cake feel completely unique.
When choosing flowers for cake decorating, think beyond color. Consider the season, flower varieties, texture, scale, and how the blooms will complement your cake and overall event design. A thoughtfully chosen selection of fresh flowers can turn even a simple cake into a stunning centerpiece.
Herbs on Cakes
Herbs are another beautiful way to decorate a cake, especially if you love a more natural, garden-inspired look. Their delicate size, beautiful texture, and fragrant foliage make them wonderful additions to floral cakes and fresh flower cake designs. And many culinary herbs can be used in ways that complement the flavors of the cake as well as its appearance.
I especially love using small sprigs of rosemary and lavender on cakes, but don’t overlook lemon verbena and the many varieties of mint. Along with classic peppermint and spearmint, look for unusual varieties such as orange mint, chocolate mint, pineapple mint, and strawberry mint. I grow many different varieties on my farm, and they come in handy when creating beautiful, natural cake designs.

Florals: Studio Sprig Cake: One Sweet Baking Co.
How to Create a Floral Wreath
I love creating floral wreaths on cakes because they add such an elegant, garden-inspired touch. A fresh flower wreath can transform a simple cake into a beautiful centerpiece, and although it takes a little extra time to create, the finished result is well worth the effort.
create the Floral wire base
To make a floral wreath for a cake, I use medium-gauge floral wire. Floral wire is ideal because it’s flexible and easy to shape, allowing you to create a wreath in virtually any size or shape.
Start by measuring the diameter of your cake. Then, loosely cut and bend the floral wire into a circle that is slightly smaller than the cake itself. For example, if you’re working with a 9-inch round cake, create a wire circle that is approximately 7 to 8 inches in diameter. This allows the finished floral wreath to sit neatly on top of the cake without extending all the way to the edge.
Twist the ends of the wire together to close the circle. If you have floral tape, wrap the joined ends to cover any sharp or rough edges.
Next, take a longer length of floral wire and begin crisscrossing it back and forth across the original circular wire. Wrap the wire underneath the circle and back up with each pass. This creates a simple, open wire base for arranging greenery and flowers. You can see this technique in the photo below.
There are many ways to create a floral wire wreath base, so don’t worry about following this method exactly. The important thing is to create a sturdy, flexible base that gives you plenty of places to attach your greenery and flowers.

Layer the greens and herbs
Once you’ve gathered, washed, and thoroughly dried the fresh greens and herbs you want to use for your cake wreath, you can begin layering them onto the wire base.
Starting with your largest pieces of greenery, use a small amount of floral adhesive to attach each piece securely to the wire. Work your way around the circle, overlapping the greens slightly to create a full, natural-looking foundation for your floral cake wreath.
Once you have a good base of larger greens and herbs, begin adding smaller pieces on top. Layering different sizes and textures creates depth and gives the wreath a more organic, garden-inspired appearance.
Don’t be afraid to tuck small pieces of greenery into the gaps to conceal the wire and add movement and texture. Thyme is especially useful for this because its delicate stems can fill in small spaces beautifully. Keep layering until the wire base is completely hidden and you have a lush, natural foundation ready for your flowers.


Flowers in the wreath
Now comes the fun part—adding the flowers! When creating a floral wreath for a cake, choose small to medium-sized blooms that will keep the wreath in proportion to the size of the cake. Smaller flowers tend to create a more delicate, balanced design without overwhelming the cake.
Some of my favorite flowers for small cake wreaths include Nigella, Bachelor’s Button, small pieces of Hydrangea, and Dianthus. You can also experiment with seasonal flowers from your garden to create a wreath that feels natural and unique.
When choosing flowers for cake decorations, however, be thoughtful about flower safety. Not every flower is appropriate for use around food, and some varieties can be toxic. Avoid flowers such as hellebore and any flowers you know to be toxic or that have been treated with chemicals that are not appropriate for use around food.
Important: A floral cake wreath made with glued flowers is a decoration only and is NOT edible. Make sure everyone serving the cake knows that the wreath should be removed before the cake is served. This simple step can help prevent any confusion and keep your beautiful floral cake display safe for everyone.

Finishing Touches
For the finishing touches on your floral cake wreath, add delicate flowers and herbs to soften the edges and create a more natural, abundant look. If you’re working with flowers that have small stems, such as lavender, place a small dab of floral adhesive on the stem and gently tuck the flowers into the wreath. These delicate sprigs can extend beyond the edge of the wreath, creating a beautiful herbal spillover that adds movement and texture to the cake.
Once your fresh flower cake wreath is complete, take a moment to inspect it from every angle. Look for any visible floral adhesive or exposed wire and cover those areas with additional greenery or flowers. The goal is for the wreath to look lush and natural, with none of the structural elements visible when it’s placed on the cake.
You can also add a layer of leaves underneath the wreath to conceal the wire base. This isn’t always necessary, especially since the wreath is a removable decoration that will be taken off before the cake is cut. What matters most is creating a beautiful, finished floral cake design from the perspective of your guests.

Florals: Studio Sprig Cake: One Sweet Baking Co.
What is a Flower Swag?
A flower swag is a little bit of floral art that I made up—and it’s one of my favorite shortcuts for decorating cakes, cupcakes, and other desserts with fresh flowers.
Quite simply, a flower swag is a small, wired floral sculpture covered with a bit of floral tape and accented with tiny flowers, herbs, and greenery. Unlike a full floral wreath for a cake, a flower swag is quick to create and can be tucked onto a dessert wherever you want a touch of botanical beauty.
It’s especially useful when you don’t have time to make a wreath but still want to add fresh flower cake decorations or a little flower art to cupcakes, cakes, and other dessert displays. A few strategically placed swags can make even a simple dessert feel special, romantic, and garden-inspired.

Florals: Studio Sprig
Building a Floral Swag
To make a floral swag for a cake or cupcake, start by cutting a piece of floral wire and bending it into a shape that complements your dessert. The wire can be curved, angled, or shaped to create a small botanical sculpture that will sit naturally on the cake or cupcake.
Once you have your shape, cover the ends and any visible or exposed sections of wire with floral tape. The floral tape creates a finished surface that makes it easier to attach your small flowers, herbs, and greenery with floral adhesive.
Think of a flower swag as being similar to a boutonniere, except instead of building your design around a flower stem, you’re creating it around a flexible wire base. This gives you much more freedom to shape the floral decoration exactly as you want.
For the black-eyed Susan shown above, I first taped the flower stem directly to the wire. The wire then acted like a small, rigid spring, allowing the flower to pop up playfully from the cupcake. It’s a simple technique that creates a wonderfully unexpected fresh flower cake decoration.

Florals: Studio Sprig
Swags are just fun!
Floral swags are such a fun and versatile way to add fresh flowers and botanical details to a dessert display. Use them around a cake table as little floral sculptures, or tuck them into cakes, cupcakes, and even pies for an unexpected pop of color, texture, and garden-inspired charm.
Because each flower swag is small and easy to shape, you can experiment with different flowers, herbs, greenery, and forms. There really are no hard and fast rules—play around with placement and scale, and see what works best with your cake and overall event design.
Thank you so much for visiting Studio Sprig! If you’d like more ideas and inspiration for decorating cakes with fresh flowers and herbs, take a look at How to Create Cake Crowns and Mini Wreaths from Herbs and Flowers.
I’m always here to help inspire your creative journey and bring a little more flower art and natural beauty to your celebrations. Stay inspired with Studio Sprig! Sign up to receive new blog post notifications, floral design inspiration, creative ideas, and seasonal projects delivered to your inbox. You can also follow Studio Sprig on Instagram and Pinterest for more floral inspiration, cake decorating ideas, botanical art, and creative projects.

How to Make DIY Bouquets for Prom
There’s no better time to have fun creating a small posy or a larger bouquet for your special night.
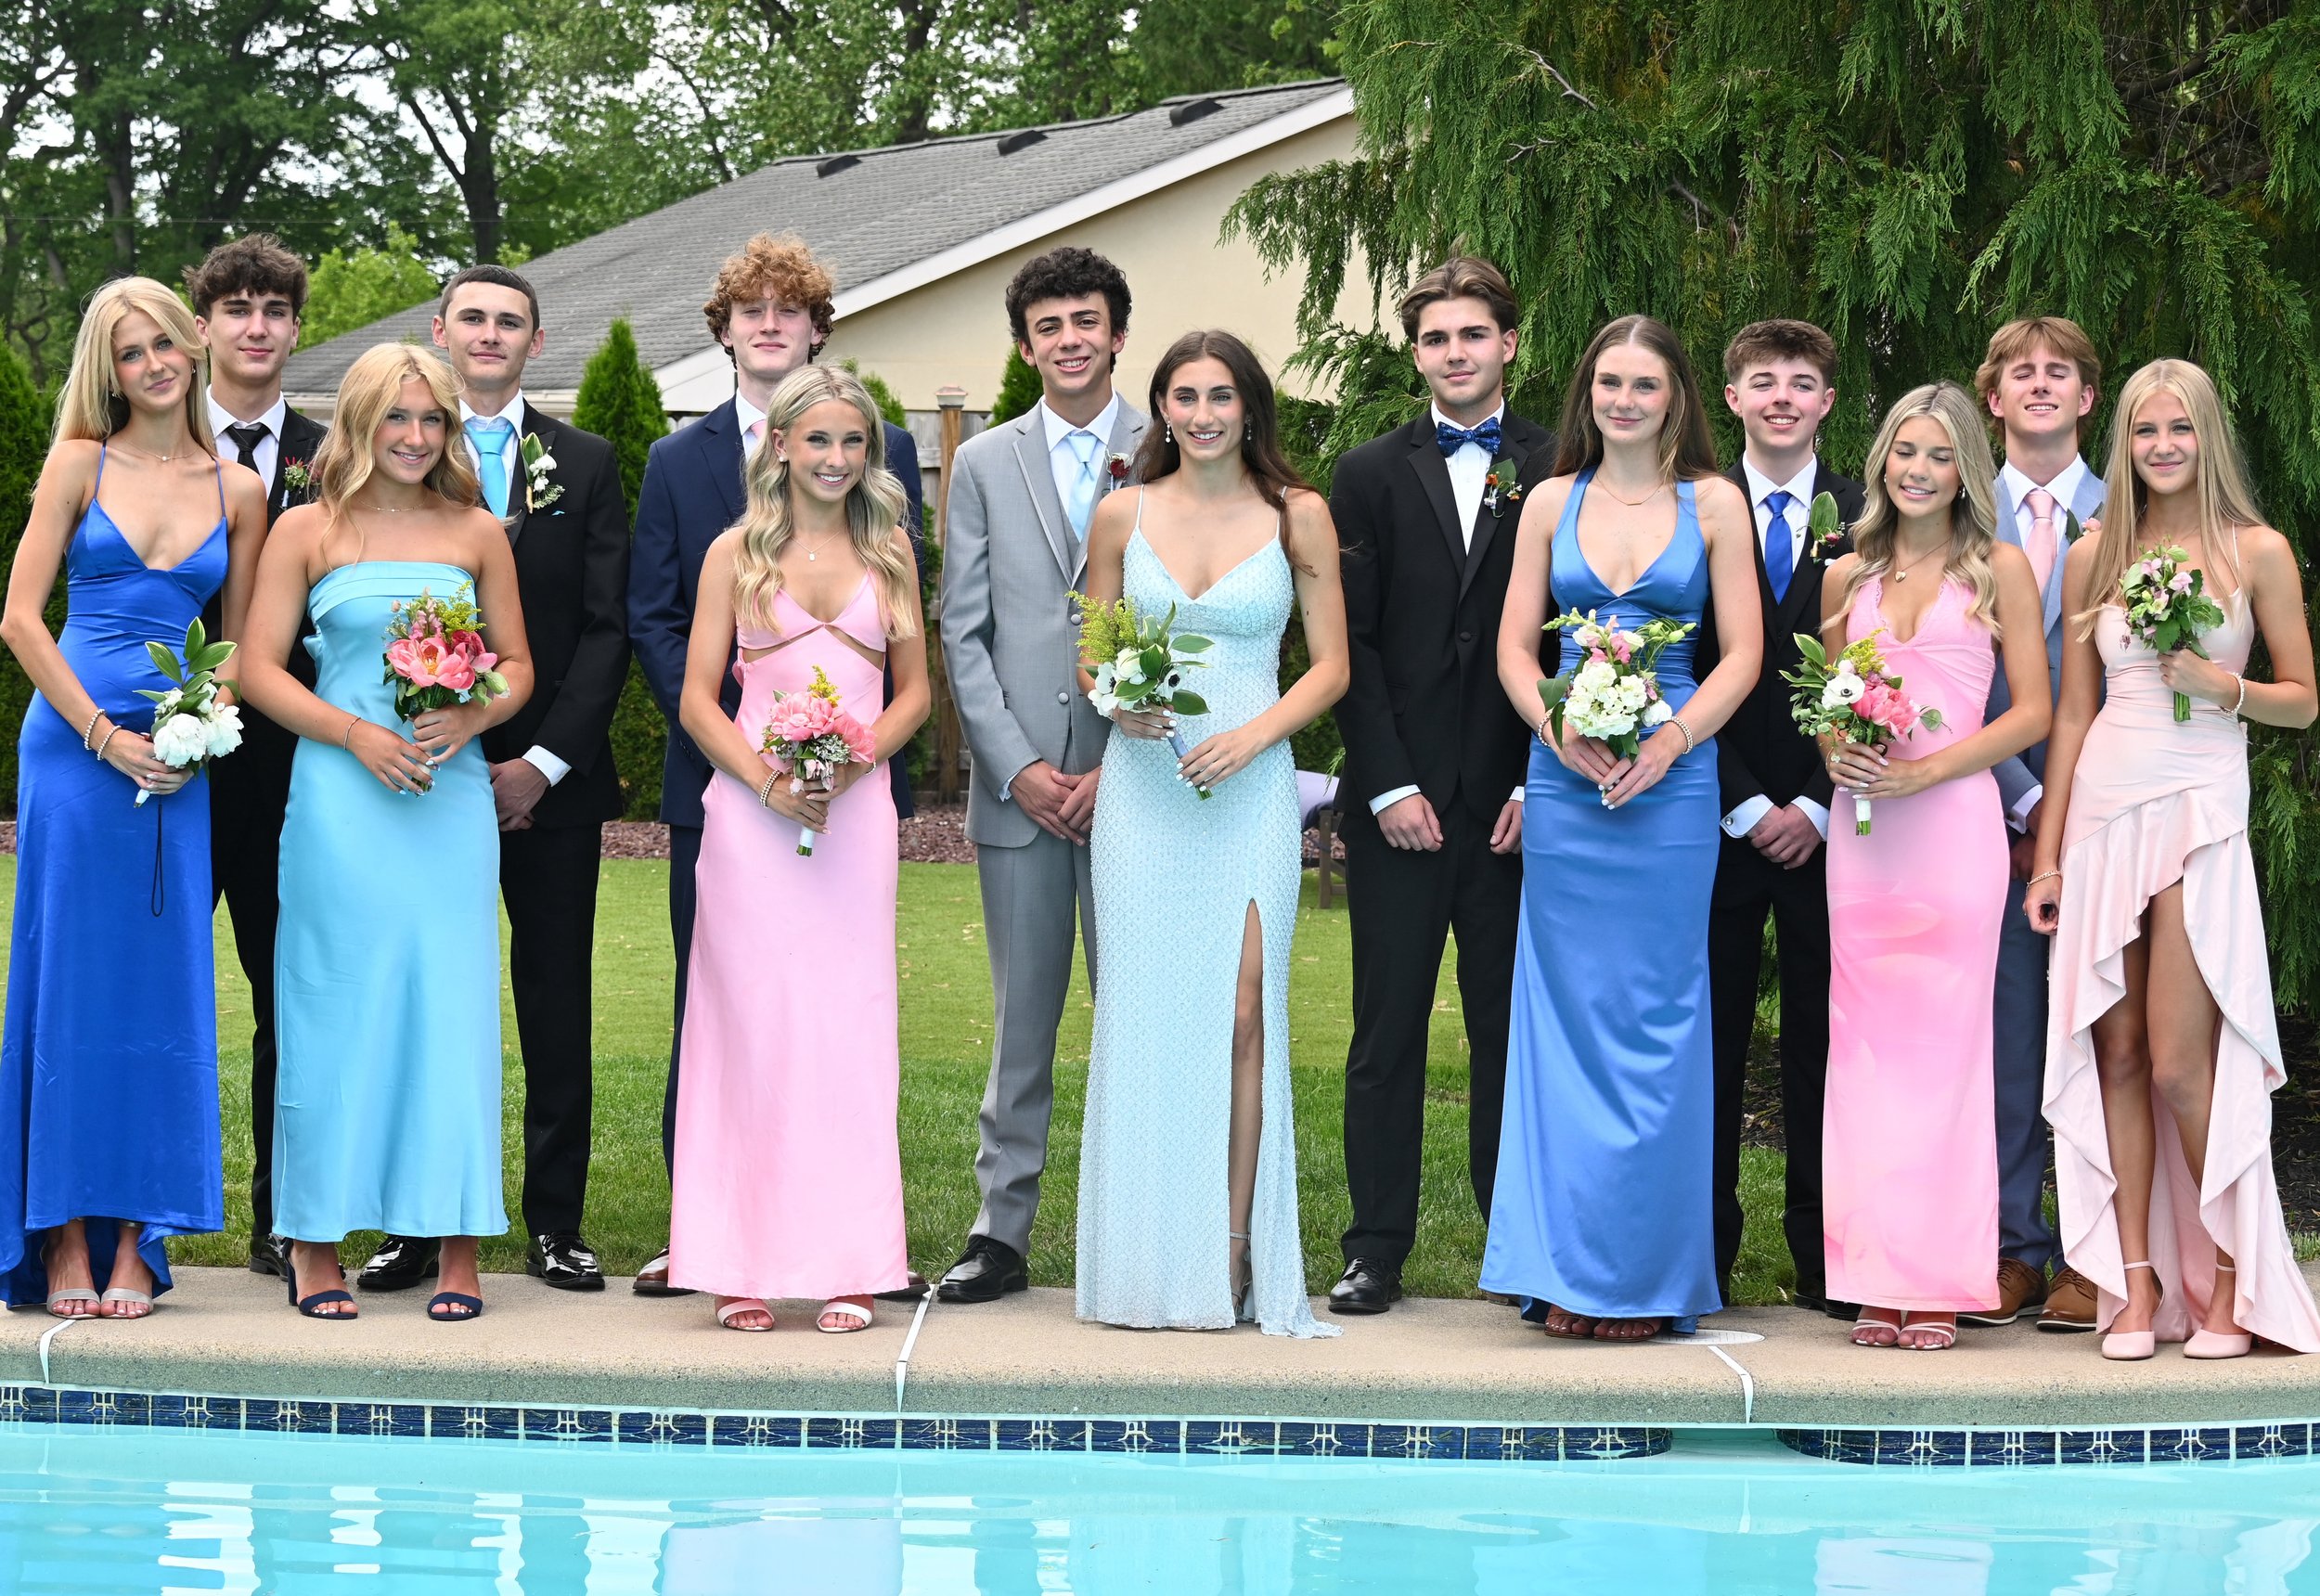
All DIY Prom Bouqets
It’s Prom Season and Flower Bars and Do-it-yourself Flower Bouquet Parties are trending right now. There’s no better time to have fun creating a small posy or a larger bouquet for your special night. Parents, it’s also really fun to host a “Posy Party” and let the kids enjoy an impromptu event where they get together the day before prom to make their bouquets and boutonieres. If this sounds like a great idea, here’s what you’ll want to do.
I’ve led many Flower Bars at venues like Peddler’s Village in New Hope, PA, and for Vanguard as corporate team-building events. I’ve also done Flower Bar drop-offs for events like bridal showers and cocktail parties. However you decide to create your Prom Bouquet or Bloom Bar, you can’t go wrong, because everyone loves an invitation to play with flowers.

Simple Prom Posy with Herbs
First, Find A nice Assortment of Flowers
If the season is right, I think it’s best to contact a LOCAL Flower Grower so you’ll have a nice, fresh variety of beautiful blooms for your Bouquet Bar. If you do not have a farm in mind, go to this website to find flower growers in your area.
Reach out to the growers via their websites or call to learn their policies and how you can purchase a bucketful of their flowers. Some growers sell only at farmers’ markets, but many allow pick-ups at the farm.
If you are throwing a Posy or Bloom Party, buying assorted buckets is the best way to ensure you have a nice variety for each person participating. This is important because all the prom dresses will be different, and you don’t want all the bouquets to be identical.

Large Buckets filled with Flowers from a Flower Farm
Forage for some Wildflowers and Foliage
I like to have a nice mix of filler, or smaller flowers on hand, so sometimes I forage one day ahead of time so that my bouquets overflow with pops of unexpected whimsy. But you do need to be careful, because not all roadside and wildflowers hold up when taken out of water. So as soon as the posies and boutonnieres are removed from water for prom photos, they may start to wilt.
Therefore, if you want to forage, experiment ahead of time by removing the flowers from the water and propping them in a vase, and see how long it takes them to wilt. If it’s immediate, they are not a good choice.

An Assortment of White Flowers and Foliage
One Day Before
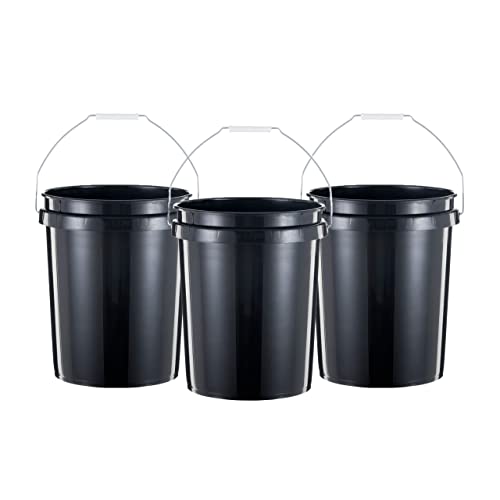
Prepare by hydrating well. It’s very important to properly hydrate all the flowers you forage and gather at the farm. Give all the flowers and foliage a clean, fresh cut and place them into cold water as soon as you can. Try to give them 24 hours to soak up the water and properly hydrate before you start designing. You can use Large Plastic Buckets and just keep them on the ground, or you can also design your flower bar space with nicer Galvanized Floral Buckets, to create a more formal event.


An Active Prom Posy Prepping Station
How To Prepare Your Space
Choose an appropriate space I always think it’s a good idea to create a Prom Flower Bar on a patio, in a garage, or on a deck, but sometimes weather dictates our choices. If you must be inside the most common space might be your dining room because you probably already have a large table. Find an area that will accommodate your crowd and anticipate other mothers and fathers as part of that. Many parents enjoy helping their kids prepare for prom.
Set up enough tablespace for everyone you invited to work comfortably. You’ll also want room for the flower buckets, creative workstations, and ribbon tying. Portable Folding tables and simple white tablecloths work well for this.


DIY Prom Bouquet Workstation in a Garage
Don’t be afraid to use herbs
Sprigs of herbs are a nice addition to any bouquet. They add a fresh scent and pop out in unexpected places. You won’t normally find them in traditional posies; that’s why, whenever possible, I like to include them in my creations. I mention this because many people grow herbs, and perhaps other families can participate by bringing bunches of homegrown herbs to add that special something.

Fresh Lavender

DIY Prom Bouquet Bar in an Open Garage Space
Choose “Dress accentuating” Flowers
Shine, don’t Blend. Consider the Prom Dress when choosing your flower assortment. I think it’s important that the flowers you choose to include in your Prom Flower Bar are not all the same color. Take into consideration the many prom dresses your guests will be designing around. This is where pops of the unexpected in the form of herbs, greens, and interesting filler flowers will help break up the monotony of focal flowers and accent a dress, rather than blend right into it.

Pretty yellow, lilac and green Prom Posy to accent a navy dress

Guests enjoy time with friends and flowers BEFORE prom

Always choose flowers that accentuate but don’t blend in with the dress
Choose Flowers You Love
Invite Creative Energy. Encourage your guests to walk to the flower buckets and choose their favorite greens and focal flowers, and then take them back to their workspace. Then, have them search for interesting items like herbs and filler flowers to really make their posies pop! Make sure they keep all the stems long and begin thinking about the style they want to create. Whether it’s a tight symmetrical bouquet or a whimsical, free-spirited posy, they’ll want something in mind before they begin. Reference photos are always a nice idea to decorate the worktables.

Building the Prom Bouquet or Posy
You can instruct guests verbally or have small printed instructions on your table before guests arrive.
Here is how I build bouquets, large and small. I always start by gathering larger, focal flowers in the center. I then add flowers, piece by piece, around that middle bunch. Sometimes it takes me a few tries to get it just right, so don’t be afraid to put everything back down on the table and begin again. Balance is important, and larger blooms like dahlia sometimes need support, so use other flowers to prop them up or wire the stem so they stay upright.

Tuck and Cuddle Your Flowers
Variety Matters. I prefer to use many varieties of both color and texture in my bouquets. Some flowers are round, others spikey, some are frail and wispy, while others are rigid and strong. You’ll also experience some breakage along the way, but don’t be opposed to using flowers that dropped a single petal or those that look like they have a slight droop. If you “tuck and cuddle” with care, they can still participate in the party.

Unexpected Fun. Tuck herbs and small filler flowers randomly throughout by inserting the delicate stems down through the middle, as you ever-so-slightly loosen your grip. Try to place these at different levels, so they flare out and create surprise.
Often, the last step is forming a nice base with the greens. I like to place the greens around the bottom edges of the posy, creating a textural base for everything. I also like to take tiny “sprigs” of the greens and foliage, loosen my grip, and tuck them inside the bouquet here and there.
Instructions
Gather a few Focal Flowers in a small bunch, grip with one hand
Add other Flowers around that bunch, one at a time
Tuck small Herbs and Filler Flowers whimsically as you go
Create a base with Greens
Secure with a Rubber Band

A DIY Posy stuffed with yummy Peony, Ranunculus and Zinnia.
Snip, Wrap, and Go!
When all of the flowers are assembled and looking just the way you want, use a small rubber band to hold them in place. Scrunch the rubber band up close to the base of the flowers to hold them snug.
Then use a sharp flower snip and trim all the stems to the same length. Aim for a stem length of about 6”. You only want enough room to wrap a ribbon and grip the stems, but not so much that the bouquet or posy looks awkward. I use this micro-tip flower snip and I cut a few stems at a time so that they are all the same length before wrapping.

A Posy with a lot of unexpected surprises.
Choosing Ribbon
There are many different types of ribbon to choose from. I prefer this beautiful White Chiffon because it’s very forgiving and the edges are intentionally frayed, which I think is a fantastic look. for prom. The Chiffon comes in an array of colors too, so having a variety would be a nice touch. You can also use a Double-Faced Satin if that’s the look you're going for.


Proud Posy Poses.
Refreshments and Photos
And before we go, two things that are important to consider are the refreshments you’ll serve and the photos you’ll take.
Floral Cookies and A Lemonade Bar! Everyone wants to snack at a Prom Flower Bar, so go the extra mile and bake some lavender cookies and create a simple lemonade and iced tea bar with pretty bottles, simple syrup, and mini, floral ice cubes that you can create with a little juice and these cute Floral Molds. If you want to learn how to set up a simple, but pretty mini bar, read my blog How to Create a Pretty Mini Bar with Items You Already Own.


Mini Rose-shaped Orange Juice Ice Cubes
Once everything is assembled and displayed, take loads of photos. Before, during, and after photos will be valued forevermore. Focusing on these details adds that little touch of memorable elegance that every Prom Bouquet Party needs.

Mission Accomplished. DIY Prom Bouquets.
Thank you so much for visiting. If you want more details or want to learn how to create a personal or corporate Flower or Bouquet Bar for another event, read How to Host a Flower Bar Event. And be sure to visit the Flower Bar Shop at Studio Sprig for a list of supplies. I’m always here to help you with your creative journey. Please sign up to receive blog post notifications and follow Studio Sprig on Instagram, Facebook, and Pinterest.

How to Preserve and Use Your Spring Flowers - All Year Long
There’s nothing like the first blooms of Spring to brighten your day. The only trouble is that many perennials, like lilacs and peonies, don’t last very long. That’s why it’s very important to preserve them quickly if you’d like to use them in the future.
Enjoying Spring Flowers
There’s nothing like the first blooms of Spring to brighten your day. The only trouble is that many perennials, like lilacs and peonies, don’t last very long. That’s why it’s very important to preserve them quickly if you’d like to use them in the future.

What You Can Do With Preserved Spring Flowers
Create a Dried Bouquet or Host A Dry Bouquet Bar
Create a Dried Arrangement or Host A Dry Arrangement Bar
Create a Dried Wreath or Host A Dry Wreath Bar
Create a Floral Memento or Host A Floral Memento Event

Fresh Hydrangea

Dry Hydrangea
How to Host A Dry Bouquet or Arrangement Bar
Hosting a Dry Bouquet or Arrangement Bar requires a fairly large room or outdoor space, depending on the size of the event, because you’ll need a table for displaying your flowers, as well as a workstation for each guest.

What You’ll Need
You should have at least one long table to display your dried flowers and greens, and at least one long 6-foot table per 3 guests. Arranging dried flowers does take up a fair amount of space, and it can get quite messy, so prepare with tablecloths. I like to stash big rubber bins under my tables for easy cleanup.


Provide each guest with a vessel or vase, and a flower snip to easily cut the stems.
And just like arranging with fresh, start each arrangement with your greens and work up to focal flowers. It’s much more difficult to design with dried flowers, as they are brittle and stiff. They fall apart easily, so be gentle when handling them. In shallow vessels, it’s a good idea to use a frog for stability. In the colorful arrangement above, I used chicken wire and shoved it into the iron, vintage vessel. It does a great job holding everything in place.

Host A Dry Wreath Bar
Wreath Bars are fun anytime of year, but especially around a seasonal change or holiday. Everyone likes a new wreath to hang on their door or wall.

What You’ll Need
All you have to do to host a wreath bar is display all of your previously made dried flowers and greens in attractive vessels and group items accordingly. Set up a few work tables or stations and invite guests to bring a wreath of their choice and a glue gun.

You can alternatively provide glue, glue guns and wreaths for everyone if you are hosting a bridal shower and want this to be a creative activity. But if this is just a fun event for friends, I recommend the “bring your own” wreath bar to keep things simple. This also enables each guest to choose the size and style of wreath they’d like to make.


Photos of the event are crucial so be sure to take lots.

Host A Dried Flower Framed Momento Bar
Framing a cherished memento is so satisfying. It’s a way to preserve a memory from a wedding, a birth, a precious handwritten card or note, or a photograph you just love with all your heart. Framed mementos make meaningful gifts all year long, so why not use your spring flowers and showcase special memories.

What You’ll Need To Create a Memento Bar
For this each guest will need only pressed, dried flowers, a memento, glue dots, and a frame. To prepare your flowers, you can use the pressing technique outlined below.
Arrange all of the flowers and green options on a big table, and give your guests an area to freely create their masterpiece. Provide each guest with a frame slightly larger than their memento. These floating glass frames work very well and they come in many sizes.
First, clean both pieces of glass. Then, use double-sided, clear tape or glue dots to place the memento wherever you want it on the first layer of glass. Now you can begin adhering the flowers. Be very careful, as dried, pressed flowers can be very delicate. You may want to provide some craft tweezers for precision.
When the design is finished, place the second piece of glass on top and assemble the frame.


There are Various Ways to Preserve Flowers
Here are four ways you can preserve your fresh Spring flowers.
Dry Flowers in Silica
Hang Flowers Upside Down
Air Dry Flowers on a Flat Surface
Flower Pressing

Flower Drying in Silica
To dry fresh flowers in silica, first you must prepare your containers and fill them with Silica Gel Flower Drying Crystals. I prefer using these Rubbermaid Containers with Lids to prevent spills. I normally have five containers going at once. Just line the bottom of each container with silica crystals and lay the flowers so that they are not touching or overlapping. Then pour more silica over the top until the flowers and stems are covered. Place the lid securely on the container and store for about a week in a cool, dark (but not moist) place.


When you remove the flowers from the silica, be careful not to break the flowers and stems, as they will be dry and brittle, but remarkably in tact. I always use a small spatula.
Hang Flowers upside Down
A very old and simple method of drying fresh flowers is simply hanging them upside down.

Game Changer Hooks
I have bunches hanging all around my home in the springtime, and I find the little, black hooks pictured below are especially helpful. They are typically used to hang utensils, but I’m able to attach flower bundles to almost anything with these little hooks - game changer.

Air Dry Flowers on a Flat Surface
There is nothing wrong with just placing your flowers on a flat surface and waiting for them to dry, but I would only do this if you prefer the crunchy look. Flowers typically shrivel when they dry this way while they retain their shape and texture with the silicon method above. However, with some flowers like lilac, I really like this look. I think it will be pretty when I use it on a wreath.

See the Difference
The lilac above was dried with the flat surface method, while the tulips below were preserved in Silica Gel Crystals. You can clearly see the difference.

Flower Pressing
You can also preserve your flowers by pressing them until they are dry.
For this method, carefully flatten and layer flowers between thick sheets of watercolor paper, then press them between heavy books, or buy a flower press and do many layers at once.

A Flower Press
I use this sweet Flower Press. What I love about it is the small profile. It’s only 11” square and fits nicely on a small table in my workspace and it would be right at home in a greenhouse. It comes with all the tools, papers, cardboard layers, and a travel bag.

Thanks for visiting. When preserving your Spring flowers, choose the method that works best for you and enjoy your flowers for as long as possible. I’d love to hear what you’re doing with your garden. Comment below.
Hi, I’m Kim. Welcome to Studio Sprig.
Kim Bensing’s original watercolors and designs are now available on wallpaper and fabric. To order visit Studio Sprig’s design library on Spoonflower. Contact me if you need assistance.
-
EVENTS
22
- Oct 23, 2026 Wrapped in Wonder: The Art of Giving a Gift Oct 23, 2026
- Sep 26, 2026 Homecoming Flowers: A Beautiful Tradition Then and Now Sep 26, 2026
- Sep 23, 2026 Choose Wedding Flowers With Meaning: How to Create a Bouquet That Tells Your Love Story Sep 23, 2026
- Sep 21, 2026 The Pre-Prom Tradition Every Mom Should Try: Host a Backyard Bouquet Party Sep 21, 2026
- Sep 18, 2026 Lambertville’s Halloween Magic: A Funky, Creative Rivertown Comes Alive Sep 18, 2026
- Aug 20, 2026 How to Host a Beautiful Flower Bar: The Ultimate DIY Flower Bar Party Guide Aug 20, 2026
- Aug 19, 2026 How to Decorate Cakes with Fresh Flowers: Floral Wreaths, Crowns & More Aug 19, 2026
- Aug 19, 2026 Decorating Cakes with Fresh Flowers Aug 19, 2026
- May 18, 2025 How to Make DIY Bouquets for Prom May 18, 2025
- May 7, 2025 How to Preserve and Use Your Spring Flowers - All Year Long May 7, 2025
- Feb 27, 2025 Get Excited for The Flower Show Feb 27, 2025
- Feb 14, 2025 Historic Castles. What are they used for? Feb 14, 2025
- Jan 31, 2025 Creative Ideas For Your Valentine Jan 31, 2025
- Jan 28, 2025 How An Invitation Can Tell Your Love Story Jan 28, 2025
- Jan 23, 2025 How to Design a Valentine Tree Jan 23, 2025
- Jan 16, 2025 Host a Fabulous Bouquet Bar for Valentine's Day Jan 16, 2025
- Apr 4, 2023 Why Choose Seasonal Flowers for Your Special Occasion? Apr 4, 2023
- Feb 1, 2023 10 Ideas for an Eco-Friendly Event or Wedding Feb 1, 2023
- Nov 14, 2022 A Family Tree Inspired Wedding Invitation Nov 14, 2022
- Oct 3, 2022 How to choose flowers that have sentimental meaning Oct 3, 2022
- Nov 9, 2020 Simplified Wedding Ceremony during Covid Nov 9, 2020
- Apr 2, 2019 Why You Should Choose Seasonal Prom Flowers Apr 2, 2019
-
HOME
23
- Sep 9, 2026 How to Name a Farm: 10 Meaningful Ideas for Creating a Name With a Story Sep 9, 2026
- Sep 1, 2026 How to Preserve Flowers for Creative Projects Sep 1, 2026
- Jul 2, 2026 How to make your own flower confetti Jul 2, 2026
- Apr 22, 2025 How We Painted our Barn Apr 22, 2025
- Apr 16, 2025 What to Plant for Mesmerizing Spring Blooms Apr 16, 2025
- Apr 8, 2025 Narcissus AKA Daffodil - What's Blooming at Studio Sprig Apr 8, 2025
- Apr 1, 2025 Glory-of-the-Snow - What's Blooming at Studio Sprig Apr 1, 2025
- Mar 19, 2025 How we turned an Artist Studio into a Weekend Retreat Mar 19, 2025
- Mar 12, 2025 The Mighty Crocus - First to Bloom - What's Blooming at Studio Sprig Mar 12, 2025
- Jan 23, 2025 How to Design a Valentine Tree Jan 23, 2025
- Jan 16, 2025 Host a Fabulous Bouquet Bar for Valentine's Day Jan 16, 2025
- Jan 9, 2025 How to Make Your Own Mint Tea Jan 9, 2025
- Jan 7, 2025 How To Create A Courtyard Jan 7, 2025
- Jan 2, 2025 How to Create a Stunning Centerpiece Jan 2, 2025
- Mar 27, 2023 How We Transformed Our Farmhouse Kitchen by Reusing, Updating, and Thrifting: (Coffee Bar) Mar 27, 2023
- Mar 27, 2023 How We Transformed Our Farmhouse Kitchen by Reusing, Updating, and Thrifting Mar 27, 2023
- Mar 1, 2023 How and Why We Love Historic Homes Mar 1, 2023
- Jan 3, 2023 Eliminate Sneaky Sugars Jan 3, 2023
- Dec 14, 2022 How to Create a Pretty Mini Bar with Items You Already Own Dec 14, 2022
- Nov 21, 2022 Friendsgiving At Our Farm Nov 21, 2022
- Nov 9, 2022 Herbs: How to Grow, Harvest and Dry Your Own Nov 9, 2022
- Nov 9, 2022 DIY Herb Drying Rack: Herb Drying at Home Nov 9, 2022
- Oct 12, 2022 Have you ever thought about creating a beautiful water feature? Oct 12, 2022
-
STYLE
27
- Oct 6, 2026 Where Flowers Become Art, Experiences & Memories Oct 6, 2026
- Sep 1, 2026 How to Preserve Flowers for Creative Projects Sep 1, 2026
- Aug 20, 2026 How to Host a Beautiful Flower Bar: The Ultimate DIY Flower Bar Party Guide Aug 20, 2026
- Aug 19, 2026 How to Decorate Cakes with Fresh Flowers: Floral Wreaths, Crowns & More Aug 19, 2026
- Aug 19, 2026 Decorating Cakes with Fresh Flowers Aug 19, 2026
- Jul 2, 2026 How to make your own flower confetti Jul 2, 2026
- Nov 3, 2025 Creating a Pressed Flower Frame Nov 3, 2025
- May 7, 2025 How to Preserve and Use Your Spring Flowers - All Year Long May 7, 2025
- Jan 28, 2025 How An Invitation Can Tell Your Love Story Jan 28, 2025
- Jan 23, 2025 How to Design a Valentine Tree Jan 23, 2025
- Jan 6, 2025 How to Create Oyster Shell Necklaces Jan 6, 2025
- Jan 2, 2025 How to Create a Stunning Centerpiece Jan 2, 2025
- Mar 14, 2023 How to Make Sentimental Easter Eggs Mar 14, 2023
- Mar 6, 2023 How to Enjoy The PHS Philadelphia Flower Show Mar 6, 2023
- Feb 13, 2023 Let's Save The Bees Feb 13, 2023
- Feb 1, 2023 10 Ideas for an Eco-Friendly Event or Wedding Feb 1, 2023
- Jan 12, 2023 A Great Way to Help Kids with Cancer (PENN STATE) Jan 12, 2023
- Dec 14, 2022 How to Create a Pretty Mini Bar with Items You Already Own Dec 14, 2022
- Nov 29, 2022 Lunch and Dinner -Studio Sprig Style Micro Blog Nov 29, 2022
- Nov 14, 2022 A Family Tree Inspired Wedding Invitation Nov 14, 2022
- Nov 9, 2022 DIY Herb Drying Rack: Herb Drying at Home Nov 9, 2022
- Oct 30, 2022 Lambertville, Nj , A Funky, Cool Rivertown You Must Visit on Halloween. Oct 30, 2022
- Oct 19, 2022 How to choose an interesting place to stay when you travel or go on vacation Oct 19, 2022
- Oct 12, 2022 Have you ever thought about creating a beautiful water feature? Oct 12, 2022
- Oct 3, 2022 How to choose flowers that have sentimental meaning Oct 3, 2022
- Feb 1, 2021 How to design marketing materials for your small business Feb 1, 2021
- Oct 29, 2020 Surprise the bride when you can't come to her wedding Oct 29, 2020