

How we turned an Artist Studio into a Weekend Retreat
How we turned an Artist Studio into a Weekend Retreat

Making an Artist Studio
Just behind our farmhouse sits this adorable little cottage. But, as you’ll see, it wasn’t so cute when we moved in 18 years ago.
When we bought this farm in 2007, this cottage was rented out as a mini apartment or what we’d now call a tiny house. The outside and inside were dingy, off-white, and tan. There was a big, ugly oil tank outside and an even uglier furnace inside. But somehow in this little space, there was an eat-in kitchen with wall-to-wall cabinets, a carpeted floor, a full-size refrigerator, and a big, hideous smoke pipe poking out of the roof.
While it was still in this state, we saved up some money and rented the space to an artist, who used the space to paint a few days a week. Then one day the furnace broke down and leaked all over the carpet. Fortunately for me, we were forced to release the artist, gut the space, and fix the problem. Here is how we did it.
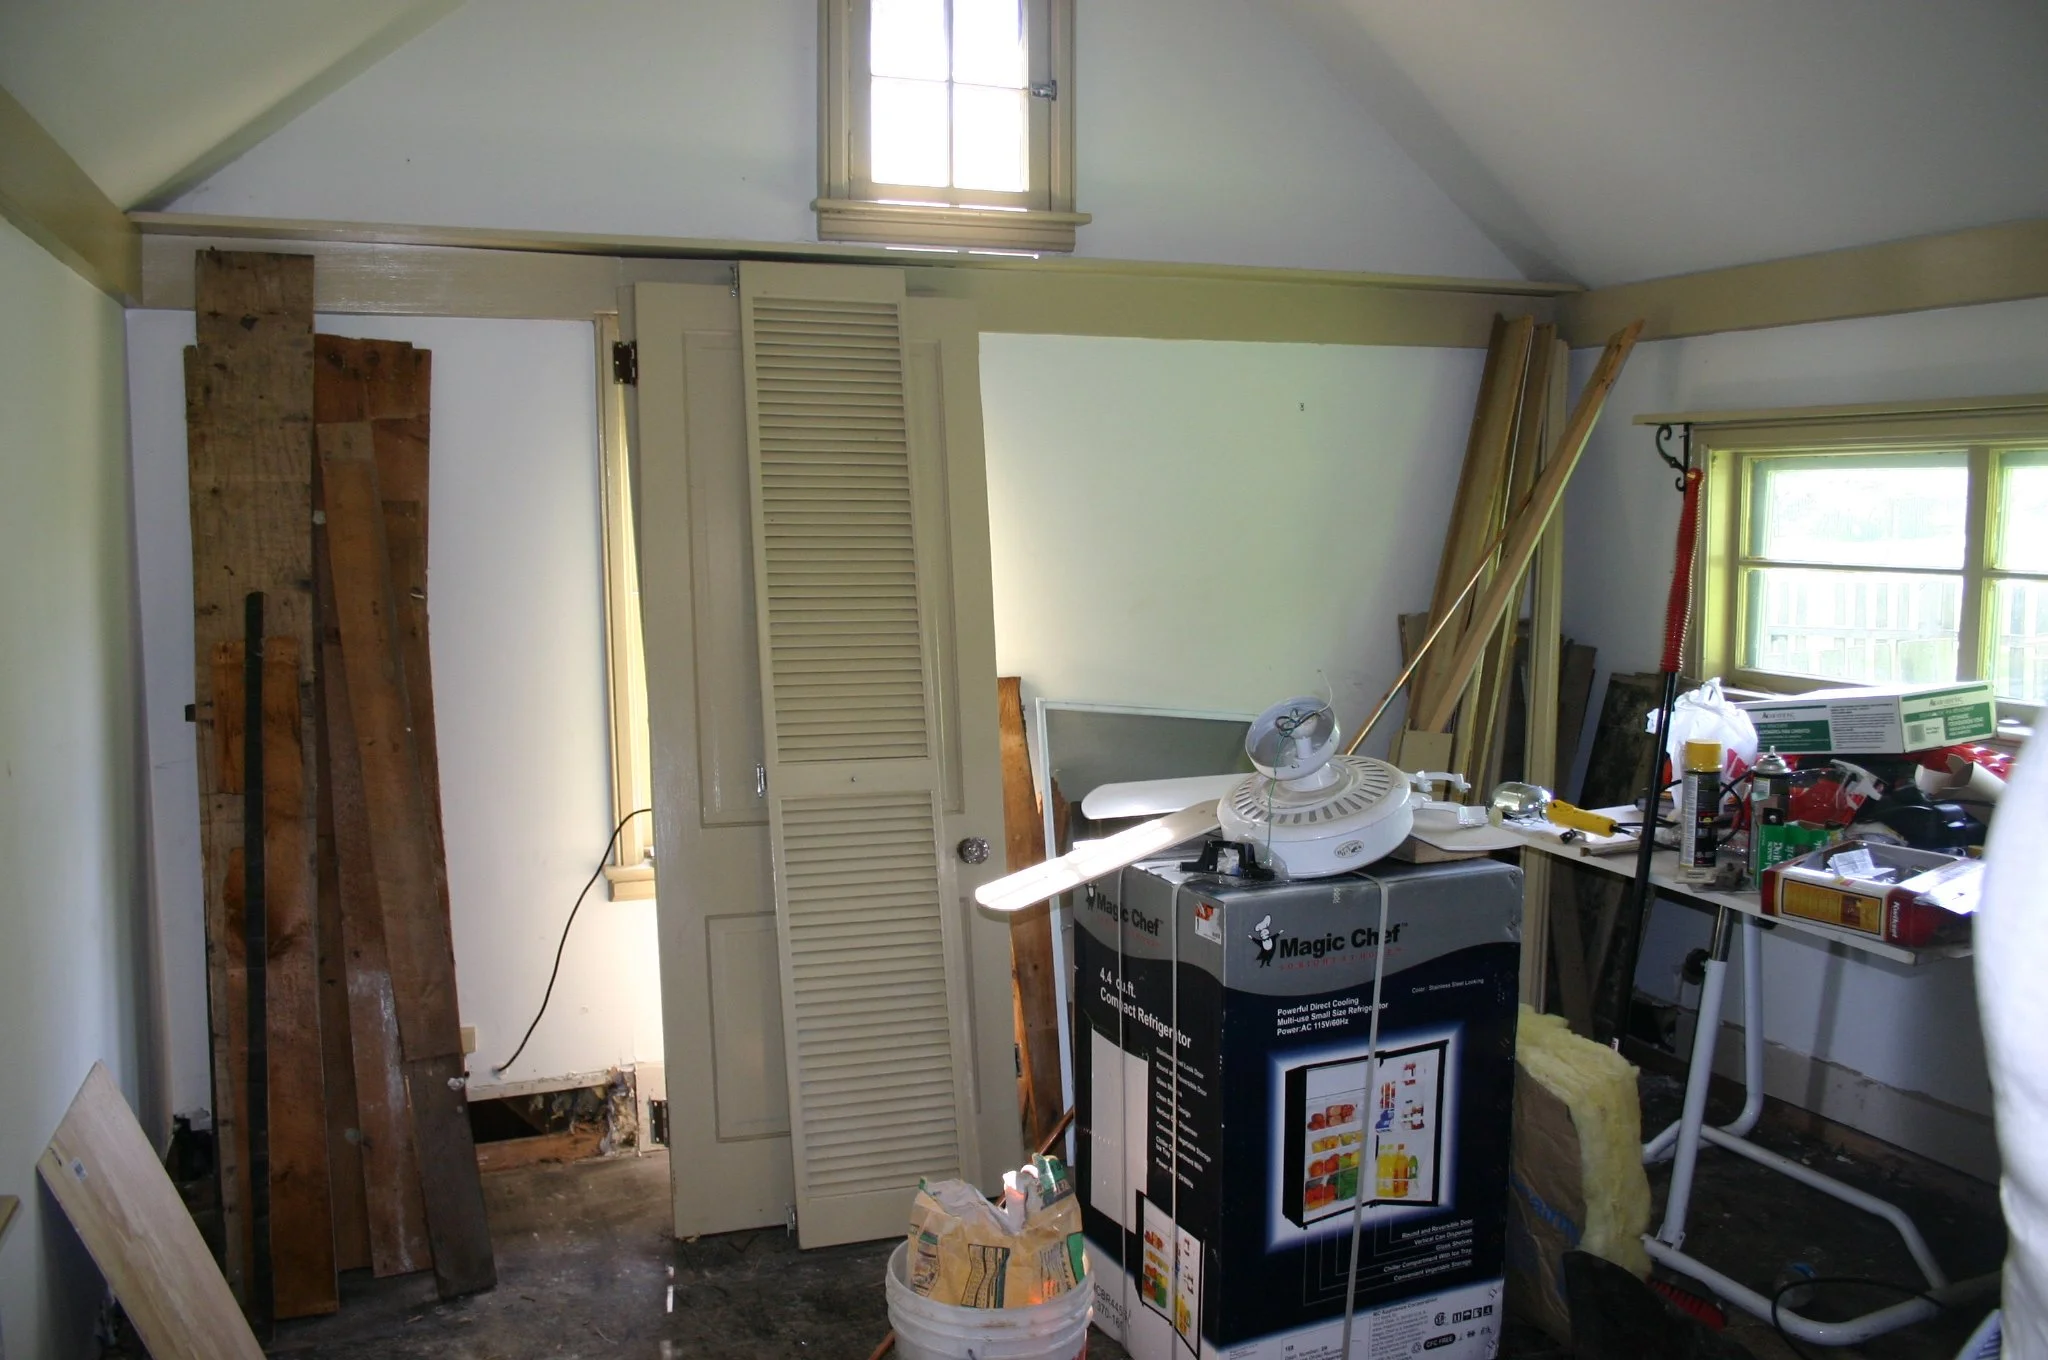
We ripped out a few baseboards to install the electric heat.
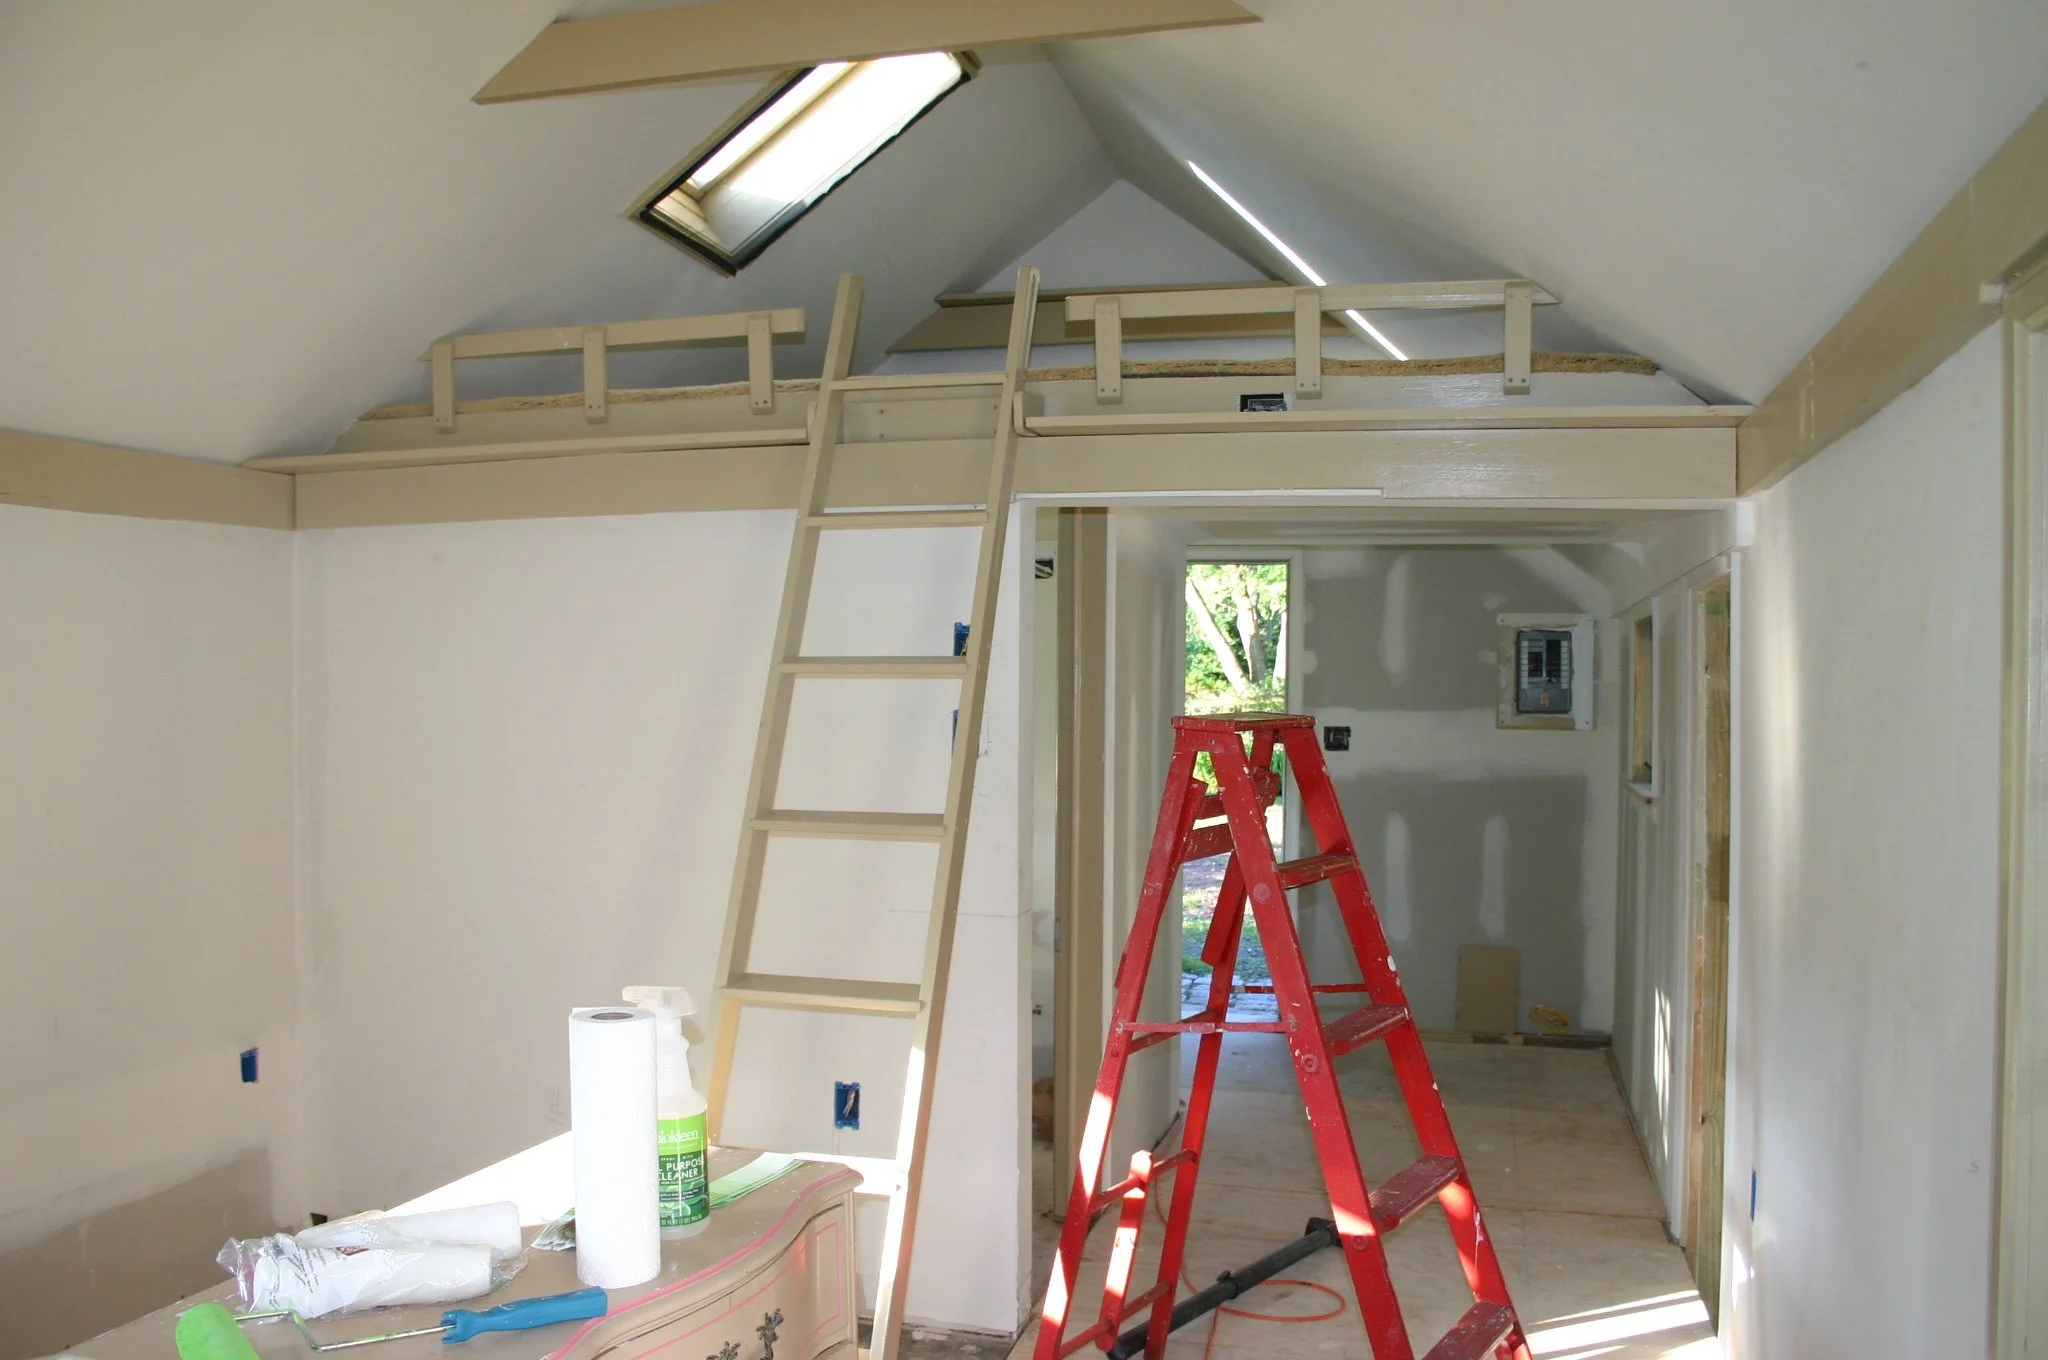
We patched walls and vaulted ceilings with drywall in a few places.

We employed our workforce (I mean our kids) to help with cleaning up.
Cottage Renovations
Originally the exterior was painted a dingy off-white and the cottage always looked dirty, so that was one of the first things we addressed. We power-washed the exterior, brightened it with lime paint, and accented it with an eggplant purple front door! It was eye-catching and perfect for an art studio.
On the inside, We added baseboard electric heat so we could remove the old and ugly oil heater sitting right at the front door. With the help of a friend, we tore out all the carpet, laid a subfloor, and installed hardwood throughout the main rooms and beautiful slate tiles in the bathroom and entry. We patched many walls with fresh drywall, cut a hole for a new door and window, installed some light fixtures, and created a wet bar from an antique dresser. We also had to patch the metal roof because, in addition to a skylight, there was a smoke pipe coming out from the oil furnace. When all the construction was complete we painted all the walls and ceilings with several coats of Benjamin Moore Super White to finish things off. We worked every weekend and I’d say the entire renovation took just over a few months.
Fun Side Note: In the photo below you will see the addition of a side door. We found a cement step in that exact spot, leading us to believe there was once a door there. We kept the step and brought the entry way back to life. I planted walking thyme all around the door when we created our courtyard which you can read about in this blog How To Create A Courtyard. And now the thyme nicely covers the old cement and flowers in the spring.

We removed the oil tank, patched the smoke pipe hole in the roof, and installed electric heat.
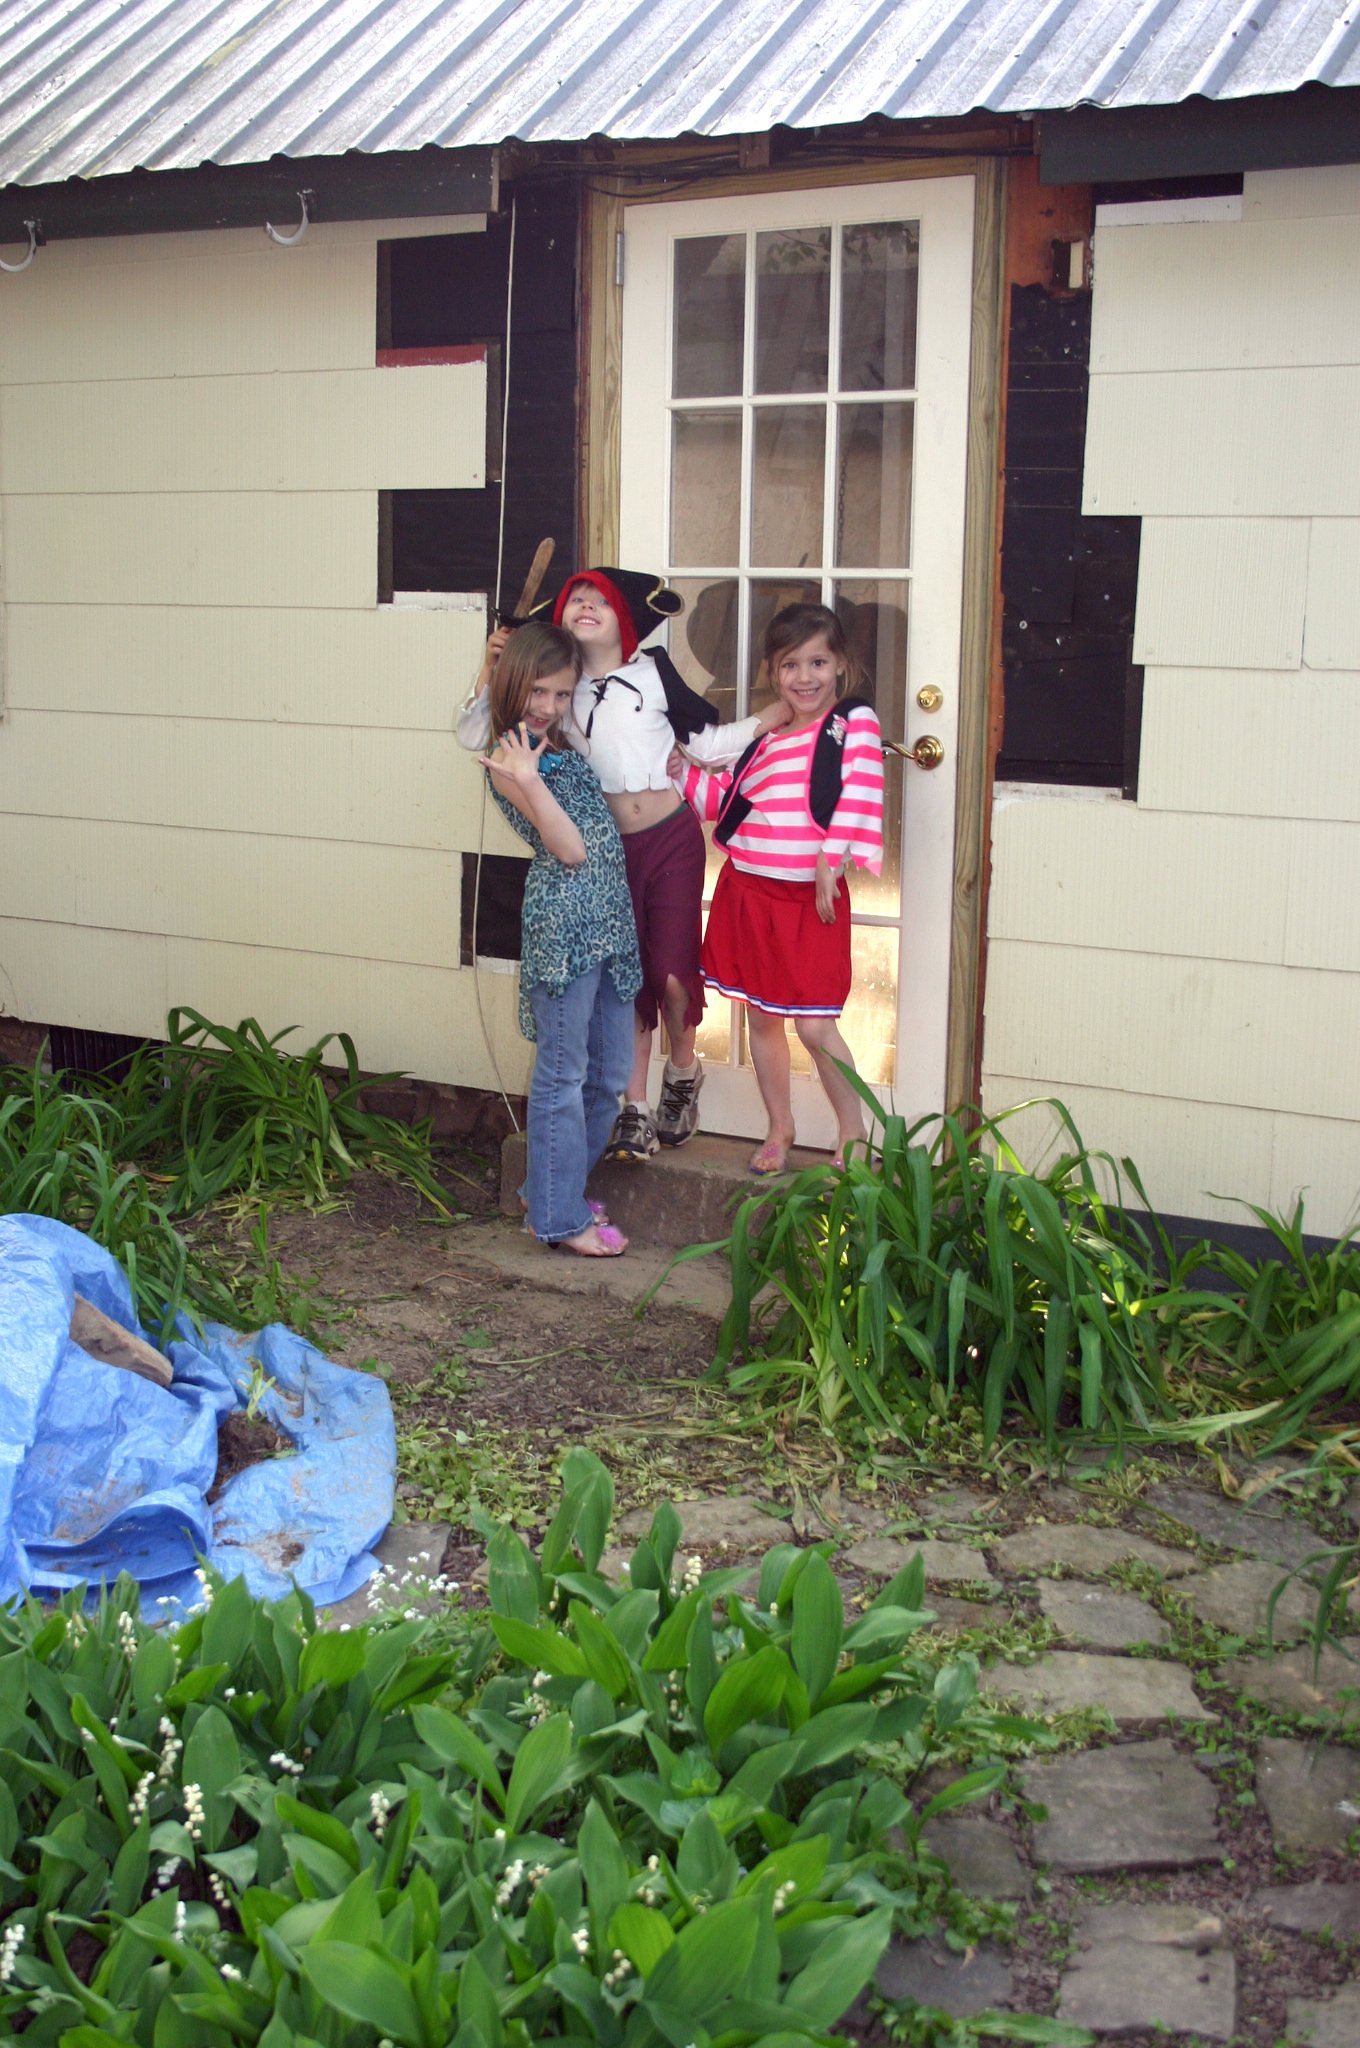
We installed a side door that leads into the courtyard. My 3 kids goofing around in costumes when we had lots of work to do.

Michael and a friend installed the hardwood floors, and I painted the ladder purple. The simple chandelier is from Ballard.

The Artist Cottage at Windy Hill when it was an Artist Studio. We chose bright lime green with an eggplant purple door for the exterior of the Artist Studio. Tile Artist Khara Flint created the “heirloom” tile that hangs above the doorway. I love how the Iceland Poppies decided this was their spot to shine. (they were not planted by me!)
The photos above show how the art studio remained until 2024. We used this space as a haven for Kim Bensing Design and eventually Studio Sprig, my two small business adventures. My kids also used it as a campaway site whenever they had friends over. It was a fun place and still is. It wasn’t until the summer of 2024 that we decided to turn the art studio into a weekend retreat.
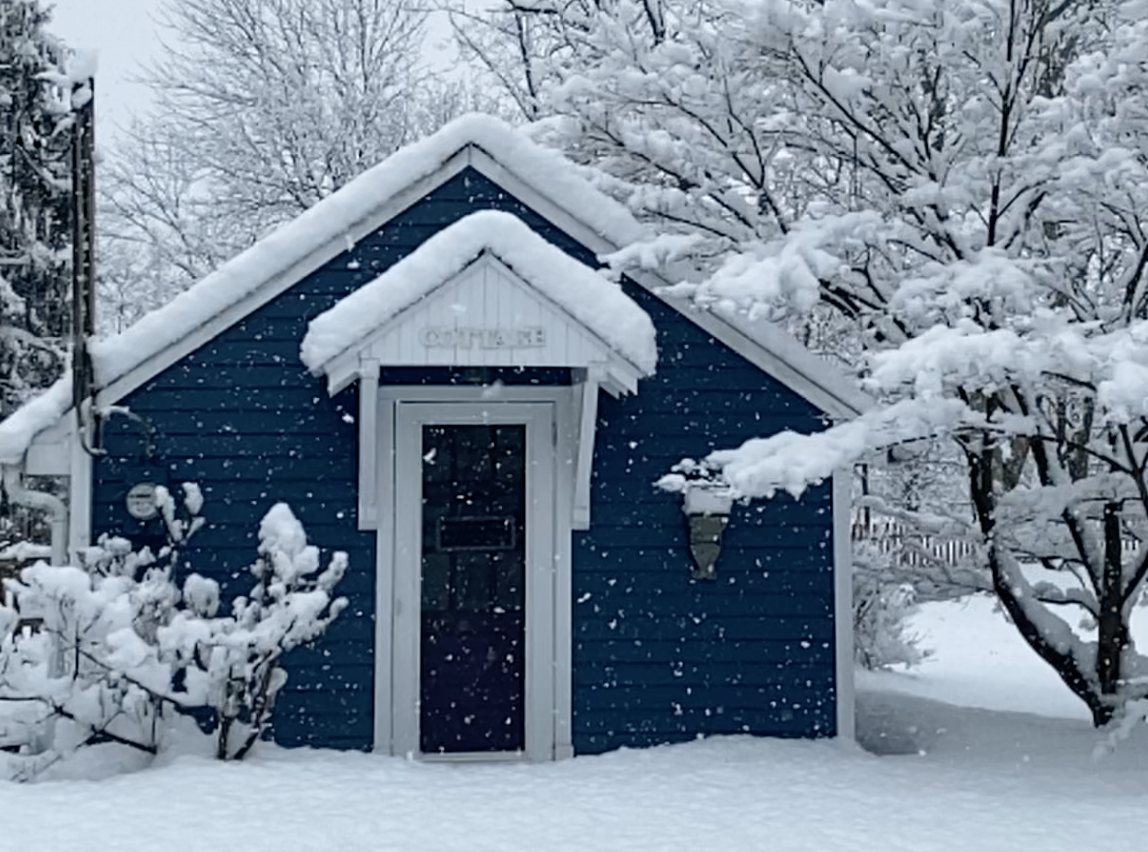
The Artist’s Cottage at Windy Hill today
Creating a Weekend Retreat
The decision to reinvent the space is a direct result of my very 1980s dream of someday owning a bed and breakfast. Fast forward to 2025, and the invention of VRBO.
We knew it would only take a few permits and a couple of updates to turn this Artist’s cottage into a weekend retreat so we came up with a summer plan and ran with it.
Around 2021 two of my Studio Sprig interns and I repainted the cottage exterior with Benjamin Moore’s Van Deusen Blue, so the outside was already freshed up, leaving only the inside to alter.
We started with some interior Super White paint touchups and the we gave the ladder and the front door a new coat of black because they needed to be refreshed as well. We removed the computer desk and replaced it with a comfortable bed and fluffy comforter. We left all the framed news articles about my design business because they add to the appeal. Below them we incorporated a small workstation equipped with a set of watercolor paints, a sketch pad, and drawing pencils. (Guests have been spotted painting in the courtyard and that makes me smile).
So there would be a place to relax, play a game, and eat, we resurrected a small, round yard sale table and paired it with 3 fiberglass spun chairs by mid-century modern artist, Russell Woodward. These were found on Facebook Marketplace. For wall decor, we hung several original paintings, including a watercolor by Bucks County artist, Jane Ramsey, and we also included a few fine art, floral, and photography books from my library, and we displayed them on a recycled children’s wall bookshelf.
In the bath, we refinished the shower with a process called Miracle Method which we learned about on This Old House. This brought it up to date with a beautiful bright white finish. Our electrician installed two new light fixtures, we patched and painted and that was all we needed to do.
The kitchenette is small and not ready to cook full meals, but we added a stainless island with wheels, a retro microwave and toaster by Nostalgia, a coffee maker, and a mini fridge, enough amenities for a weekend retreat.
Thank you for your interest in our labor of love - twice restored. Comment if you have any questions about the renovation, I’d love to hear from you. I’ve included some product links below for your convenience, and f you or someone you know is interested in booking the Artist Cottage at Windy Hill, the next time you visit Bucks County, PA, here is the link.
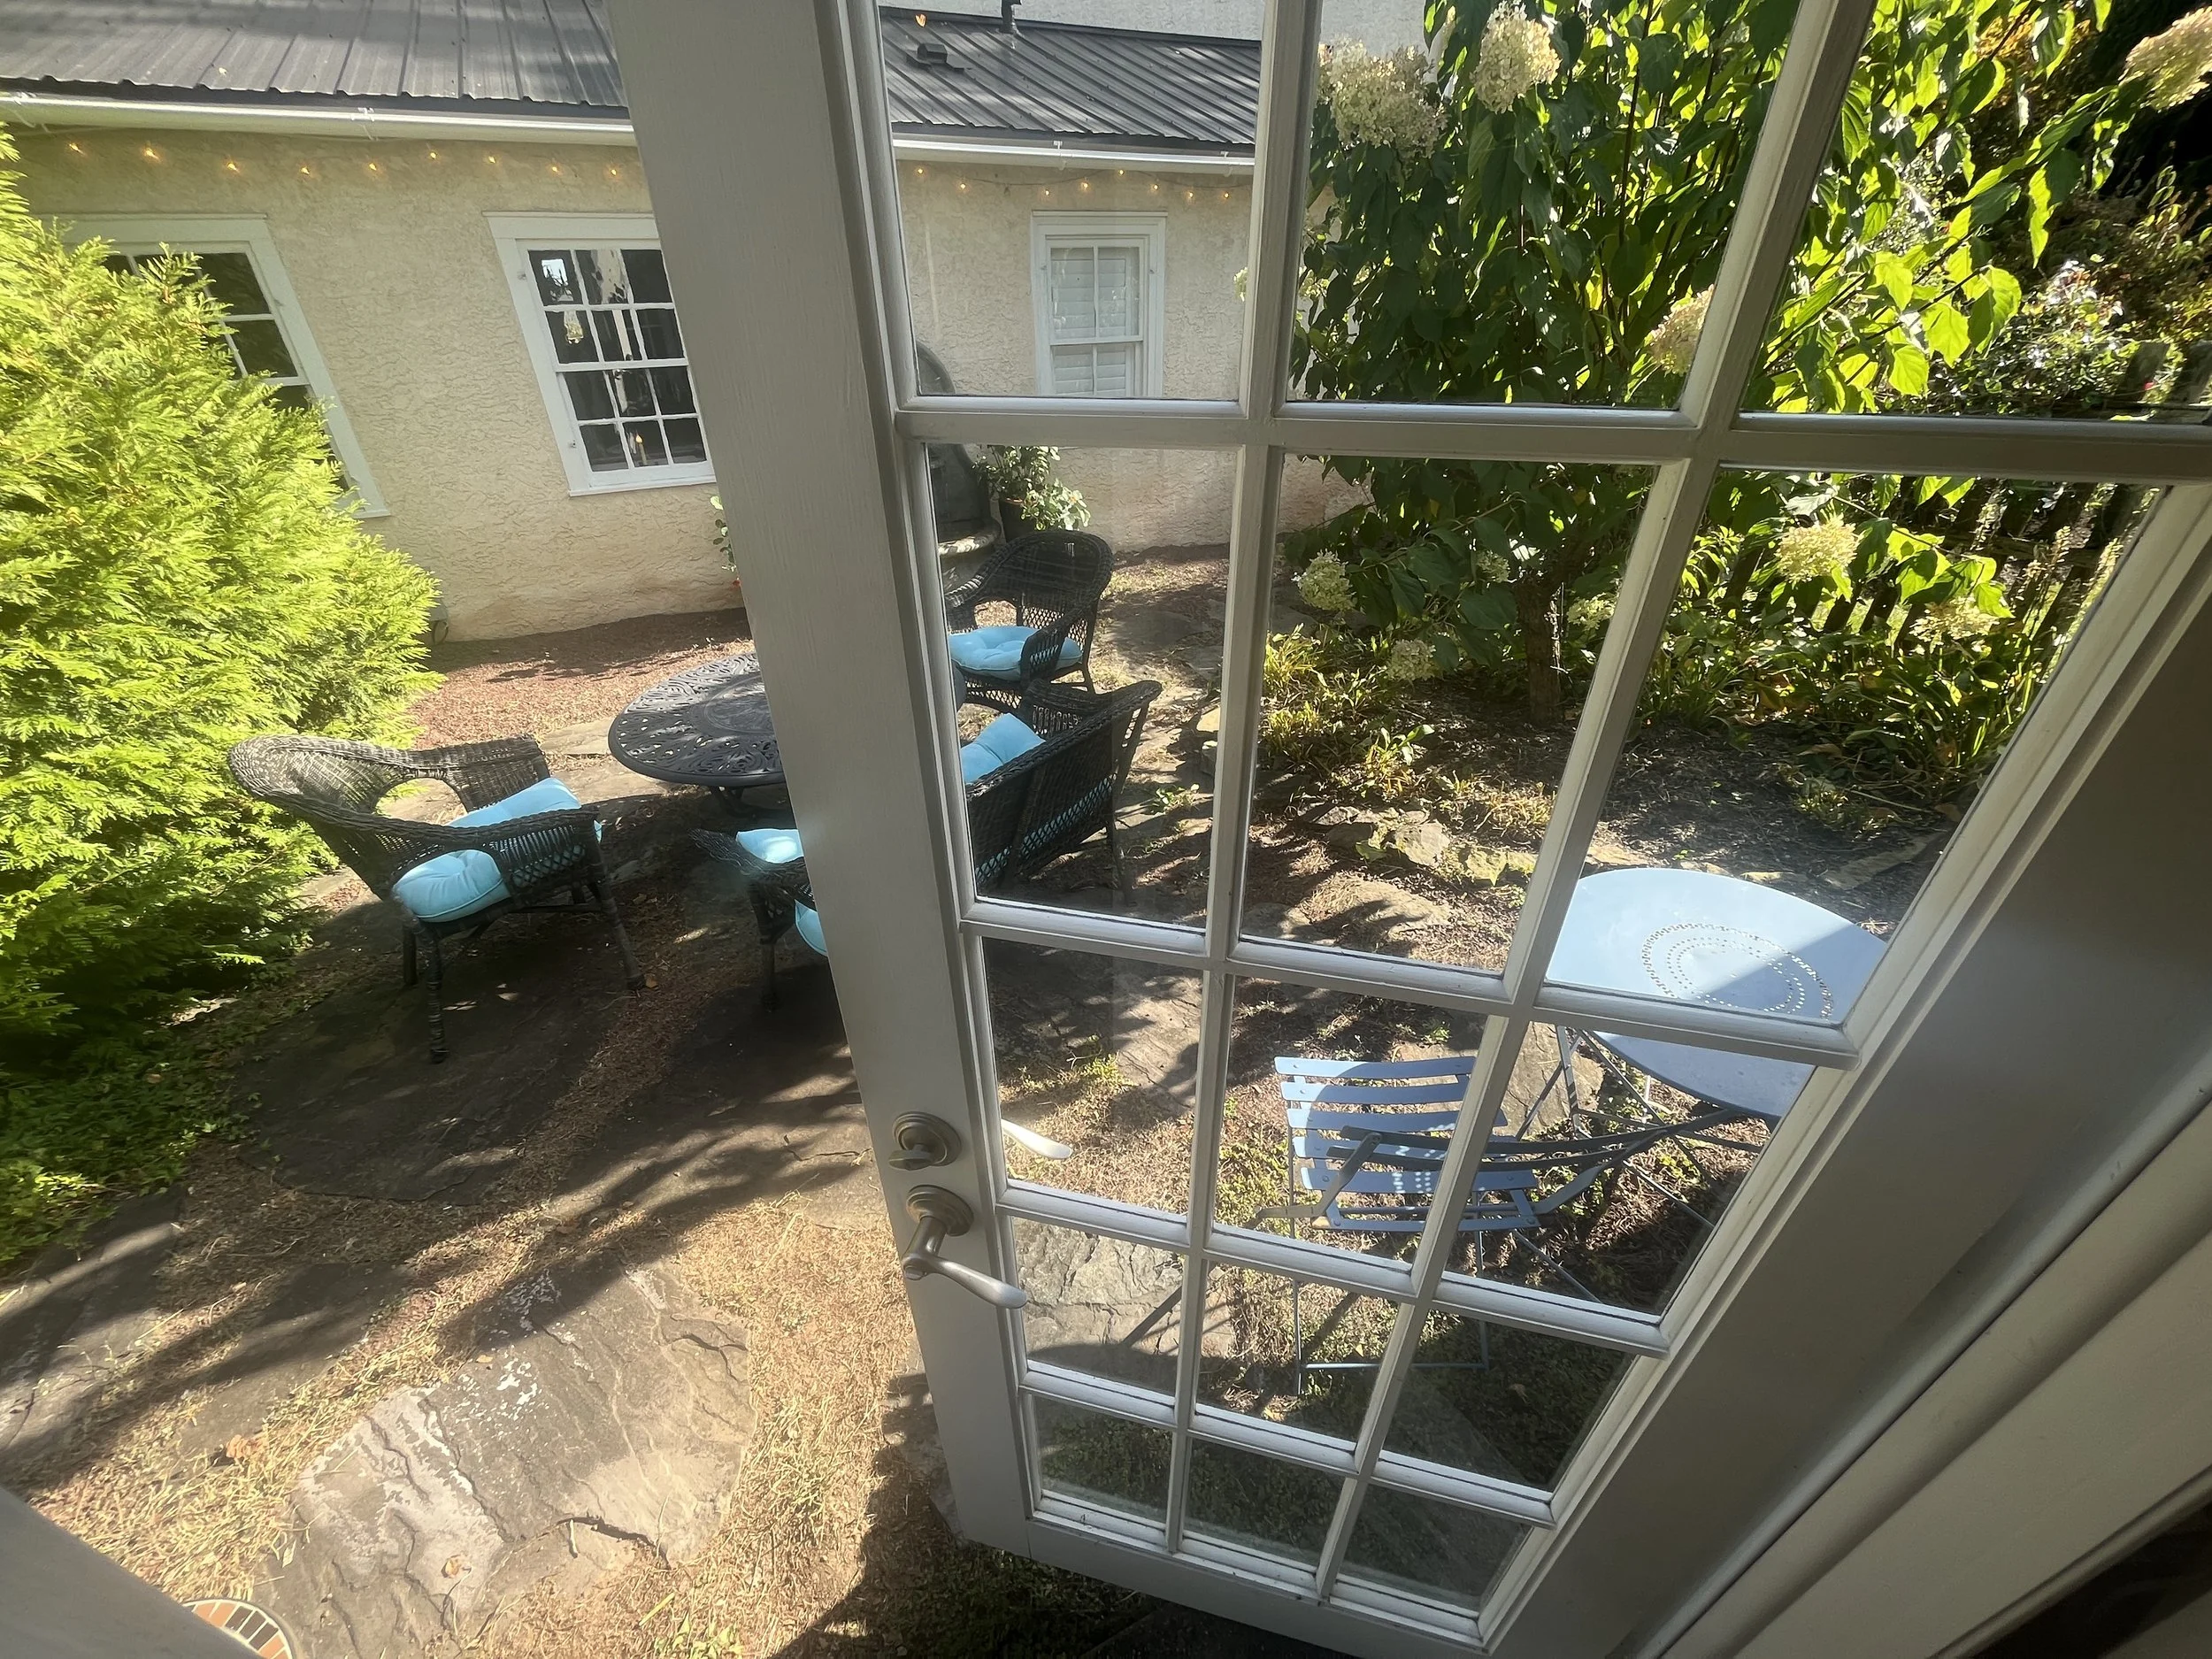
We had this side door installed so there would be access into the courtyard.

The Nostalgia Microwave adds a touch of retro charm.

Fresh white towels in a pretty seagrass basket awaits guests.

Just a simple setup with all the comforts of home.

The pedestal sink was salvaged at an estate sale. The colorful mirror I found at a craft fair. We included a frilly ruffled shower curtain to add texture.

We repainted the loft ladder black and added a round table with chairs for guests.

This rolling, stainless table becomes a nice little countertop.

This is the fountain view into the courtyard.

I supply a set of traveling watercolor paints,professional drawing pencils and a sketch pad for guests to enjoy.

This sink was created from an antique dresser and the Ecosmart tankless hot water heater and all the plumbing hides inside.

Exterior Paint: Benjamin Moore Van Deusen HC-156 / Interior Paint: Benjamin Moore Super White HC-152


I have included a few links to some of the products we used for your convenience. Thank you for reading about this journey. As an Amazon Associate, I earn a small commission from qualifying purchases. The price for you is the same, whether you choose to use the links or not. Thank you.

How We Transformed Our Farmhouse Kitchen by Reusing, Updating, and Thrifting
As we begin this exciting journey of home exchanging I thought I’d share some of the ways we previously renovated rooms, gardens, and outbuildings and how we’re simplifying to make our home exchange-worthy for future guests.

Welcome to our farmhouse kitchen at Windy Hill. I explained in a previous blog post, why we love historic homes, so today I wanted to share with you some of the farmhouse renovation hacks we’ve used over the years.
We began minor family-friendly renovations the minute we moved here in 2007, and we continue to make them because we are still not finished and we recently listed our farm on homeexchange.com.
As we begin this exciting journey of home exchanging for travel I thought I’d share some of the ways we previously restored rooms, gardens, and outbuildings and how we’re simplifying to make our home exchange-worthy for guests. I will break these down by project so look for them in future blogs.

Farmhouse renos can unveil difficult challenges, objects of educational interest, and sometimes disturbing artifacts. Even a small change can prove difficult. But we didn't let that discourage us during this kitchen construction project because as we uncovered the years we looked for creative design elements and clever ways to get what we wanted and needed, disguising many imperfections along the way.
Paint
Neutralize and calm: When we moved here in 2007 this kitchen was a bright and cheery, yellow and teal, "French Country", a vintage farmhouse style you see a lot. The cabinets and trim were teal, while the walls were a rag-rolling yellow. We promptly inserted our Fiestaware collection on the open shelves and lived with it for a short while. But after a few years, it was looking pretty worn and dated, so we made the decision to renovate the kitchen.
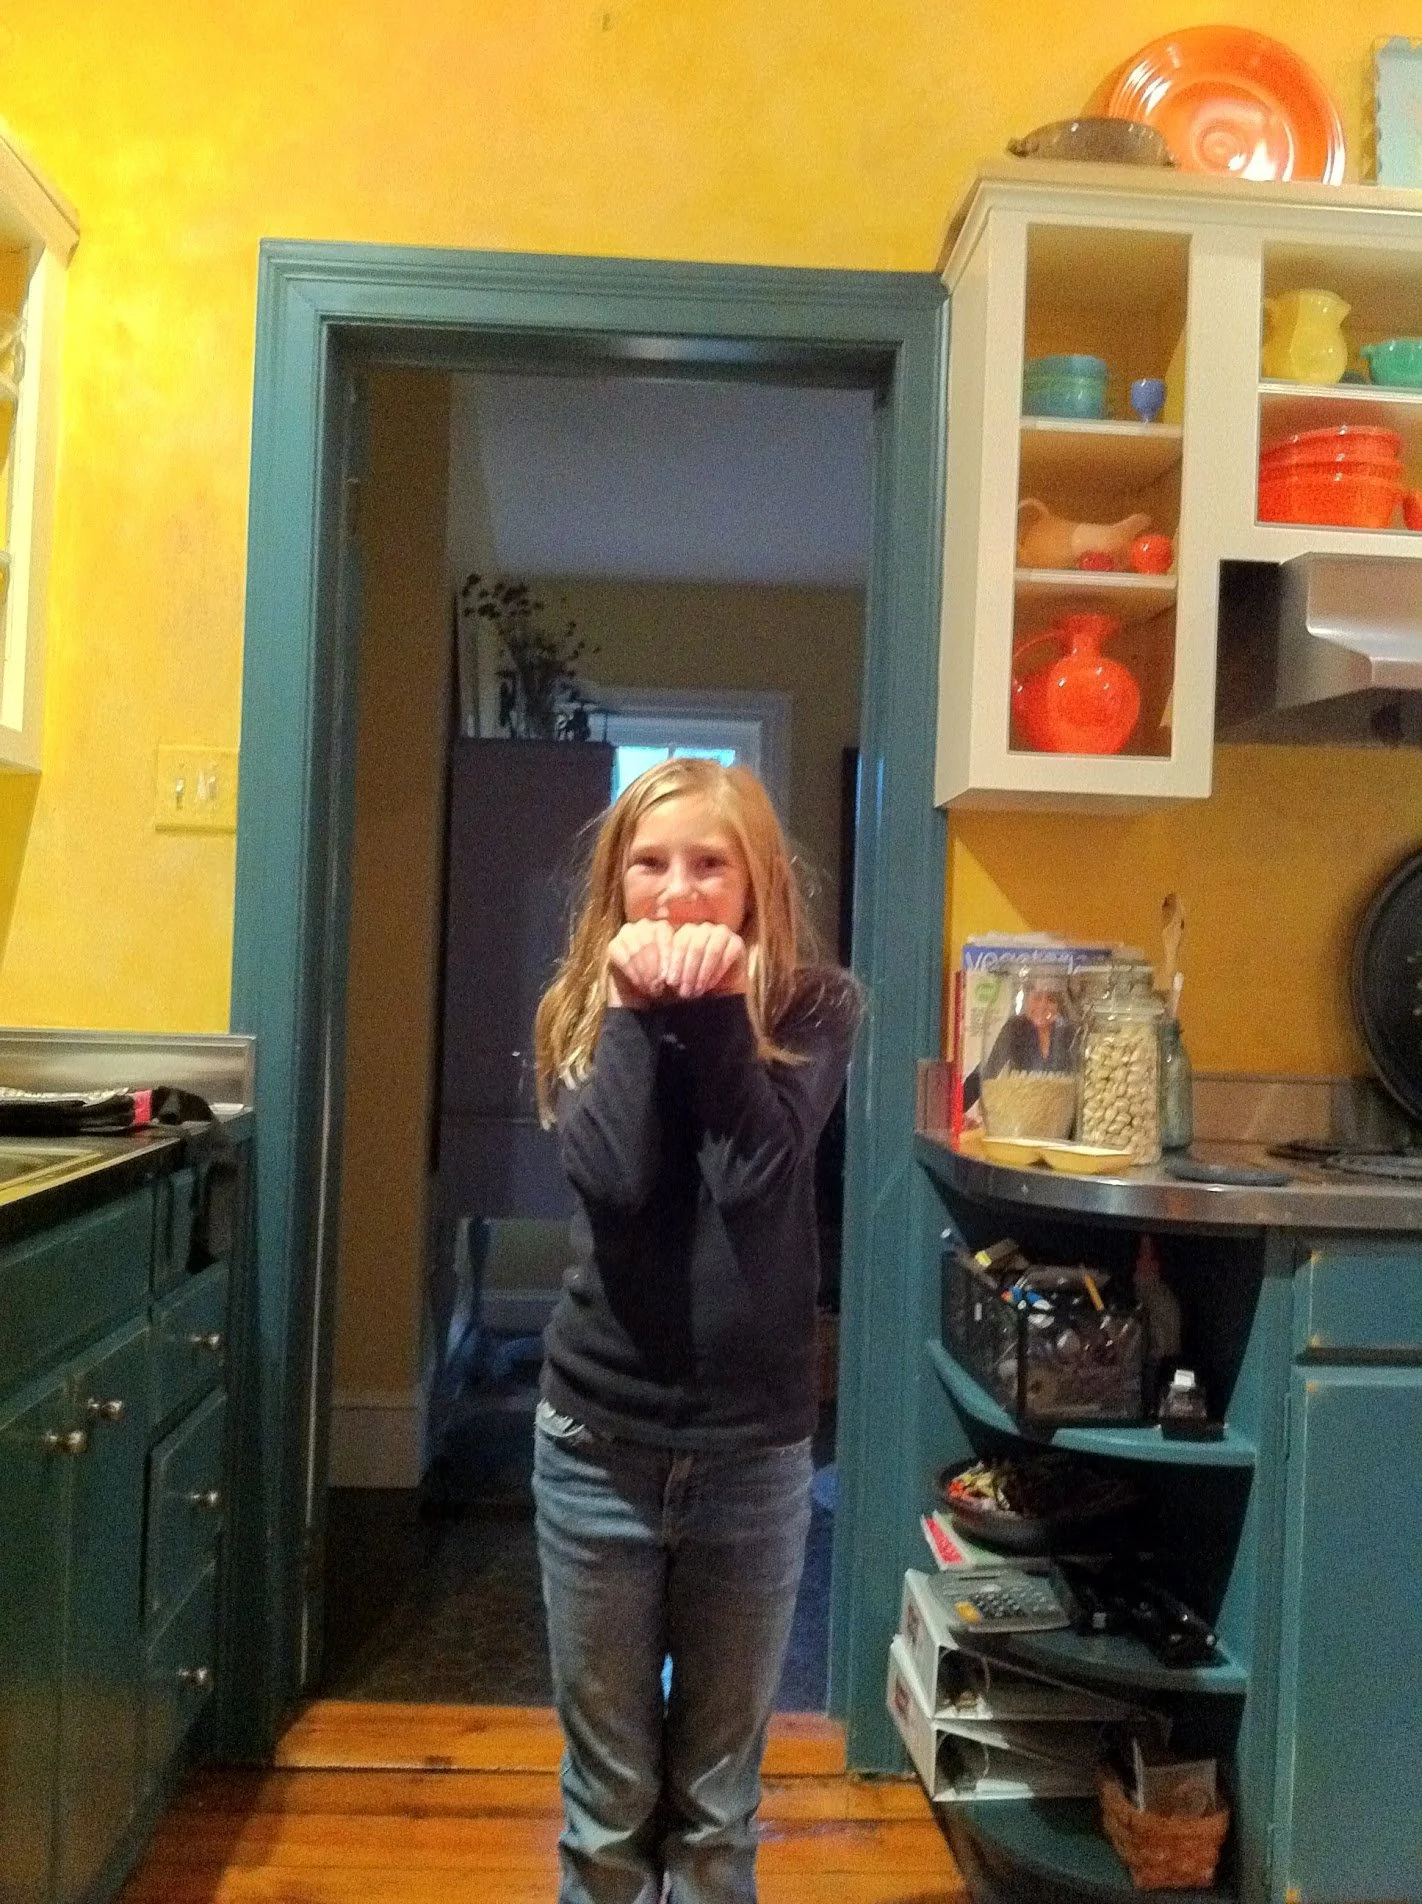
For the renovation we decided not to do traditional white walls, instead, we painted them a light gray and opted for white cabinets, white trim (to match the rest of the house), and eventually a white island piece. We chose Benjamin Moore's White Dove as it’s a soft, mellow white. The kitchen always had vintage stainless steel appliances, so as needed we slowly upgraded with new appliances and I think they complement the updated neutral colors well.
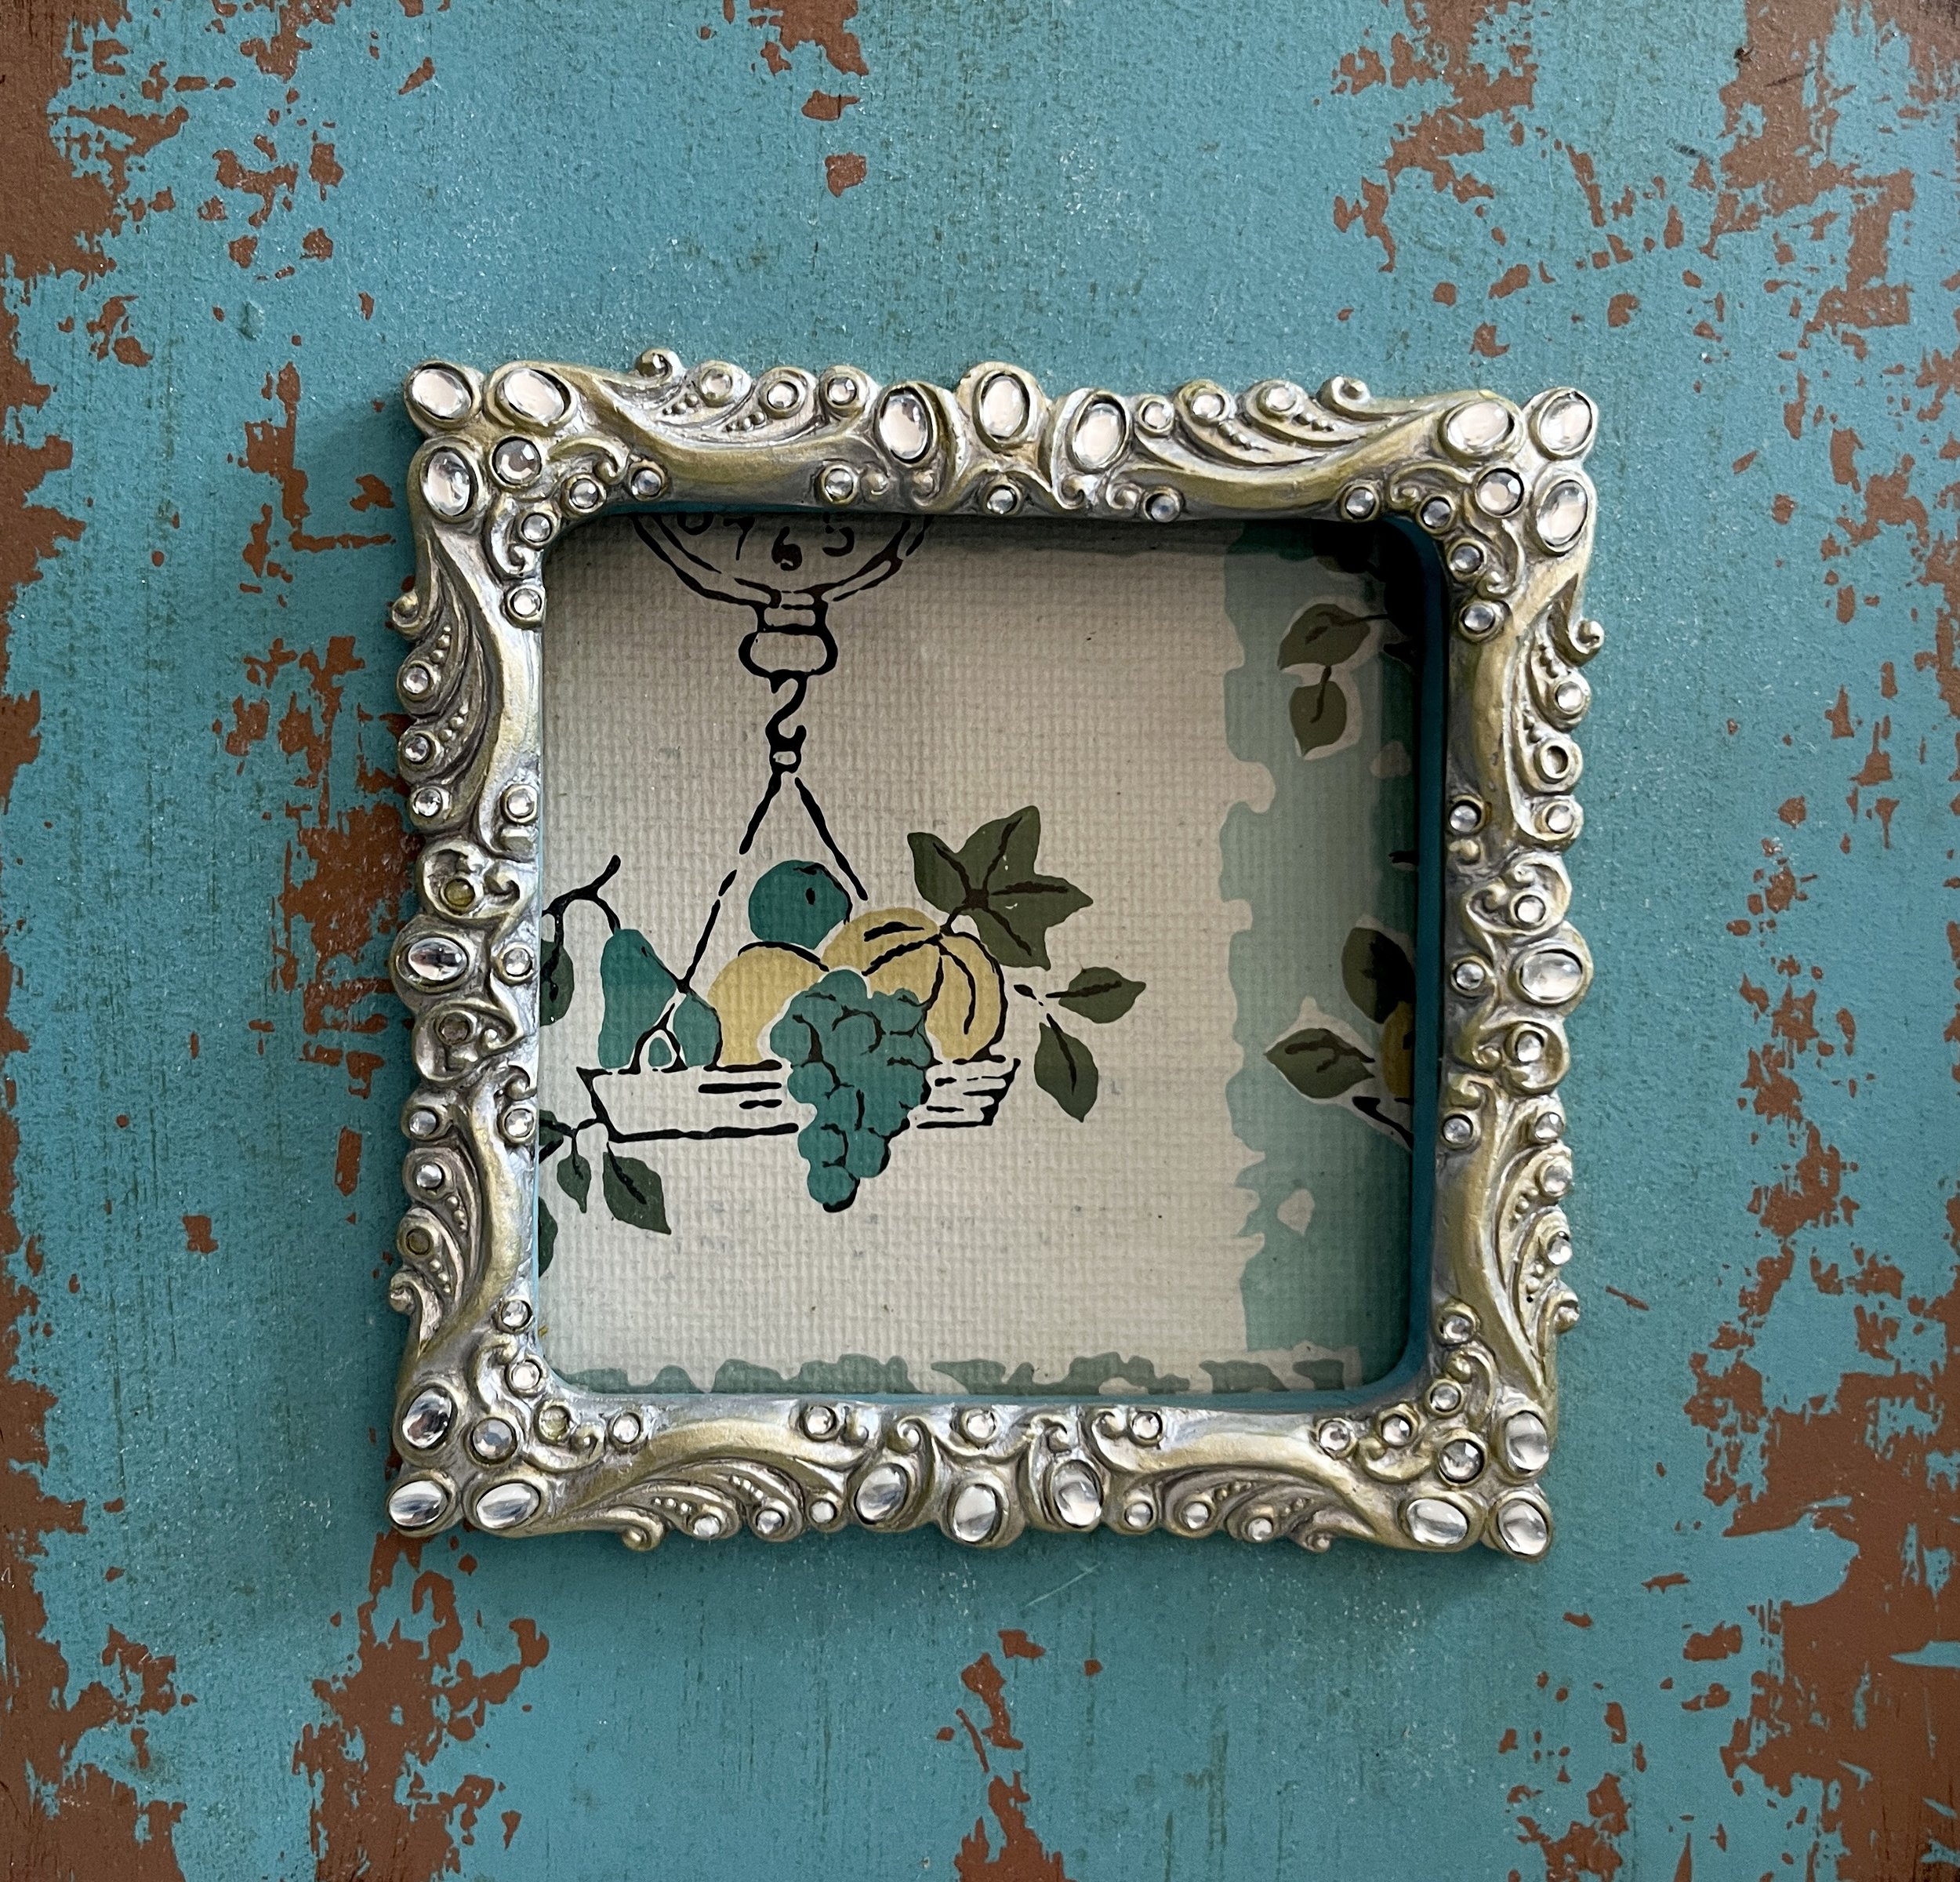
When we dug in, we found vintage wallpaper remnants under some of the upper cabinets. It was clearly a 1950s fruit pattern, so I imagine this is why the woodwork was originally painted teal even though the rest of the house trim was already painted white. As we peeled some of that old wallpaper away, I was quick to frame a small fragment.
Wall Removal
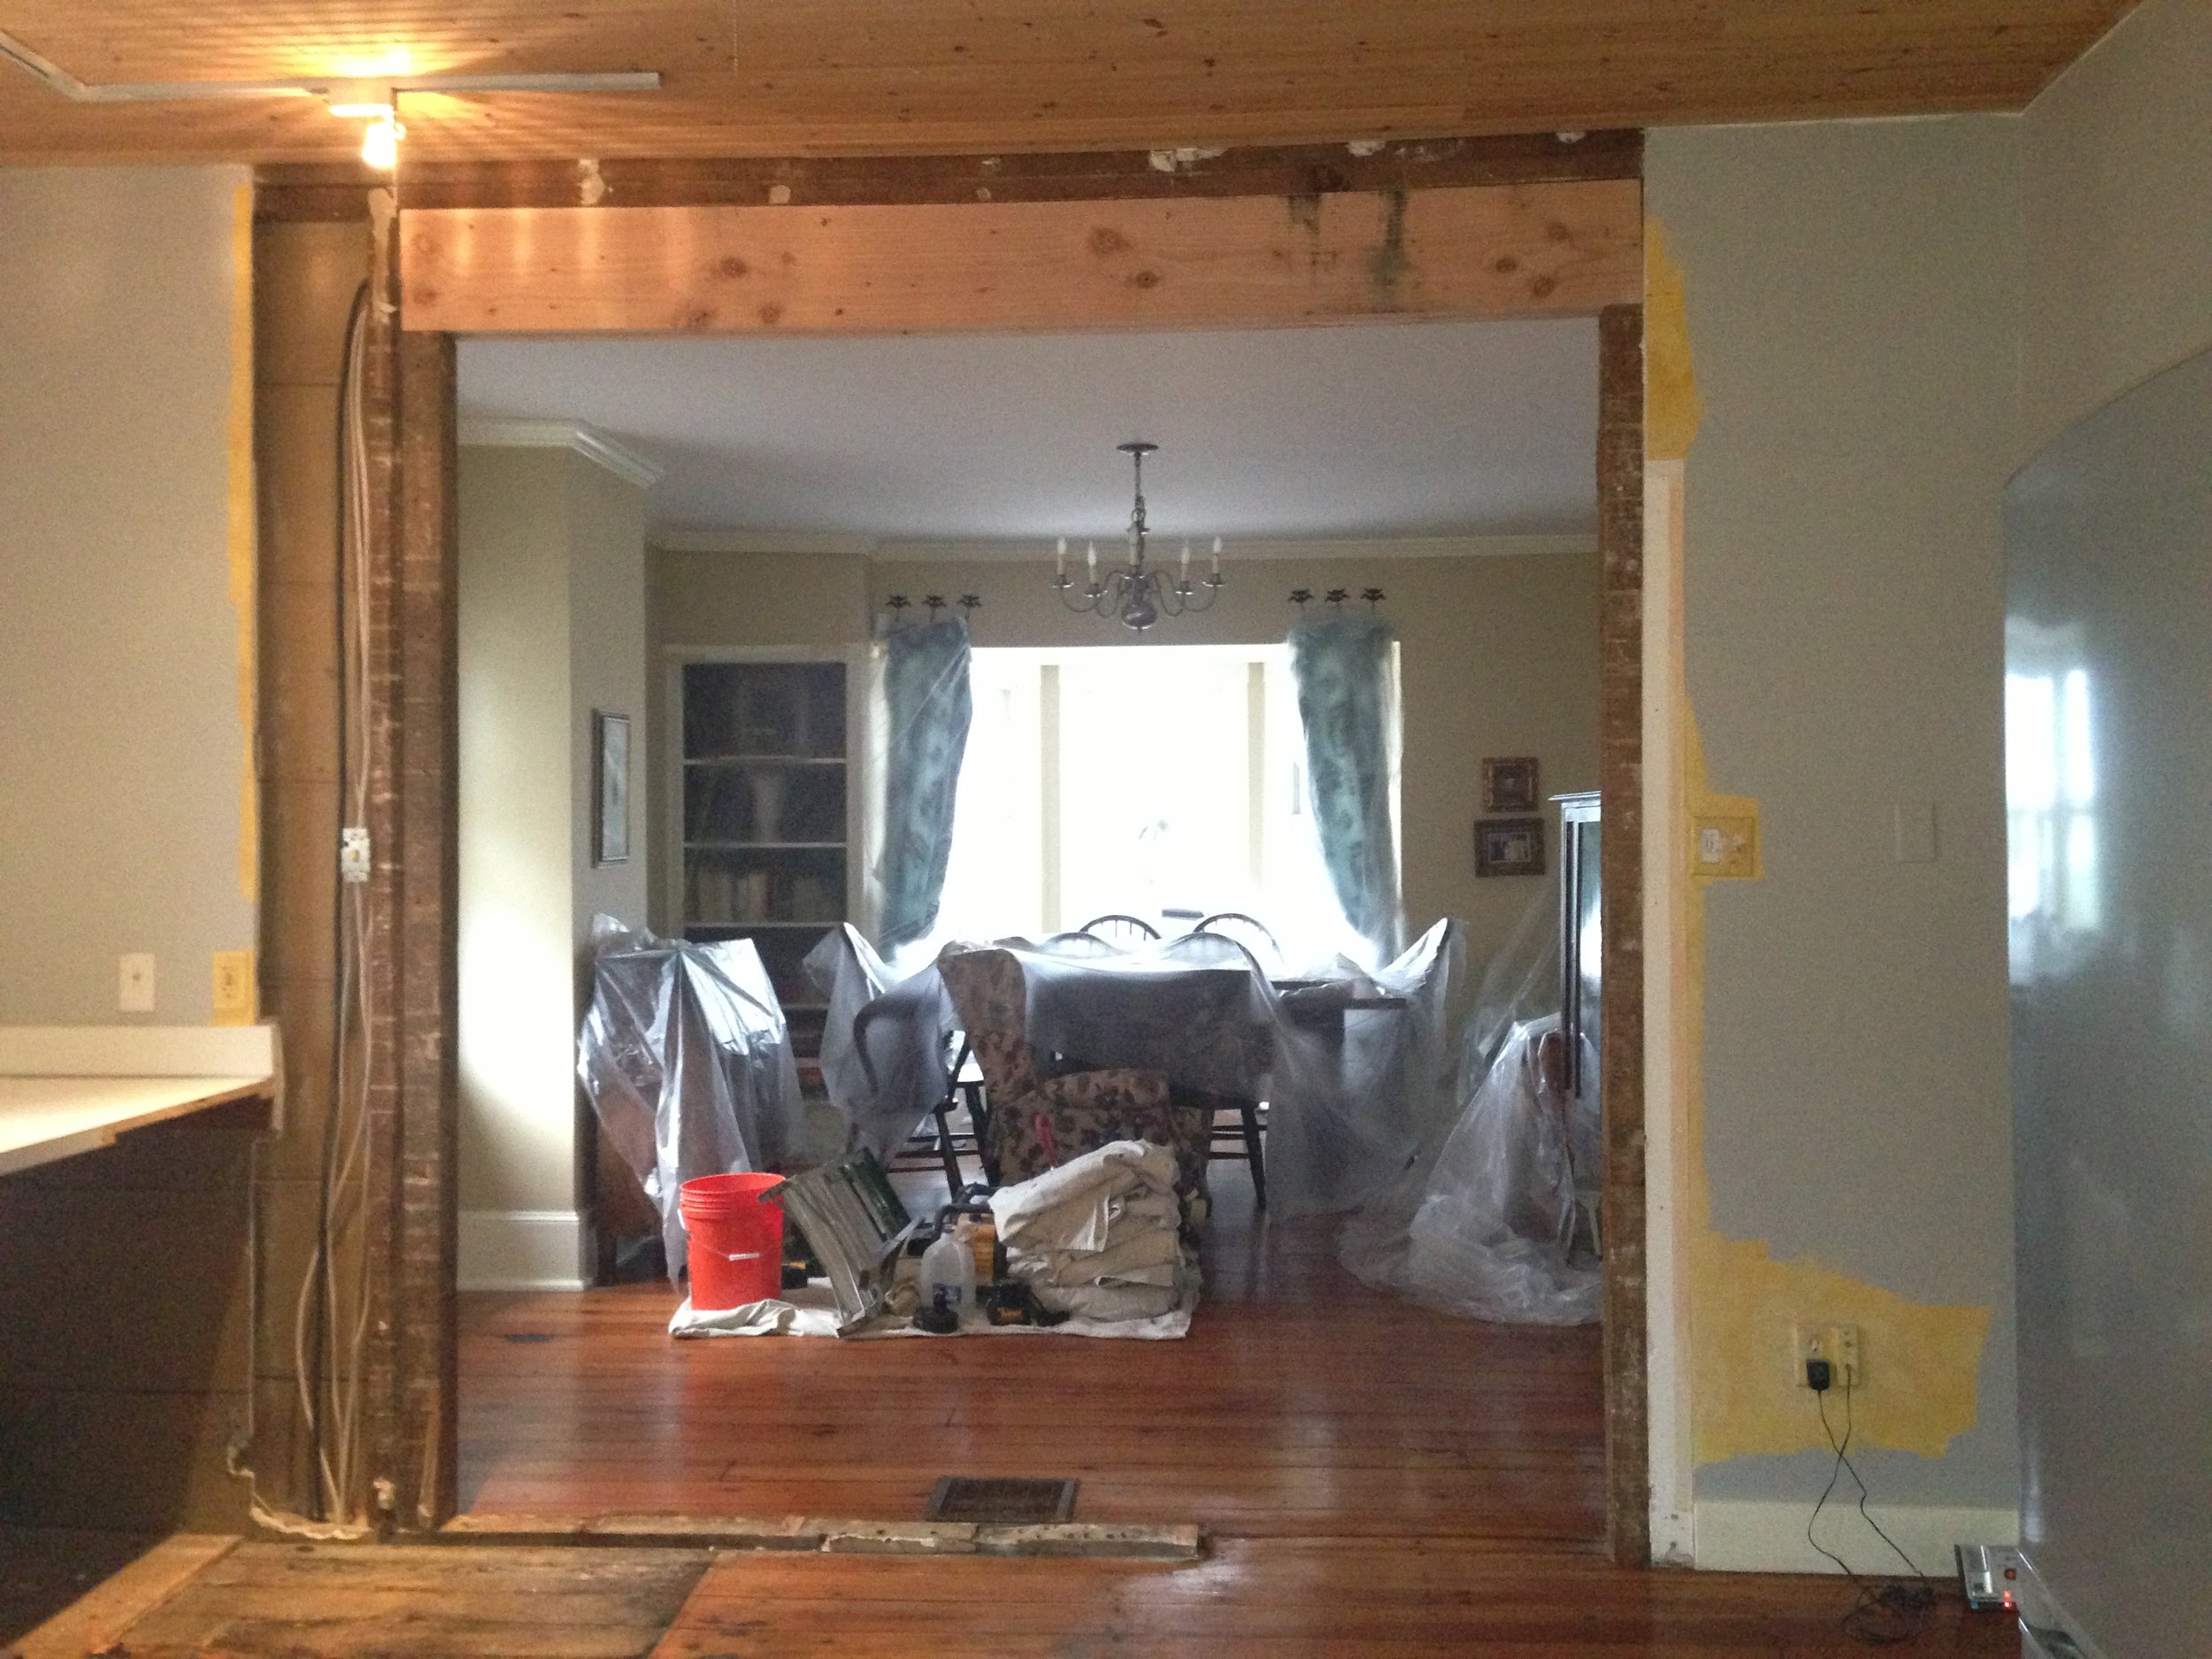
The biggest change: By far our best idea was to remove the entire wall that housed the refrigerator and a small doorway to the dining room. By far, it was the best idea for this kitchen and my husband gets all the credit for that one. In fact, he even designed the double french doors, window wall, and transom we have now.
Our contractor found horse hair used for insulation when he removed this wall and he needed to install a support beam so the rest of the house wouldn't come down. But other than that, the construction of this section went rather smoothly. We had to patch the hardwood floor in some places but opening this wall really created a new space for us which lets in much more natural light while the french doors still provide privacy when needed. If you’re thinking of doing something like this, be sure to use an insured contractor with a very good reputation, because you never know what you may find.


Kitchen IslanD
Flexible and Versitile: Because we opted for only one set of open shelves and no upper cabinets, we had to come up with farmhouse design ideas for storing unsightlies like water bottles, small dishes, and spices. This kitchen is not that big, therefore a large custom island with seating, as you see in modern kitchens, was out of the question. I wanted to find a solution that was versatile, movable, and ultimately removable if I someday grew tired of it and wanted to change my style.

So one day while thrifting with my sister-in-law, I came across an antique brown buffet that was narrow enough to fit the space but long and high enough to actually be useful. As luck would have it, it was half-price day, so I snagged it for under $200. We lived with it intact for a few years, until one day I brought out the brushes and painted the bottom white with a chalkboard painted top. The chalkboard black paint is almost the same tint as the new soapstone countertop which is from Bucks County Soapstone. I just love the way it looks plus it provides extra counter space. It’s “flexible” and it encourages much fun in the kitchen because we can write and draw on it when entertaining plus keeping the paint close at hand makes touch-ups easy. And if someday I find something better, I won’t have the price agony weighing me down.

Cabinet Repurposing
Big cost savings: We opted out of buying new custom cabinetry, and instead, reused the existing lower cabinets which originally spanned all four walls of the kitchen. However, in several places, we did have to completely disassemble some and piece them back together a little differently so that we could move around or eliminate appliances like the refrigerator and wall oven. We called it the great cabinet shuffle.

So I guess you could say we have some custom cabinetry in a sense as our contractor knocked out the rounded shelves and gave us a small storage space instead next to the range. He also rebuilt the cabinet under the main sink to accommodate the new stainless apron sink we wanted to add centered under the 3 windows (shown above) which existed before we arrived. We also repurposed some leftover upper open shelves (which were pretty ugly), transforming them into glass-fronted cabinets with crown molding as an accent above the range hood.
I found these glass doors below at an antique shop, and as I often do, I brought them home having no idea where I would use them. But when I discovered that they somehow fit the kitchen windows perfectly I used them to highlight the middle window and set it off above the sink. It reminds me of the open shutters I’ve seen in France. Some new hardware, a few antique accents, and a little white paint, and this old house was coming along nicely.

Coffee Bar
Using found objects: One side of the kitchen came with a small clean-up sink and dishwasher. It's a great bonus space that older farmhouses usually don't enjoy. In the original kitchen, the very old double wall oven used to be on the left, but with the renovation, we moved the refrigerator to that space and kept the little sink, dishwasher, and lower cabinets much the same. If you look closely you’ll see a window peeking out of the wall. That’s the kind of surprise that’s very exciting. I spent days trying to rearrange where the fridge could go so that I could expose that window because it looks right into the refurbished pantry. Finding this was so perfect, but I could not find another space for the fridge and so we had to sacrifice the window….for now.
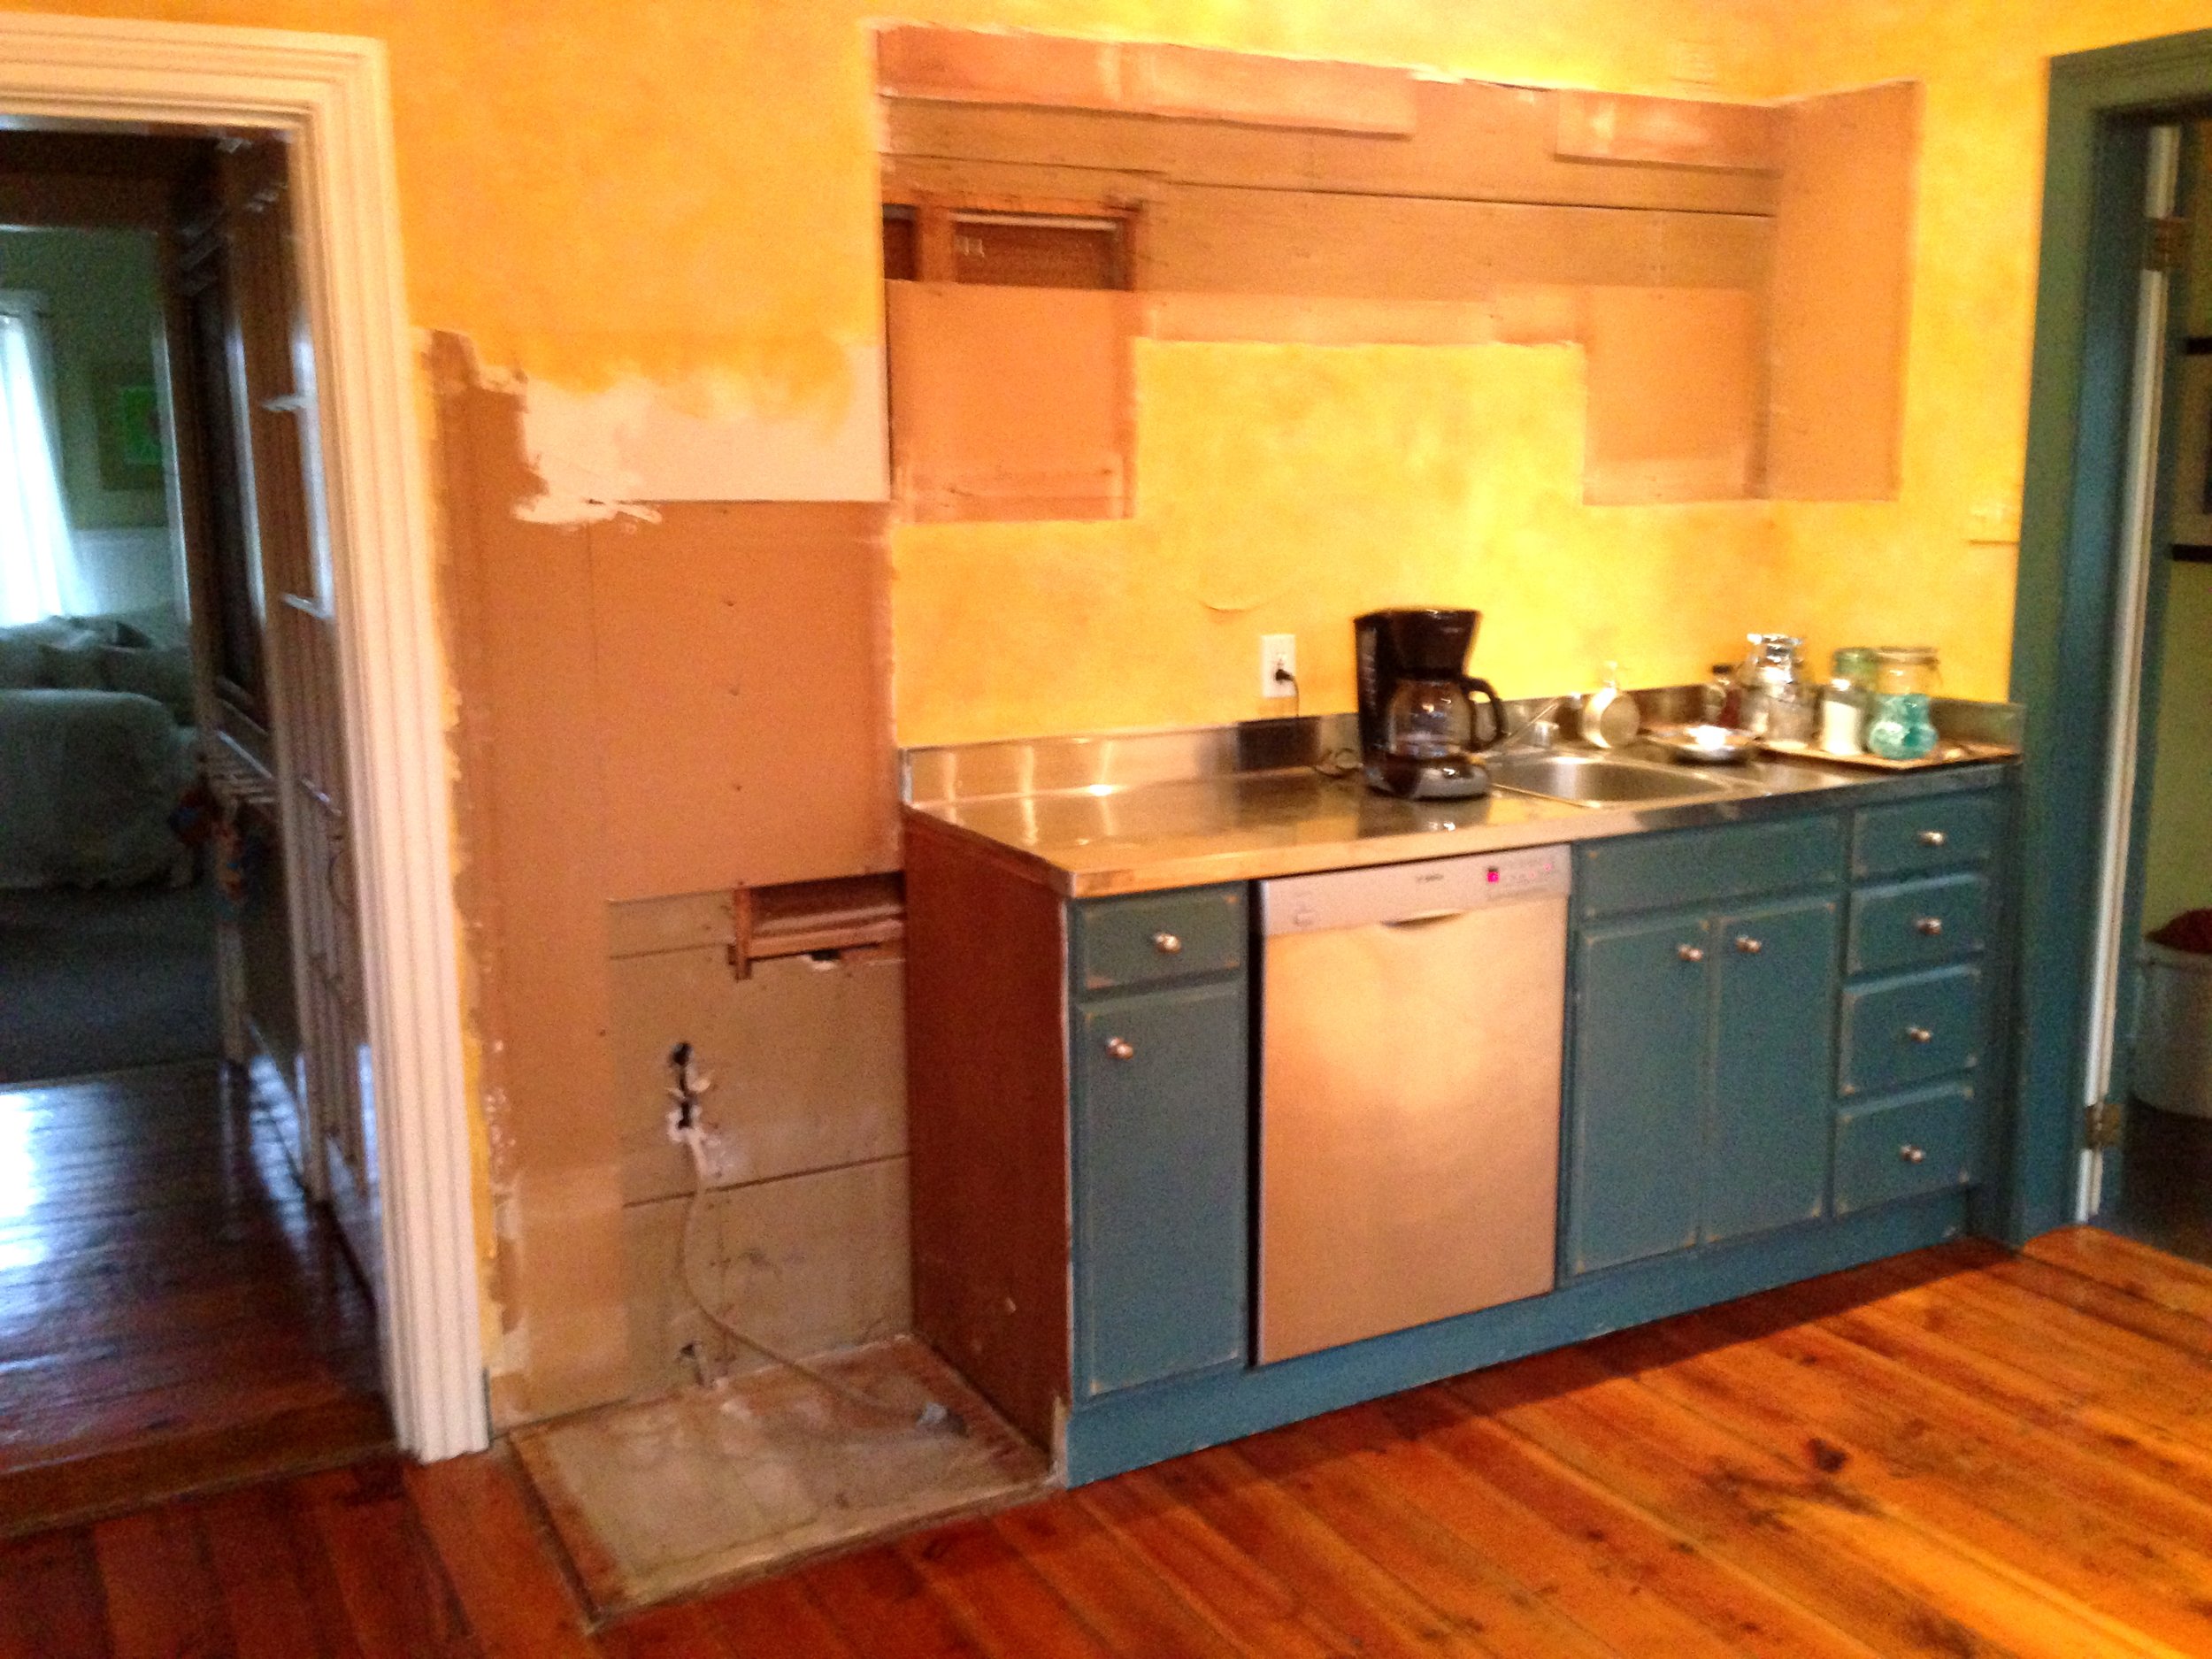

Since coffee is a big part of my mornings, we transformed this area into a little coffee bar. And what does every coffee bar need, but a big chunky mirror above it? This is my favorite part because the mirror I used didn't cost anything. In fact, I found the wooden frame alongside the road one day. It was just abandoned by its owner never to be used again, or so they thought. I grabbed it, cleaned it, painted it, took it to the local glass shop, and had it fitted with new antiqued mirror glass. Yes, this is something you can actually buy. I just love the way it turned out and how it fits perfectly in the space. It's a great way to repurpose an old frame that you can't part with and it’s a conversation piece for sure. Start hunting for yours.
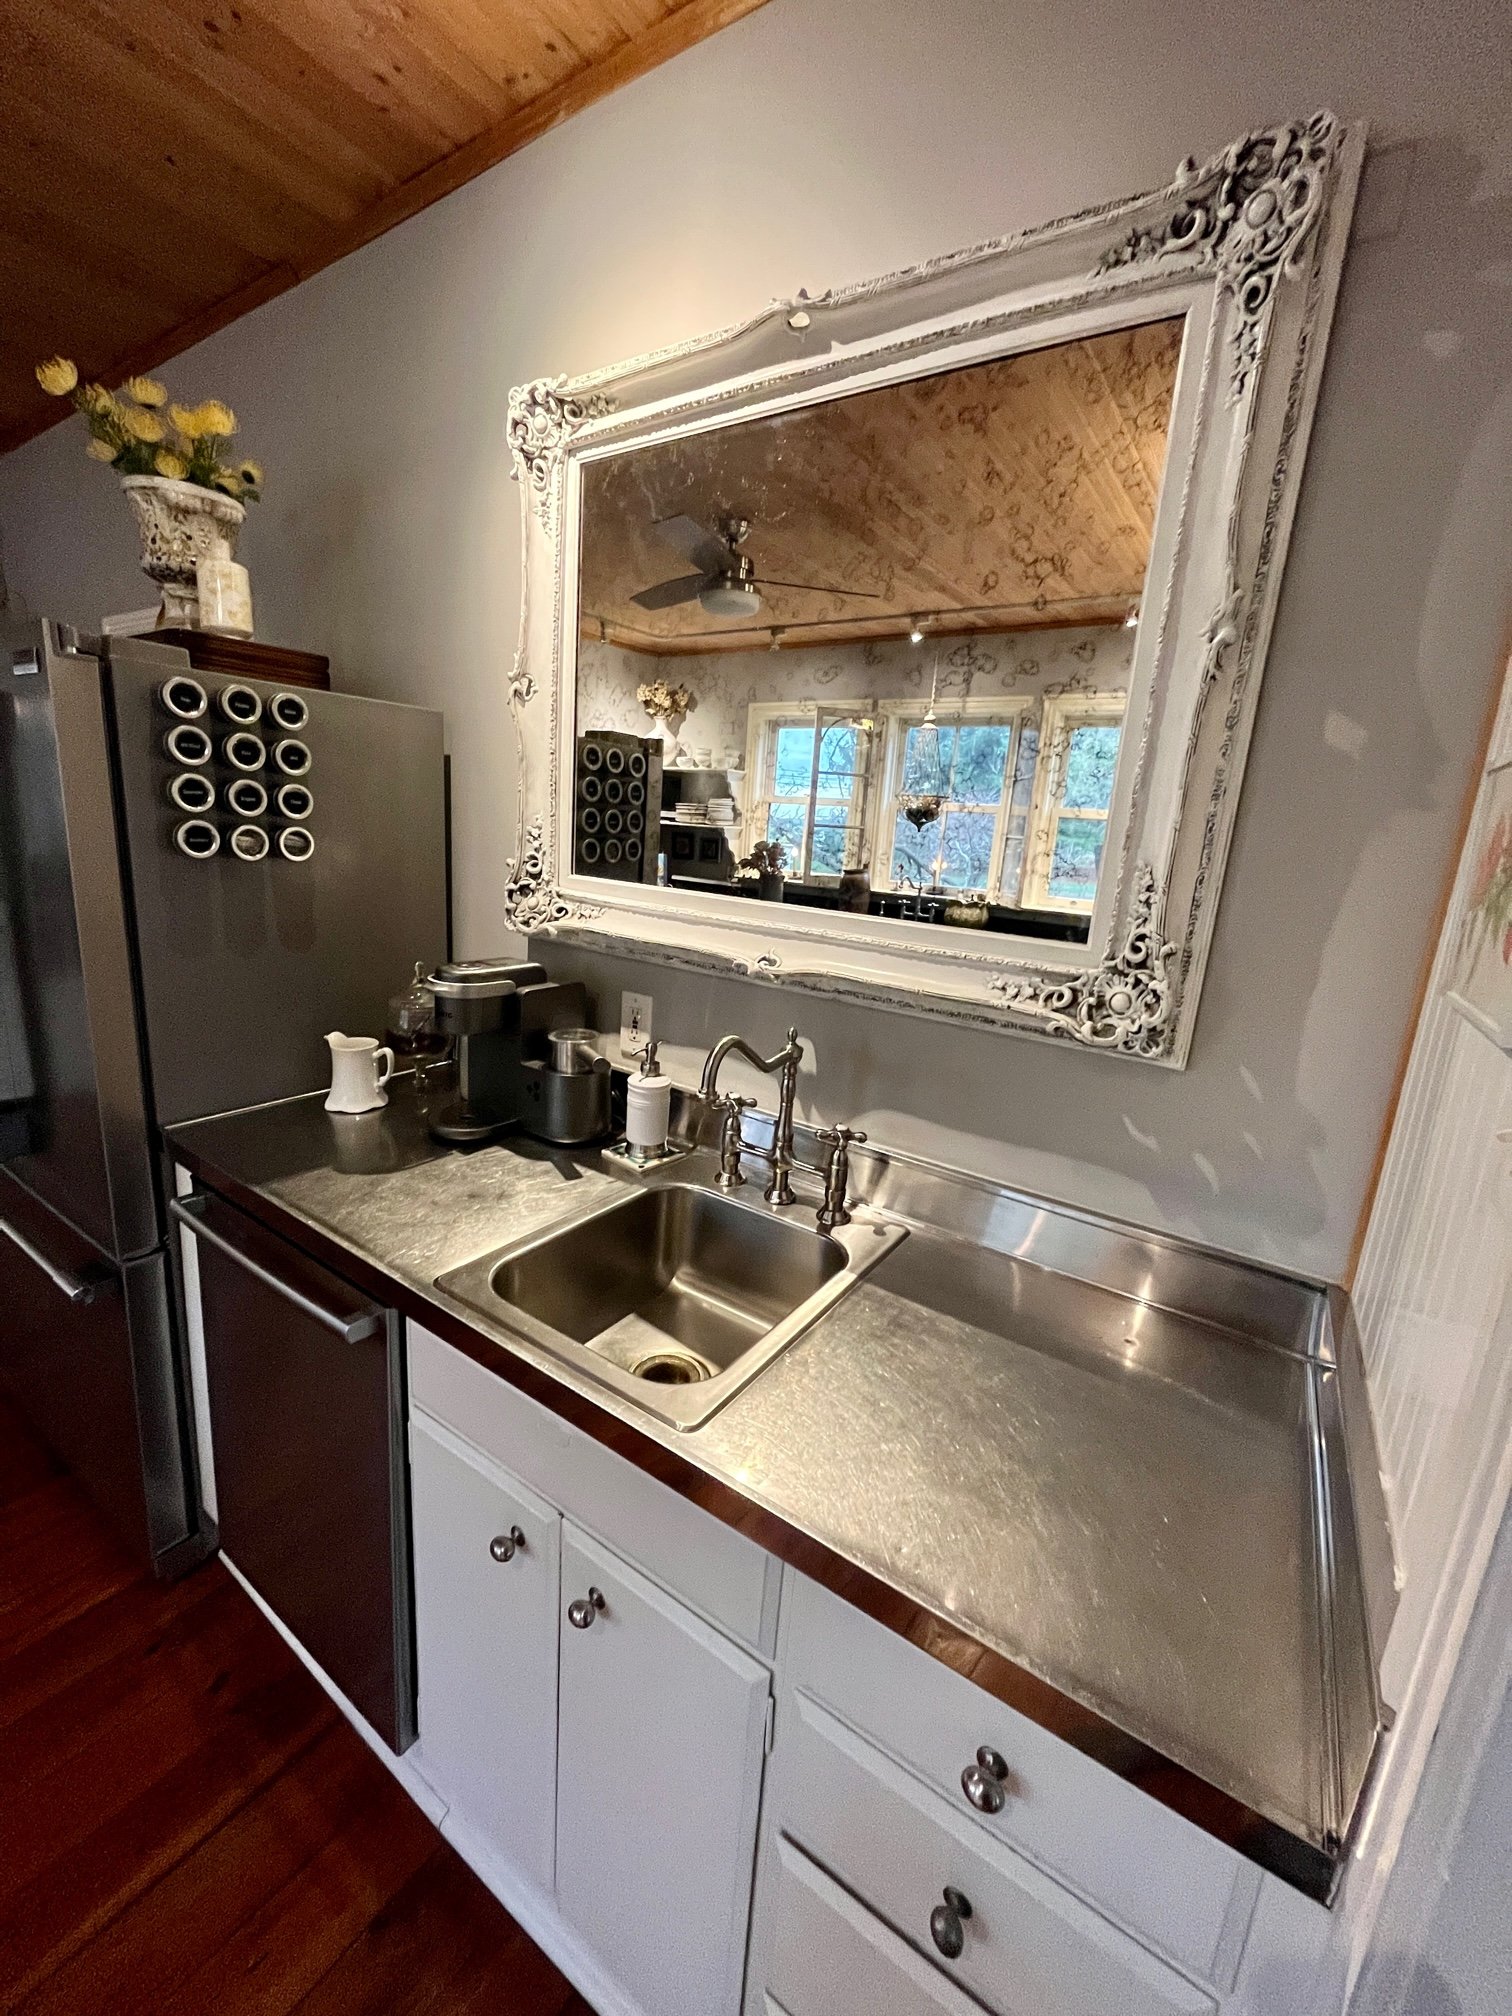
Here are a few detailed photos of the mirror, Kingston Brass faucet, magnetic spice tins, etc. You can find links to most of these items and/or items with similar styles on Studio Sprig’s Shop My Home page.

I like to keep a little vintage-style pitcher next to the coffee maker so that I can easily fill it. I store my coffee grounds in a pretty apothecary jar and I use a stainless, beaded scooper created by an artist at a craft fair. I’ve linked a really nice copper coffee scooper here. The apothecary jar and soap dispenser sit upon artistic tiles made by my children.
Glassware Storage
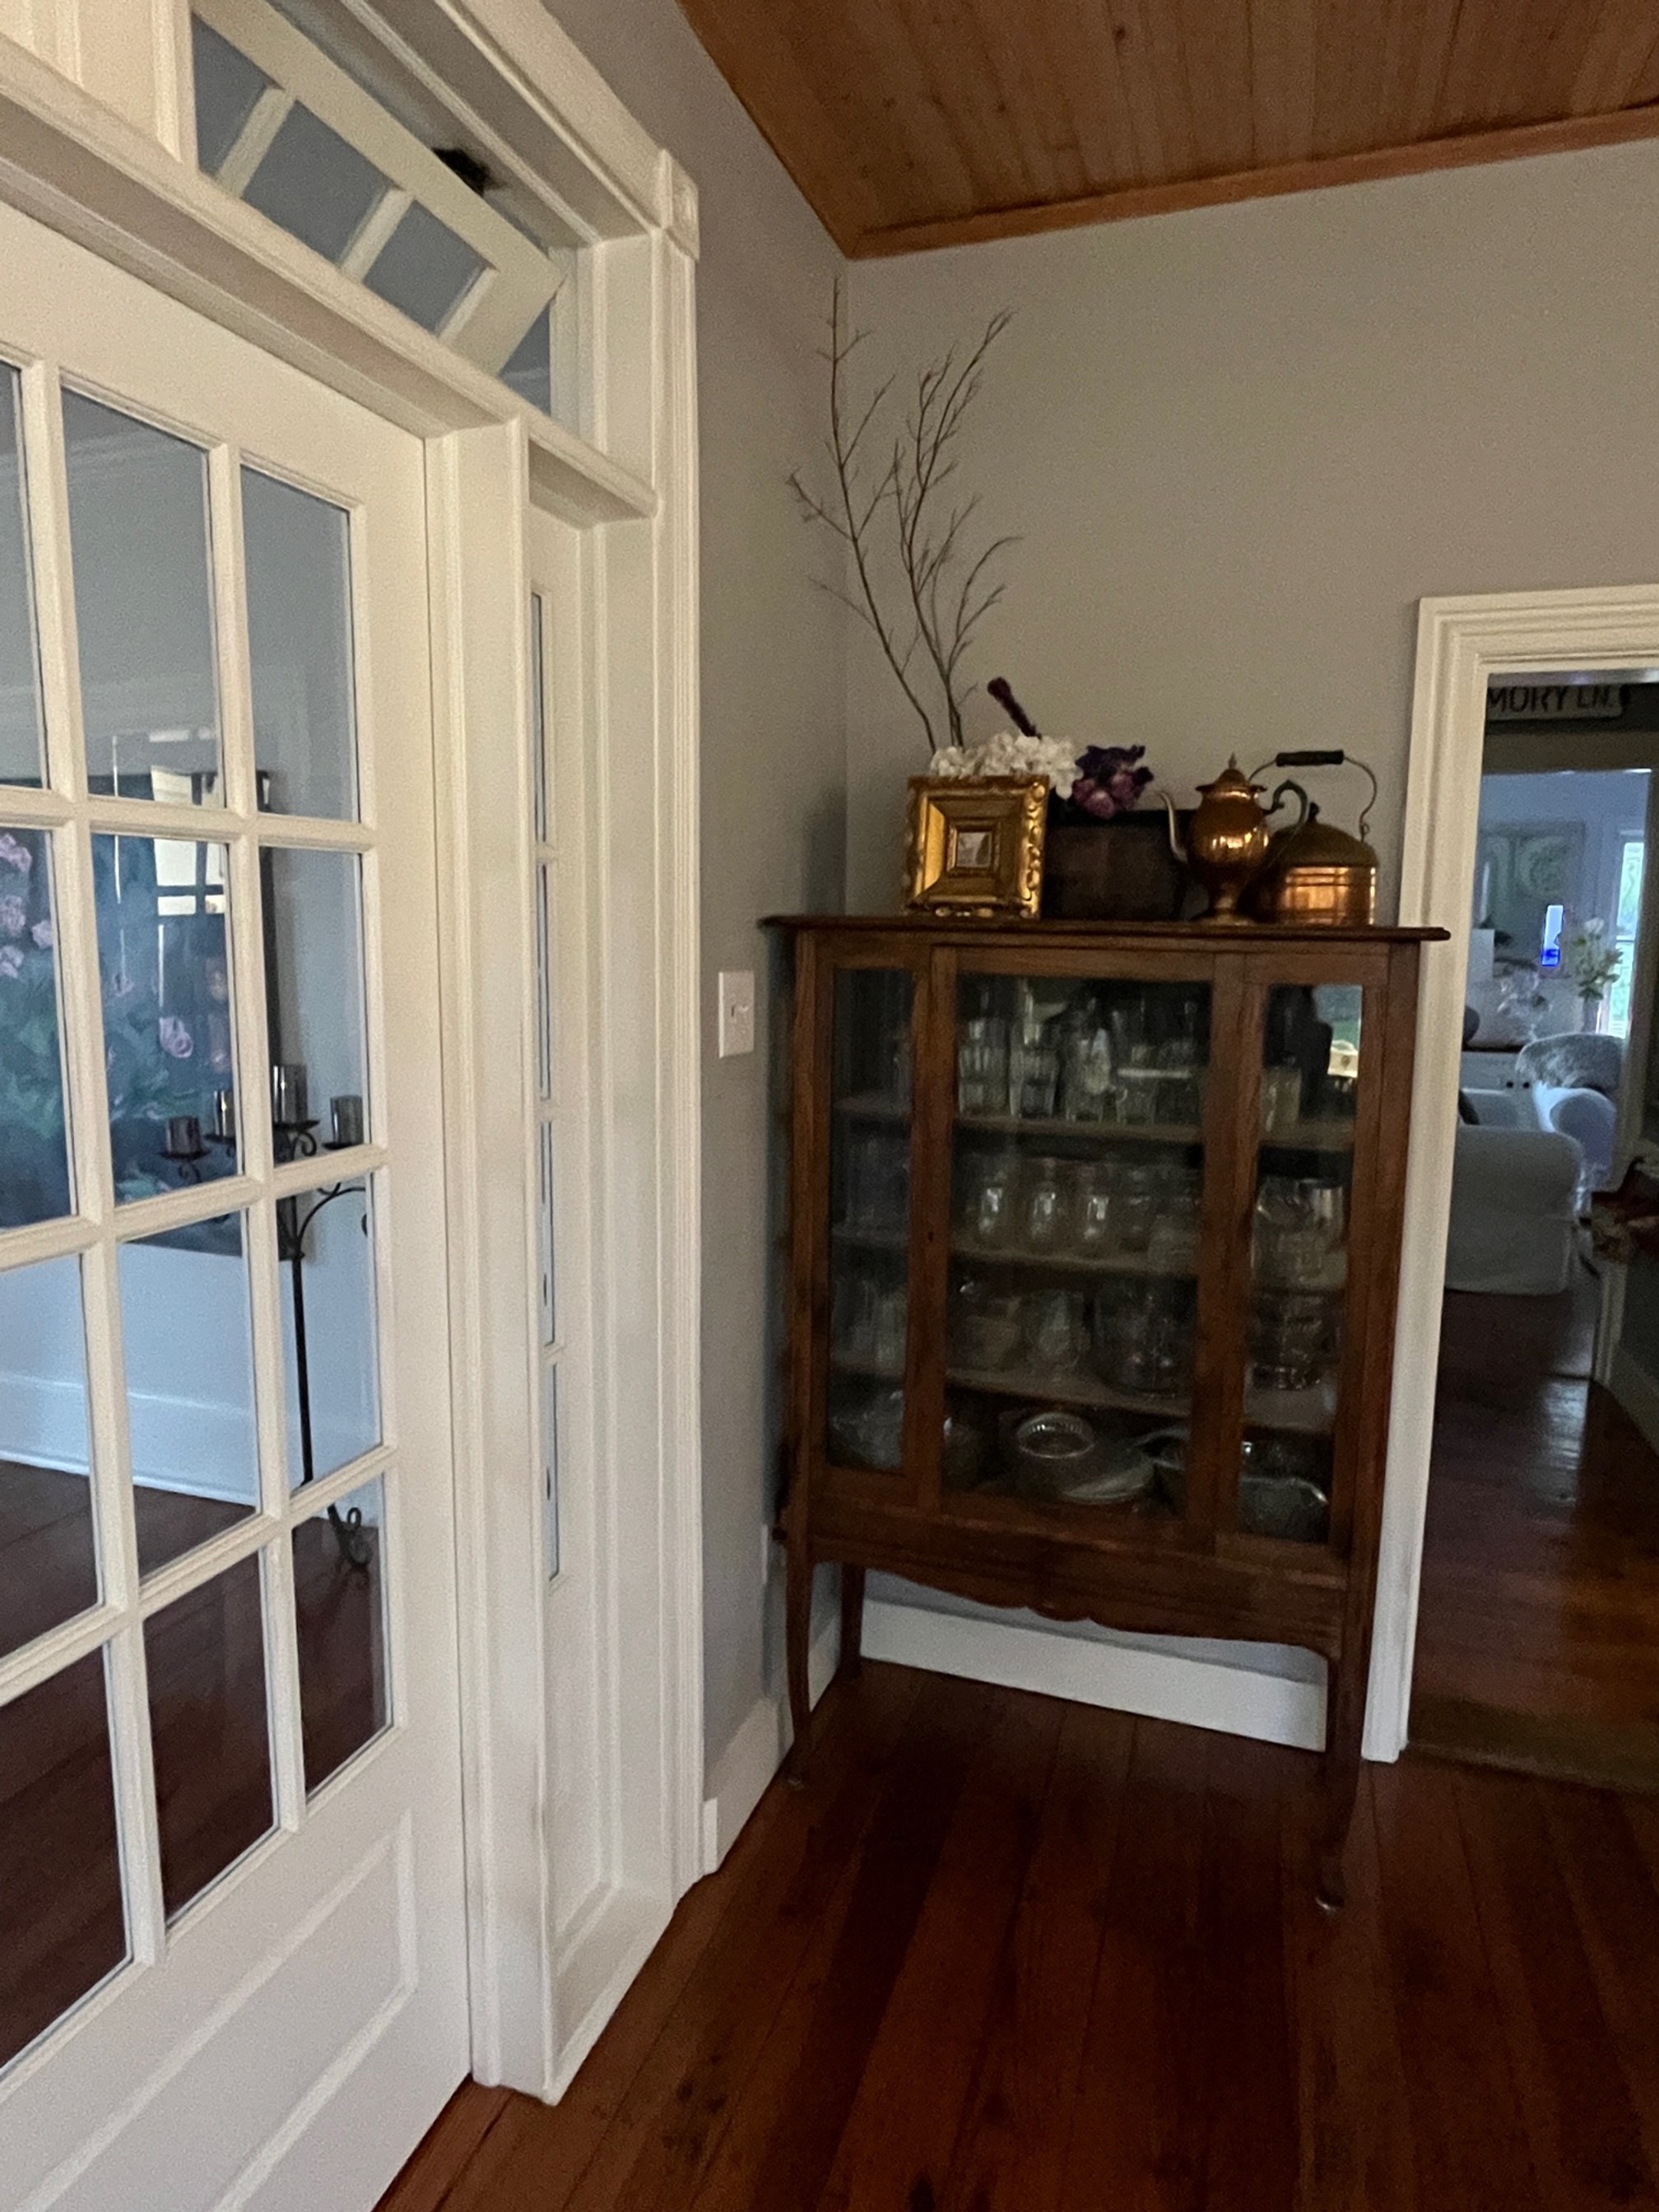
With the elimination of upper cabinets comes the realization that you'll need a place to put all of your glassware. Many years before purchasing this farmhouse, I purchased this delicate hutch at a yard sale. It was in great shape so I stripped the varnish and exposed the woodgrain as soon as I brought it home. It moved around inside various homes until finding a perfect vocation in this kitchen as the keeper of all things glass. Drinking glasses, glass bowls, glass dishes, and random glass items that need a place to perch.

There's a little section of wall where it fits very nicely and here it will undoubtedly remain forever, or until I change my mind. I like having all of my glassware in one perfect place and the glass doors encourage me to keep it neat and tidy.
Thank you for visiting my kitchen. If you are interested in some of the products or product styles we used, here is a pretty comprehensive list with links for your convenience. Shop my home. I am happy to answer any questions you may have about the transformation if you comment below. If you’re a blogger, what’s your favorite SEO Tool? I’ve had much keyword success with RankIQ. Learn more here.
Hi, I’m Kim. Welcome to Studio Sprig.
Kim Bensing’s original watercolors and designs are now available on wallpaper and fabric. To order visit Studio Sprig’s design library on Spoonflower. Contact me if you need assistance.
-
EVENTS
22
- Oct 23, 2026 Wrapped in Wonder: The Art of Giving a Gift Oct 23, 2026
- Sep 26, 2026 Homecoming Flowers: A Beautiful Tradition Then and Now Sep 26, 2026
- Sep 23, 2026 Choose Wedding Flowers With Meaning: How to Create a Bouquet That Tells Your Love Story Sep 23, 2026
- Sep 21, 2026 The Pre-Prom Tradition Every Mom Should Try: Host a Backyard Bouquet Party Sep 21, 2026
- Sep 18, 2026 Lambertville’s Halloween Magic: A Funky, Creative Rivertown Comes Alive Sep 18, 2026
- Aug 20, 2026 How to Host a Beautiful Flower Bar: The Ultimate DIY Flower Bar Party Guide Aug 20, 2026
- Aug 19, 2026 How to Decorate Cakes with Fresh Flowers: Floral Wreaths, Crowns & More Aug 19, 2026
- Aug 19, 2026 Decorating Cakes with Fresh Flowers Aug 19, 2026
- May 18, 2025 How to Make DIY Bouquets for Prom May 18, 2025
- May 7, 2025 How to Preserve and Use Your Spring Flowers - All Year Long May 7, 2025
- Feb 27, 2025 Get Excited for The Flower Show Feb 27, 2025
- Feb 14, 2025 Historic Castles. What are they used for? Feb 14, 2025
- Jan 31, 2025 Creative Ideas For Your Valentine Jan 31, 2025
- Jan 28, 2025 How An Invitation Can Tell Your Love Story Jan 28, 2025
- Jan 23, 2025 How to Design a Valentine Tree Jan 23, 2025
- Jan 16, 2025 Host a Fabulous Bouquet Bar for Valentine's Day Jan 16, 2025
- Apr 4, 2023 Why Choose Seasonal Flowers for Your Special Occasion? Apr 4, 2023
- Feb 1, 2023 10 Ideas for an Eco-Friendly Event or Wedding Feb 1, 2023
- Nov 14, 2022 A Family Tree Inspired Wedding Invitation Nov 14, 2022
- Oct 3, 2022 How to choose flowers that have sentimental meaning Oct 3, 2022
- Nov 9, 2020 Simplified Wedding Ceremony during Covid Nov 9, 2020
- Apr 2, 2019 Why You Should Choose Seasonal Prom Flowers Apr 2, 2019
-
HOME
23
- Sep 9, 2026 How to Name a Farm: 10 Meaningful Ideas for Creating a Name With a Story Sep 9, 2026
- Sep 1, 2026 How to Preserve Flowers for Creative Projects Sep 1, 2026
- Jul 2, 2026 How to make your own flower confetti Jul 2, 2026
- Apr 22, 2025 How We Painted our Barn Apr 22, 2025
- Apr 16, 2025 What to Plant for Mesmerizing Spring Blooms Apr 16, 2025
- Apr 8, 2025 Narcissus AKA Daffodil - What's Blooming at Studio Sprig Apr 8, 2025
- Apr 1, 2025 Glory-of-the-Snow - What's Blooming at Studio Sprig Apr 1, 2025
- Mar 19, 2025 How we turned an Artist Studio into a Weekend Retreat Mar 19, 2025
- Mar 12, 2025 The Mighty Crocus - First to Bloom - What's Blooming at Studio Sprig Mar 12, 2025
- Jan 23, 2025 How to Design a Valentine Tree Jan 23, 2025
- Jan 16, 2025 Host a Fabulous Bouquet Bar for Valentine's Day Jan 16, 2025
- Jan 9, 2025 How to Make Your Own Mint Tea Jan 9, 2025
- Jan 7, 2025 How To Create A Courtyard Jan 7, 2025
- Jan 2, 2025 How to Create a Stunning Centerpiece Jan 2, 2025
- Mar 27, 2023 How We Transformed Our Farmhouse Kitchen by Reusing, Updating, and Thrifting: (Coffee Bar) Mar 27, 2023
- Mar 27, 2023 How We Transformed Our Farmhouse Kitchen by Reusing, Updating, and Thrifting Mar 27, 2023
- Mar 1, 2023 How and Why We Love Historic Homes Mar 1, 2023
- Jan 3, 2023 Eliminate Sneaky Sugars Jan 3, 2023
- Dec 14, 2022 How to Create a Pretty Mini Bar with Items You Already Own Dec 14, 2022
- Nov 21, 2022 Friendsgiving At Our Farm Nov 21, 2022
- Nov 9, 2022 Herbs: How to Grow, Harvest and Dry Your Own Nov 9, 2022
- Nov 9, 2022 DIY Herb Drying Rack: Herb Drying at Home Nov 9, 2022
- Oct 12, 2022 Have you ever thought about creating a beautiful water feature? Oct 12, 2022
-
STYLE
27
- Oct 6, 2026 Where Flowers Become Art, Experiences & Memories Oct 6, 2026
- Sep 1, 2026 How to Preserve Flowers for Creative Projects Sep 1, 2026
- Aug 20, 2026 How to Host a Beautiful Flower Bar: The Ultimate DIY Flower Bar Party Guide Aug 20, 2026
- Aug 19, 2026 How to Decorate Cakes with Fresh Flowers: Floral Wreaths, Crowns & More Aug 19, 2026
- Aug 19, 2026 Decorating Cakes with Fresh Flowers Aug 19, 2026
- Jul 2, 2026 How to make your own flower confetti Jul 2, 2026
- Nov 3, 2025 Creating a Pressed Flower Frame Nov 3, 2025
- May 7, 2025 How to Preserve and Use Your Spring Flowers - All Year Long May 7, 2025
- Jan 28, 2025 How An Invitation Can Tell Your Love Story Jan 28, 2025
- Jan 23, 2025 How to Design a Valentine Tree Jan 23, 2025
- Jan 6, 2025 How to Create Oyster Shell Necklaces Jan 6, 2025
- Jan 2, 2025 How to Create a Stunning Centerpiece Jan 2, 2025
- Mar 14, 2023 How to Make Sentimental Easter Eggs Mar 14, 2023
- Mar 6, 2023 How to Enjoy The PHS Philadelphia Flower Show Mar 6, 2023
- Feb 13, 2023 Let's Save The Bees Feb 13, 2023
- Feb 1, 2023 10 Ideas for an Eco-Friendly Event or Wedding Feb 1, 2023
- Jan 12, 2023 A Great Way to Help Kids with Cancer (PENN STATE) Jan 12, 2023
- Dec 14, 2022 How to Create a Pretty Mini Bar with Items You Already Own Dec 14, 2022
- Nov 29, 2022 Lunch and Dinner -Studio Sprig Style Micro Blog Nov 29, 2022
- Nov 14, 2022 A Family Tree Inspired Wedding Invitation Nov 14, 2022
- Nov 9, 2022 DIY Herb Drying Rack: Herb Drying at Home Nov 9, 2022
- Oct 30, 2022 Lambertville, Nj , A Funky, Cool Rivertown You Must Visit on Halloween. Oct 30, 2022
- Oct 19, 2022 How to choose an interesting place to stay when you travel or go on vacation Oct 19, 2022
- Oct 12, 2022 Have you ever thought about creating a beautiful water feature? Oct 12, 2022
- Oct 3, 2022 How to choose flowers that have sentimental meaning Oct 3, 2022
- Feb 1, 2021 How to design marketing materials for your small business Feb 1, 2021
- Oct 29, 2020 Surprise the bride when you can't come to her wedding Oct 29, 2020