

How An Invitation Can Tell Your Love Story
Today it seems most big events have a theme or a distinguishing thread that evokes an emotion or tells a story. However, not everyone wants a theme. Instead…

Should Everyone have A Wedding Theme?
Today it seems most big events have a theme or a distinguishing thread that evokes an emotion or tells a story. However, not everyone wants a theme. Instead, you may have a small vision board, colors, or floral suggestions representing how you see your event unfolding. Here is how adding a touch of creativity to your existing idea can help you tell your love story in an interesting way.

what is your Love Story?
Most couples do not come to me with a theme, instead, they have some sort of special love story that they want to tell. Occasionally these stories are very unique, but more often than not the love stories are pretty typical.
This was the situation with Marisa and Corey. When they asked me to design their wedding invitation, they did not have a theme. They met while at Kutztown University, had dated for a few years, got engaged, and were now planning their wedding. So they hired me to find a way to tell their love story compellingly and creatively.

Designing A Love Story
Right from the start, Marisa and Corey knew they wanted sunflowers to be their wedding flower. These were the perfect choice because they are lovely to work with and very much in season in mid-August. Aside from being big, bold, and beautiful, sunflowers represent adoration and loyalty, so I thought they were a good start for a wedding invitation concept.

Step 1: Develop an interesting concept
I began this design project by writing a short poem about an adoring couple of sunflowers. Sunflowers needed to be the main characters so I broke the poem into three parts and began by designing the bright yellow text pages of this 8-page invitation book. Writing the poem text helped me develop the concept, in this case, the Sunflower.
Sunflower Concept: Although we often fall for surface beauty, it’s what’s underneath that’s important.
Here is the poem:
“A little bloom peeked out today, out of the earth and far away another bloom about the same came up to dance and feel the rain. They sunned and soared but always two, for each, alone, had much to do.”
“And then one day the sun went down, they looked beneath the garden’s ground. Below the tangled leaves they saw, inside the dirt, no light at all.”
“It’s not the beauty we can see, or bright, rich colors calling thee, It’s underneath and deep inside, undying love that’s true and tried.”

Step 2: Capture compelling Images
To capture the proper images to match the poem, I hired a renowned local watercolor illustrator, Jane Ramsey. Jane illustrated each poem’s page perfectly. I then brought her illustrations into my design program and gave each a thin border for definition. This helped define each sunflower illustration on the page opposite its corresponding bright yellow text page in the book.

Step 3: A good title says it all
The title “Intertwined” is centered on a deep soil-like background on the cover of this book. A small paper sunflower tied with a delicate string of raffia dangled over the saddle-stitched spine. All the pages were printed and bound by a professional printer. This book was the first thing guests saw when they slid open the invitation suite. The full suite consists of the love storybook, the loose wedding invitation that slides out of an envelope glued to the back inside of this book, a custom-designed response card, an accommodation card, and an envelope. You can see the full design and other love stories in my portfolio here.

designing your own concept invitation
If you want to tell your love story creatively, choose blooms, colors, or something special that embodies your emotions, and find a designer who can convey your heartfelt message to guests in a creative way.


Kim Bensing is the creative director behind Studio Sprig at Windy Hill. With the help of her 19th-century farmhouse and its vintage gardens, she shares floral styling strategies, custom stationery concepts, home DIY inspiration, and a new line of wallpaper and fabric designs. Join her on her artist's journey, one project at a time! Subscribe here

How to Design a Valentine Tree

Why I Designed a Tree FIlled with Love
As the Christmas season was coming to an end, I decided I wanted to enjoy our pretty tree a little longer. I knew I could get away with keeping our faux Balsam Hill Pine up through January dressed in its wintery guise, but what excuse did February have? That’s why, this year, I created a Valentine's Tree. Read on to see how I did it.

Transitioning a Christmas Tree
We created a pretty simple Christmas tree this year so the transition was easy. I first removed all of the Christmas balls but kept all the white lights and icicles. This step was very quick and with a semi-bare tree, I was able to then plan for February-appropriate decor.
Making a Valentine's Tree Topper
I considered keeping our glowing Moravian Star tree topper but decided that a Valentine's tree needed to better reflect Valentine’s Day. I considered a grapevine heart wreath covered in dried flowers but decided I’d like to just use found materials and make my own. This is how I did it.

Start with a basic shape
I took an old cardboard box and cut two identical free-form hearts. I then hot-glued a 10” doubled-up piece of floral wire about 4” deep inside the two panels and extended it out the bottom, so that I’d have something to wrap around the tree’s top branch. If I do it again, I will also extend the wire from each side so the heart has more stability when topping the tree.
Once the wire is secured, hot glue the hearts together. This step helps the topper to be more ridged and stable.

Designing the front of your heart topper
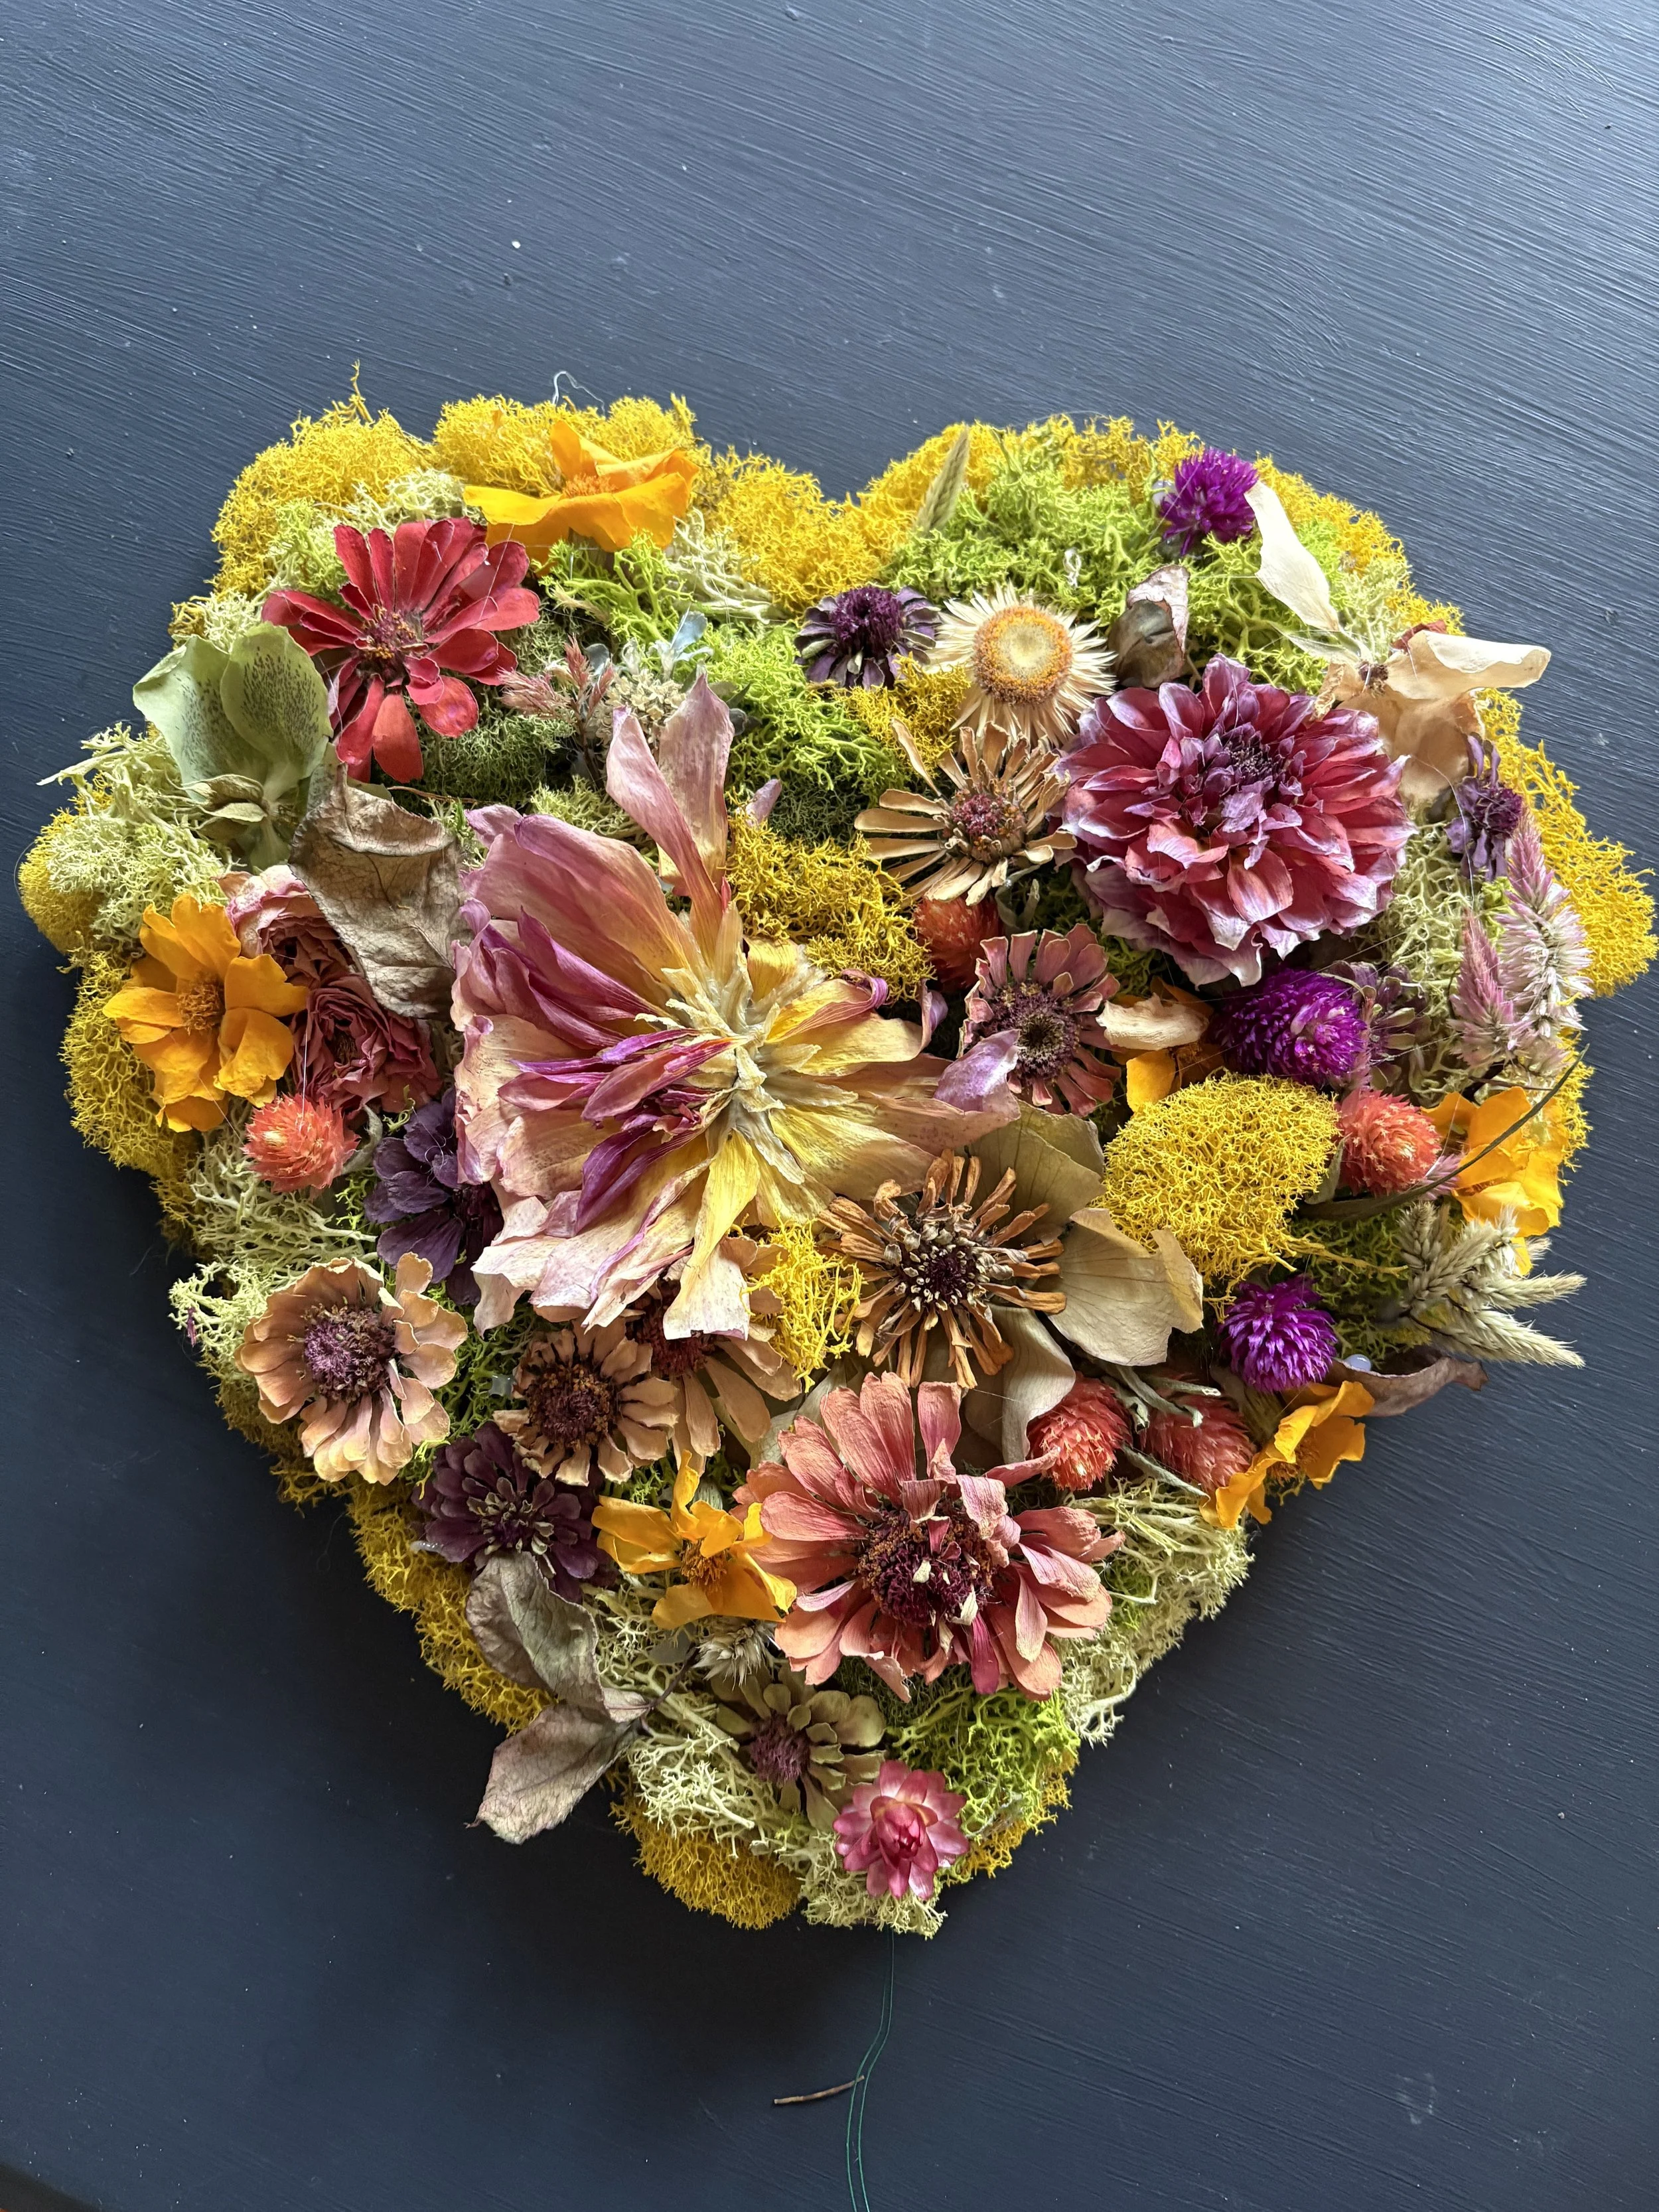
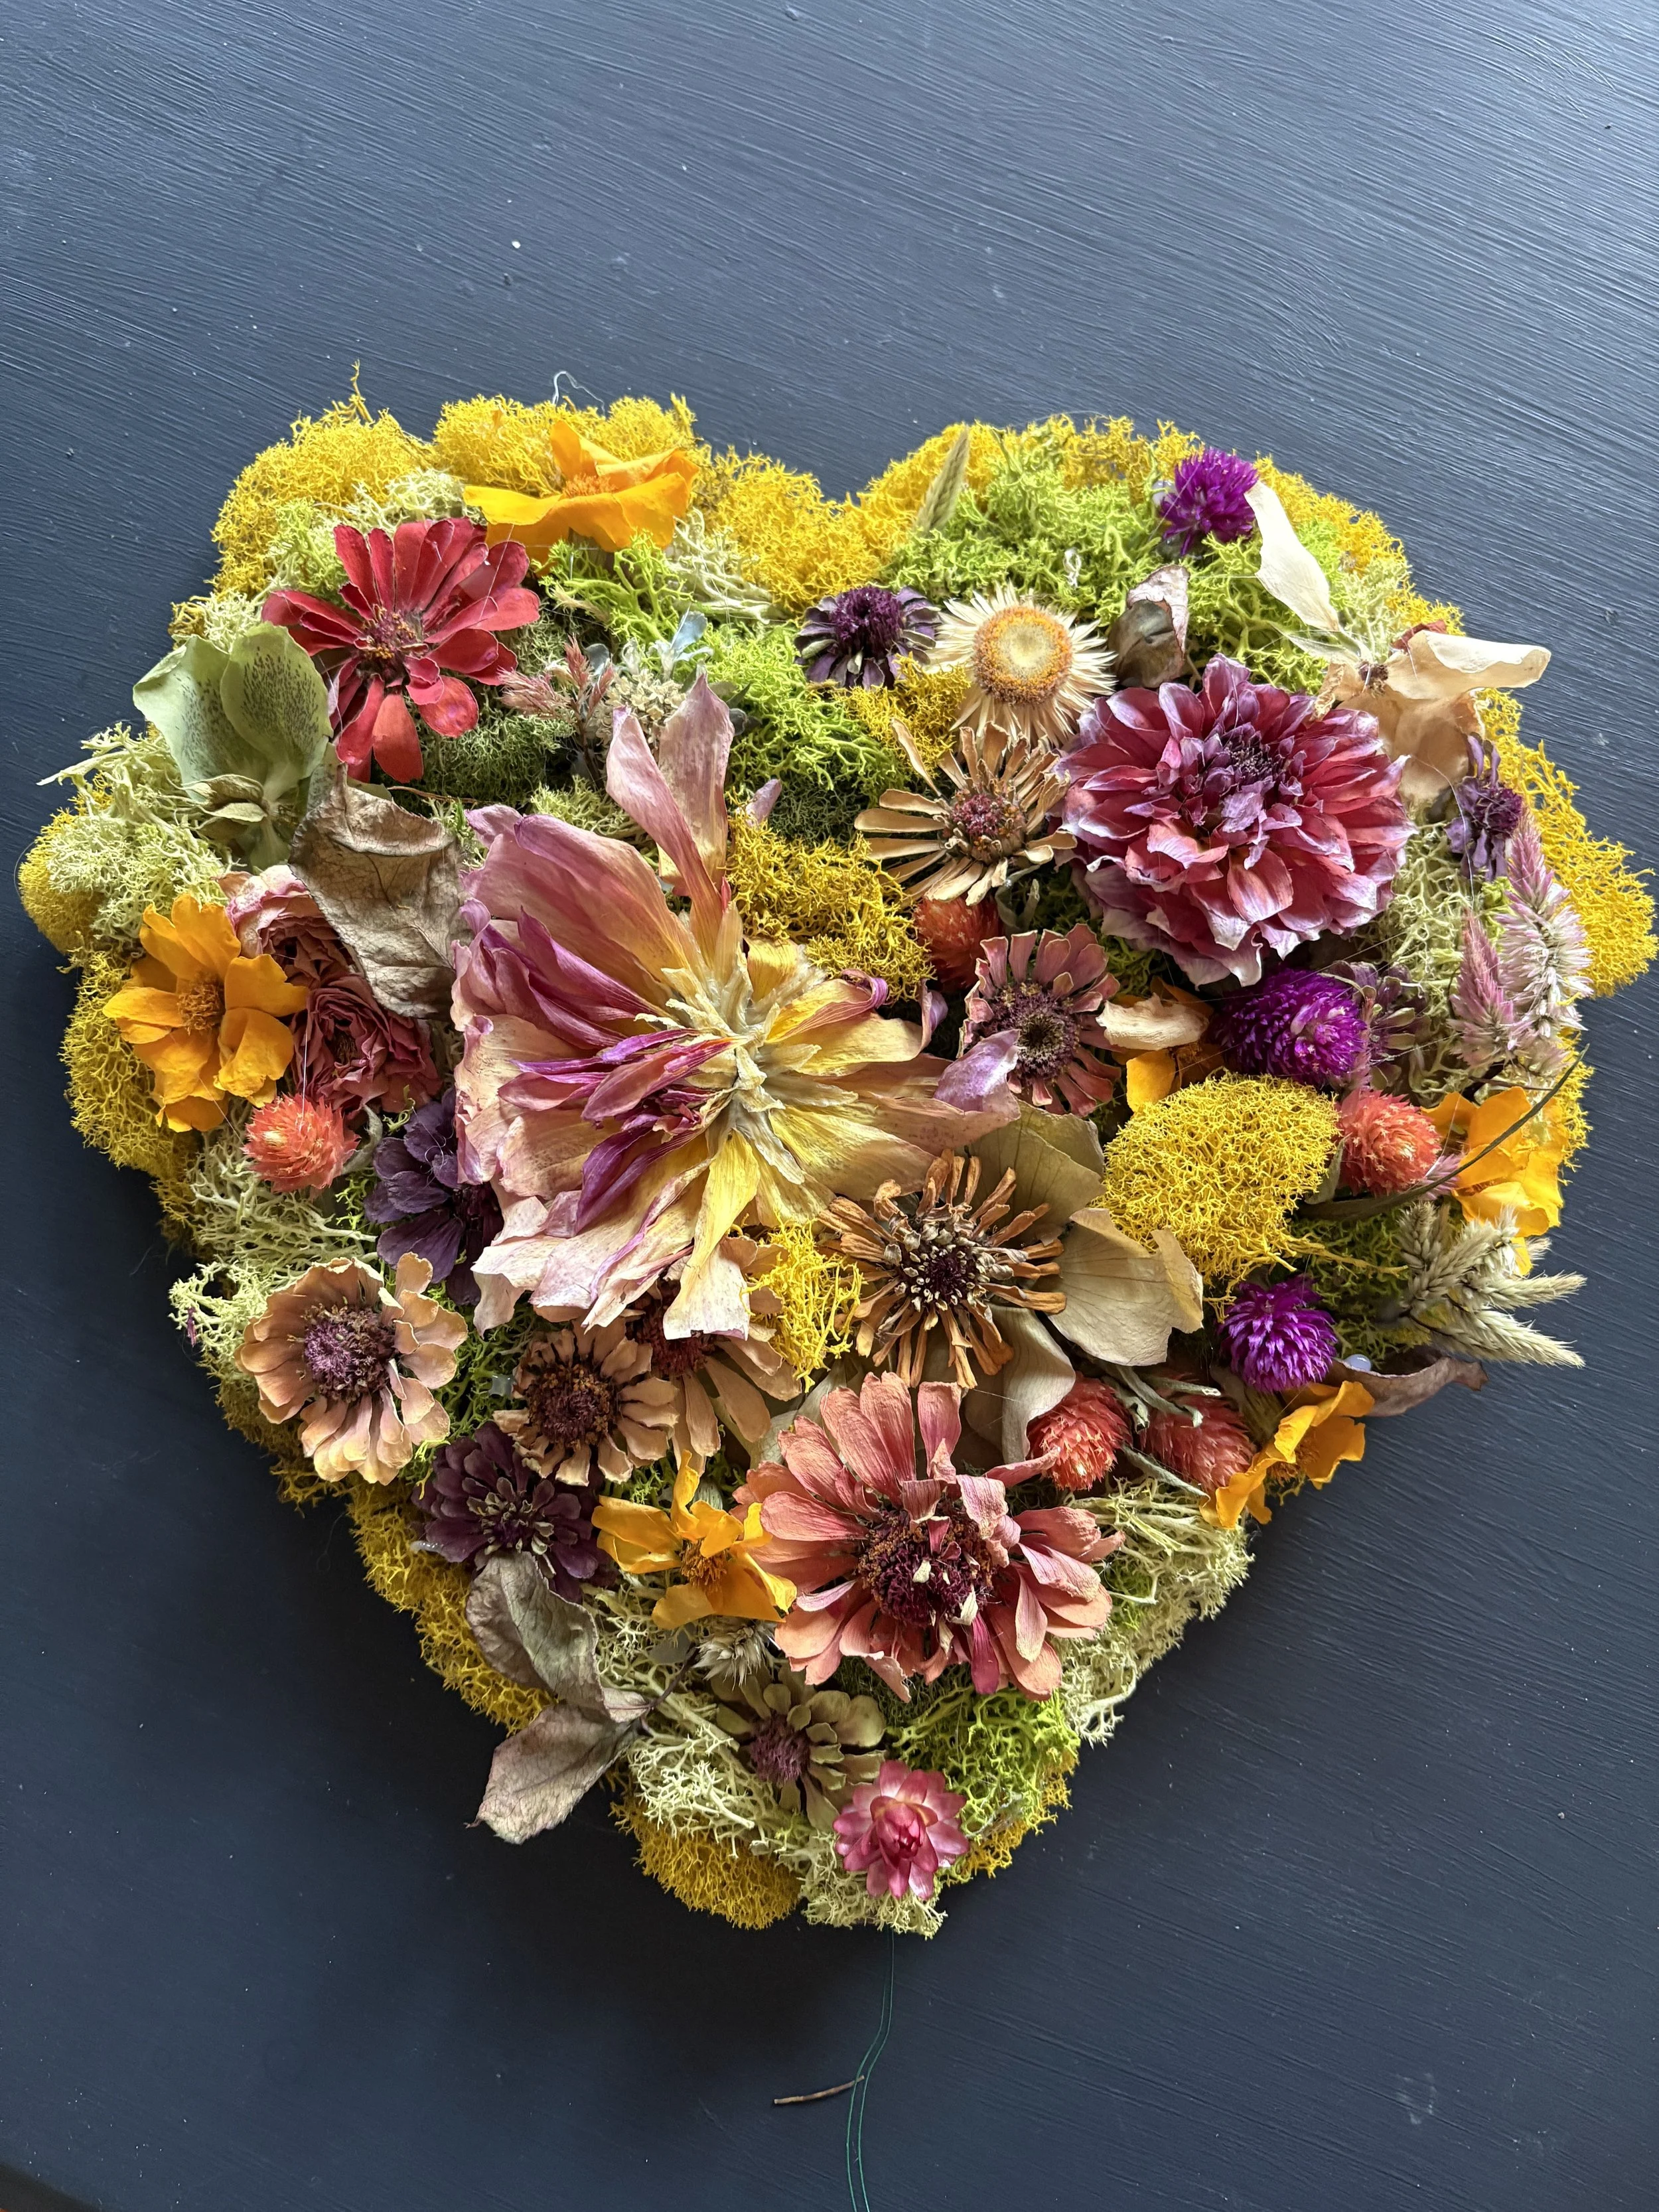
Start by designing one side of the heart with your dried flowers and moss. I used my professional-grade Ryobi glue gun, some reindeer moss, and the dried flowers I harvested this year. If you want to learn how to dry your own flowers, see my blog: Learn how to dry your own garden flowers. I didn’t have much of a design or plan, but I just kept filling in the cardboard as I went around the heart and eventually, one side of my heart was completely covered.

Designing side 2
When I finished side 1, I realized leaving the second side of the heart blank wouldn’t look very nice from the side view, so I cut up a coloring book, quickly glued it to the surface of the heart, and glued some leftover moss around the edges to finish it off. In retrospect, I would cover this side first with contact paper or something simple to make the job easier. You could also fill the back side with moss if you have it.

The Heart-Shaped Tree Topper
Here is the result. Not bad for a trial run. Later I’ll show you how it looks on the tree.
Hanging hearts on the Tree
Now the rest of the tree needed some LOVE-ly decor. I found these pretty heart ornaments in rose gold online. They are sold in sets of 45 so I only ordered one set. You can also get them in silver, pink, gold, red, and a pink, red & white combo.

Accenting with Vintage Valentine Cards
I also found some vintage Valentine ornaments to add some character to my tree. There are many types of interesting card ornaments to choose from on Amazon, so look around. Some are more childish which would be nice if you are creating this for your children or grandchildren.

The Unveiling
When all the little rose gold hearts and vintage Valentines were hung, I added a few large dried flowers and some colorful felt ball garlands that I had lying around.
I am very pleased with how this turned out and I’m happy I started a new tradition for our home. Don’t worry, if you’ve already removed your Christmas tree this year, you can plan for next February or grab some fallen branches from outside and place them in a garden pot to make a smaller Valentine’s Branch Tree. Anything is possible. Please share your thoughts in the comments below.

Hi, I’m Kim. Welcome to Studio Sprig.
Kim Bensing’s original watercolors and designs are now available on wallpaper and fabric. To order visit Studio Sprig’s design library on Spoonflower. Contact me if you need assistance.
-
EVENTS
22
- Oct 23, 2026 Wrapped in Wonder: The Art of Giving a Gift Oct 23, 2026
- Sep 26, 2026 Homecoming Flowers: A Beautiful Tradition Then and Now Sep 26, 2026
- Sep 23, 2026 Choose Wedding Flowers With Meaning: How to Create a Bouquet That Tells Your Love Story Sep 23, 2026
- Sep 21, 2026 The Pre-Prom Tradition Every Mom Should Try: Host a Backyard Bouquet Party Sep 21, 2026
- Sep 18, 2026 Lambertville’s Halloween Magic: A Funky, Creative Rivertown Comes Alive Sep 18, 2026
- Aug 20, 2026 How to Host a Beautiful Flower Bar: The Ultimate DIY Flower Bar Party Guide Aug 20, 2026
- Aug 19, 2026 How to Decorate Cakes with Fresh Flowers: Floral Wreaths, Crowns & More Aug 19, 2026
- Aug 19, 2026 Decorating Cakes with Fresh Flowers Aug 19, 2026
- May 18, 2025 How to Make DIY Bouquets for Prom May 18, 2025
- May 7, 2025 How to Preserve and Use Your Spring Flowers - All Year Long May 7, 2025
- Feb 27, 2025 Get Excited for The Flower Show Feb 27, 2025
- Feb 14, 2025 Historic Castles. What are they used for? Feb 14, 2025
- Jan 31, 2025 Creative Ideas For Your Valentine Jan 31, 2025
- Jan 28, 2025 How An Invitation Can Tell Your Love Story Jan 28, 2025
- Jan 23, 2025 How to Design a Valentine Tree Jan 23, 2025
- Jan 16, 2025 Host a Fabulous Bouquet Bar for Valentine's Day Jan 16, 2025
- Apr 4, 2023 Why Choose Seasonal Flowers for Your Special Occasion? Apr 4, 2023
- Feb 1, 2023 10 Ideas for an Eco-Friendly Event or Wedding Feb 1, 2023
- Nov 14, 2022 A Family Tree Inspired Wedding Invitation Nov 14, 2022
- Oct 3, 2022 How to choose flowers that have sentimental meaning Oct 3, 2022
- Nov 9, 2020 Simplified Wedding Ceremony during Covid Nov 9, 2020
- Apr 2, 2019 Why You Should Choose Seasonal Prom Flowers Apr 2, 2019
-
HOME
23
- Sep 9, 2026 How to Name a Farm: 10 Meaningful Ideas for Creating a Name With a Story Sep 9, 2026
- Sep 1, 2026 How to Preserve Flowers for Creative Projects Sep 1, 2026
- Jul 2, 2026 How to make your own flower confetti Jul 2, 2026
- Apr 22, 2025 How We Painted our Barn Apr 22, 2025
- Apr 16, 2025 What to Plant for Mesmerizing Spring Blooms Apr 16, 2025
- Apr 8, 2025 Narcissus AKA Daffodil - What's Blooming at Studio Sprig Apr 8, 2025
- Apr 1, 2025 Glory-of-the-Snow - What's Blooming at Studio Sprig Apr 1, 2025
- Mar 19, 2025 How we turned an Artist Studio into a Weekend Retreat Mar 19, 2025
- Mar 12, 2025 The Mighty Crocus - First to Bloom - What's Blooming at Studio Sprig Mar 12, 2025
- Jan 23, 2025 How to Design a Valentine Tree Jan 23, 2025
- Jan 16, 2025 Host a Fabulous Bouquet Bar for Valentine's Day Jan 16, 2025
- Jan 9, 2025 How to Make Your Own Mint Tea Jan 9, 2025
- Jan 7, 2025 How To Create A Courtyard Jan 7, 2025
- Jan 2, 2025 How to Create a Stunning Centerpiece Jan 2, 2025
- Mar 27, 2023 How We Transformed Our Farmhouse Kitchen by Reusing, Updating, and Thrifting: (Coffee Bar) Mar 27, 2023
- Mar 27, 2023 How We Transformed Our Farmhouse Kitchen by Reusing, Updating, and Thrifting Mar 27, 2023
- Mar 1, 2023 How and Why We Love Historic Homes Mar 1, 2023
- Jan 3, 2023 Eliminate Sneaky Sugars Jan 3, 2023
- Dec 14, 2022 How to Create a Pretty Mini Bar with Items You Already Own Dec 14, 2022
- Nov 21, 2022 Friendsgiving At Our Farm Nov 21, 2022
- Nov 9, 2022 Herbs: How to Grow, Harvest and Dry Your Own Nov 9, 2022
- Nov 9, 2022 DIY Herb Drying Rack: Herb Drying at Home Nov 9, 2022
- Oct 12, 2022 Have you ever thought about creating a beautiful water feature? Oct 12, 2022
-
STYLE
27
- Oct 6, 2026 Where Flowers Become Art, Experiences & Memories Oct 6, 2026
- Sep 1, 2026 How to Preserve Flowers for Creative Projects Sep 1, 2026
- Aug 20, 2026 How to Host a Beautiful Flower Bar: The Ultimate DIY Flower Bar Party Guide Aug 20, 2026
- Aug 19, 2026 How to Decorate Cakes with Fresh Flowers: Floral Wreaths, Crowns & More Aug 19, 2026
- Aug 19, 2026 Decorating Cakes with Fresh Flowers Aug 19, 2026
- Jul 2, 2026 How to make your own flower confetti Jul 2, 2026
- Nov 3, 2025 Creating a Pressed Flower Frame Nov 3, 2025
- May 7, 2025 How to Preserve and Use Your Spring Flowers - All Year Long May 7, 2025
- Jan 28, 2025 How An Invitation Can Tell Your Love Story Jan 28, 2025
- Jan 23, 2025 How to Design a Valentine Tree Jan 23, 2025
- Jan 6, 2025 How to Create Oyster Shell Necklaces Jan 6, 2025
- Jan 2, 2025 How to Create a Stunning Centerpiece Jan 2, 2025
- Mar 14, 2023 How to Make Sentimental Easter Eggs Mar 14, 2023
- Mar 6, 2023 How to Enjoy The PHS Philadelphia Flower Show Mar 6, 2023
- Feb 13, 2023 Let's Save The Bees Feb 13, 2023
- Feb 1, 2023 10 Ideas for an Eco-Friendly Event or Wedding Feb 1, 2023
- Jan 12, 2023 A Great Way to Help Kids with Cancer (PENN STATE) Jan 12, 2023
- Dec 14, 2022 How to Create a Pretty Mini Bar with Items You Already Own Dec 14, 2022
- Nov 29, 2022 Lunch and Dinner -Studio Sprig Style Micro Blog Nov 29, 2022
- Nov 14, 2022 A Family Tree Inspired Wedding Invitation Nov 14, 2022
- Nov 9, 2022 DIY Herb Drying Rack: Herb Drying at Home Nov 9, 2022
- Oct 30, 2022 Lambertville, Nj , A Funky, Cool Rivertown You Must Visit on Halloween. Oct 30, 2022
- Oct 19, 2022 How to choose an interesting place to stay when you travel or go on vacation Oct 19, 2022
- Oct 12, 2022 Have you ever thought about creating a beautiful water feature? Oct 12, 2022
- Oct 3, 2022 How to choose flowers that have sentimental meaning Oct 3, 2022
- Feb 1, 2021 How to design marketing materials for your small business Feb 1, 2021
- Oct 29, 2020 Surprise the bride when you can't come to her wedding Oct 29, 2020