

How to Name a Farm: 10 Meaningful Ideas for Creating a Name With a Story
How to Name A Farm -how we named our farm in Bucks County Pennsylvania, Windy Hill Farm after the book The Ghost of Windy Hill.
Choosing a farm name can be one of the most personal parts of making a place your own. The best farm names often come from somewhere real—a family story, the land itself, a favorite memory, an old photograph, or even a beloved book. Here's how I found the perfect name for our historic Pennsylvania farmhouse—and how you can find a meaningful name for yours. A Treasured Storybook
Start With the Story Behind Your Farm
When we decided to name our farm, I didn't want a name that simply sounded pretty. I wanted something that had meaning.
Our farmhouse is located in historic Bucks County, Pennsylvania, surrounded by old farms, stone houses, and beautiful countryside. We moved here in 2007, after our family outgrew our first historic home.
The house we found was a wonderful old clapboard farmhouse with a wrap-around porch, a barn, enormous trees, and plenty of history.
But as much as I loved the property, it didn't have a name.
So, naturally, I decided it needed one.

Front View Windy Hill Farm. Photo courtesy of Kim Bensing Design.
How Do You Choose a Farm Name?
If you're wondering how to name a farm, start by looking around you.
Before making a long list of clever farm names, look for the stories that already exist on your property.
Ask yourself:
What is the history of the land?
Who lived here before you?
Is there an interesting family name connected to the property?
What natural features surround the farm?
Is your farm on a hill, beside a creek, in a valley, or near a particular grove of trees?
Are there old barns, stone walls, gardens or outbuildings?
What animals, flowers or crops are special to the property?
Is there a favorite childhood memory associated with the land?
Are there old photographs, maps, letters or documents that might reveal something?
Is there a book, song or story that has a personal connection to your family?
Sometimes the best farm name ideas aren't invented at all. They're discovered.

Windy Hill’s wrap-around balcony is not original to the farmhouse. We think it was added sometime in the early 1980s. It’s very nice and provides a great place to catch 9 simultaneous fireworks shows on the 4th of July.
Look to the Land for Farm Name Ideas
The landscape itself can be a wonderful source of inspiration.
Think about words that describe your property:
Hill • Hollow • Meadow • Grove • Creek • Brook • Orchard • Field • Valley • Ridge • Woods • Garden • Acres • Farm
You can combine these with something personal.
For example:
Willow Hill Farm
Fox Hollow Farm
Meadow Grove
Old Oak Farm
Windy Hill Farm
Rose Hill
Bluebird Farm
Orchard House
A good farm name doesn't necessarily need to explain everything about the property. Sometimes one evocative word is enough to create a feeling.

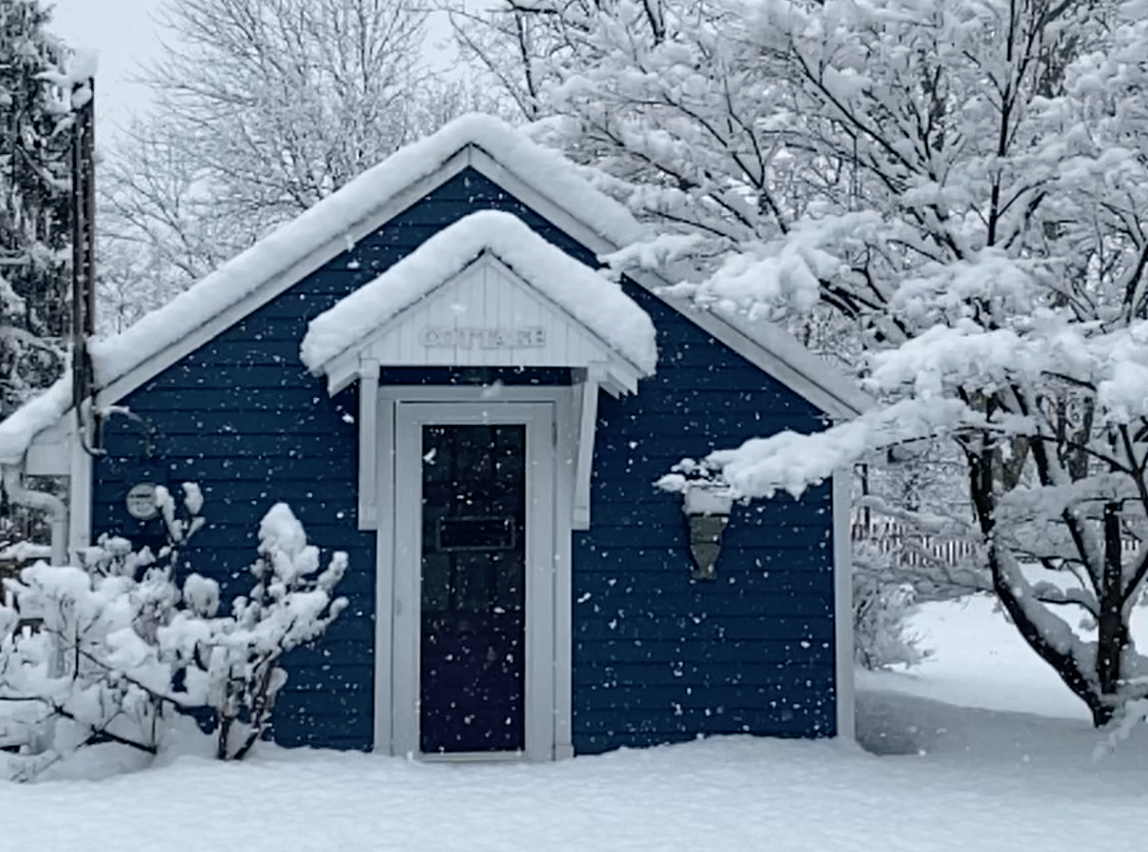
Snow covered little Cottage at Windy Hill Farm. Photo courtesy of Kim Bensing Design.
Look Into Your Farm's History
If you own an older property, spend some time investigating its past before choosing a name.
Old deeds, maps, photographs, newspapers and family records can reveal fascinating clues.
And don't overlook your neighbors.
Someone who has lived in the area for decades may know something about your property that you could never find online.
That's exactly what happened to us.

Walpole Lamppost and sign created by McElHaney Signs here in town.
The Story Behind Windy Hill Farm
For years, I had owned a little vintage children's storybook called The Ghost of Windy Hill.
It was one of my favorite weekly readers as a child, and somehow that little book stayed on my bookshelf throughout my entire life.
The book was written in 1966—the same year I was born—and the story takes place in 1851, around the same era our farmhouse was built.
I had never imagined that the book would eventually inspire the name of our home.
But then we discovered something about the property.
Our farmhouse sits at the top of a ridge, surrounded by enormous old trees. The wind moves through the property constantly, whistling through the original windows and across the hill.
When it gets windy here, it gets really windy.
Suddenly, the name seemed obvious.

Windy Hill’s side view with a big old tree. Photo courtesy of Kim Bensing Design
Windy Hill.
The old storybook gave the name a personal history, while the land itself gave it meaning.
And just like that, our farm had a name.

View of Windy Hill’s Barn behind a lilac. Photo courtesy of John Arehart Photography.
Sometimes the History Finds You
After we named the property Windy Hill, something unexpected began happening.
People started stopping by.
Over the years, approximately twenty people have told us that they had once lived in the house, visited the property or spent time in the old barn.
Then one summer day, an older woman named Dee and her daughter stopped by.
Dee told us that she and her cousin had spent summers here during the 1930s. The farm had belonged to their aunt and uncle, and the property held some of her favorite childhood memories.
A week later, Dee returned with her cousin.
They brought old photographs.
They showed us pictures of the property from decades earlier and even brought a hand-drawn floor plan of the house.
As we walked through the rooms together, they remembered where old doorways had been and explained why certain parts of the house seemed unusual.
Then Dee's cousin stopped before what is now our dining room.
He said there had once been a large hole in the floor for the heat.
We had always known there was something unusual about the floorboards, but we had never understood why.
Sure enough, there was a covered opening exactly where he remembered it.
It was one of those moments when a house stops being simply a house.
It becomes a story.

Dee, her daughter, her cousin, Kim & Mike Bensing.
Meaningful Farm Names Often Come From the Past
That experience changed the way I think about naming a property.
A farm name doesn't have to be clever.
It doesn't have to follow a trend.
And it doesn't have to be something you come up with in one afternoon.
The most memorable farm names with meaning often connect the present to the past.
Your perfect name might be hiding in:
An old family photograph
A childhood book
The name of a former owner
A nearby landmark
A favorite tree
A creek or hill
An old field name
A family tradition
A local legend
The history of the property
A meaningful event that happened there

How to Choose the Right Farm Name
Once you've gathered your ideas, make a short list.
Then say each name out loud.
Does it feel natural?
Is it easy to remember?
Can people spell it?
Will it still make sense if your farm changes or grows?
And most importantly:
Does the name mean something to you?
A good farm name should feel like it belongs to the land.
You don't necessarily need the most unique name. You need the name that feels right.

Dining Room Floorboards at Windy Hill Farm.
Give Your Farm a Name That Can Become Part of Its History
After choosing Windy Hill, we installed a beautiful lamppost and sign at the entrance to the property.
That little sign became more than decoration.
It gave our home an identity.
Over the years, it has become part of the story of this place—and now, whenever someone asks where we live, I can simply say:
Windy Hill.
And somehow, that says so much more than an address ever could.
If you're trying to name your own farm, farmhouse, homestead or historic property, look for the story before you look for the name.
You may discover that the perfect name has been there all along.

Historic Images of Windy Hill Farm circa 1930s.
More Studio Sprig Inspiration
If you love historic homes, gardens, flowers and the stories behind beautiful places, explore more of Studio Sprig's floral art, surface patterns and inspiration from Windy Hill Farm.
And if your property has a story of its own, I'd love to hear it.
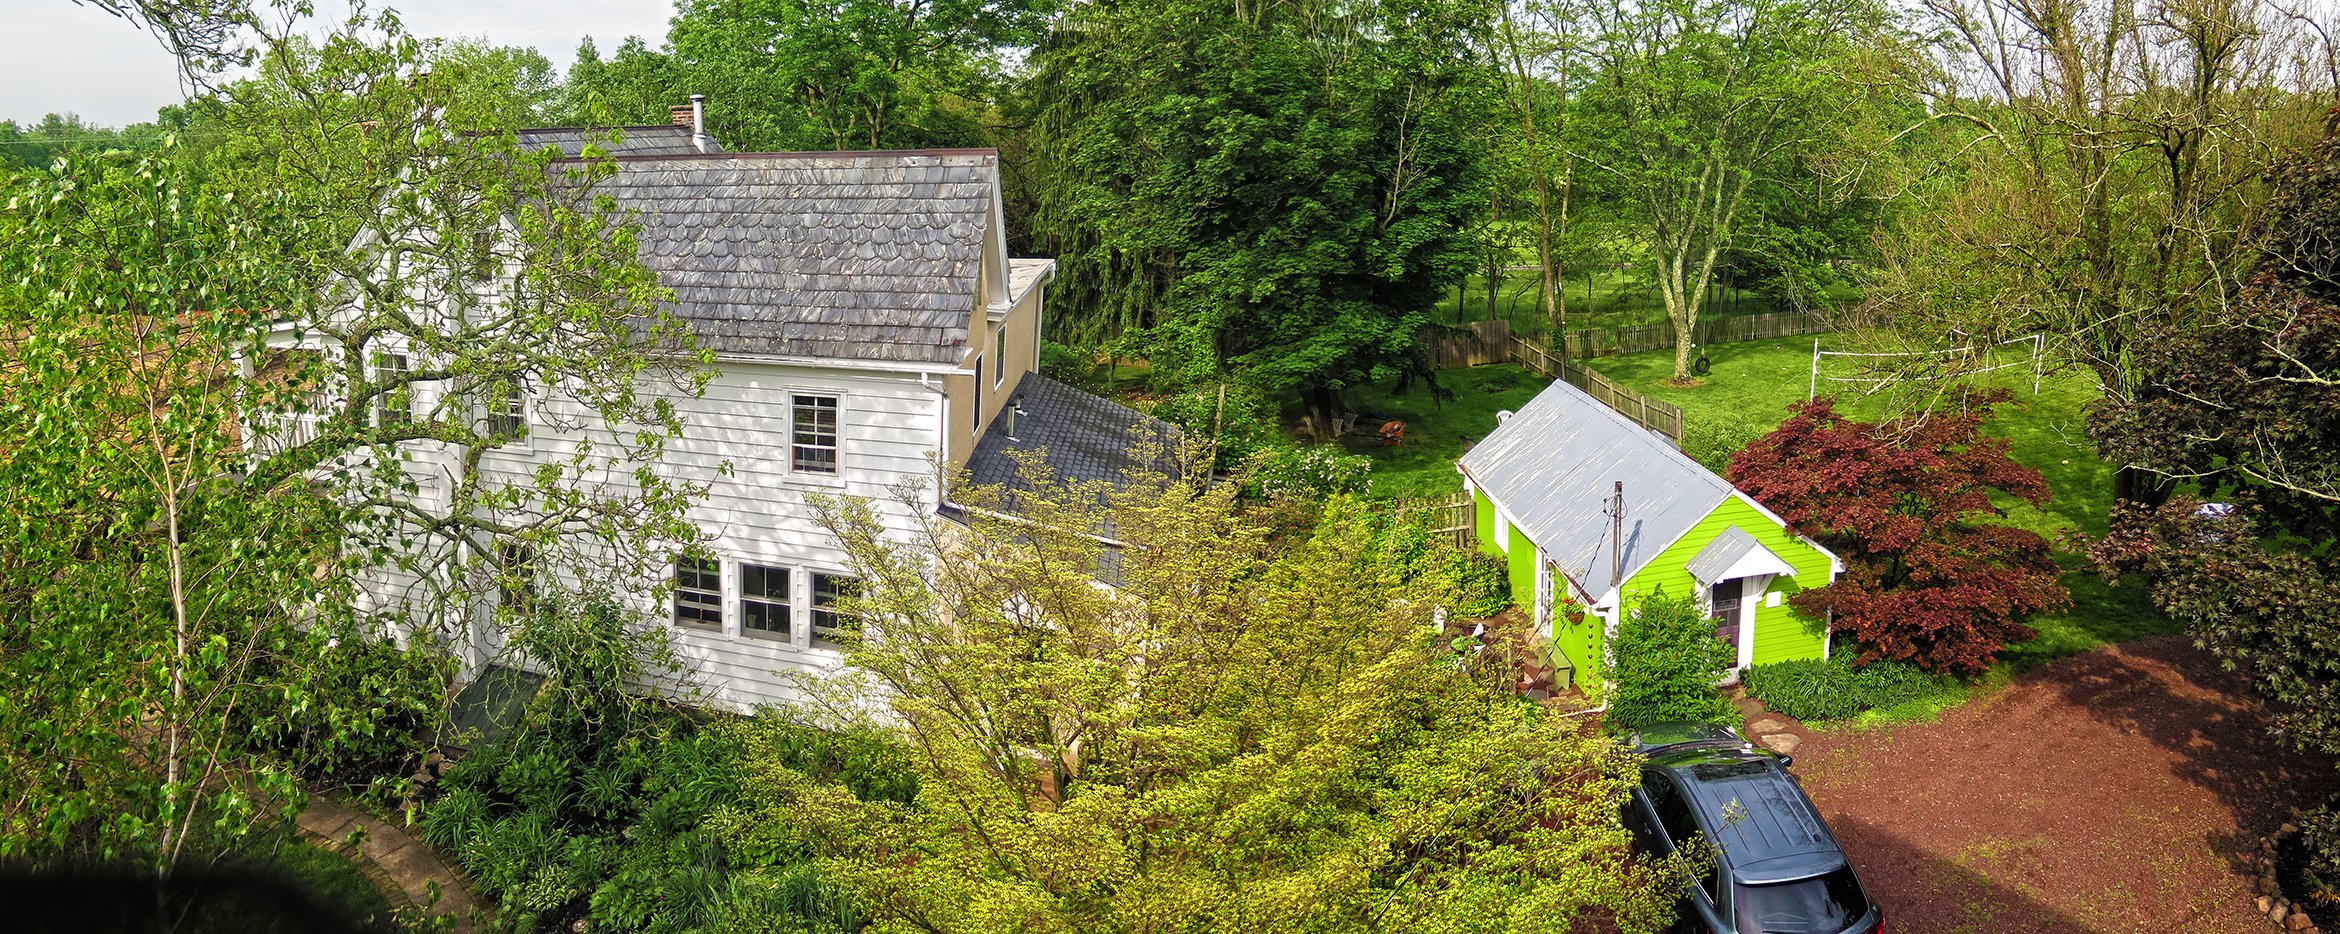
View of Property from the Barn. Photo courtesy of John Arehart Photography.
How to Preserve Flowers for Creative Projects

Dried flower & Dried Lime Grapevine Wreath. This wreath features some Wooden Flowers.
After designing and creating something special with flowers, I always hate to see them wither and eventually fade away. Recently, I began preserving the flowers I love so I can enjoy and use them again in future creative projects. This year, I’ve been experimenting with one of my favorites—the beloved dahlia—and the results have been wonderful.
I’ve even been known to disassemble a special bouquet and transform its individual flowers into a small everlasting wreath, creating a meaningful keepsake that helps commemorate a beautiful occasion.
Preserving flowers this way gives them a second life, turning something fleeting into a lasting piece of art.
Different Methods for Drying and Preserving Flowers
There are several simple ways to dry and preserve flowers, and the best method often depends on the type of flower. When I have abundant, sturdy stems like lavender, I typically use the traditional method of hanging small bunches upside down to air dry.
For flowers such as hydrangeas and tiny spray roses, I’ve found that an even easier method works beautifully: simply place them in a vase without water and let them dry naturally. As they lose their moisture, many flowers take on a wonderfully sculptural quality, creating a beautiful piece of dried-flower art with almost no effort at all.
Experimenting with different flower-preservation methods is part of the fun. With a little patience, flowers that might otherwise be discarded can become lasting materials for wreaths, arrangements, crafts, and other creative projects.
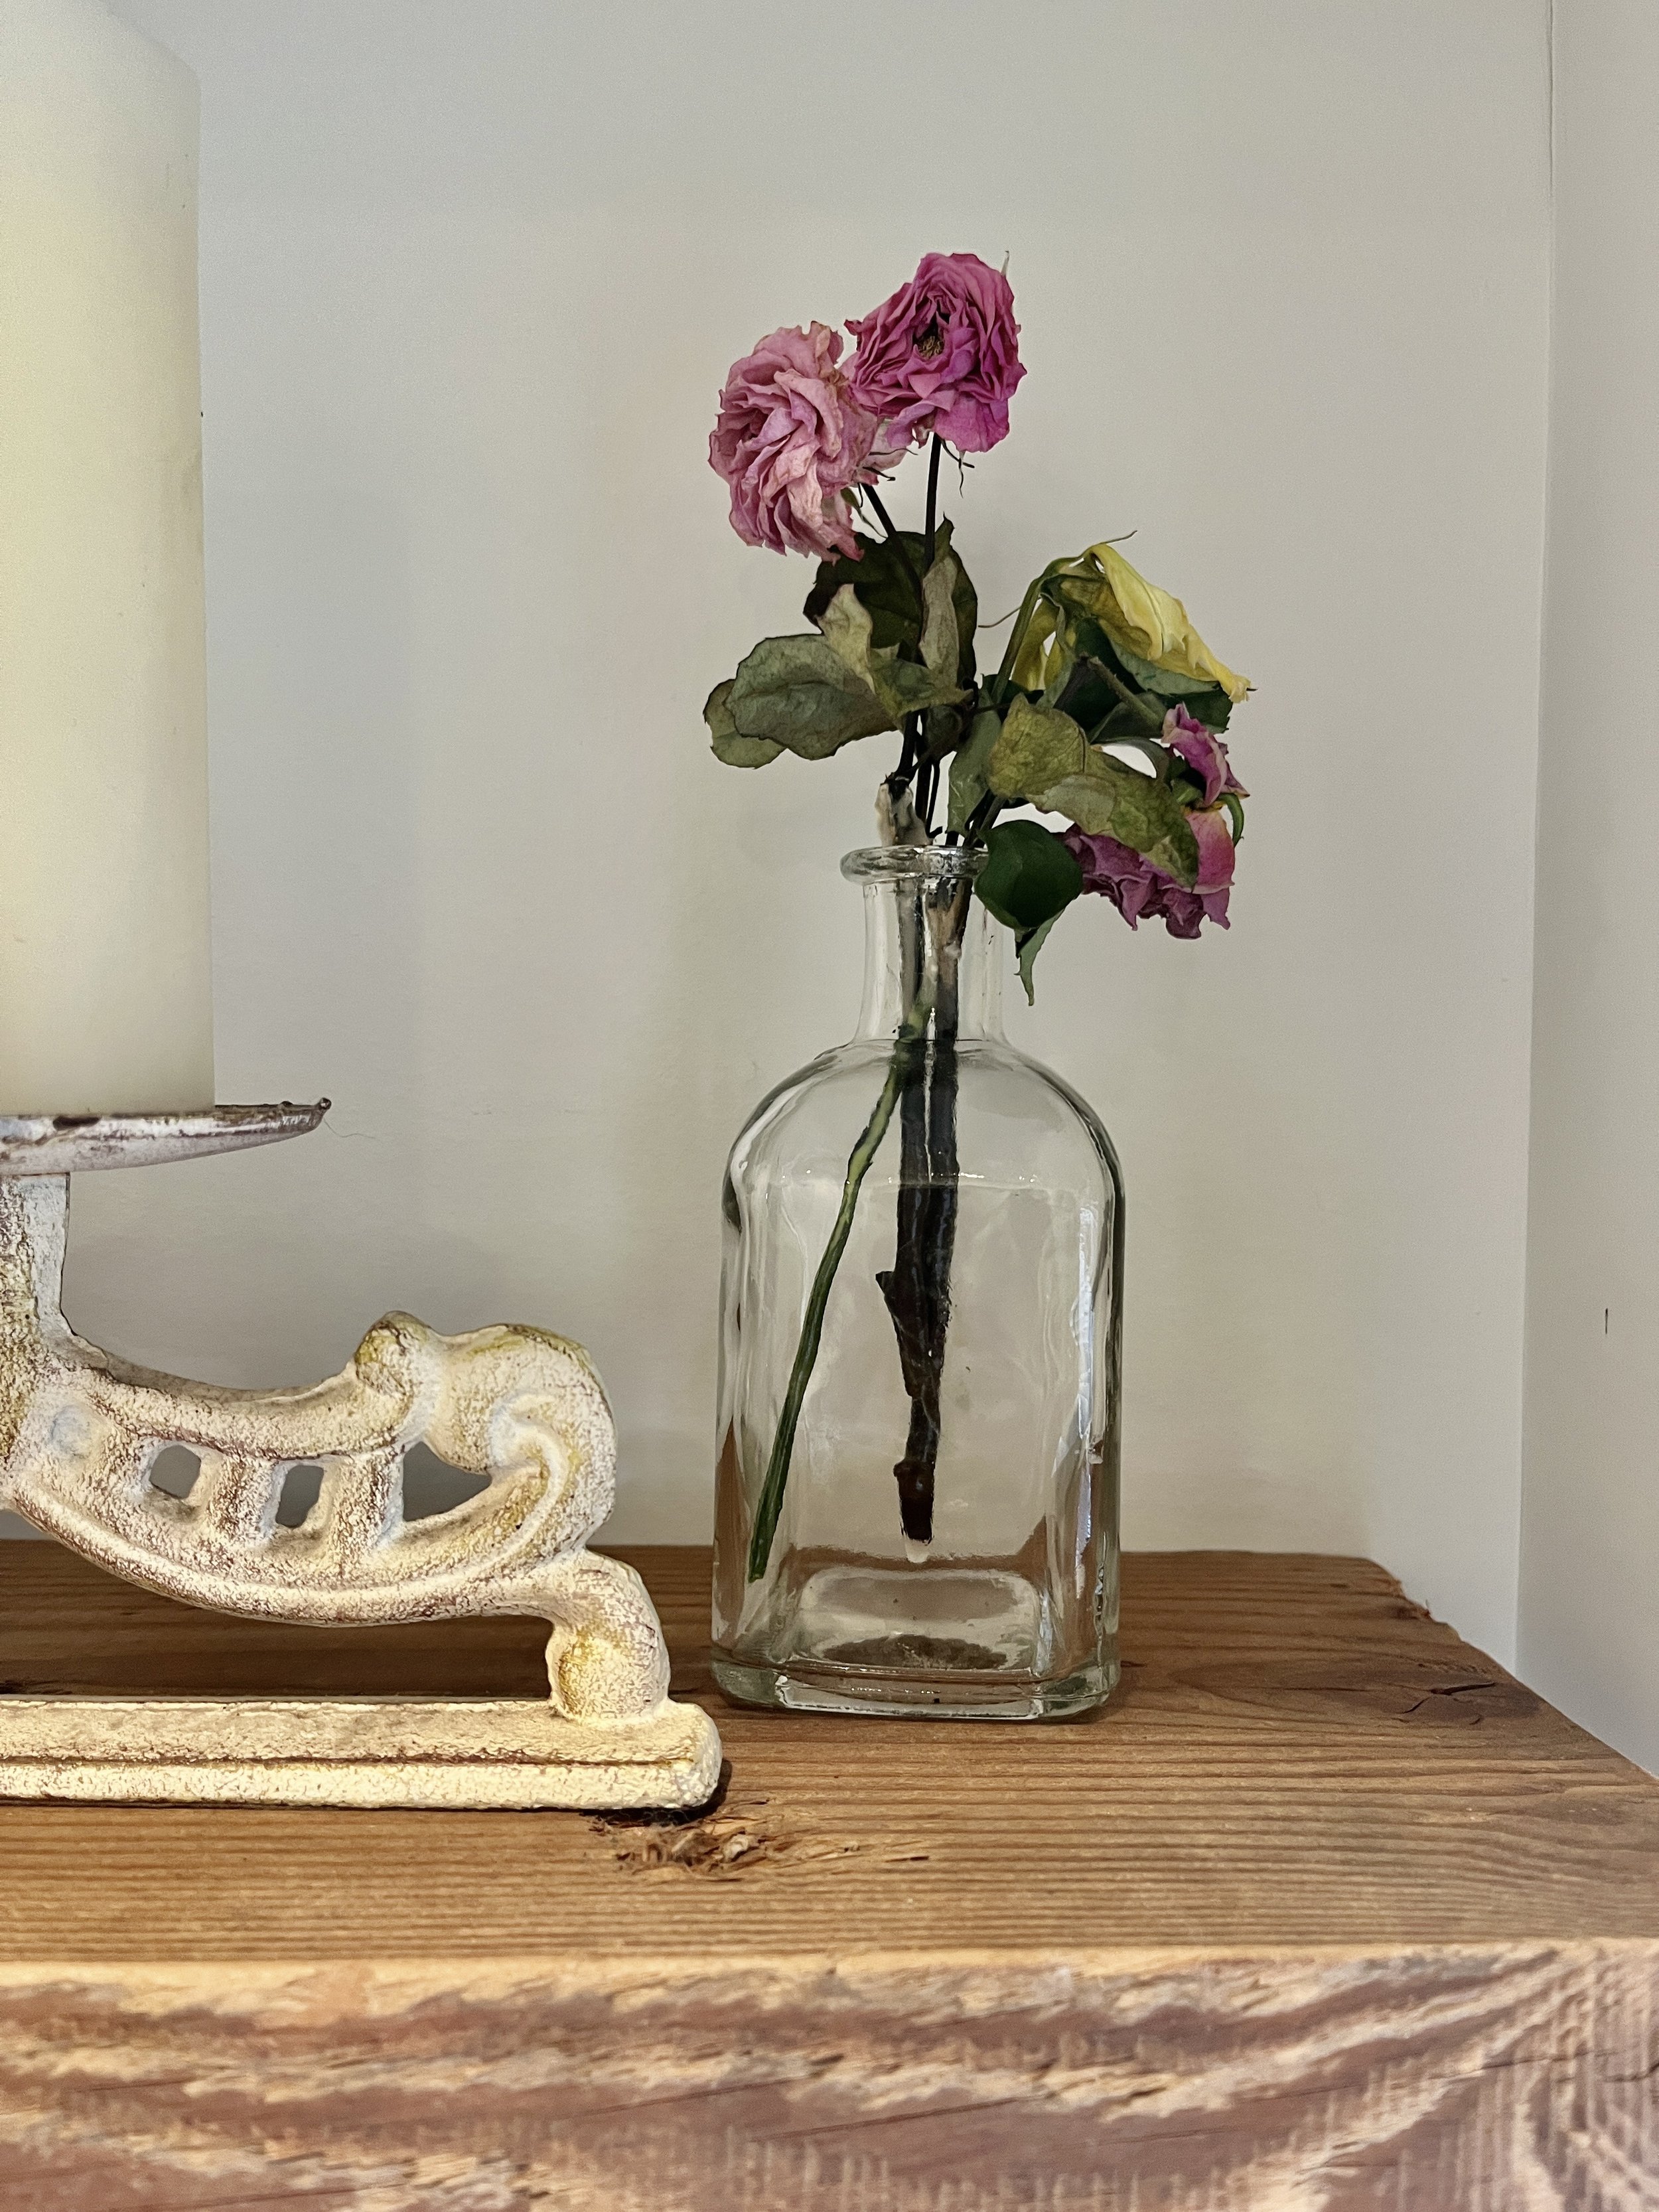
Dried spray roses in simple vase.
How to Preserve Flowers with Silica Gel Crystals
One of my favorite methods for preserving flowers is drying them with silica gel crystals. Silica gel gently draws moisture from the flowers, helping them retain much of their original shape, color, and delicate details. It’s an especially effective method for preserving flowers for wreaths, floral arrangements, crafts, and other creative projects.
I like to begin by removing any excess foliage and stems using my favorite Micro Pruning Snips. If you’re planning a project that requires the stems, you can certainly leave them intact.
Next, add about 1 inch of Silica Gel Crystals to the bottom of a Rubbermaid container, making sure the crystals create an even layer across the entire surface. Carefully place your flowers on top of the silica gel, either face up or face down, depending on the shape and type of flower. Arrange them closely together, but make sure the flowers aren’t touching one another.
Once all of your flowers are arranged, slowly pour more Silica Gel Crystals over the top. Continue adding crystals until each flower is completely covered and the silica gel has gently filled in around every petal and detail.
Secure the lid tightly and place the container in a cool, preferably dark location for approximately one week. The exact drying time will vary depending on the type and size of the flower. Some delicate flowers may be completely dry in just a few days, while larger, moisture-rich flowers can take longer.
The wonderful thing about drying flowers with silica gel is that you can experiment with different varieties and drying times to see what produces the best results. With a little trial and error, you’ll discover which flowers preserve beautifully—and you’ll have a wonderful supply of everlasting blooms ready for your next creative project.

Delicate dried Dahlia Flowres.
How to Remove and Store Flowers Preserved with Silica Gel
Once your flowers have finished drying, it’s time to carefully remove them from the silica gel. For this step, I recommend using a small slotted spatula, which makes it much easier to gently retrieve smaller, delicate flowers without damaging the petals.
I carefully slide the spatula underneath each flower and lift it slowly, allowing the Silica Gel Crystals to fall back into the container. Once the flower is removed, I gently tap it on all sides to release any crystals that may still be tucked between the petals.
I then arrange all of my newly preserved flowers side by side on a tray and allow them to sit for a little while longer, making sure they are completely dry before storing them. This extra step is important because any remaining moisture can lead to mold.
Once I’m confident the flowers are completely dry, I store them in a container with air vents to allow for some circulation. Properly dried and stored flowers can last for a long time, giving you a beautiful collection of everlasting blooms to use in wreaths, floral arrangements, crafts, and other creative projects.

Gently scooping dried Dahlia Flowers out of the Silica Gel Crystals.
Creative Ideas for Dried Flowers
Once you’ve preserved a beautiful collection of flowers, the fun really begins! There are so many creative things to make with dried flowers, from everlasting wreaths and floral branches to small decorative pieces that can be used as table cards, place settings, or gift toppers.
I especially love turning little pieces of wood into unique dried flower decorations. They make charming table cards or thoughtful gift toppers and are a wonderful way to give preserved flowers a second life. Another favorite in autumn are dried flower pumpkins. Hot gluing your dried bounty to the top of a pumpkin is simple and it makes a great centerpiece.
Or, you can keep it wonderfully simple. I often arrange small groupings of dried flowers in a pretty vase and let their natural beauty speak for itself. Unlike fresh flowers, dried floral arrangements can be enjoyed for months or even years, making them a lovely way to preserve a special moment, bouquet, or season.
If you’re planning to make dried flower wreaths, floral decorations, or gift toppers, I highly recommend investing in a quality glue gun. Because I do quite a bit of designing, I purchased a professional-grade, cordless Ryobi Glue Gun, and I absolutely love it. It gets very hot, so be careful when working with it, but not having a cord to maneuver around makes creating so much easier. The battery and charger are included, too.
With a collection of preserved blooms and a few simple supplies, you can turn dried flowers into beautiful, lasting pieces for your home, entertaining, gift wrapping, and creative projects.

Mini spray roses glued to a tiny piece of wood.
I hope this inspires you to start preserving all the beautiful flowers you encounter and turn them into something you can enjoy for years to come. I’d love to see what you create, so feel free to drop me a line and share your dried flower projects!
Your Supply list:
Hearty Fresh Flowers (without a lot of delicate & loose petals)
Micro-Tip Pruning Snips
Rubbermaid Storage Containers with Lids
Silica Gel Crystals
Mini Slotted Spatula
Professional-grade Glue Gun
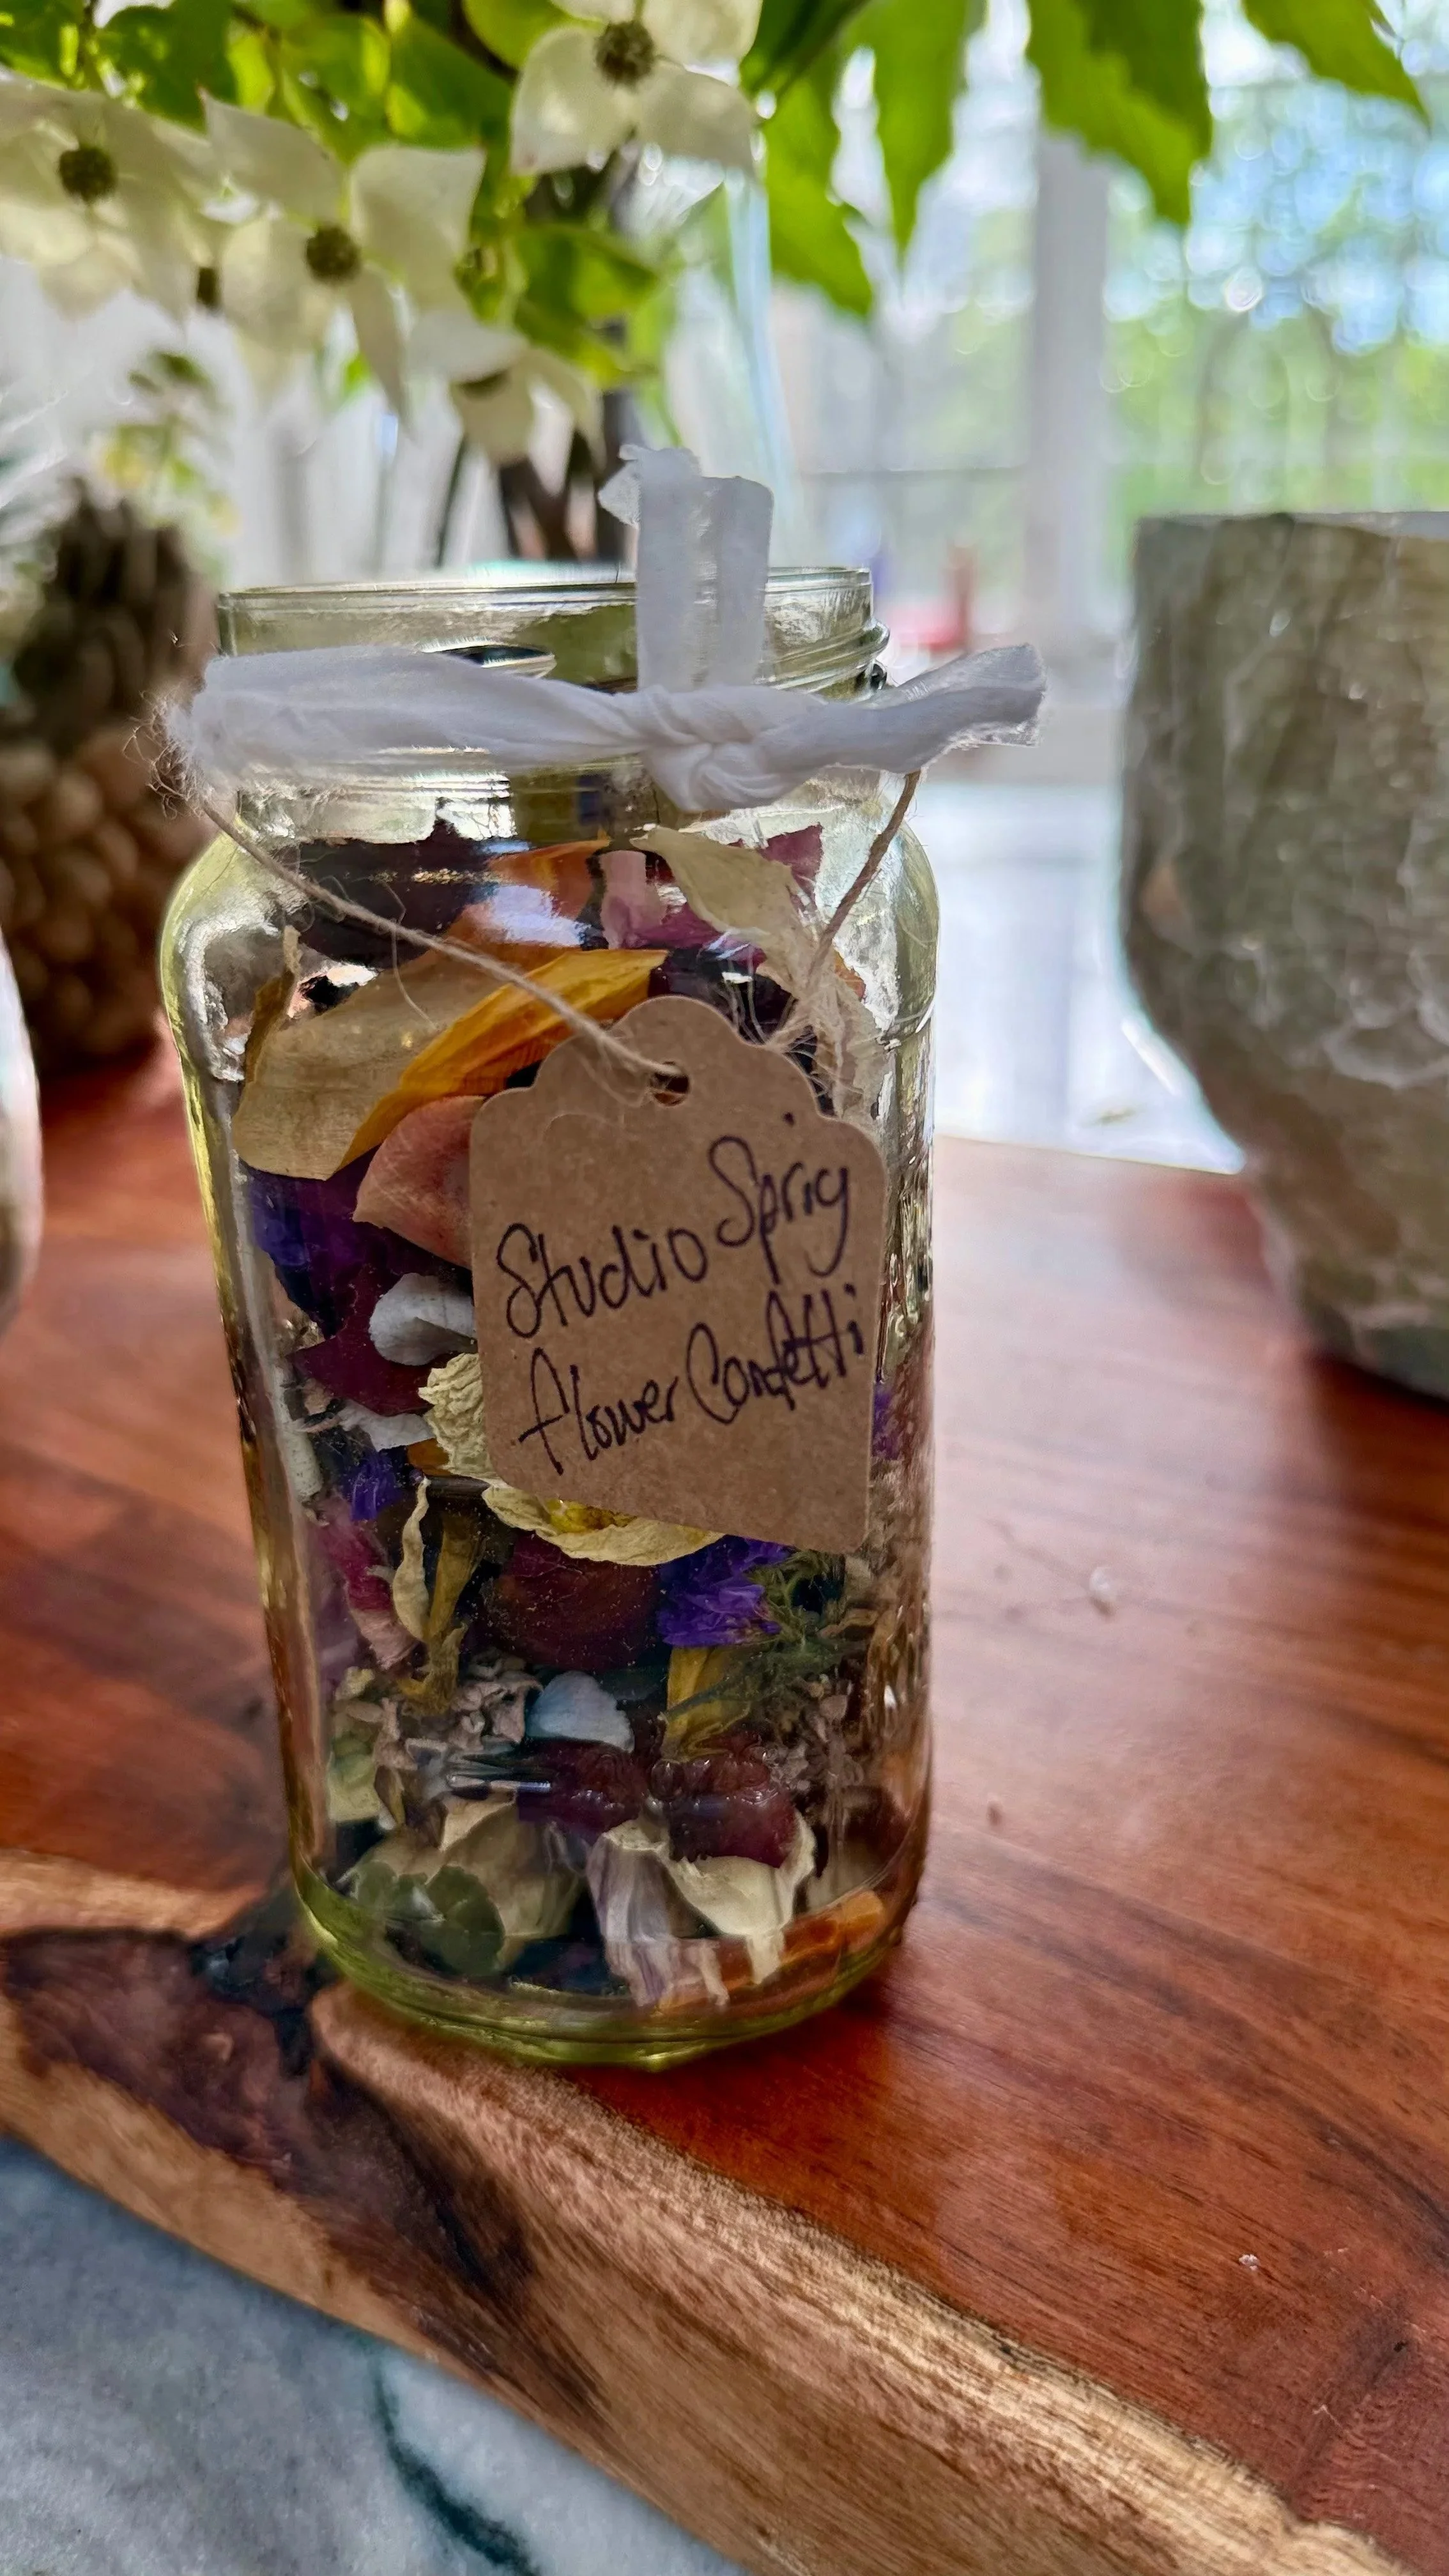
How to make your own flower confetti
Learn how to make beautiful natural flower confetti using petals gathered from your garden or meadow. This simple DIY project is perfect for summer tables, outdoor entertaining, weddings, gifts and celebrations, turning colorful dried flower petals into a charming, eco-friendly detail.
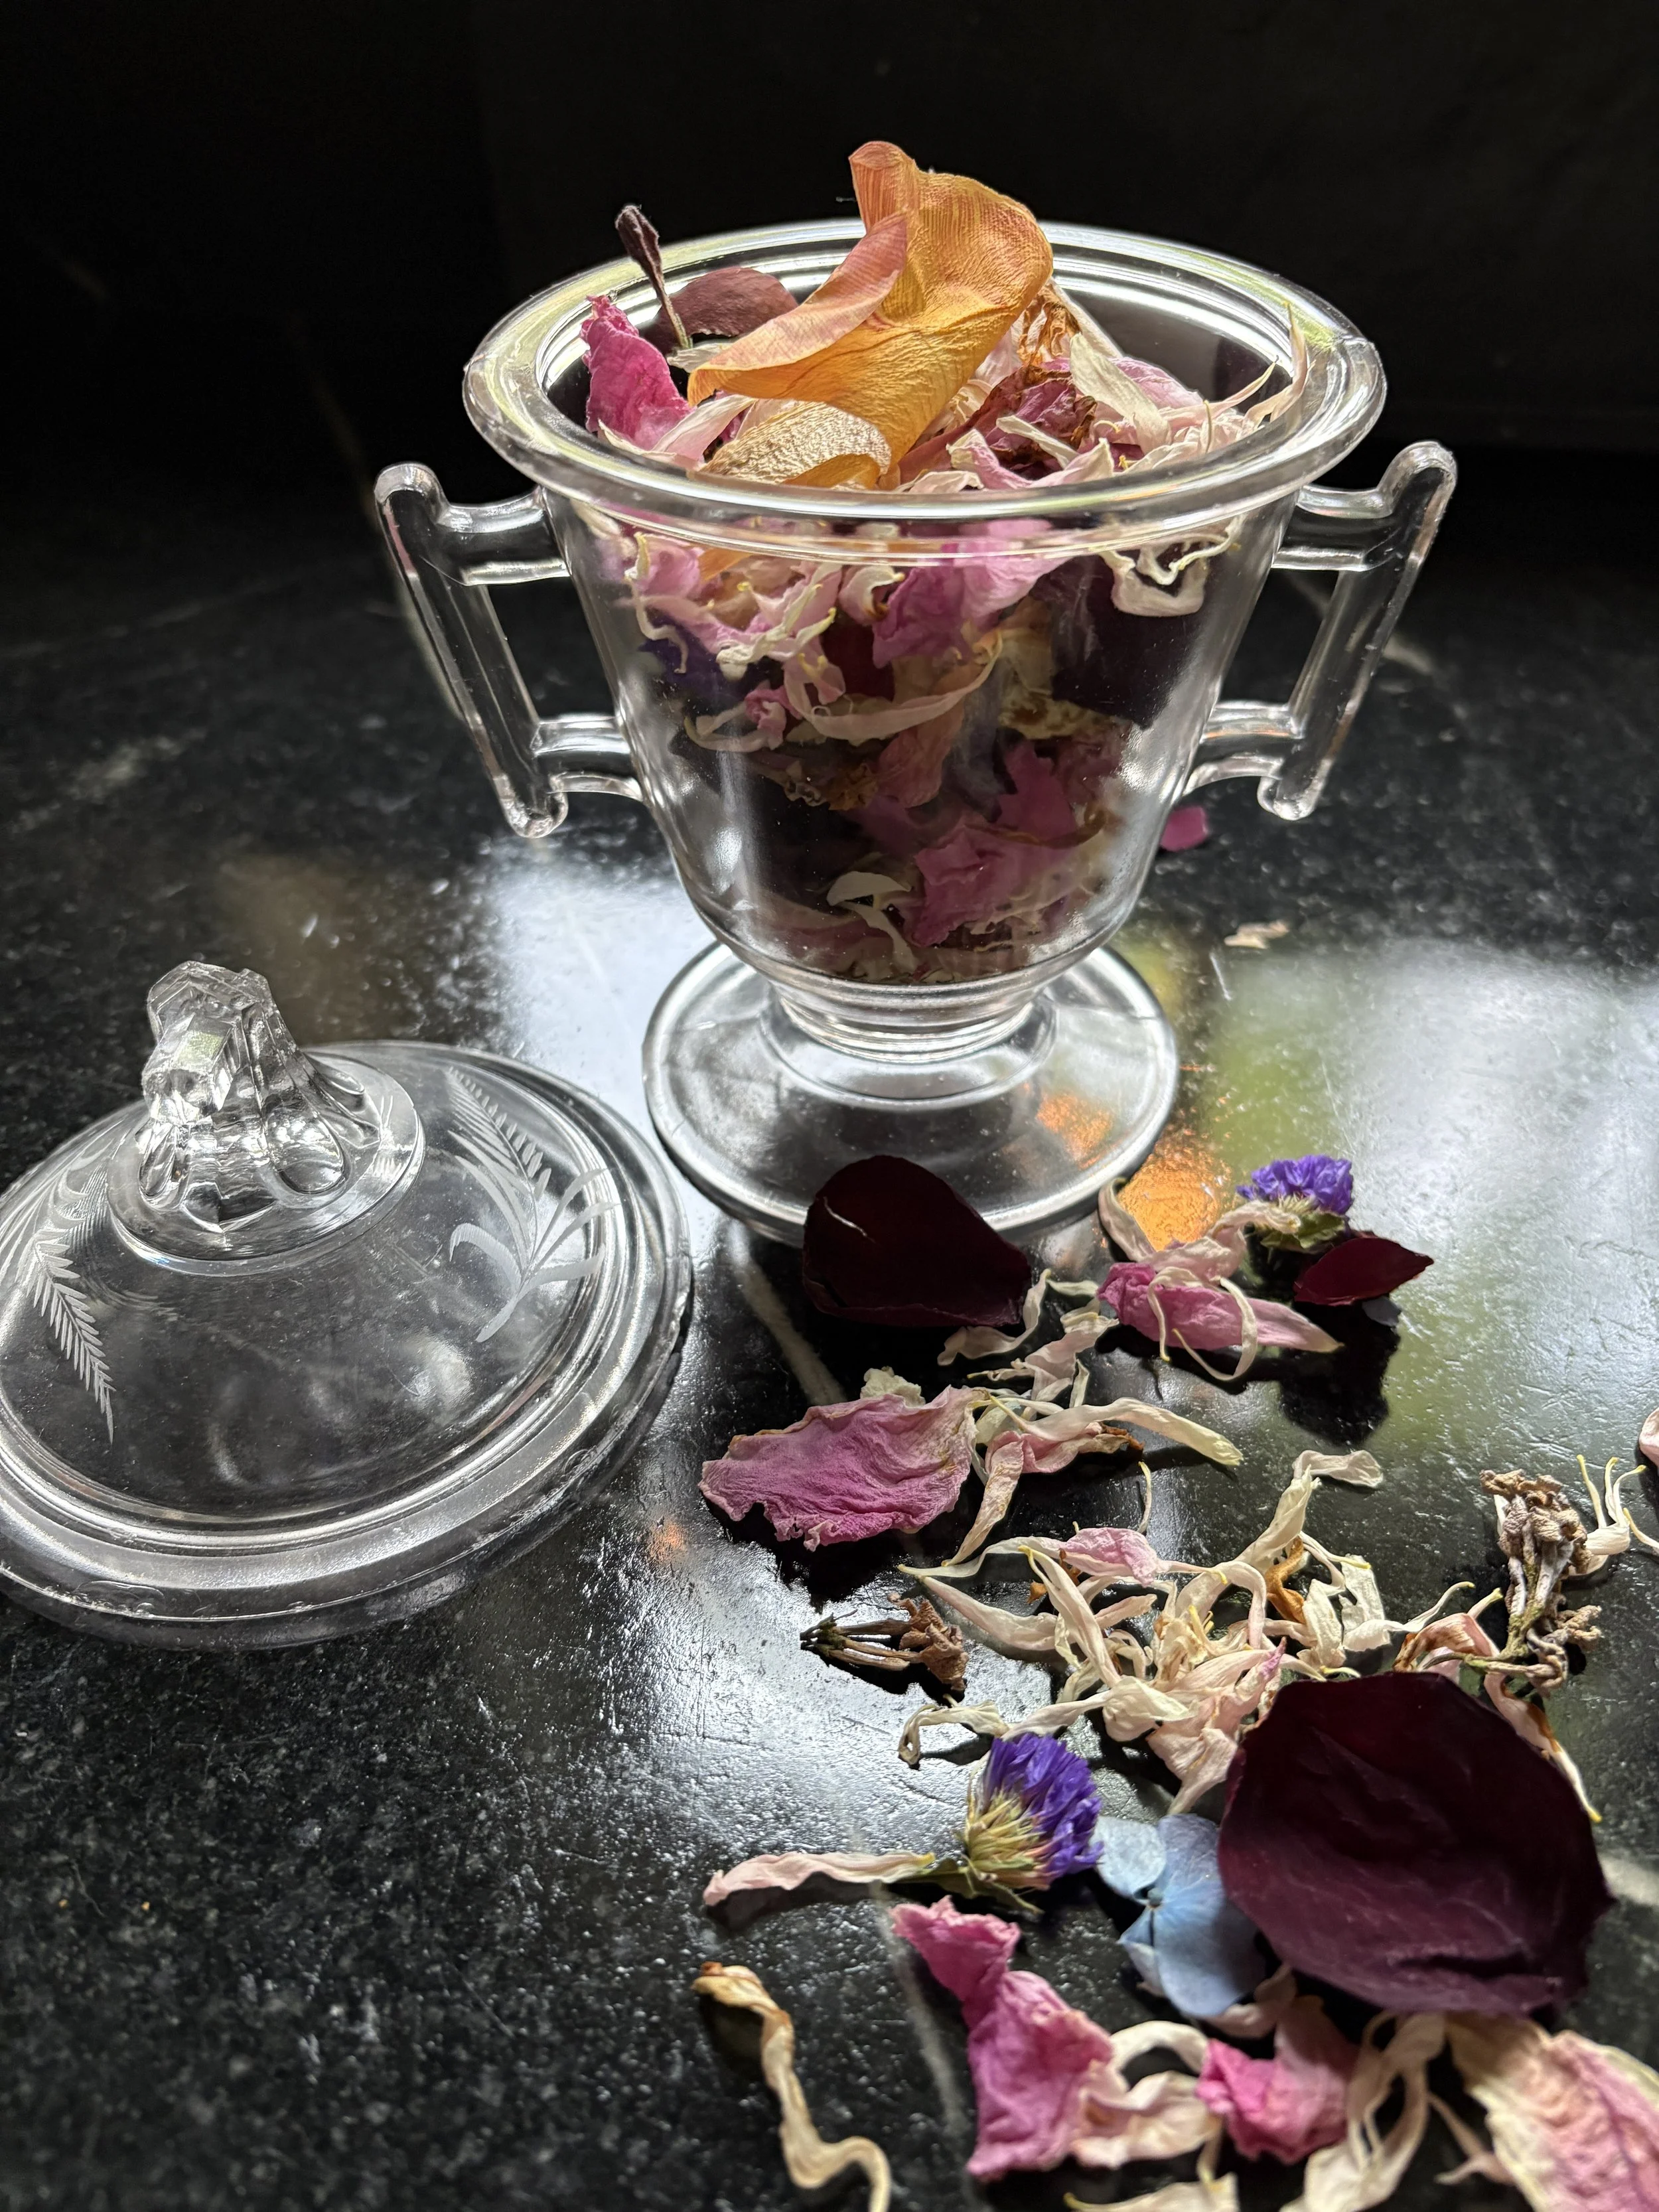
Flower Confetti for Styling Summer Tables
Forage from your gardens
Take a walk around your gardens or a nearby meadow and bring your shears and a small bag or basket. Whenever I come across a flower with great color, I try to snip a few to use for flower confetti. Many cut flowers like to be cut regularly because this promotes new growth, so don’t be afraid to snip a few. If you are foraging in a meadow, make sure the petals are large enough, and if they are not, like with a wild daisy, snip the entire flower head.
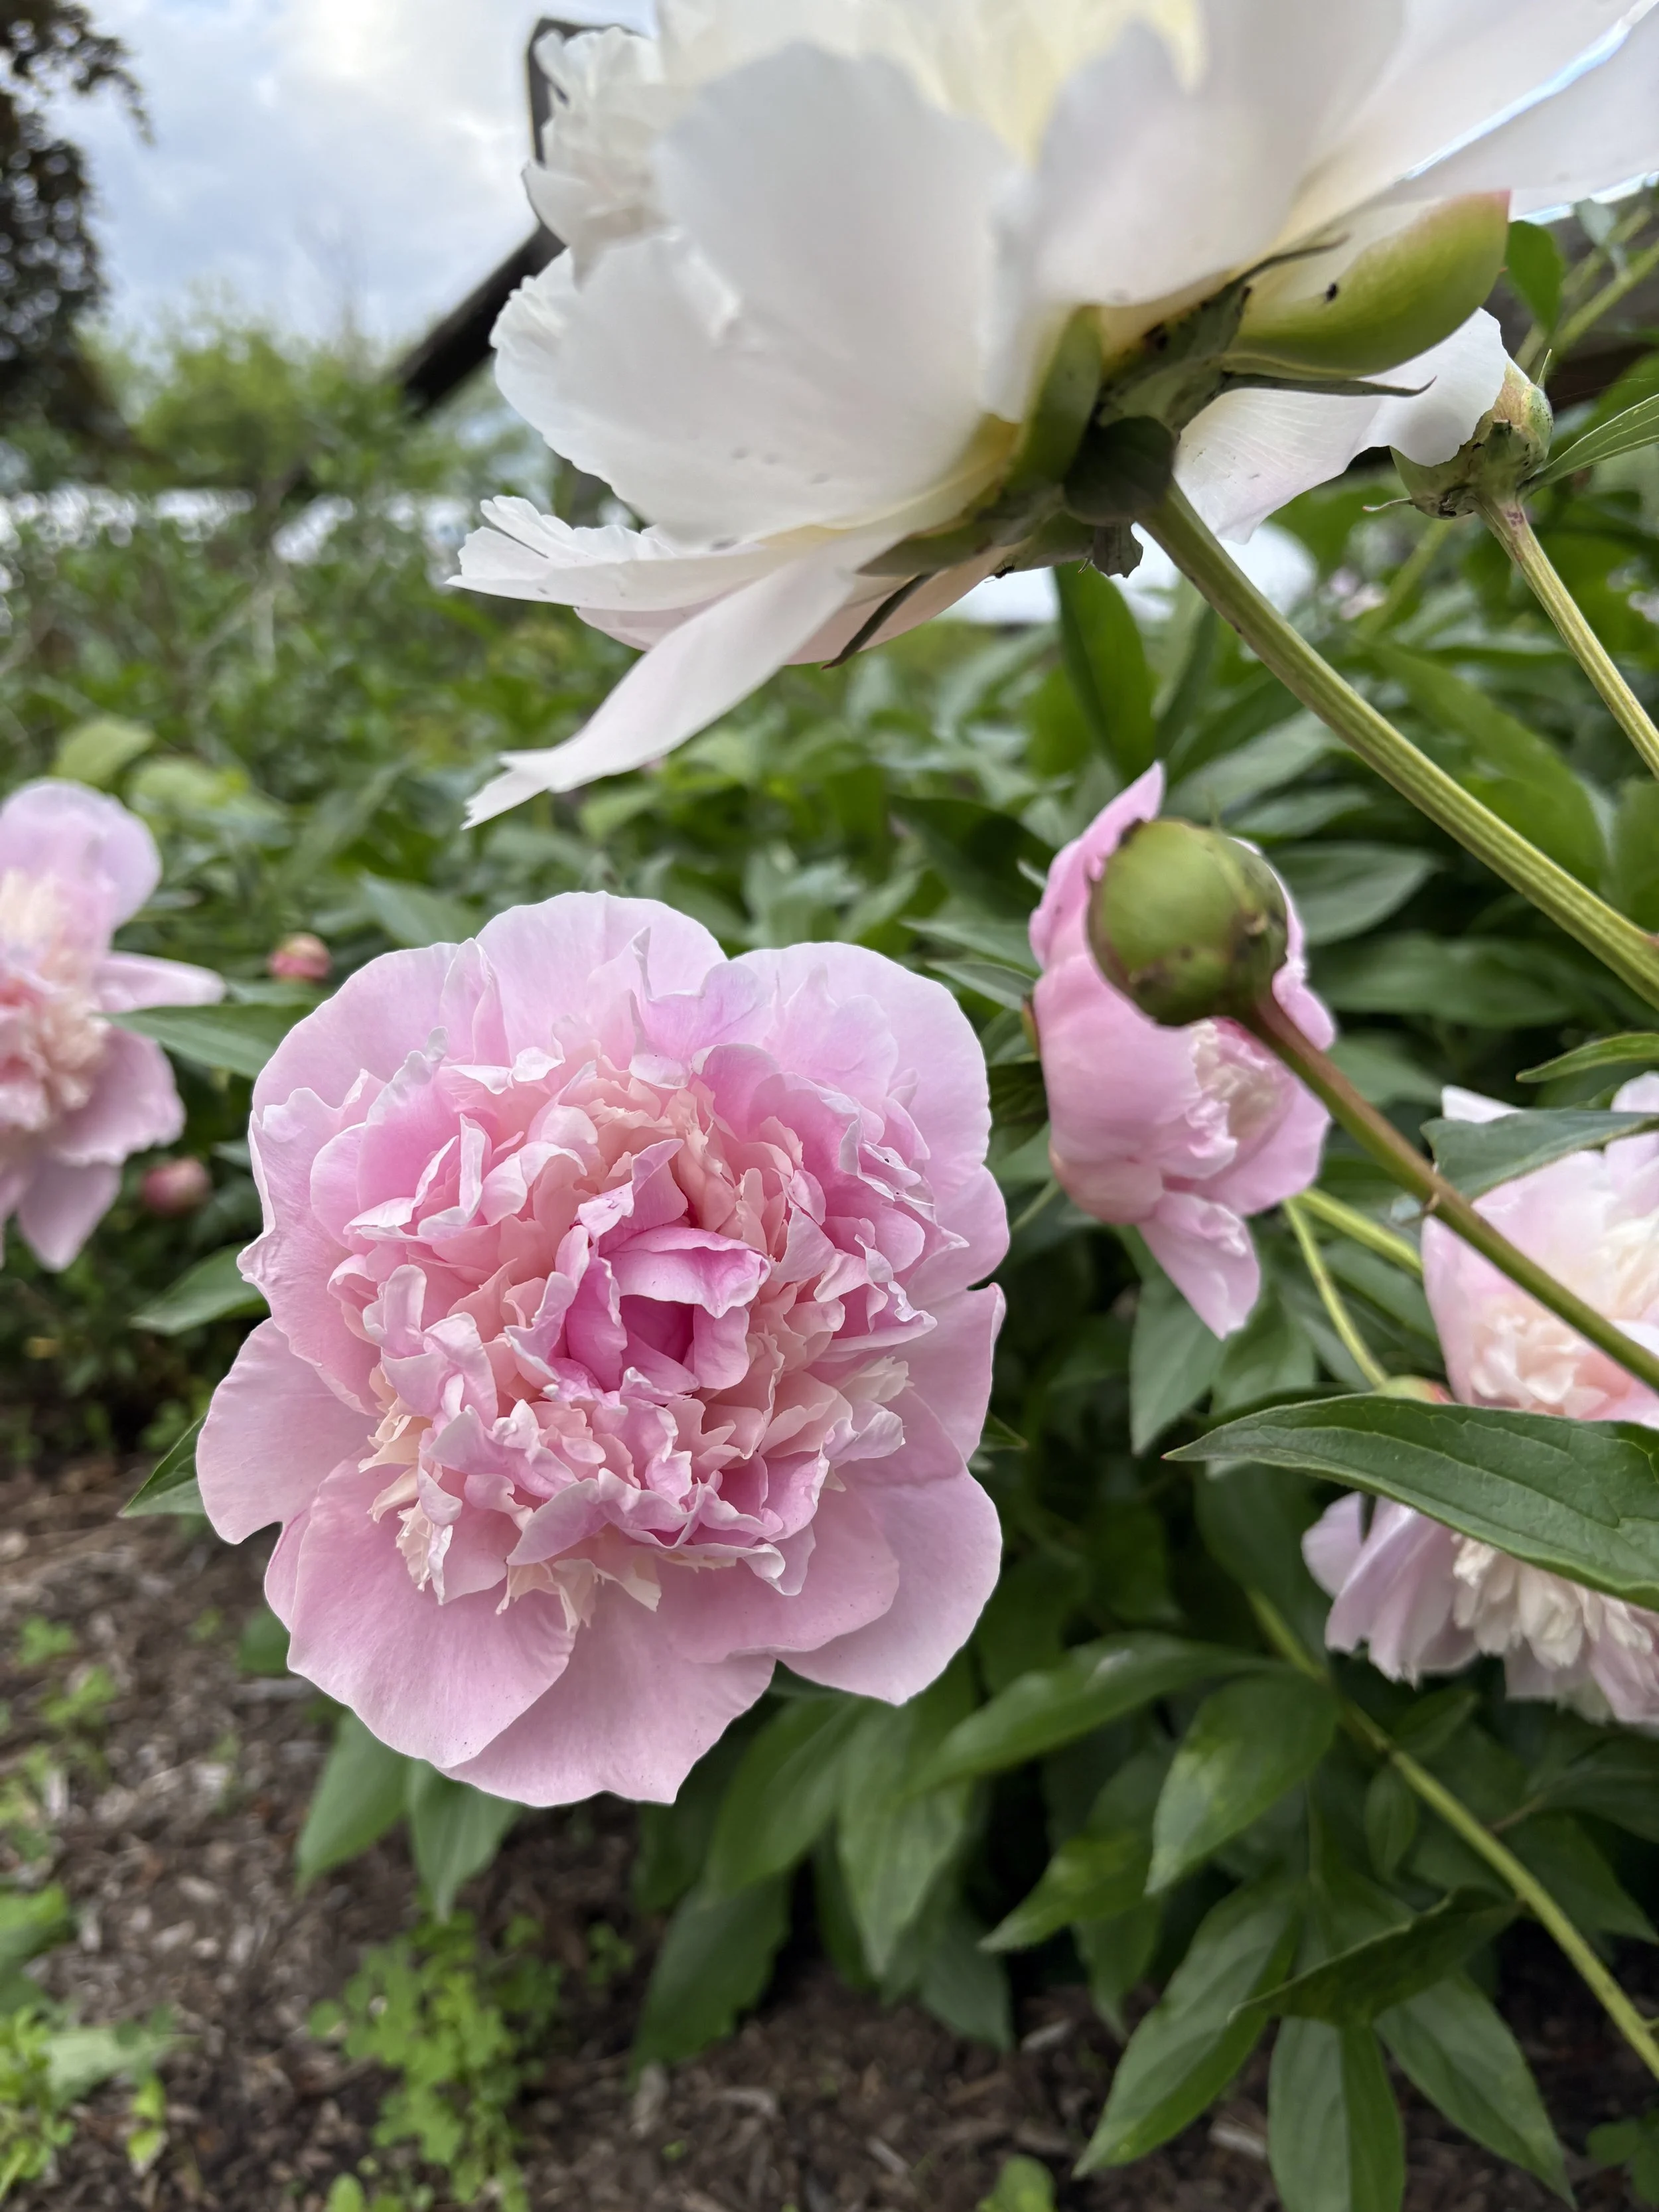
Choosing flowers with colorful petals
Save every petal
After foraging, lay everything out on a tray or towel to see what you have. Shoosh away any small insects and gently begin to remove the petals from the larger flowerheads before they turn brown
You can separate and leave the petals to dry as is on a flat surface or …
Place the petals in your dehydrator and set it to the lowest setting. Dehydrate for only about 1 hour or until all petals are completely dry but not brown. Be careful not to over-dehydrate; watch closely. All flowers are different, so this step needs to be monitored
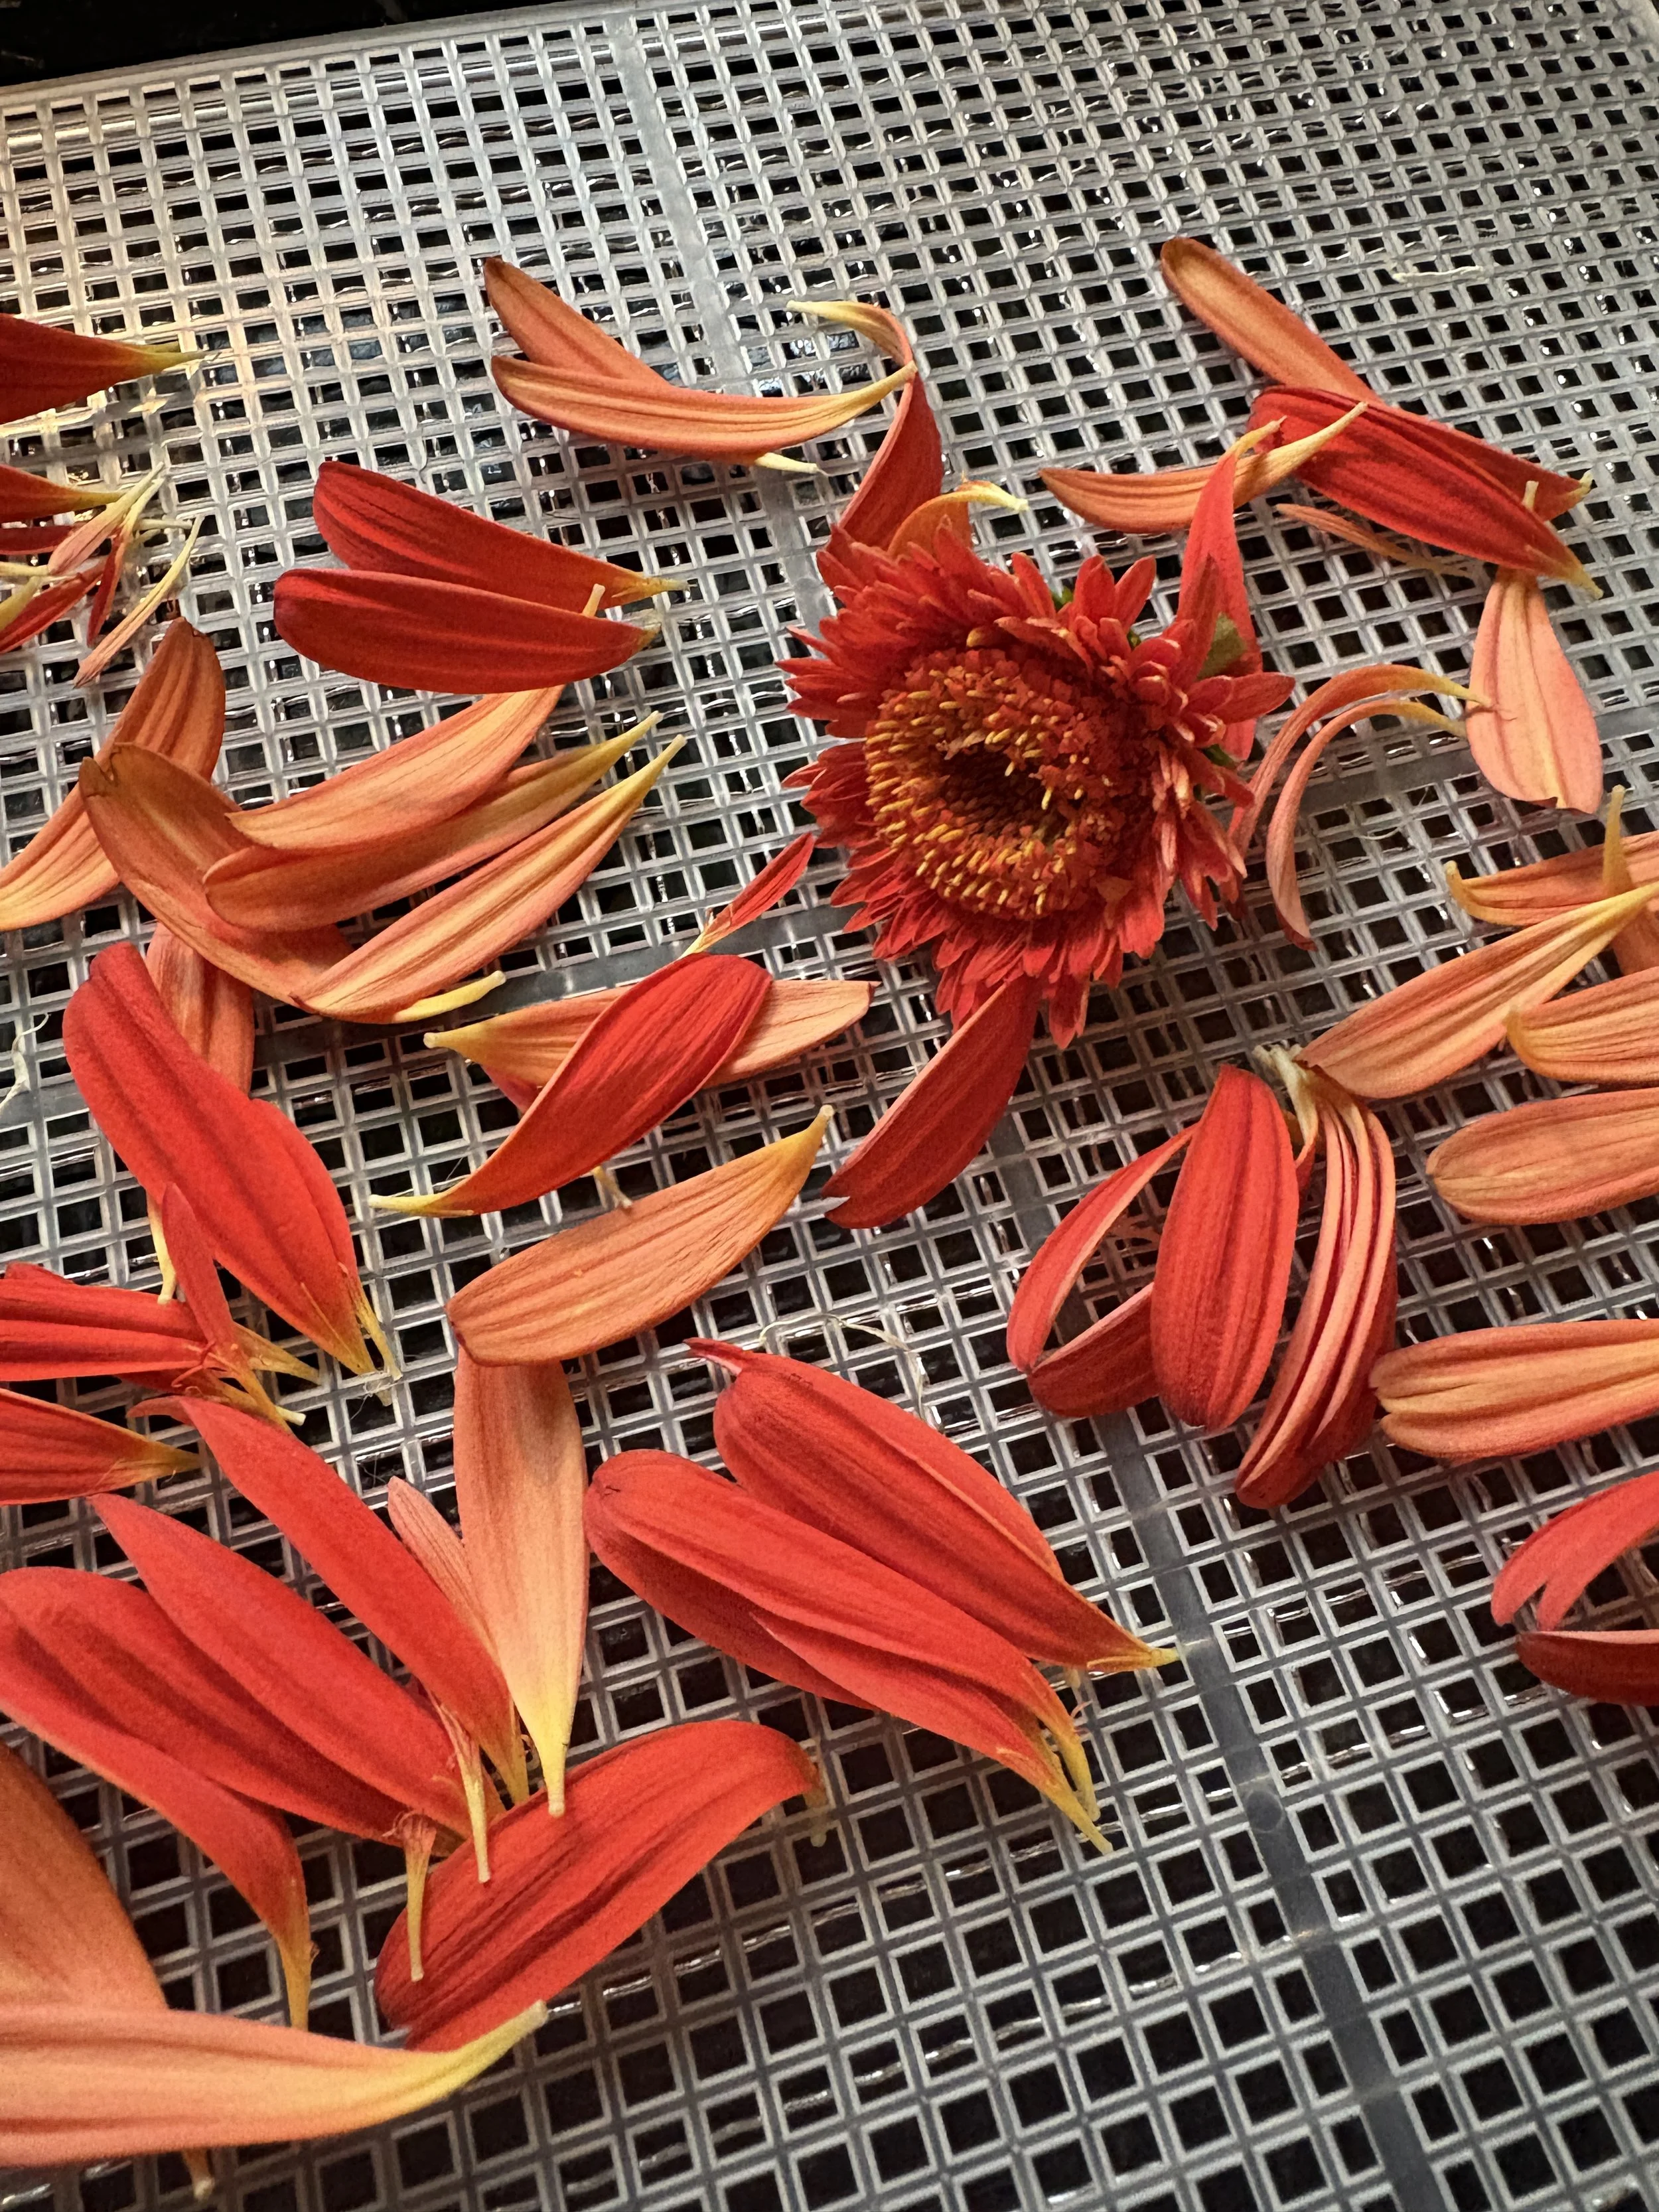
Separating the petals from the centers
Store After Drying
Separate and place the petals on a white plate so you can easily see the array of colors, and if necessary, wait several days to make sure they completely dry
Discard any petals that have turned brown
Store the dried petals in a wide-mouth jar without a lid or use a lid with air vents to allow air circulation and prevent molding.
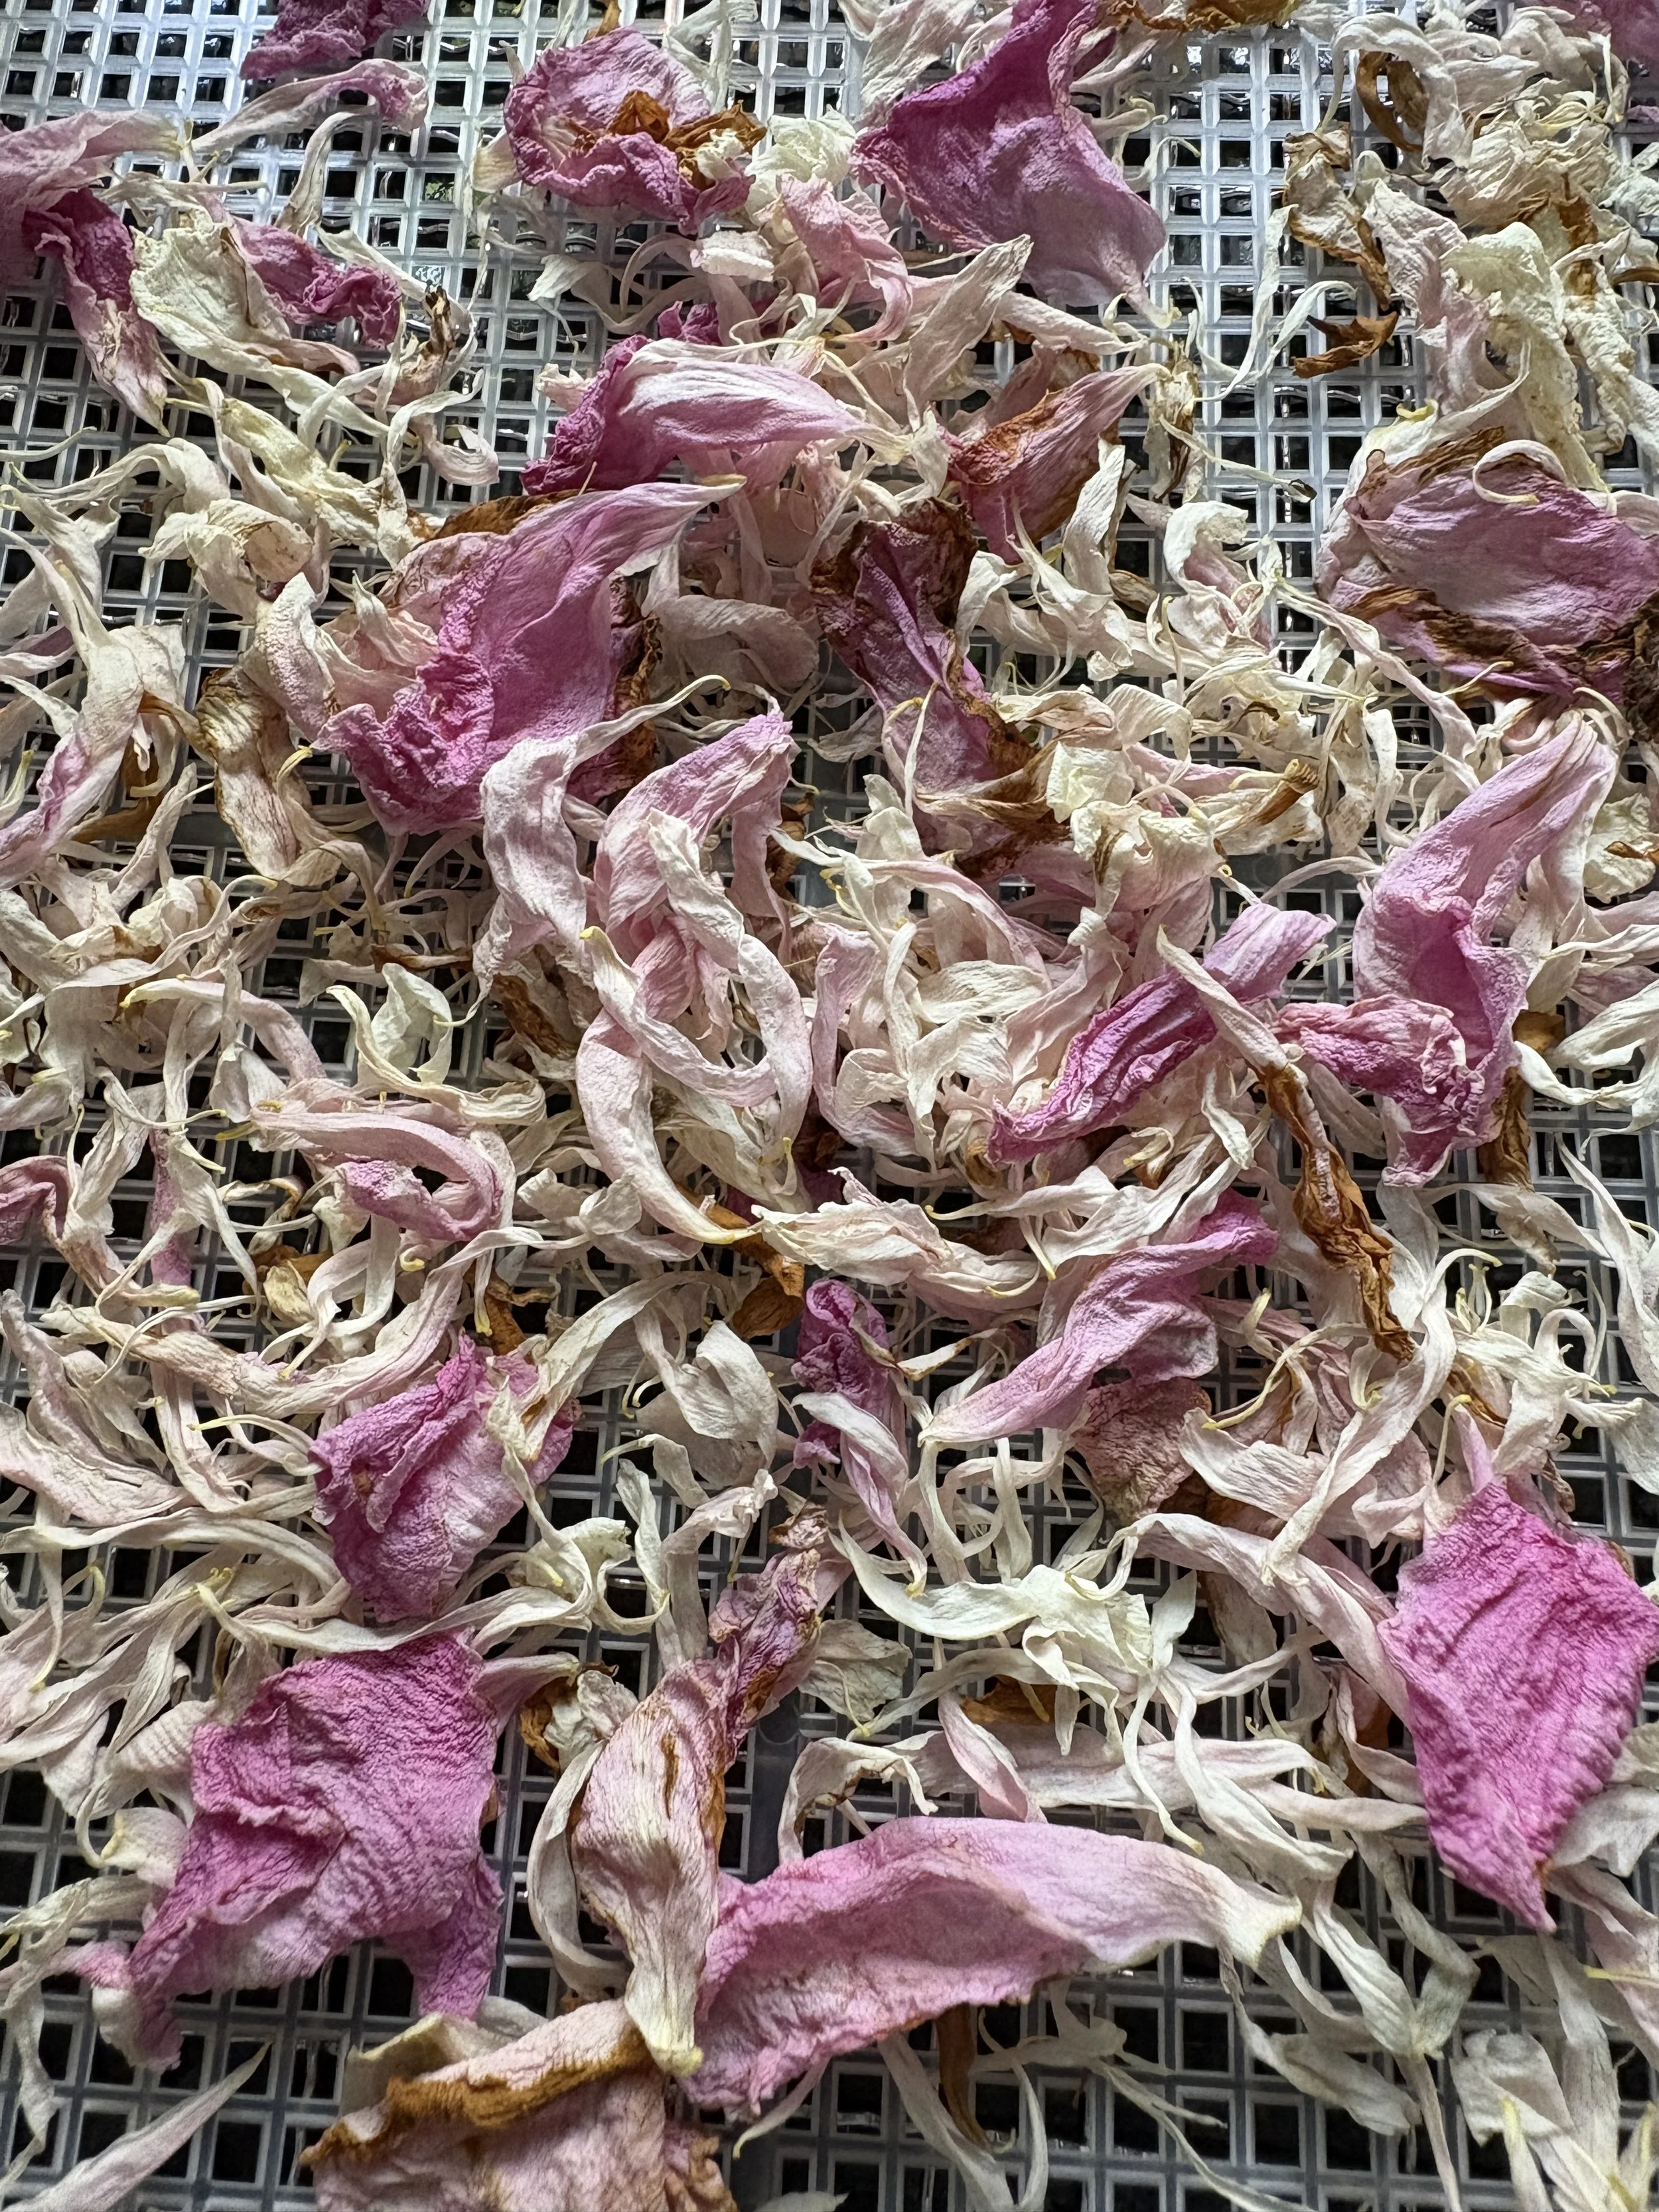
Dried Peony Petals
Style Tables and Give Confetti Gifts
Now on demand, you can create flower confetti jars to give as gifts. They make lovely summer picnic gifts, and they pair so nicely with baskets full of fresh herbs, vegetables, and homemade sourdough bread.
Style pretty summer tables by sprinkling the flower confetti around candles, place settings, or amidst flower arrangements. Here is the list of all the supplies I use to create my own flower confetti. Enjoy!
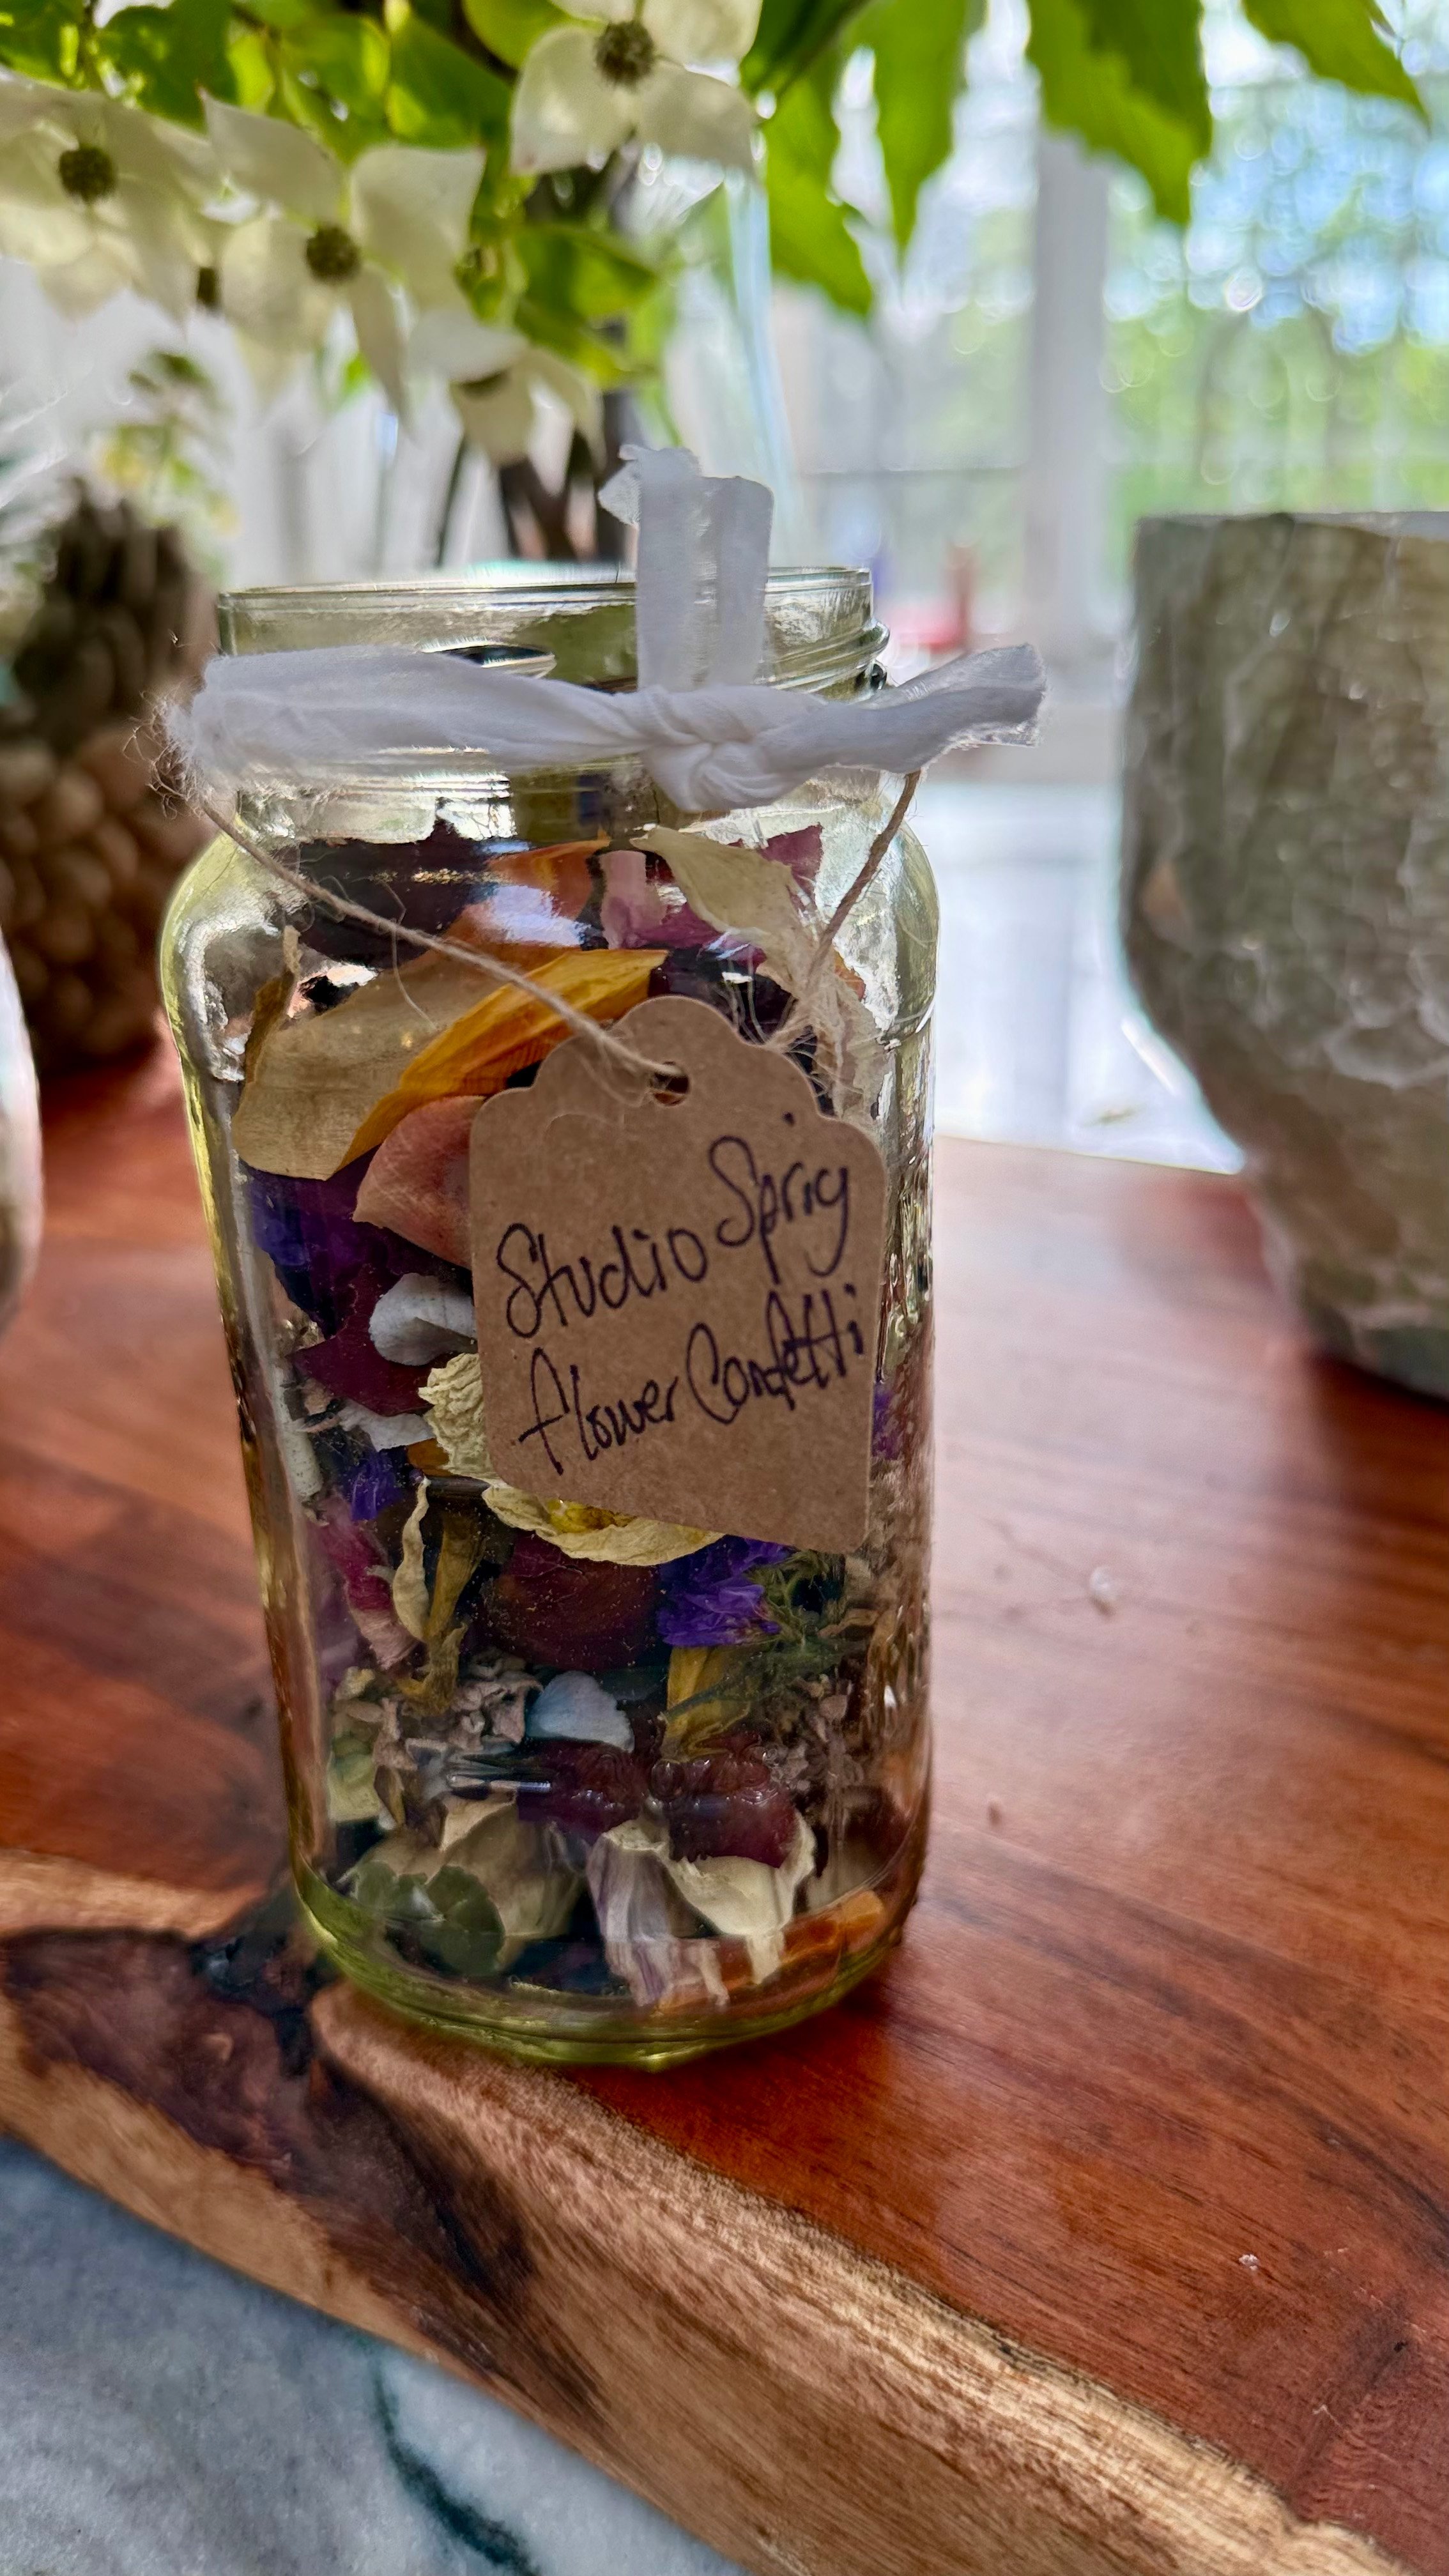
Simple jars of Flower Confetti make wonderful gifts
How We Painted our Barn
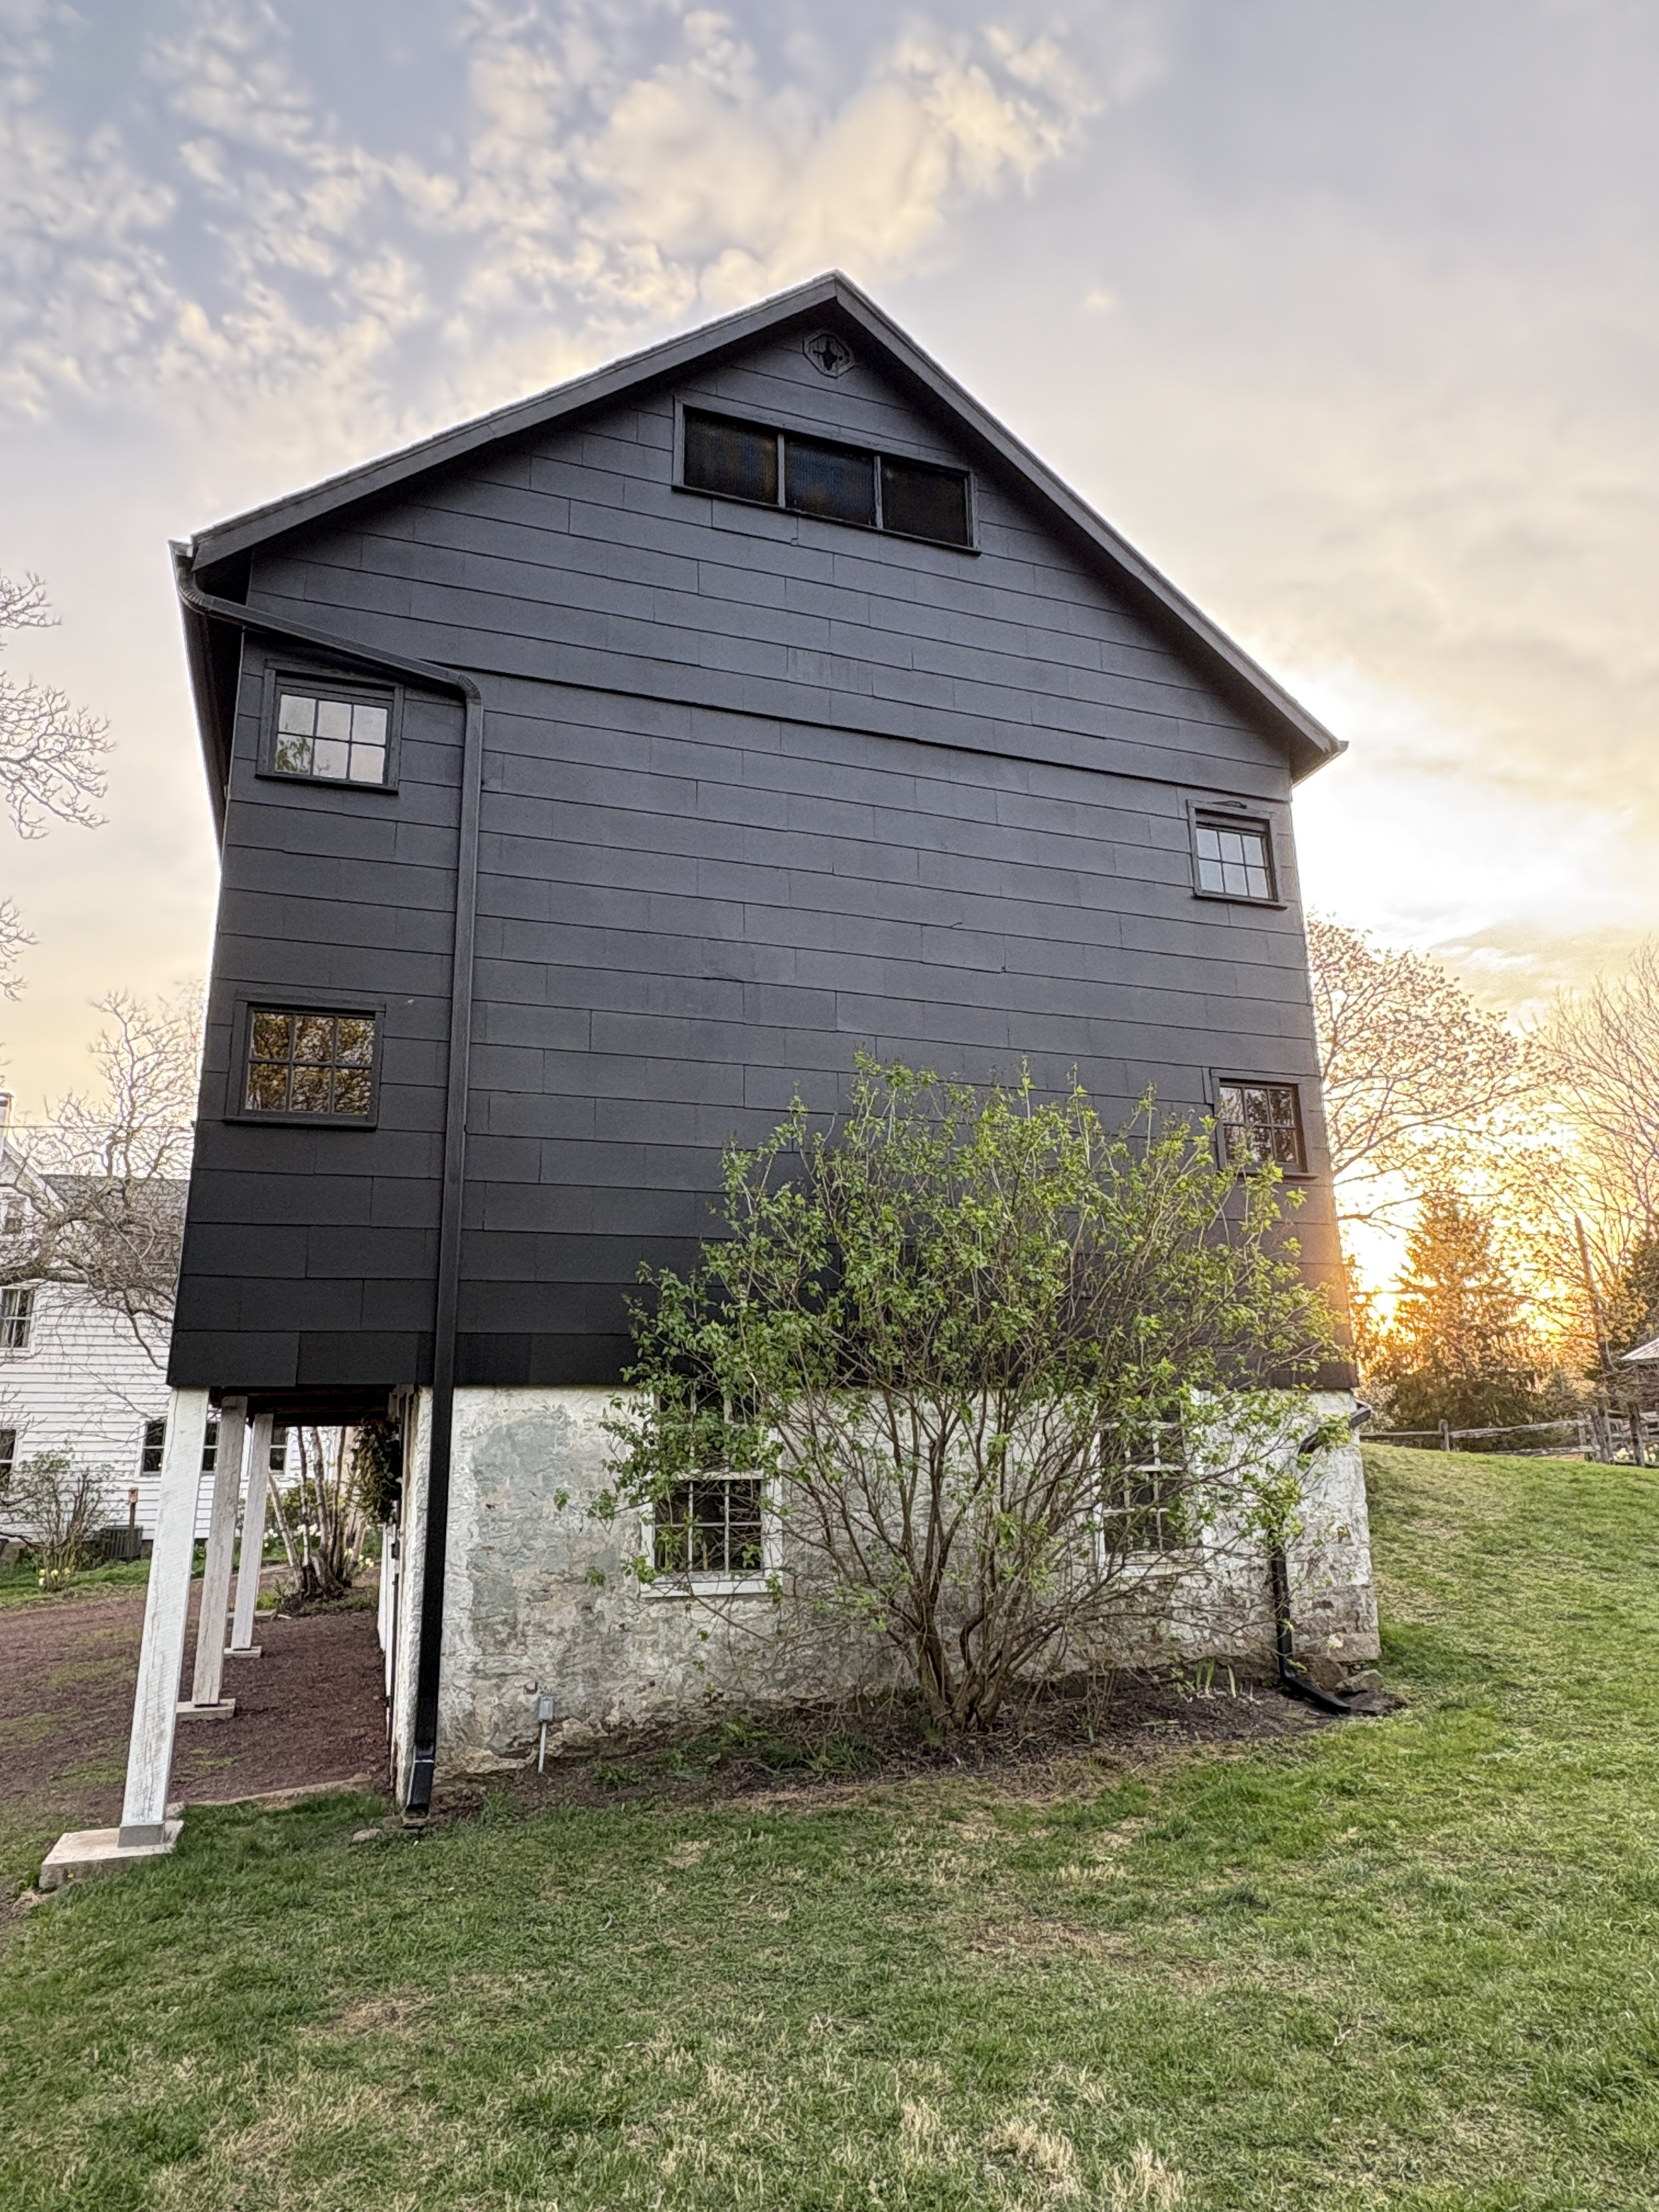
When we bought our farm, Windy Hill, in 2007, the property had a beautiful Victorian farmhouse, a small cottage, a big storage building in the back, and a stately, 4-story, hunter green barn.
The barn, unlike the modernized house, was in near-original condition. A lone chicken resided in the barn, not too long before we arrived, and there were animal pens, a long trough, and more than a few bird nests waiting for us inside. We jumped on this pretty early on, cleaning up the unnecessary chicken coop, powerwashing the trough and floors, and securing many of the windows so new birds would not get inside. The exterior, however, remained intact until we had to replace a few of the 28 windows that were damaged during a windstorm.

Windy Hill’s Victorian House

Windy Hill’s Bank Barn 2007-2024

Windy Hill Bank Barn North Side View

Windy Hill Bank Barn South Side View
This Old Barn
Over the years, we didn’t need the barn, and we made no plans to raise farm animals because we were busy raising our three young children. But we knew it was important to preserve our piece of history and to keep her looking the best we could.
We brought in The Heritage Conservancy of Bucks County and found that the barn and house were likely built sometime in the early to mid-1800s. We learned there are Roman numerals or “marriage marks” (markings on the timbers of the roof frame to indicate timber location in the building) on the ceiling of the barn’s upper floor, so this helped in determining the age.
Why make a change?
Somewhere during the autumn of 2024, I spotted an oversized photograph of a painted, black barn at my local Benjamin Moore store. It was an advertisement for their stock black (2132-10) low lustre paint, and I fell in love immediately. I knew our barn’s south side was especially faded and worn from the severe storms we’ve been having lately, and I wondered what our barn would look like if it were updated with black. So after colorizing a photo in Photoshop to get a quick glimpse, I called professional painter, Brandon Chamberlain, for a consultation and estimate, and the rest is history.

28 Freakin’ Windows!
The first thing we had to do was remove all of the windows. Some were new, as I mentioned before, and some were very old and literally falling apart. Nevertheless, we needed to remove, categorize, clean, and prep each window for painting. This was by far the worst part of the job, and it fell primarily on me. I sorted and cleaned every single window in our mudroom, which took the better part of a day. Then Michael and I set up shelving in our dining room, where we began the tedious job of painting every single frame and muntin (strips of wood that hold the window panes in place) for every single window! I will never do this again, you can quote me.

disguising old and ugly imperfections
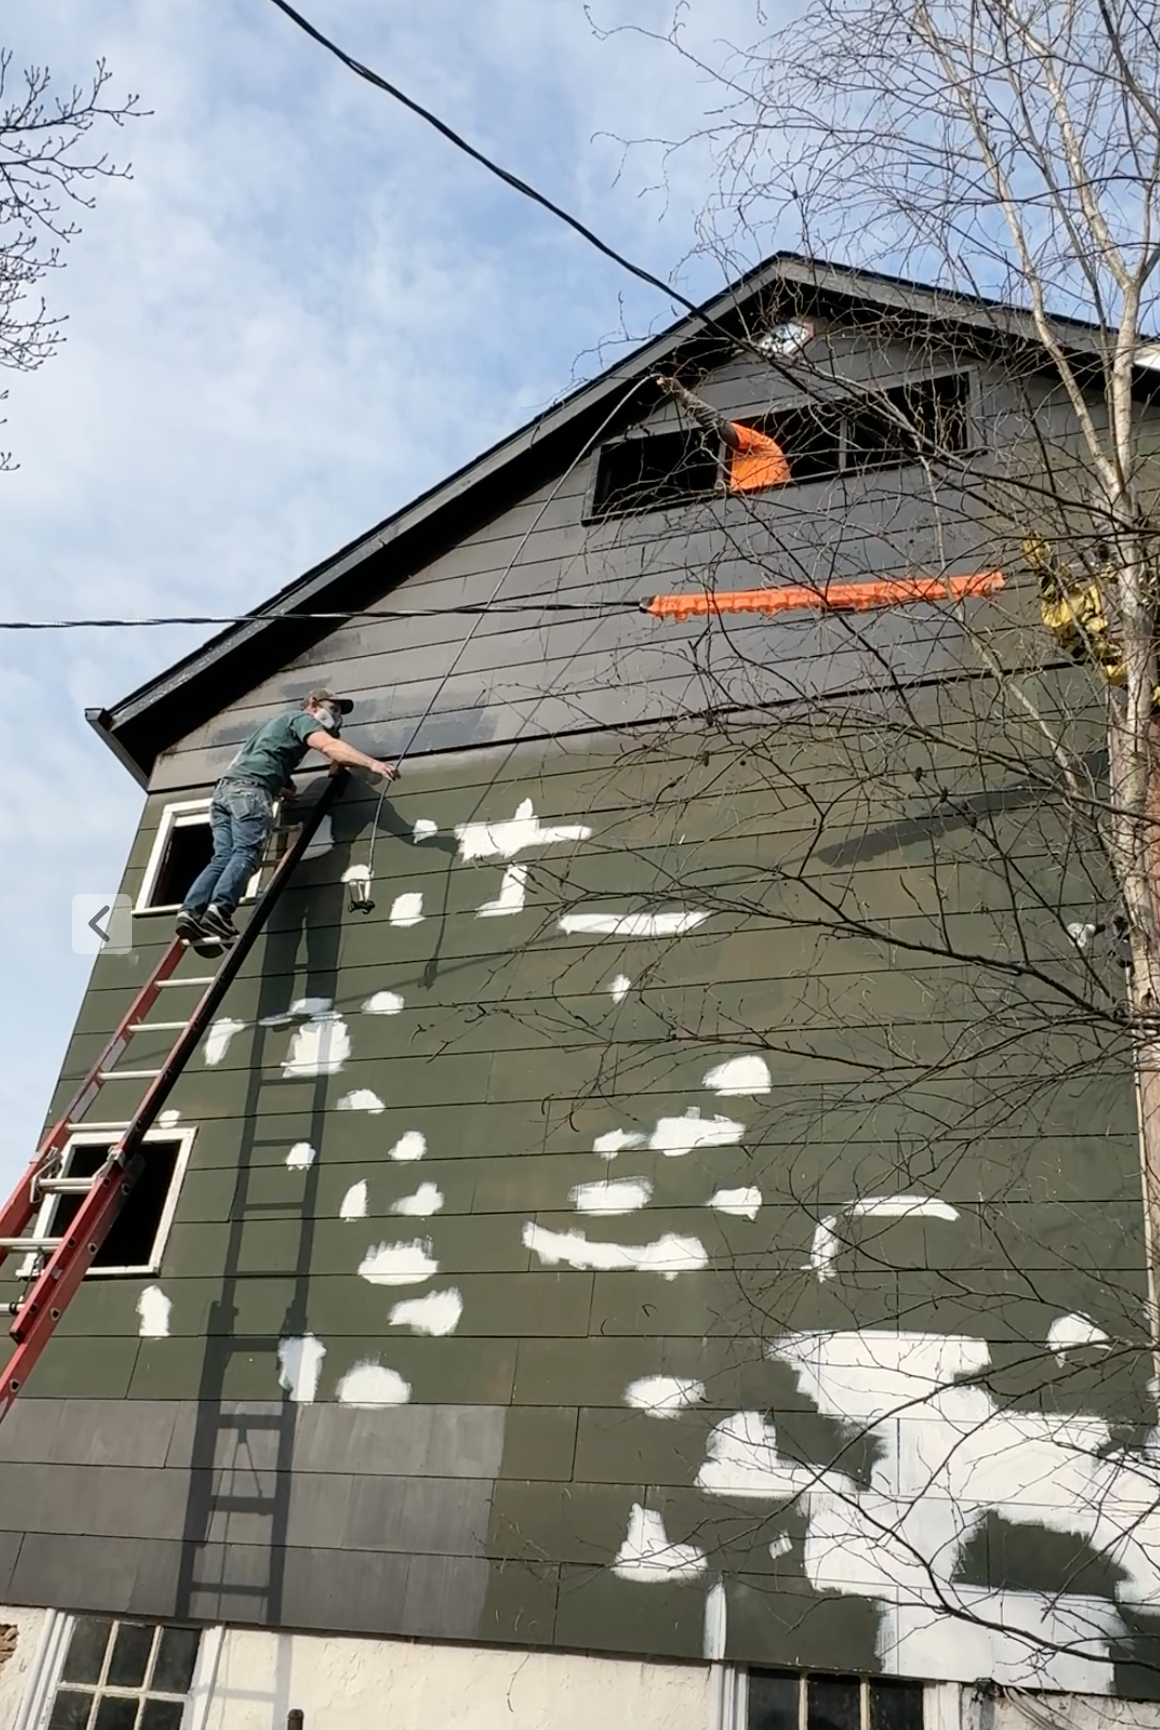
Brandon started by going around the entire barn and filling all of the cracks, holes, and broken tiles so they’d be virtually invisible after painting. For this, he used a product called Bondo Filler, which he said covers even the “worst imperfections” and dries quickly. He was right. There were quite a few broken shingles on this barn, and now it’s very difficult to spot them. Brandon also did quite a bit of carpentry prep work by patching peaked soffits riddled by carpenter bees, and by replacing a few window sills that were rotten and worn. The extra effort was very much appreciated.


The Windy weather at Windy Hill
Once the Bondo was set and all of the prep work was finished, it was time to spray the paint. Brandon set aside 2 days in April to get two coats of paint on the barn, but the weatherman had other plans.
The first week of April came with freezing temperatures, wind, and lots of rain. The second week of April brought the same awful weather. Every time Brendan tried to begin work, something would happen - a fierce wind gust, an unexpected rain shower, or freezing temperatures that we’d normally see in February and March. It was discouraging, to say the least, as our deadline was April 20, Easter.
Brandon and his assistant used only ladders to scale this tall barn. And as you can see in the photo above, the south side peak was the most difficult because he had to work around a power line and a very tall birch tree. But the two of them dangled the sprayer out of the upper windows and got the job done.

Why You Should Hire a Professional
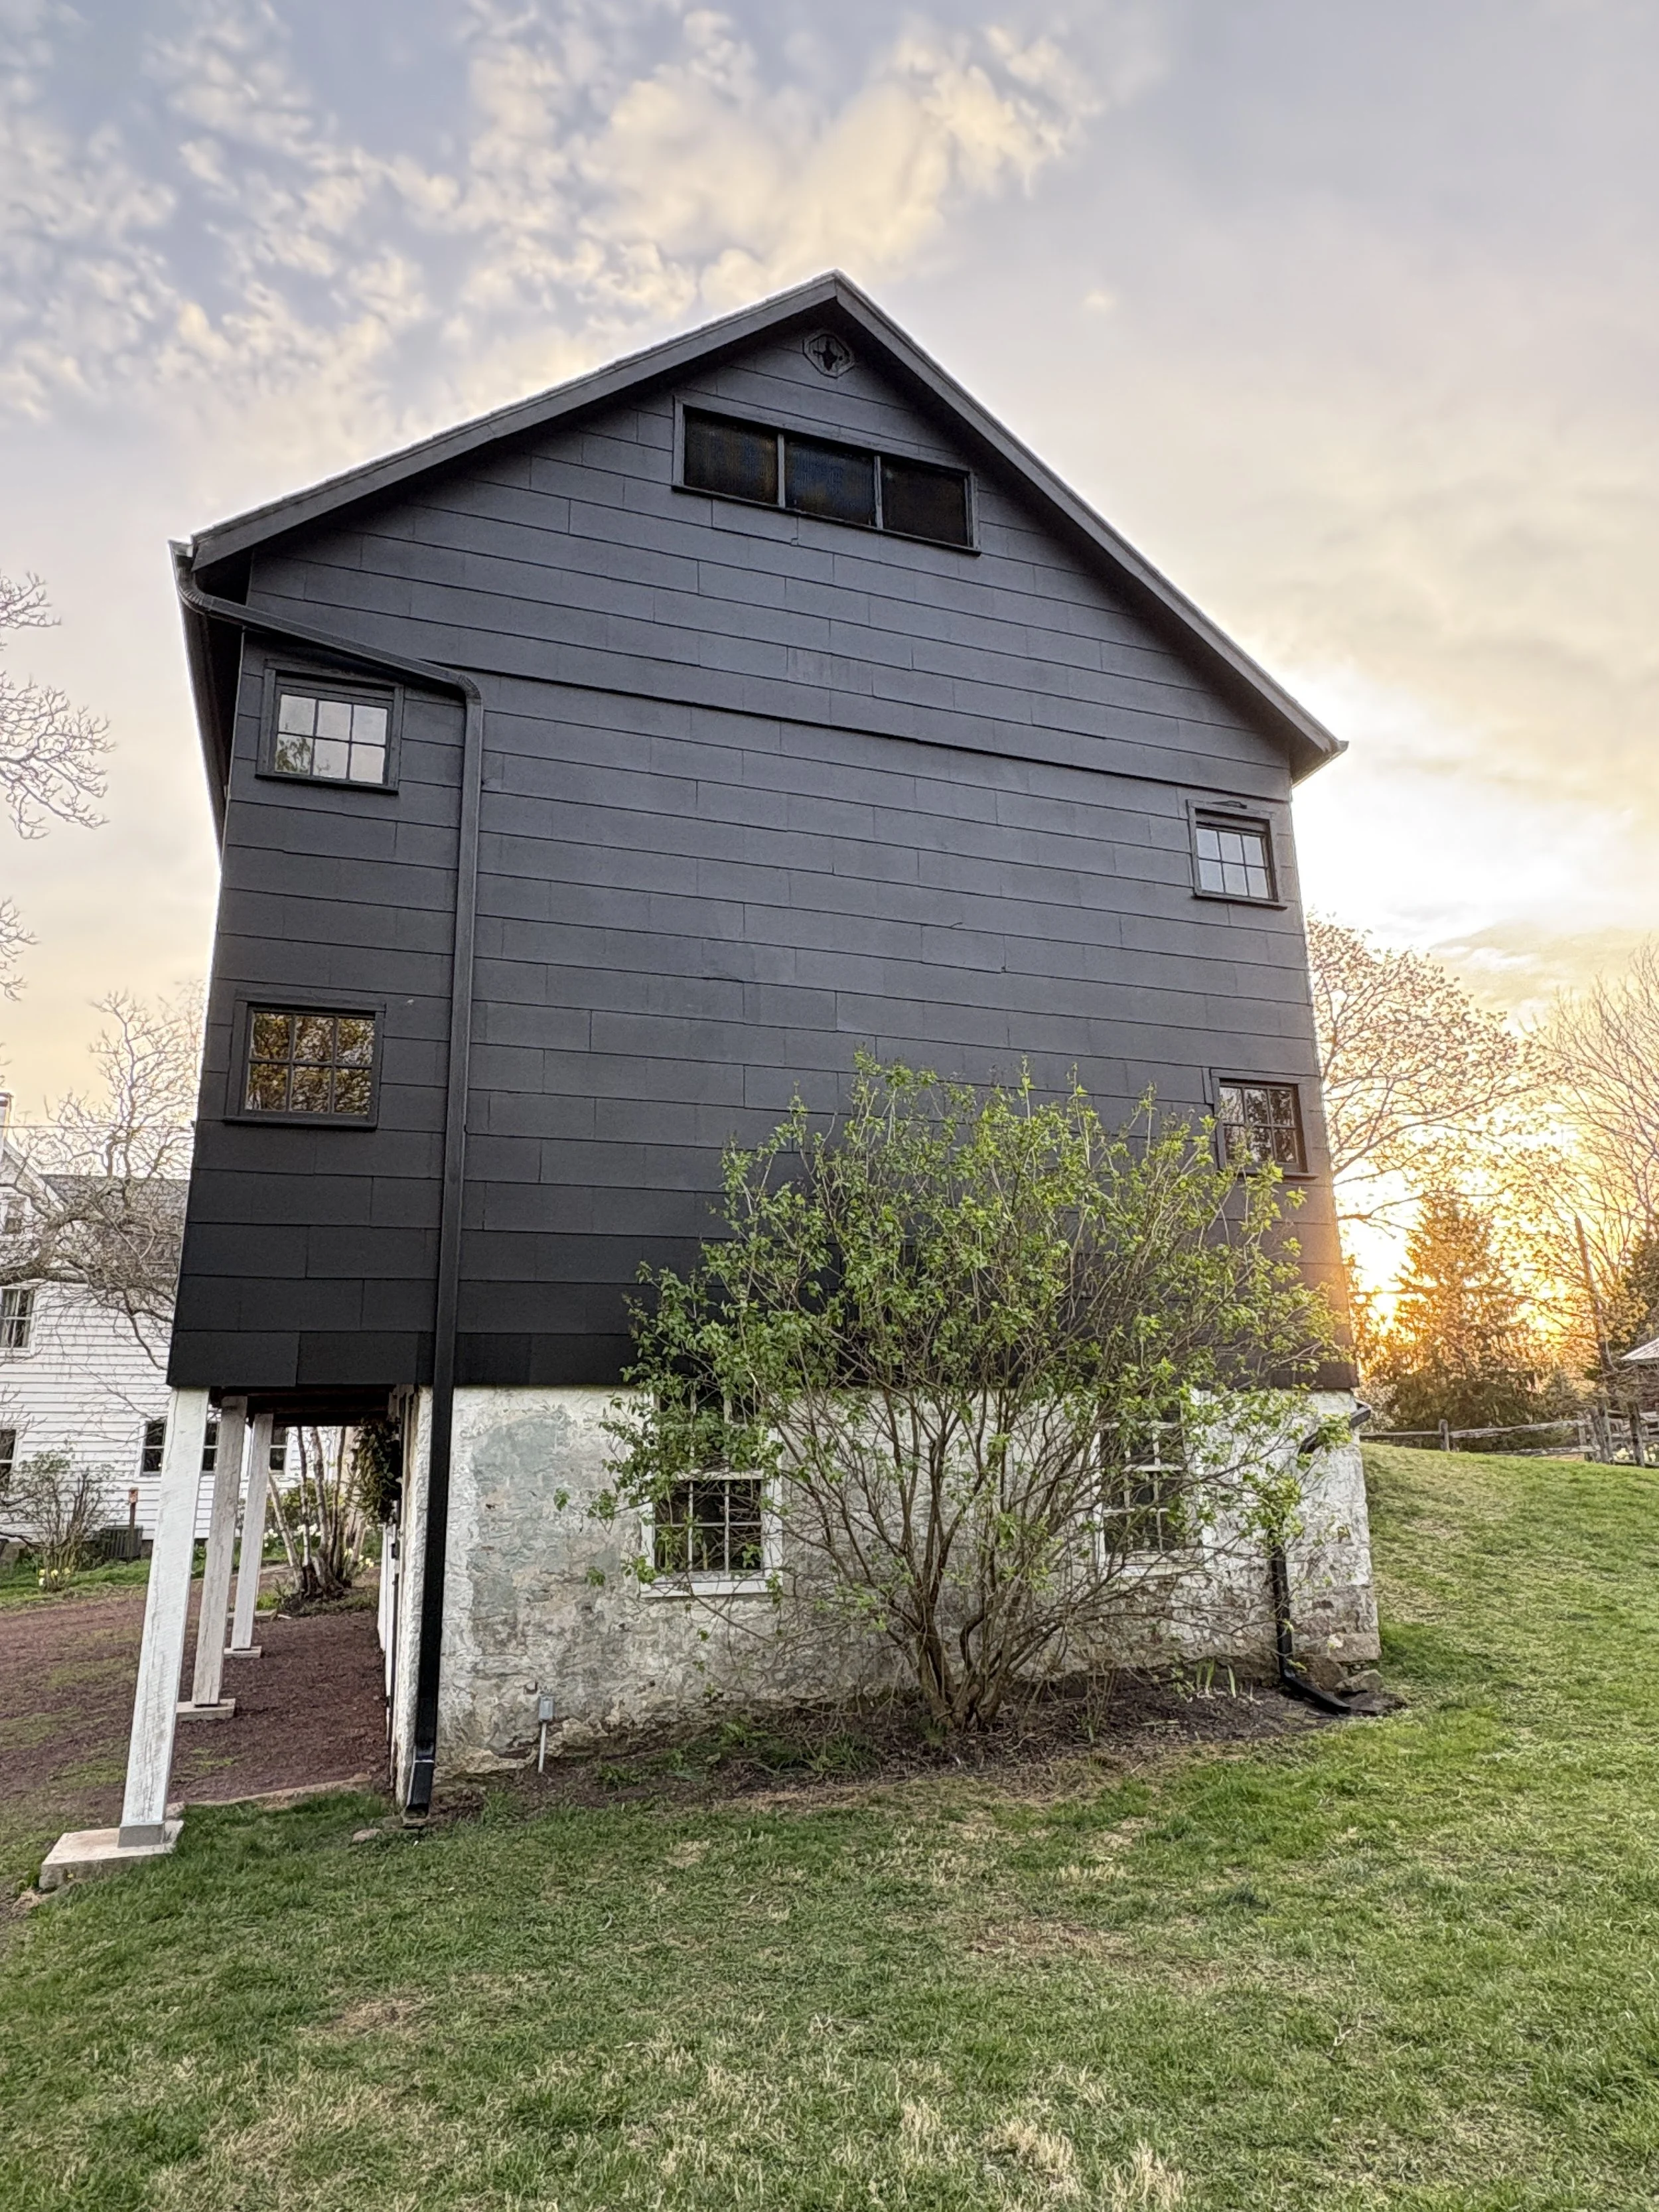
Forever the professional, Brandon pressed on, week after week, day after day, throughout April, assuring me over and over that the barn would be painted by Easter. And so it was. Brandon finished the job on Good Friday, which meant that we could reinstall all the windows on Saturday, just in time for the holiday.


the Finishing Touches
We did break two of the older window panes when we reinstalled, but fortunately we have a great, little glass shop in town that will fix them up in one day. They are already at the doctor's.
I also searched for very large, faux, spring wreaths to adorn the 3 front barn doors. These oversized green and white wreaths are from Wayfair, but you can find similar ones here.

Thank you for following along on our 2025 Bank Barn Journey. If you have any questions please share in the comments, I’d be happy to help if I can.

Windy Hill Bank Barn 2025

What to Plant for Mesmerizing Spring Blooms
Hellebore: One of my favorites!
Hellebores are known commonly as The Lenten Rose because they bloom in the winter, generally between February and April, around the time of Lent. And although they are somewhat rose-like in appearance they belong to the buttercup family. Their colors range from white to dusty pink, pale yellow, muted green, burgundy, purple and I’ve even seen coral.

they must be shy
Interestingly the flower of the Hellebore faces down in the garden so I had to position my camera underneath to get these photos. I like to think they are just timid and shy but Hellebores face downwards to protect the internals of the flower and to allow successful pollination.

Easy to Grow
Hellebores are shade perennials that naturalize easily. I planted a few little baby springs about 3 years ago and my garden is now bursting. Hellebores spread rapidly thanks to their extensive root systems and self-seeding habits. I dedicated a side garden in the shade for them and I hope they eventually cover the whole thing. Some people regard them as invasive, but I don’t think I could ever get enough of them here at Windy Hill. They are among my favorites.

Pretty but Poisonous
As with many flowering plants, the Hellebores are poisonous if ingested, so be sure to keep them out of the mouths of young children and pets. But on a positive note, deer do not go near them!

Hellelore
The Hellebore flower has a dark and mysterious reputation in folklore. They are often associated with rituals of protection and banishment. In ancient times, the plant was believed to have the power to ward off evil spirits and protect against witchcraft. Click here if you want to read more about the legends and myths surrounding Hellebore.

Use as Sculpture
Last year I didn’t want my beautiful Hellebores to end, so I preserved a few stems in silica-drying crystals and displayed them with my dried Hydrangea. This arrangement lasted all year and still has some life. I love the sculptural aspect of it and the way it contrasts with the white pot.

If you fell in love with Hellebore long ago, or are just learning about them now, I hope you take the time to plant some this spring. By next Lent you should see some beautiful blooms. I’ve provided a few links below for your convenience.


I may sometimes use affiliate links, which means I’ll make a small commission, but the price you pay will be the same whether you use the affiliate link or go directly to the vendor’s website. Thank you.
Narcissus AKA Daffodil - What's Blooming at Studio Sprig
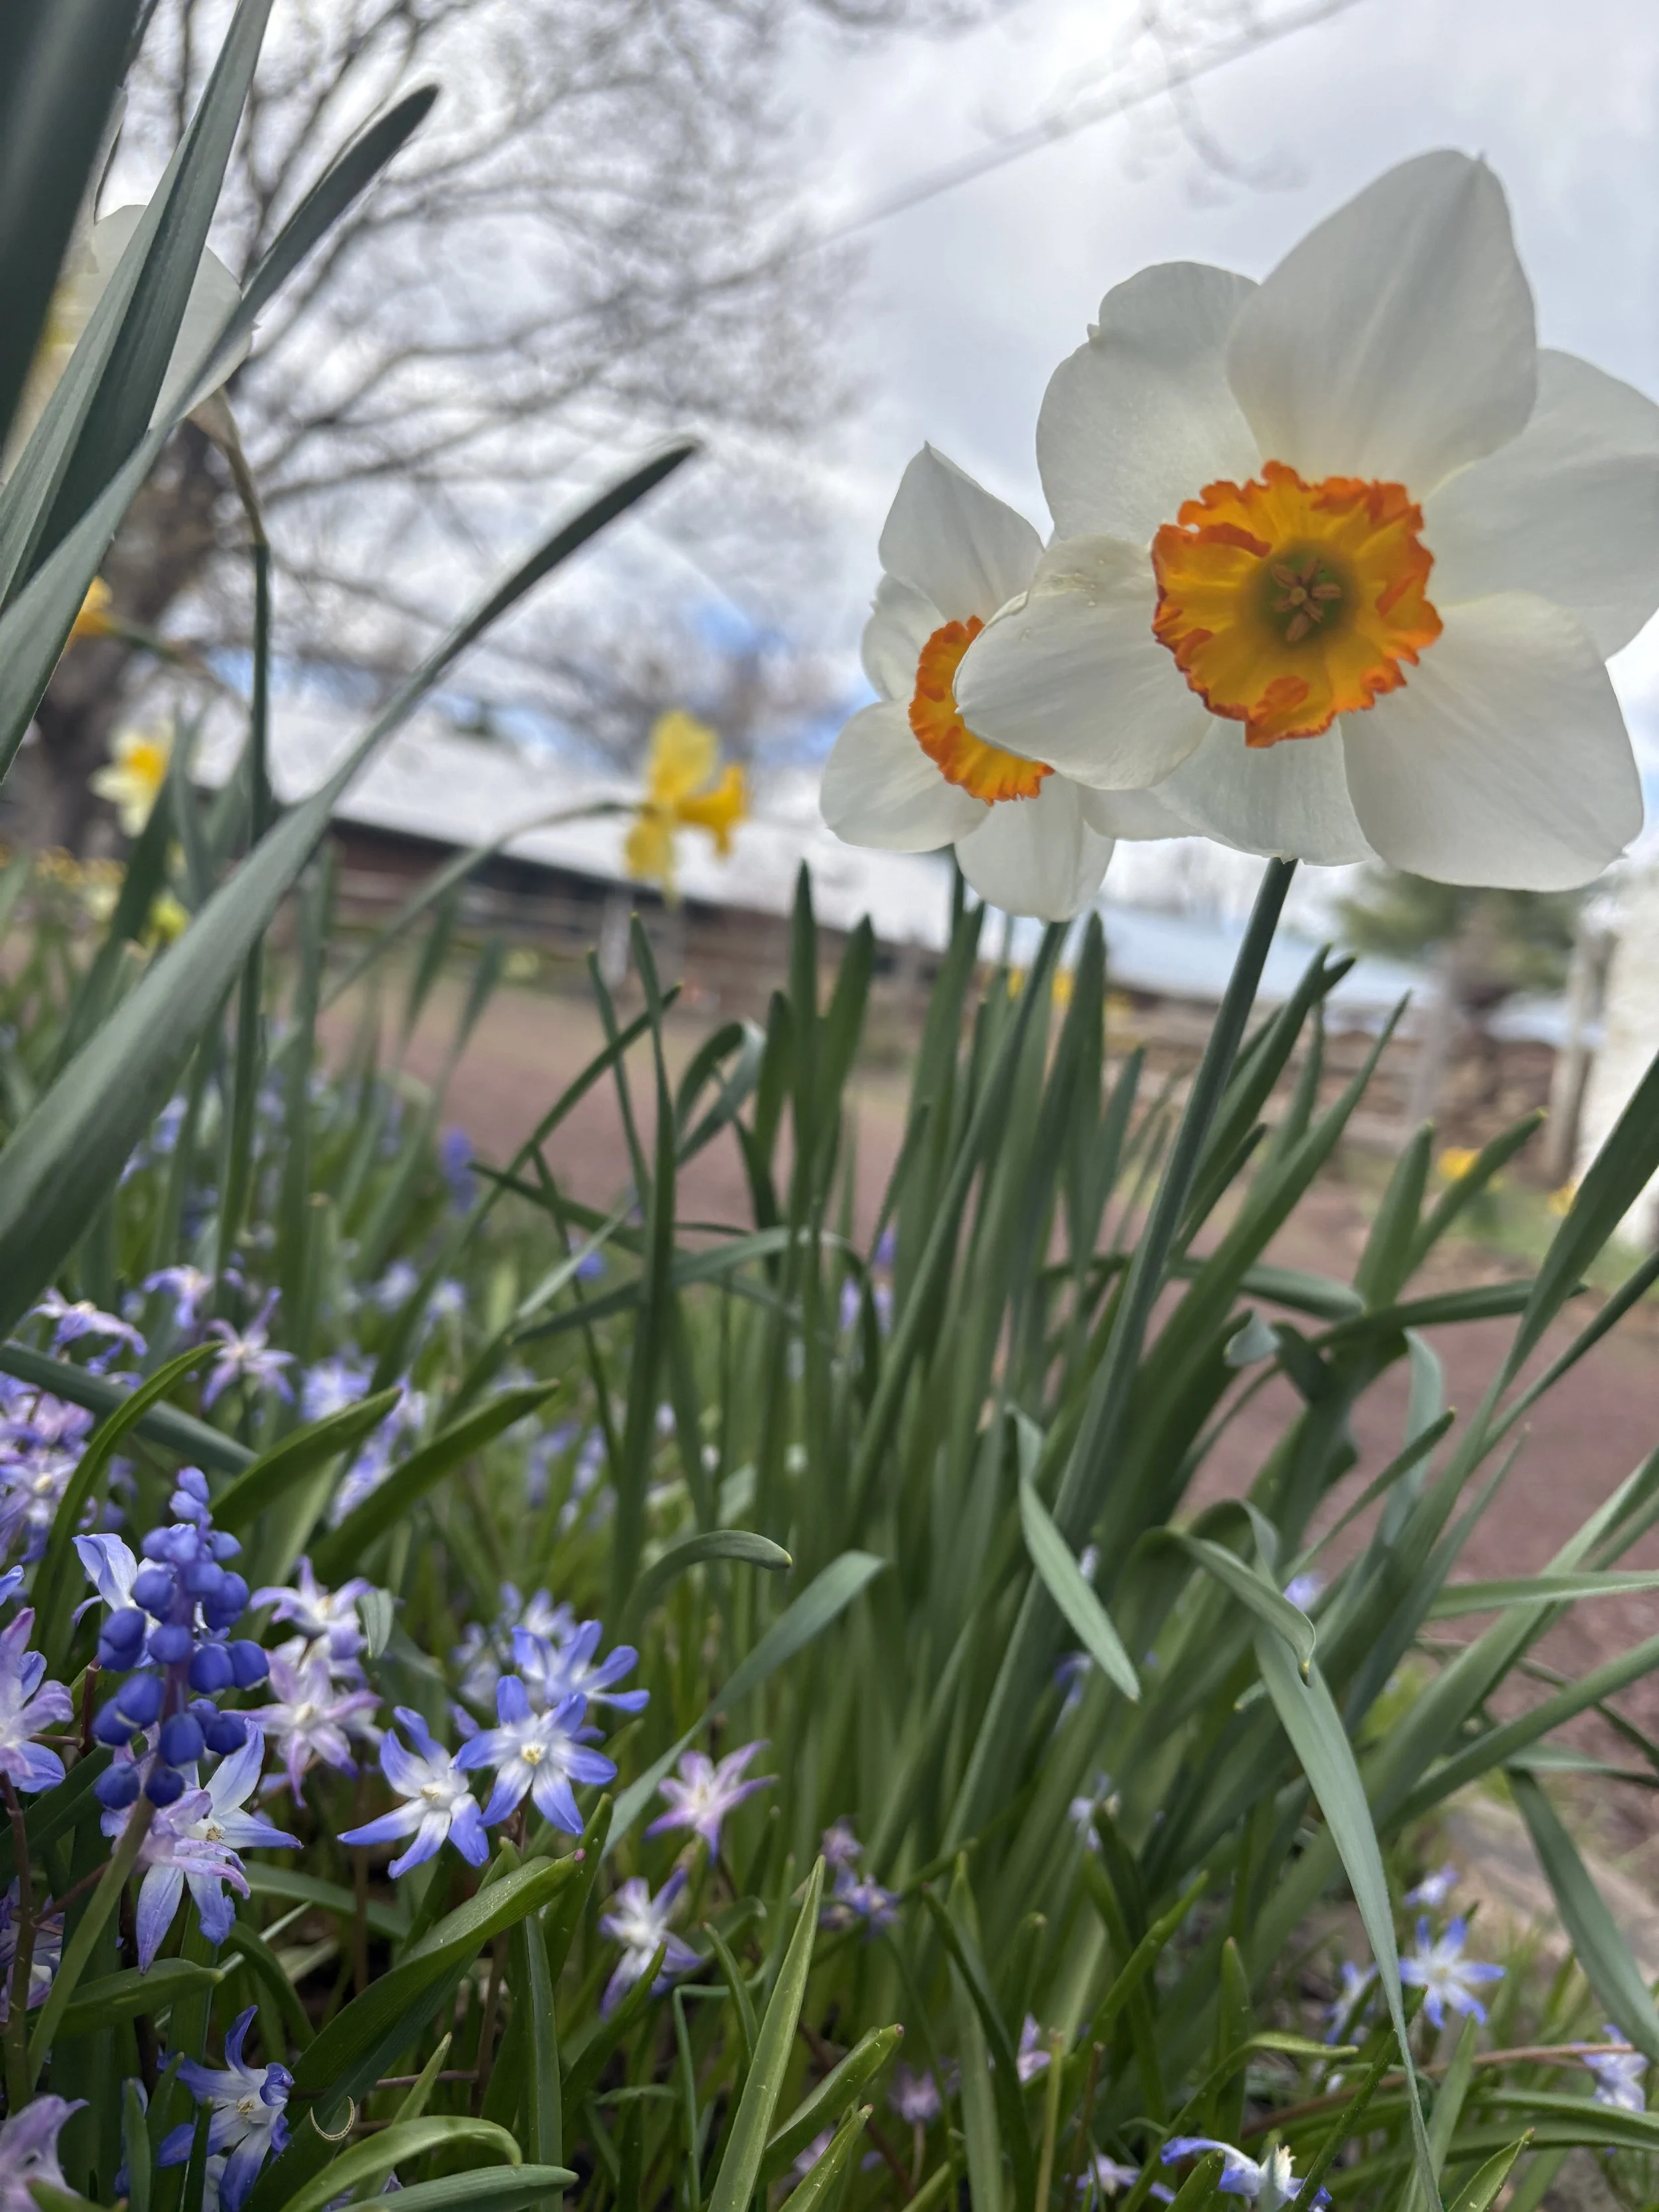
These flowers seem to pop up everywhere in early spring. They’ve become a very popular bulb to plant in autumn and I always look forward to seeing them on cold, chilly, April mornings at Windy Hill in Pennsylvania.

Almost everyone is familiar with the common Daffodil, whose scientific name is Narcissus. These flowers seem to pop up everywhere in early spring. They’ve become a very popular bulb to plant in autumn and I always look forward to seeing them on cold, chilly, April mornings at Windy Hill in Pennsylvania.
what’s interesting about this common flower?
You may not know that the name Narcissus comes from a Greek myth about a handsome youth who fell in love with his reflection in a pool of water. He was so obsessed with his reflection that he tried to grab it and fell to his death. When Daffodils sprung up on that site, they were named Narcissus in remembrance of the boy. Fun stuff.

So diverse
Narcissus is a diverse genus with over 50 species of flowering plants, including daffodils, jonquils, and paperwhites. They are a bulbous, perennial plant which means you’ll see them year after year. They also naturalize very well, meaning they will spread around to other areas of your garden if you want them to. I always leave my daffodil bulbs in the ground and each year I see more and more. Here are a few varieties growing on our farm.


Did you know?
Historical texts and archaeological digs reveal that daffodils were cultivated by the ancient Greeks and Romans, who believed that the sap from daffodil bulbs contained healing powers. This belief carried into medieval Europe, where daffodils were used in various remedies. As interesting as that is, they are also very toxic.

Toxicity
All parts of the narcissus plant are toxic if ingested, especially the bulb. They can cause skin irritation, nausea, vomiting, and even death in extreme cases. Keep them away from children and pets. Likewise, when placing stems in water, it’s best to separate daffodils from other cut flowers, as they could poison the vase.
On The Bright Side
Daffodils are the official 10th wedding anniversary flower and it is also the national flower of Wales. You can read more about that here. I have included some Narcissus links for your convenience. If you are not already growing some, please give them a try. Thanks for visiting, come again. - Kim

Yellow Dutch Master Daffodil Bulbs

Ziva Paperwhites

Jersey Lace Narcissus Bulbs
Glory-of-the-Snow - What's Blooming at Studio Sprig
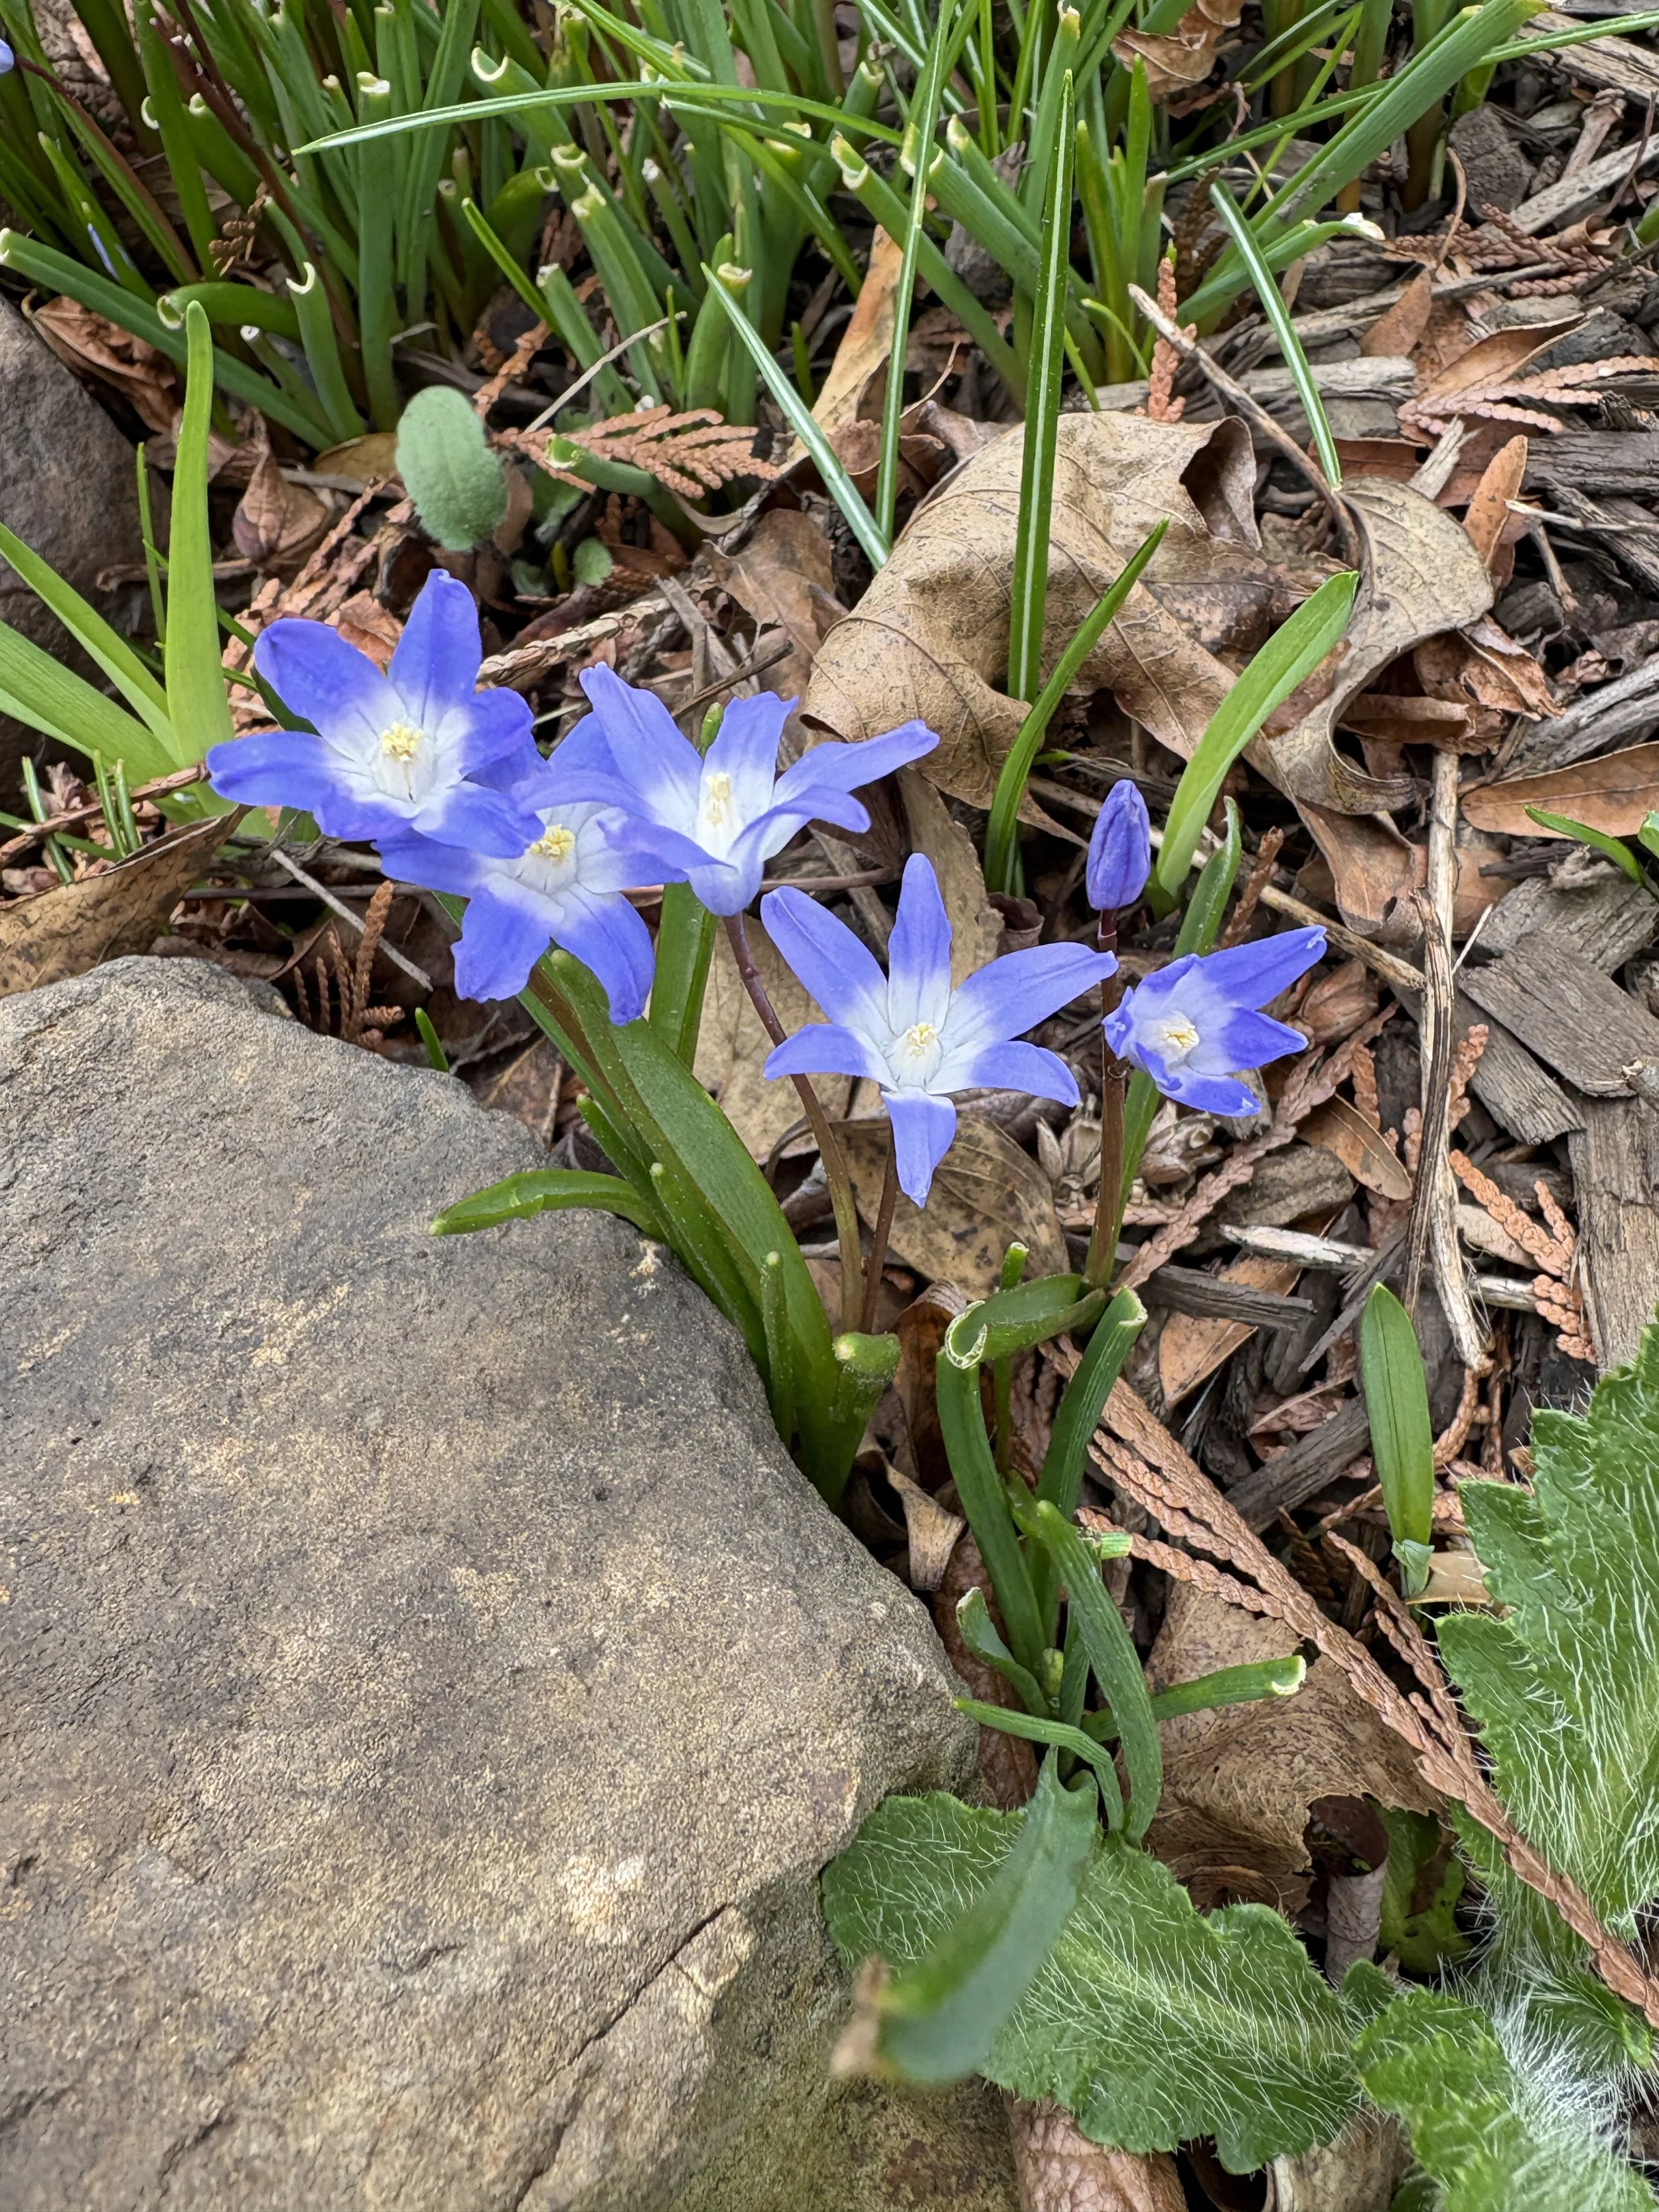
This tiny purple flower named Chionodoxa, or more commonly known as Glory-of-the-Snow, is popping up…

Glory-of-the-Snow
This tiny purple flower named Chionodoxa, more commonly known as Glory-of-the-Snow, is popping up in two of our flowerbeds here at Windy Hill. Hundreds of them spring up every year from hardy, little bulbs planted by the farm’s previous owner many years ago.

Interesting Features
The name, Chionodoxa, comes from two ancient Greek words, chion meaning snow, and doxa meaning glory.
The Glory-of-the-Snow flowers are only about an inch wide and very low to the ground, each reaching less than 4” in height. They have 6 star-shaped petals and the anthers of the stamens are yellow, with pale yellow pollen. Look closely because the stamens have flattened stalks or filaments, which resemble a cup in the center of the flower.

Chionodoxa Colors
Glory-of-the-Snow bulbs are available in blue, pink, and white shades and create a beautiful carpet in very early Spring. Ours bloomed the last week of March this year in Pennsylvania.


How To Grow
The Glory-of-the-Snow bulbs prefer to be planted in fall about 3” deep and 2-3” apart. Place them in the ground with their pointy ends up. They enjoy ample sunlight and well-drained soil and look spectacular covering hillsides or sweeping drifts. They are hardy nearly everywhere from Zone 3 to Zone 9 and they naturalize very well for your enjoyment year after year.
Give some a try if you don’t see them in your yard already. I’ve provided links just under the color photos for your convenience. And please comment below if you grow these already and love them as much as I do. Thank you.

How we turned an Artist Studio into a Weekend Retreat
How we turned an Artist Studio into a Weekend Retreat

Making an Artist Studio
Just behind our farmhouse sits this adorable little cottage. But, as you’ll see, it wasn’t so cute when we moved in 18 years ago.
When we bought this farm in 2007, this cottage was rented out as a mini apartment or what we’d now call a tiny house. The outside and inside were dingy, off-white, and tan. There was a big, ugly oil tank outside and an even uglier furnace inside. But somehow in this little space, there was an eat-in kitchen with wall-to-wall cabinets, a carpeted floor, a full-size refrigerator, and a big, hideous smoke pipe poking out of the roof.
While it was still in this state, we saved up some money and rented the space to an artist, who used the space to paint a few days a week. Then one day the furnace broke down and leaked all over the carpet. Fortunately for me, we were forced to release the artist, gut the space, and fix the problem. Here is how we did it.
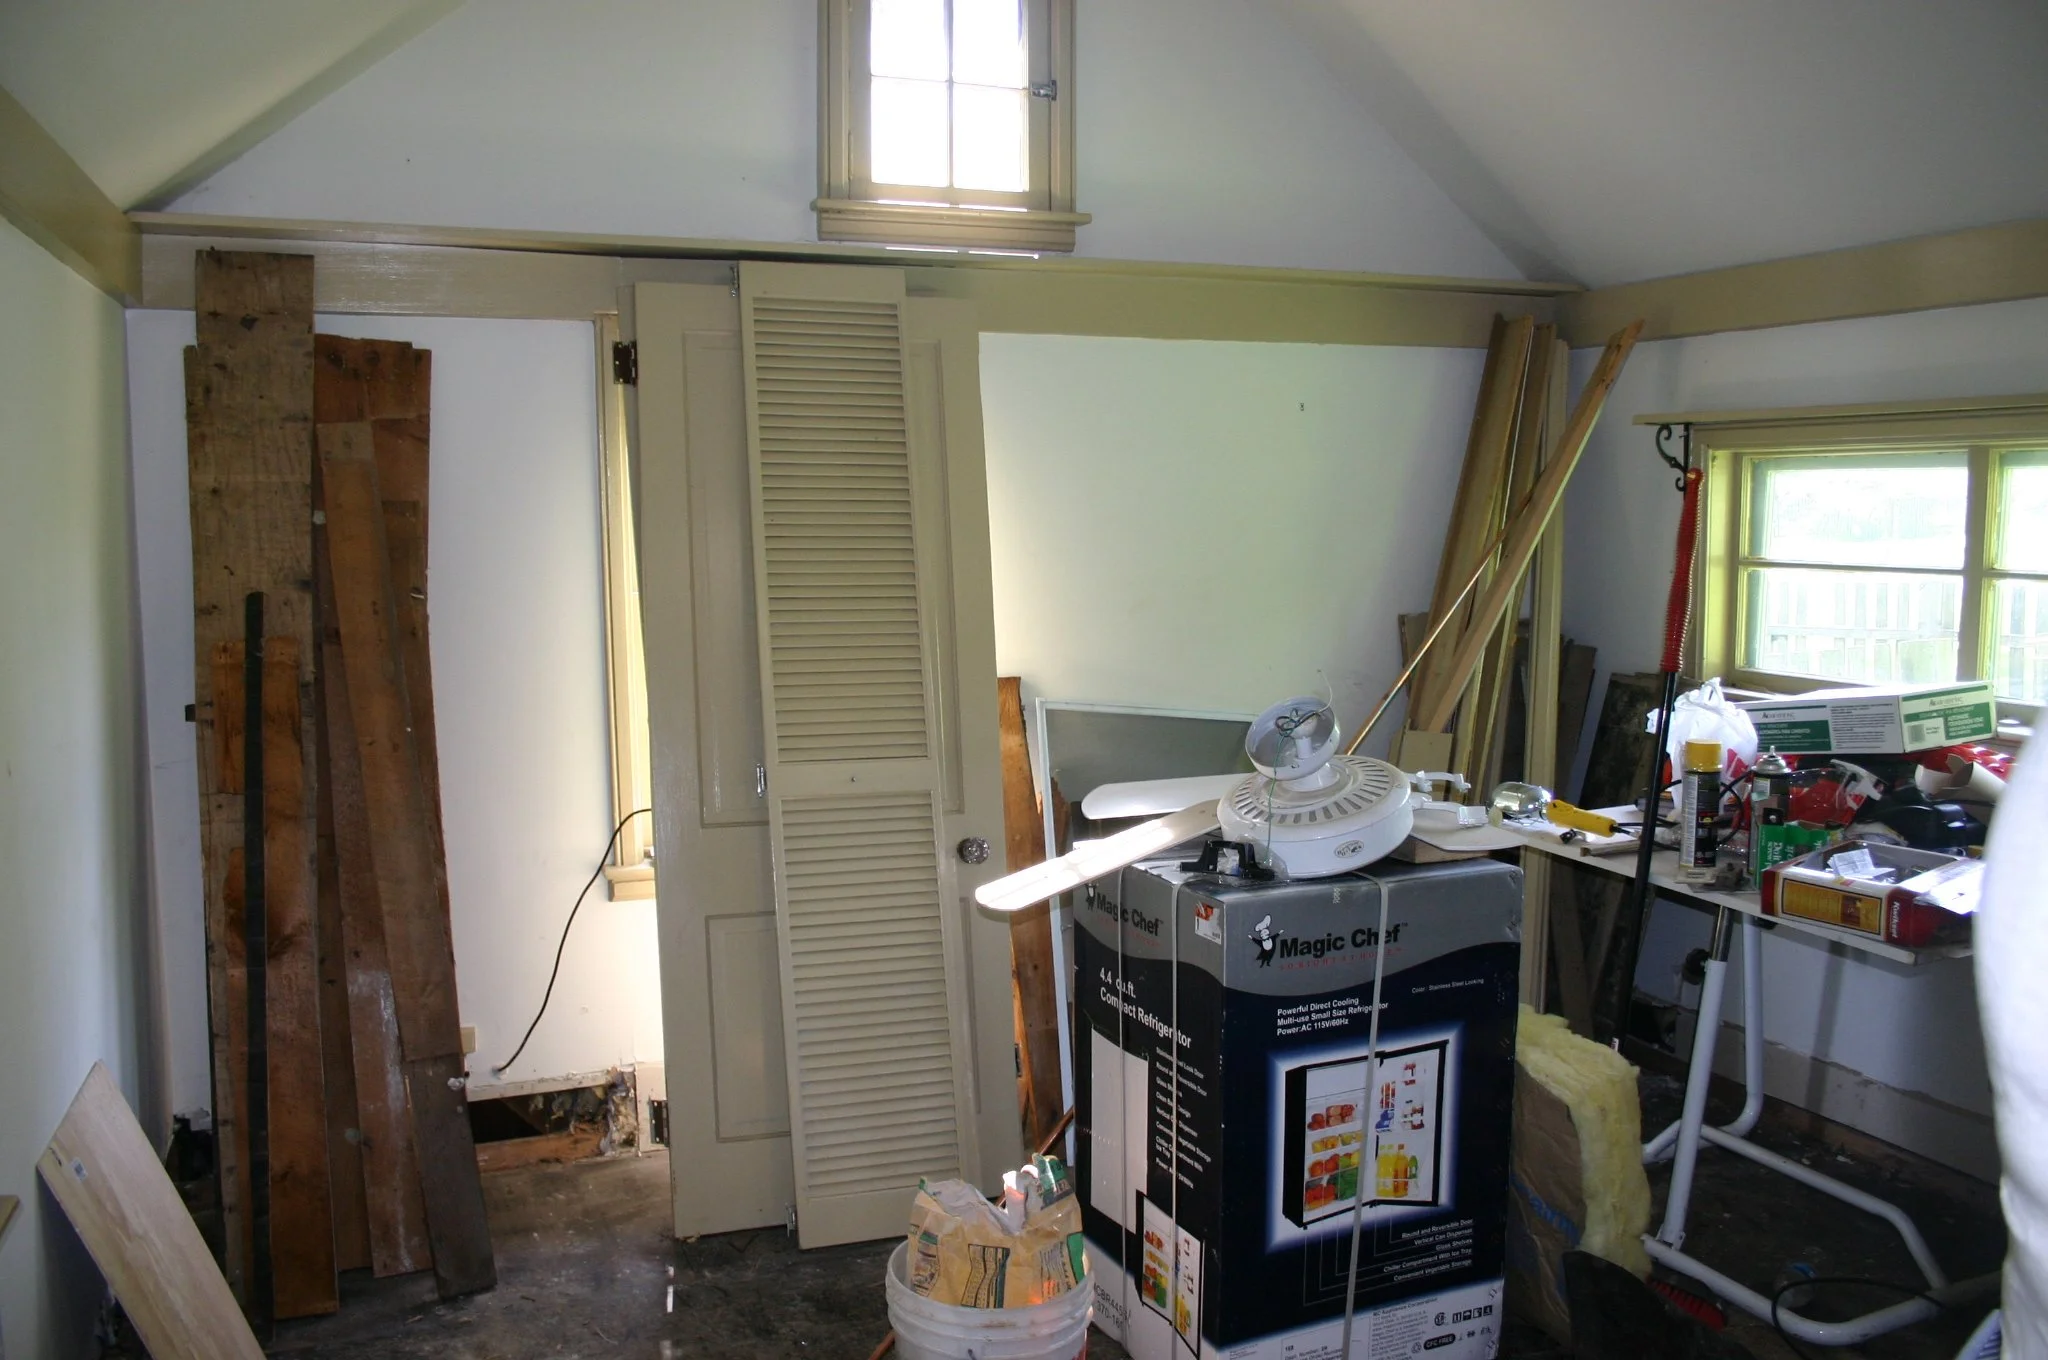
We ripped out a few baseboards to install the electric heat.
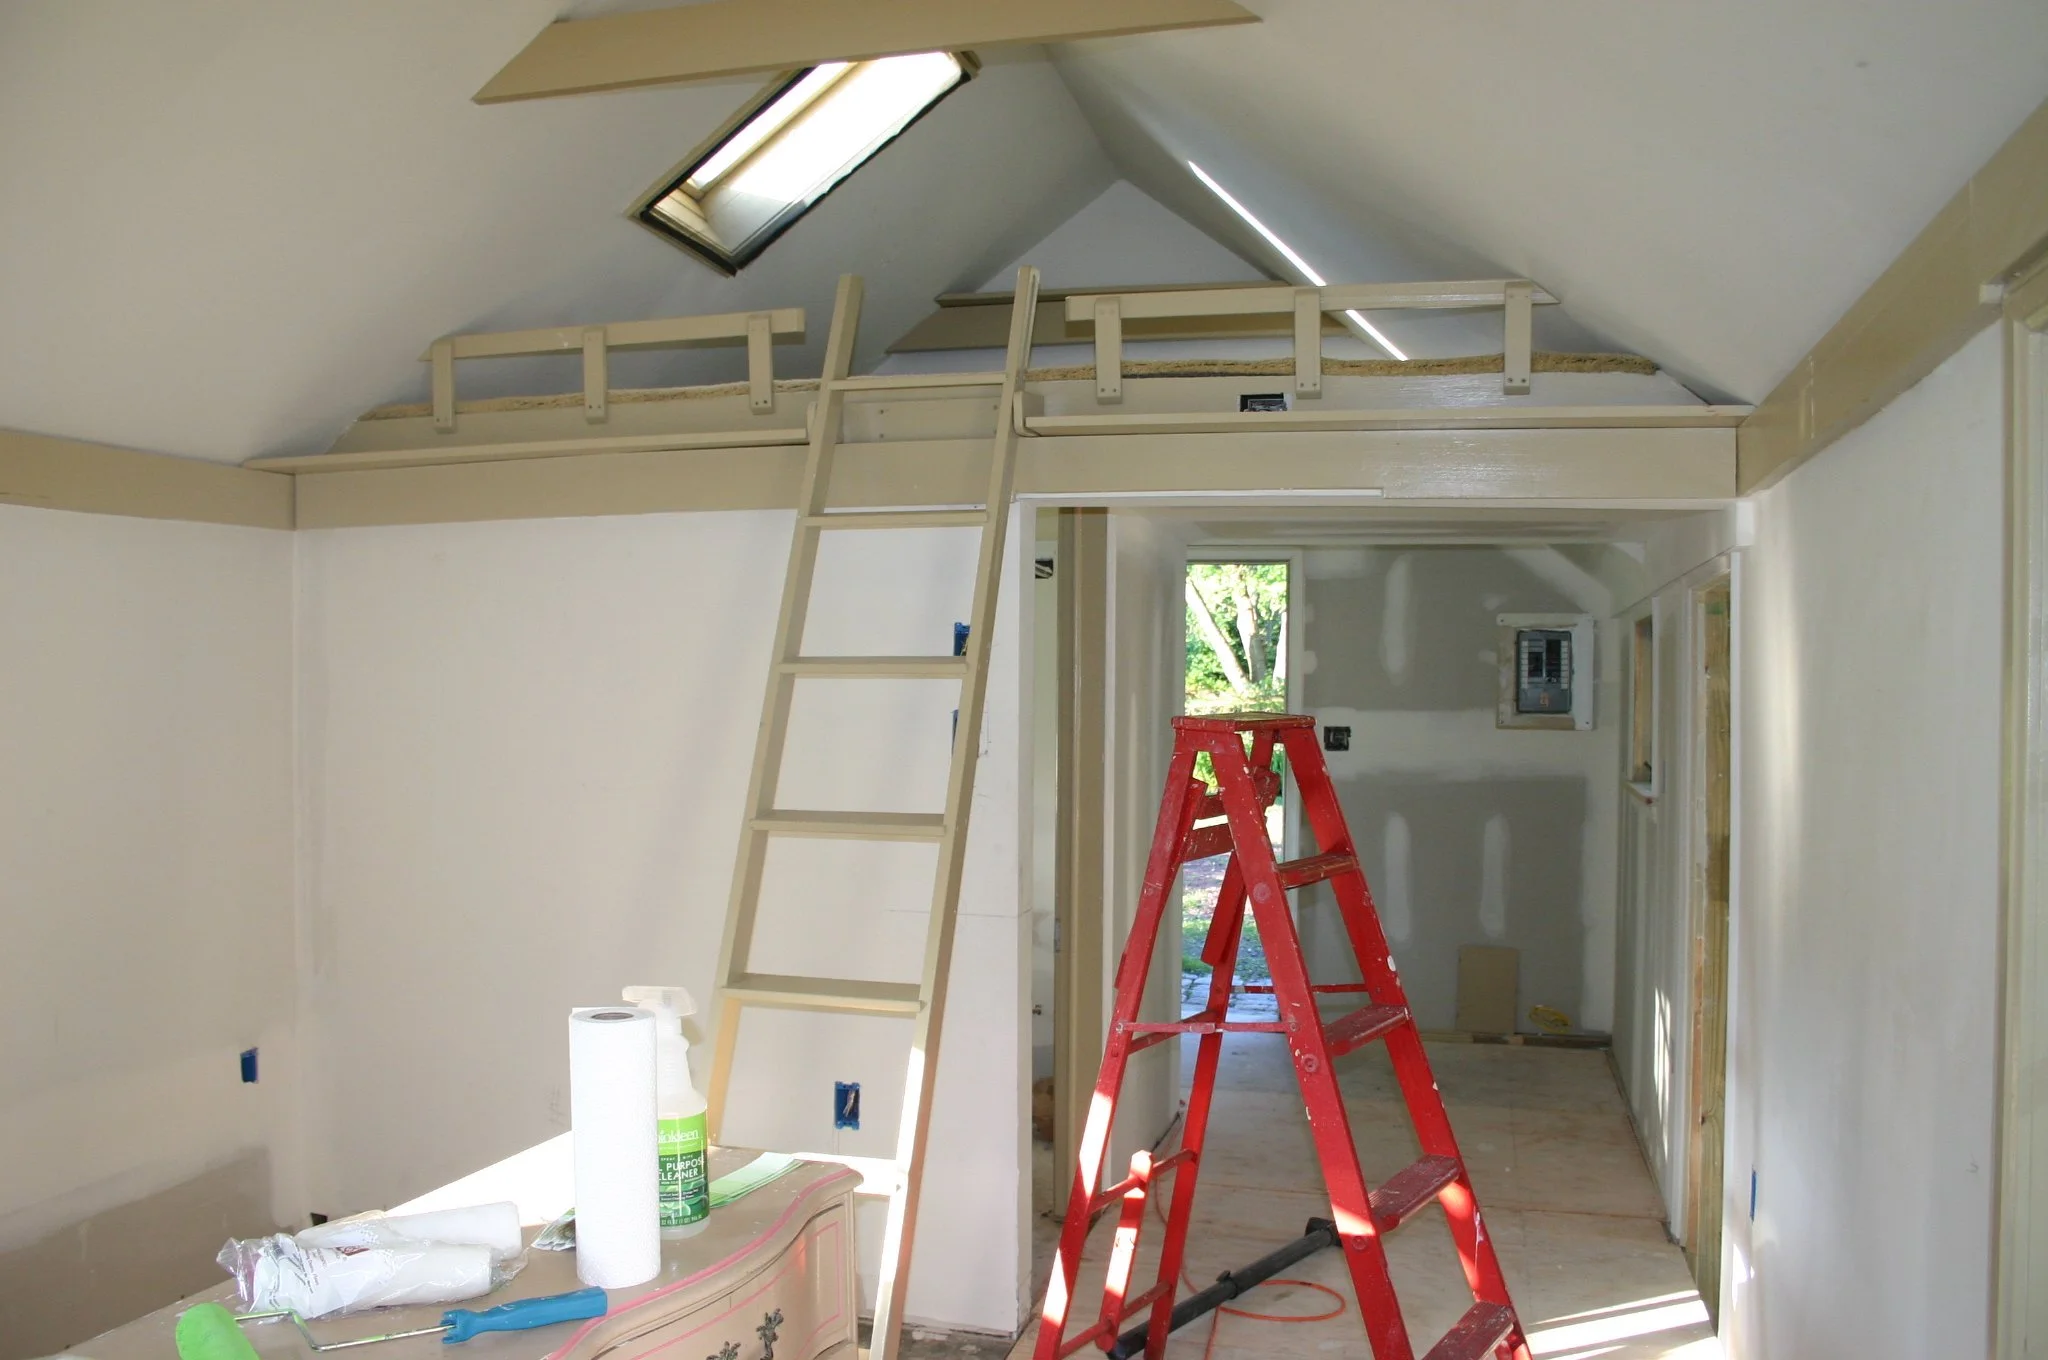
We patched walls and vaulted ceilings with drywall in a few places.

We employed our workforce (I mean our kids) to help with cleaning up.
Cottage Renovations
Originally the exterior was painted a dingy off-white and the cottage always looked dirty, so that was one of the first things we addressed. We power-washed the exterior, brightened it with lime paint, and accented it with an eggplant purple front door! It was eye-catching and perfect for an art studio.
On the inside, We added baseboard electric heat so we could remove the old and ugly oil heater sitting right at the front door. With the help of a friend, we tore out all the carpet, laid a subfloor, and installed hardwood throughout the main rooms and beautiful slate tiles in the bathroom and entry. We patched many walls with fresh drywall, cut a hole for a new door and window, installed some light fixtures, and created a wet bar from an antique dresser. We also had to patch the metal roof because, in addition to a skylight, there was a smoke pipe coming out from the oil furnace. When all the construction was complete we painted all the walls and ceilings with several coats of Benjamin Moore Super White to finish things off. We worked every weekend and I’d say the entire renovation took just over a few months.
Fun Side Note: In the photo below you will see the addition of a side door. We found a cement step in that exact spot, leading us to believe there was once a door there. We kept the step and brought the entry way back to life. I planted walking thyme all around the door when we created our courtyard which you can read about in this blog How To Create A Courtyard. And now the thyme nicely covers the old cement and flowers in the spring.

We removed the oil tank, patched the smoke pipe hole in the roof, and installed electric heat.
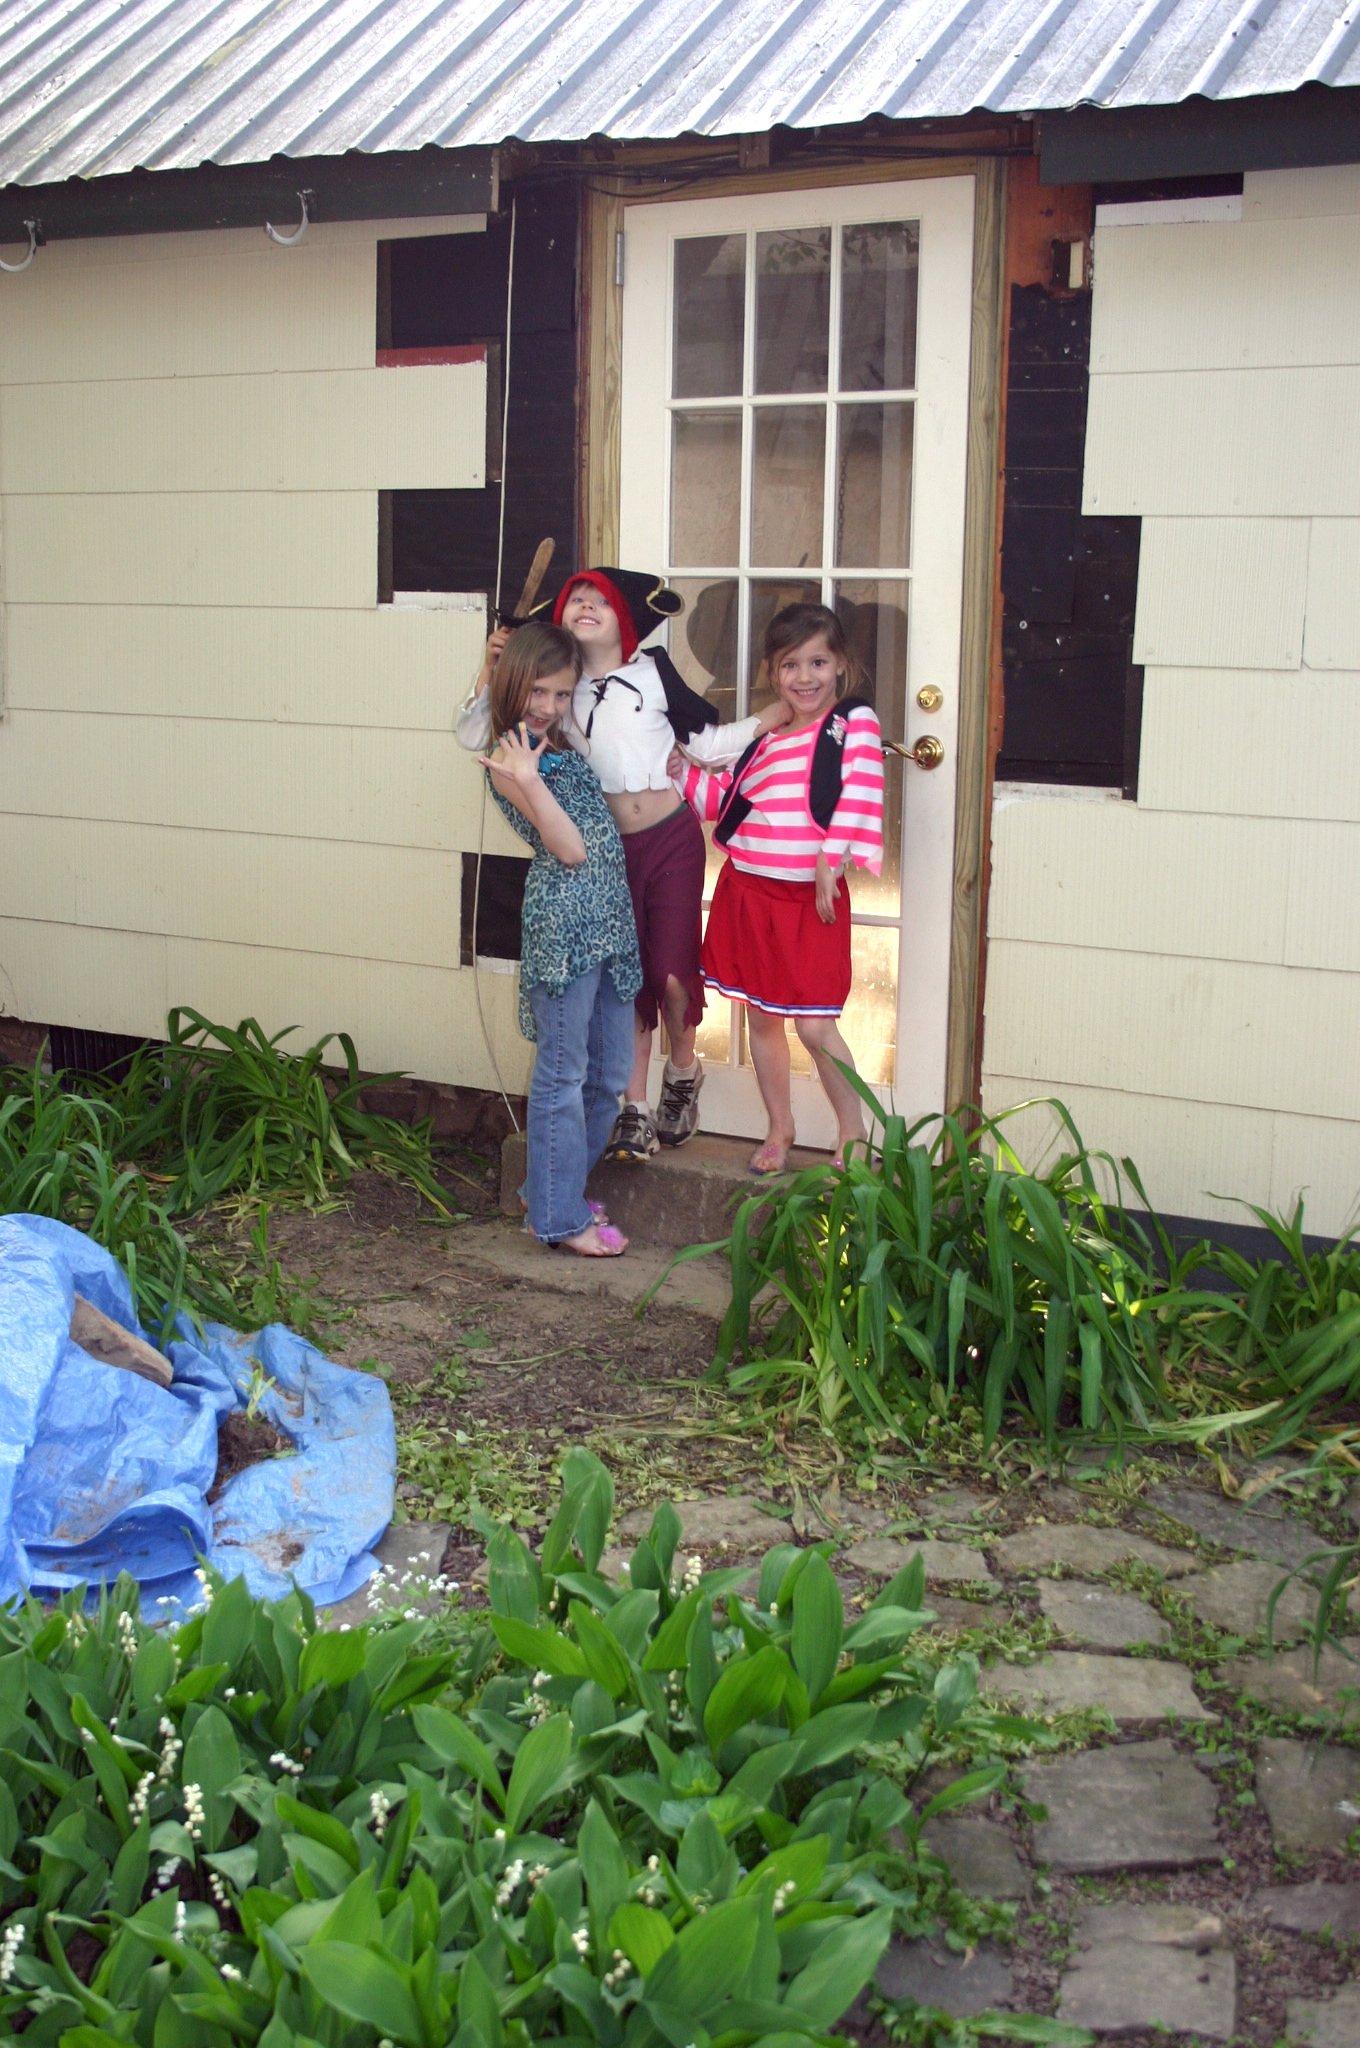
We installed a side door that leads into the courtyard. My 3 kids goofing around in costumes when we had lots of work to do.

Michael and a friend installed the hardwood floors, and I painted the ladder purple. The simple chandelier is from Ballard.

The Artist Cottage at Windy Hill when it was an Artist Studio. We chose bright lime green with an eggplant purple door for the exterior of the Artist Studio. Tile Artist Khara Flint created the “heirloom” tile that hangs above the doorway. I love how the Iceland Poppies decided this was their spot to shine. (they were not planted by me!)
The photos above show how the art studio remained until 2024. We used this space as a haven for Kim Bensing Design and eventually Studio Sprig, my two small business adventures. My kids also used it as a campaway site whenever they had friends over. It was a fun place and still is. It wasn’t until the summer of 2024 that we decided to turn the art studio into a weekend retreat.
The Artist’s Cottage at Windy Hill today
Creating a Weekend Retreat
The decision to reinvent the space is a direct result of my very 1980s dream of someday owning a bed and breakfast. Fast forward to 2025, and the invention of VRBO.
We knew it would only take a few permits and a couple of updates to turn this Artist’s cottage into a weekend retreat so we came up with a summer plan and ran with it.
Around 2021 two of my Studio Sprig interns and I repainted the cottage exterior with Benjamin Moore’s Van Deusen Blue, so the outside was already freshed up, leaving only the inside to alter.
We started with some interior Super White paint touchups and the we gave the ladder and the front door a new coat of black because they needed to be refreshed as well. We removed the computer desk and replaced it with a comfortable bed and fluffy comforter. We left all the framed news articles about my design business because they add to the appeal. Below them we incorporated a small workstation equipped with a set of watercolor paints, a sketch pad, and drawing pencils. (Guests have been spotted painting in the courtyard and that makes me smile).
So there would be a place to relax, play a game, and eat, we resurrected a small, round yard sale table and paired it with 3 fiberglass spun chairs by mid-century modern artist, Russell Woodward. These were found on Facebook Marketplace. For wall decor, we hung several original paintings, including a watercolor by Bucks County artist, Jane Ramsey, and we also included a few fine art, floral, and photography books from my library, and we displayed them on a recycled children’s wall bookshelf.
In the bath, we refinished the shower with a process called Miracle Method which we learned about on This Old House. This brought it up to date with a beautiful bright white finish. Our electrician installed two new light fixtures, we patched and painted and that was all we needed to do.
The kitchenette is small and not ready to cook full meals, but we added a stainless island with wheels, a retro microwave and toaster by Nostalgia, a coffee maker, and a mini fridge, enough amenities for a weekend retreat.
Thank you for your interest in our labor of love - twice restored. Comment if you have any questions about the renovation, I’d love to hear from you. I’ve included some product links below for your convenience, and f you or someone you know is interested in booking the Artist Cottage at Windy Hill, the next time you visit Bucks County, PA, here is the link.
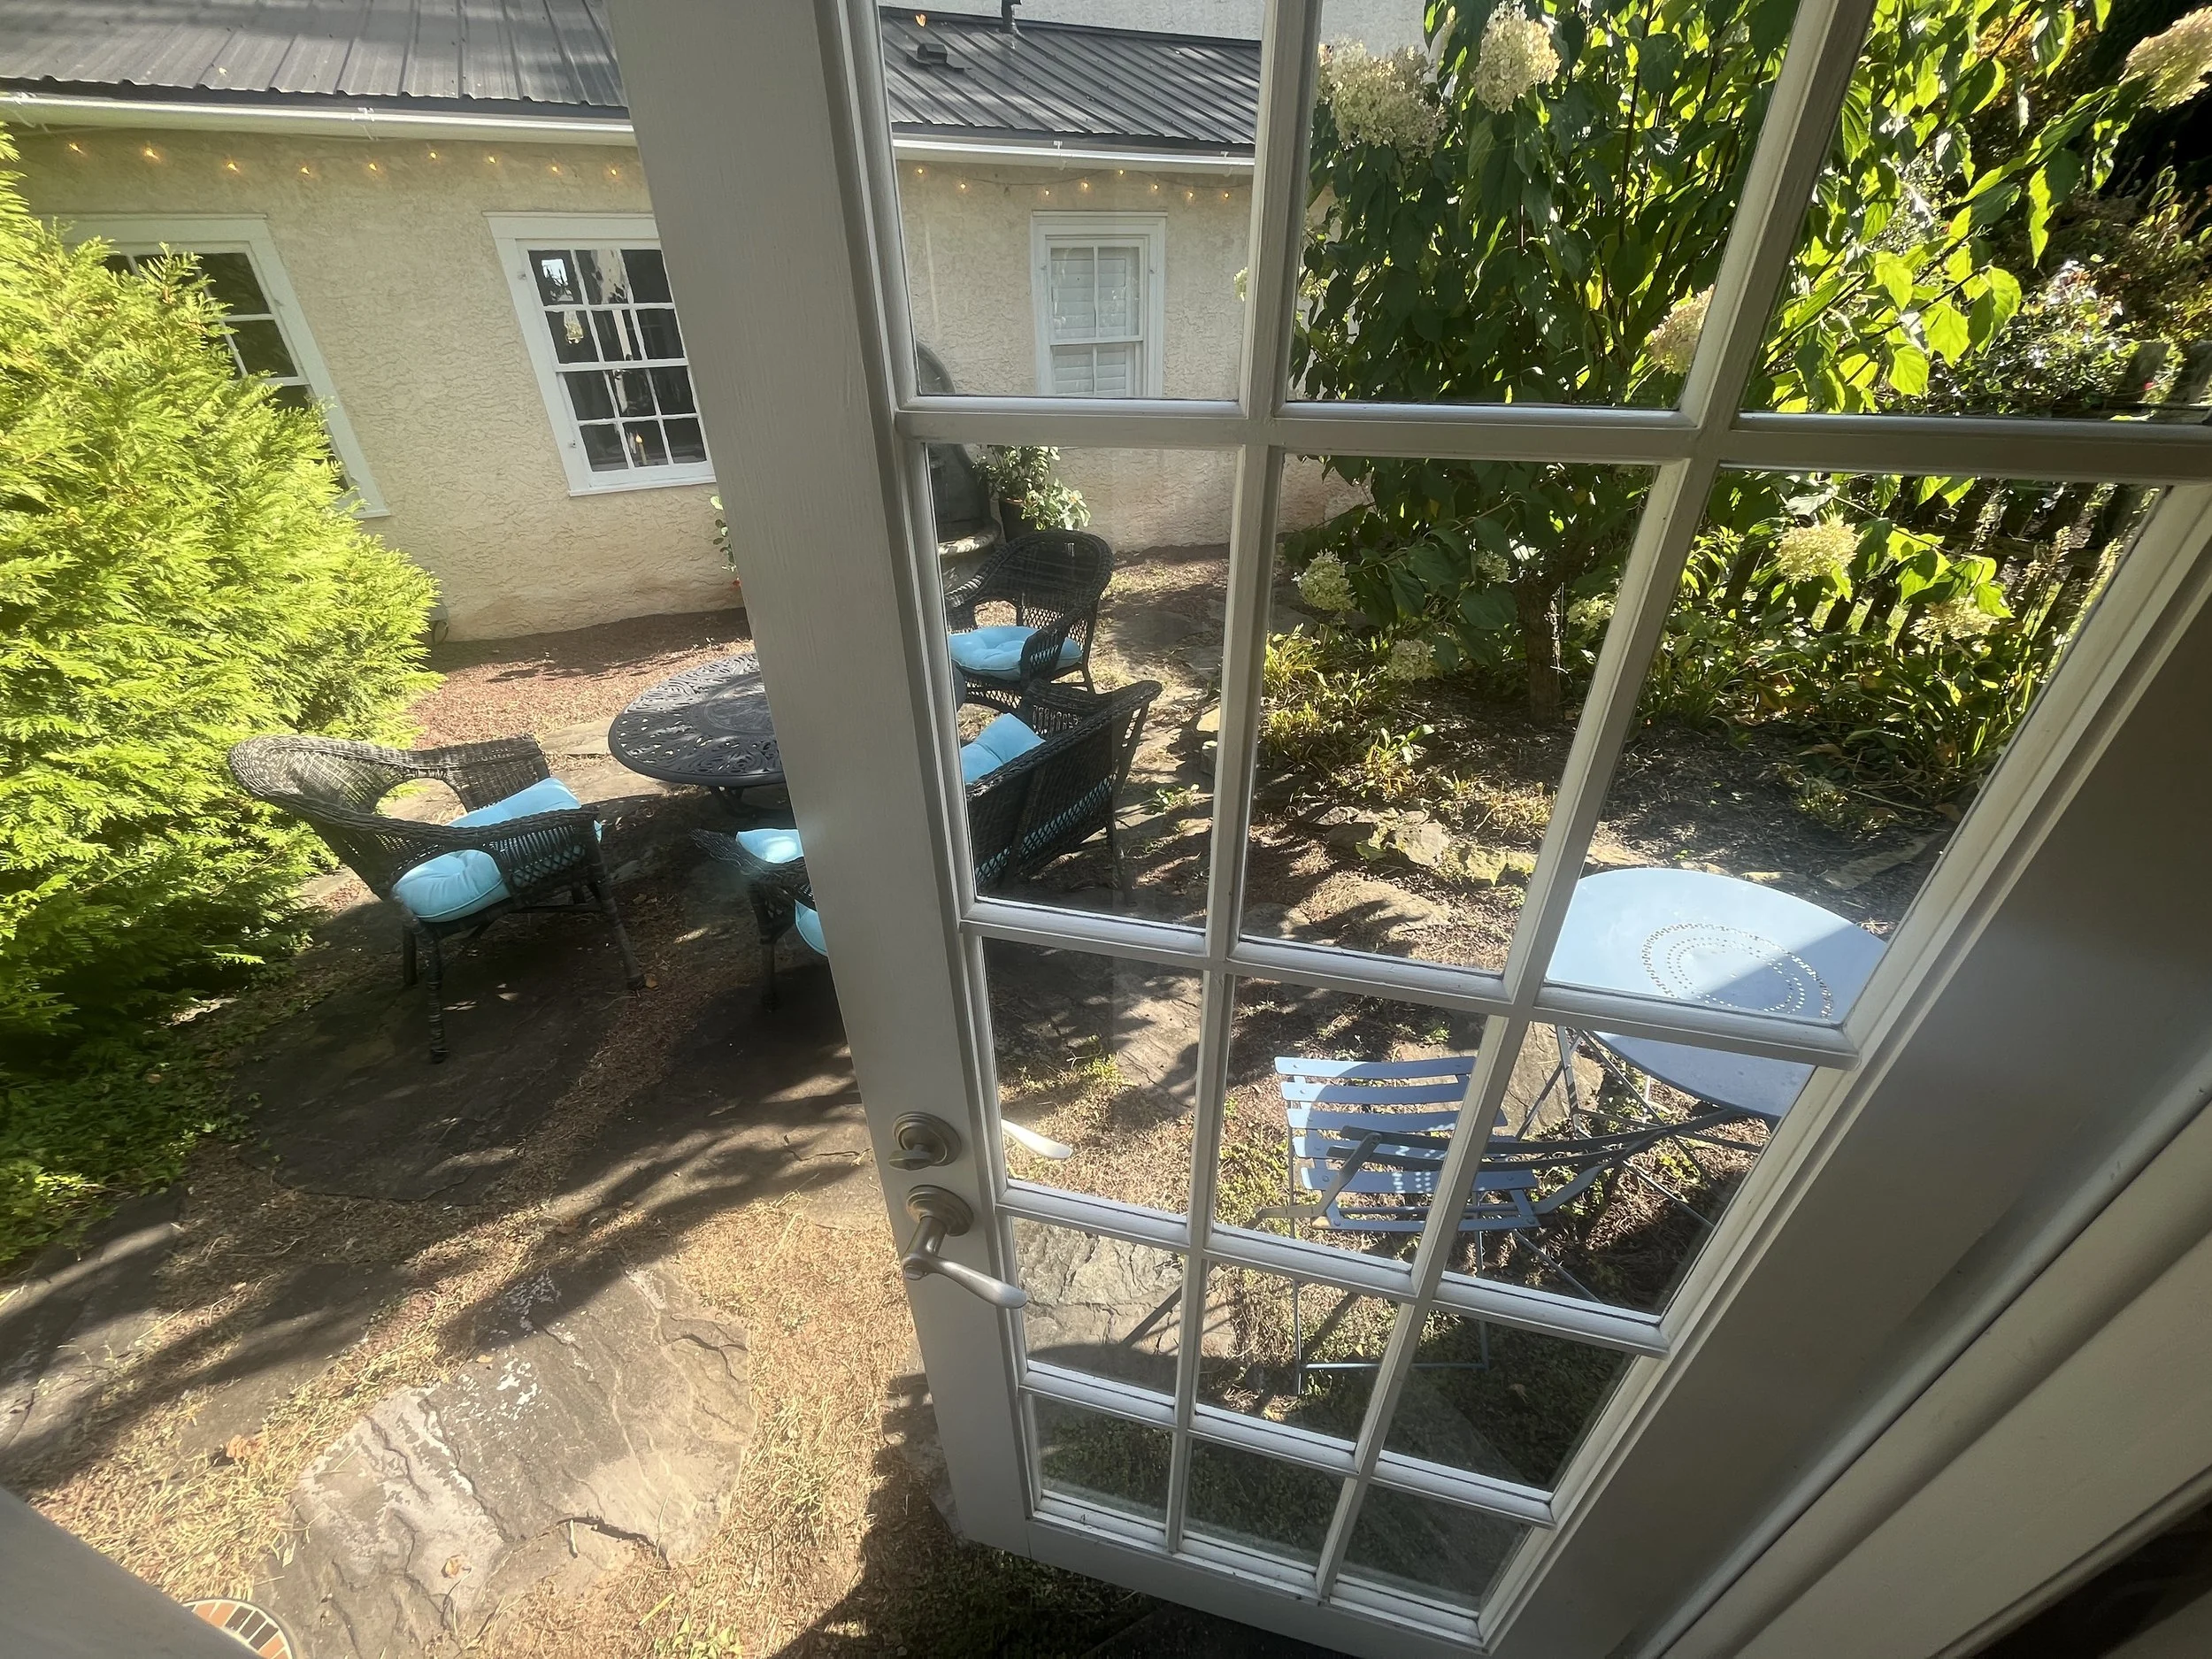
We had this side door installed so there would be access into the courtyard.

The Nostalgia Microwave adds a touch of retro charm.

Fresh white towels in a pretty seagrass basket awaits guests.

Just a simple setup with all the comforts of home.

The pedestal sink was salvaged at an estate sale. The colorful mirror I found at a craft fair. We included a frilly ruffled shower curtain to add texture.

We repainted the loft ladder black and added a round table with chairs for guests.

This rolling, stainless table becomes a nice little countertop.

This is the fountain view into the courtyard.

I supply a set of traveling watercolor paints,professional drawing pencils and a sketch pad for guests to enjoy.

This sink was created from an antique dresser and the Ecosmart tankless hot water heater and all the plumbing hides inside.

Exterior Paint: Benjamin Moore Van Deusen HC-156 / Interior Paint: Benjamin Moore Super White HC-152


I have included a few links to some of the products we used for your convenience. Thank you for reading about this journey. As an Amazon Associate, I earn a small commission from qualifying purchases. The price for you is the same, whether you choose to use the links or not. Thank you.

The Mighty Crocus - First to Bloom - What's Blooming at Studio Sprig
Finding the small, but mighty, crocus peeking out of brown grasses is one of the first signs that Spring has sprung. These photos were taken on March 11 at my farm, Windy Hill, and although Spring does not officially arrive until March 20th, we can fake it til we make it.
Masses of wild crocuses have been consistently popping up here every year since we moved in, 18 years ago. They brighten up the brittle, dry grasses and leaves and seem to scream “Wake up people, winter’s over”.

What Is A Crocus?
Believe it or not, crocuses belong to the Iris family and are native to the Mediterranean and parts of Asia. The history of crocus cultivation dates back to the Bronze Age, although the exact origin of crocus remains a mystery. They are small perennials, and they grow from corms, not bulbs. And if you don’t know what that means, take a look at this chart below. Source: brainly.in

Crocuses can poke out of the ground even when snow is present, but I have noticed they will only open if the weather is warm. Yesterday, all of my crocuses opened, but today the temps in Pennsylvania are dipping back into the 50’s, and the crocuses decided to stay closed.

Crocus Petals and Colors
Crocus flowers have six petals, three inner petals alternating with three outer petals and some believe they resemble a cup or chalice. The flowers are available in yellow, purple, white, pink, blue, orange, and even some striped varieties. They are low to the ground and only grow between 3 and 6 inches tall. The stamen are bright orange, the perfect color to attract bees.

Crocus Varieties
Carl Linnaeus originally included two species in his crocus findings in 1753. Today the estimated number of species of Crocus varies widely, anywhere between 80 and 160, with new species continuing to be identified all the time. Crocus Sativus, shown below, is a variety known for producing saffron, a spice, food coloring, and medicine that comes from the stamen of only the Crocus Sativus. Saffron has chemicals that might affect mood, kill cancer cells, decrease swelling, and act like antioxidants. It’s important to note that other types of crocus are known to be toxic, so if you’d like to harvest saffron, be sure you are growing Crocus Sativus. If you would like to try growing Crocus Sativus for a saffron harvest, keep in mind, that around 150 flowers produce only one gram of saffron.

The Meaning of the Crocus
The spiritual meaning of the crocus flower is centered around awakening, renewal, and transformation. In some cultures, the crocus flower is considered lucky. For example, in ancient Greece, it was believed that if you came across a crocus flower while walking, you would have good luck in the coming year. - source: foliagefriend.com
Pollination and Spreading
Bees pollinate crocuses. In early spring they provide a fantastic source of much-needed nutrition for bee colonies emerging from hibernation. When the crocus flowers bloom, they produce seeds that can be dispersed by wind or animals. However, it's important to note that crocus corms primarily reproduce through corm division rather than seed propagation. - source: shuncy.com

Preserving Crocus Blooms
Like any flower, there are three ways to preserve the crocus's beauty.
Submerge them in Silicone Drying Crystals (link below)
Lay flat on an air-circulating tray or surface (link below)
Press the flowers flat in a flower press (link below)
Helpful Links
If these little gems are not popping up in your yard already, why not try your hand at it? If you’d like to buy crocus corms, or items to help you dry, press, or display your perennial crocuses, use the convenient links below. If you want further instructions on flower drying, please read this blog.

Flower Drying Crystals

Herb and Flower Drying Rack

Crocus Variety Corms for Planting

Flower Press Kit

Saffron producing Crocus Sativus corms

Mini Crocus Vases
How to Design a Valentine Tree

Why I Designed a Tree FIlled with Love
As the Christmas season was coming to an end, I decided I wanted to enjoy our pretty tree a little longer. I knew I could get away with keeping our faux Balsam Hill Pine up through January dressed in its wintery guise, but what excuse did February have? That’s why, this year, I created a Valentine's Tree. Read on to see how I did it.

Transitioning a Christmas Tree
We created a pretty simple Christmas tree this year so the transition was easy. I first removed all of the Christmas balls but kept all the white lights and icicles. This step was very quick and with a semi-bare tree, I was able to then plan for February-appropriate decor.
Making a Valentine's Tree Topper
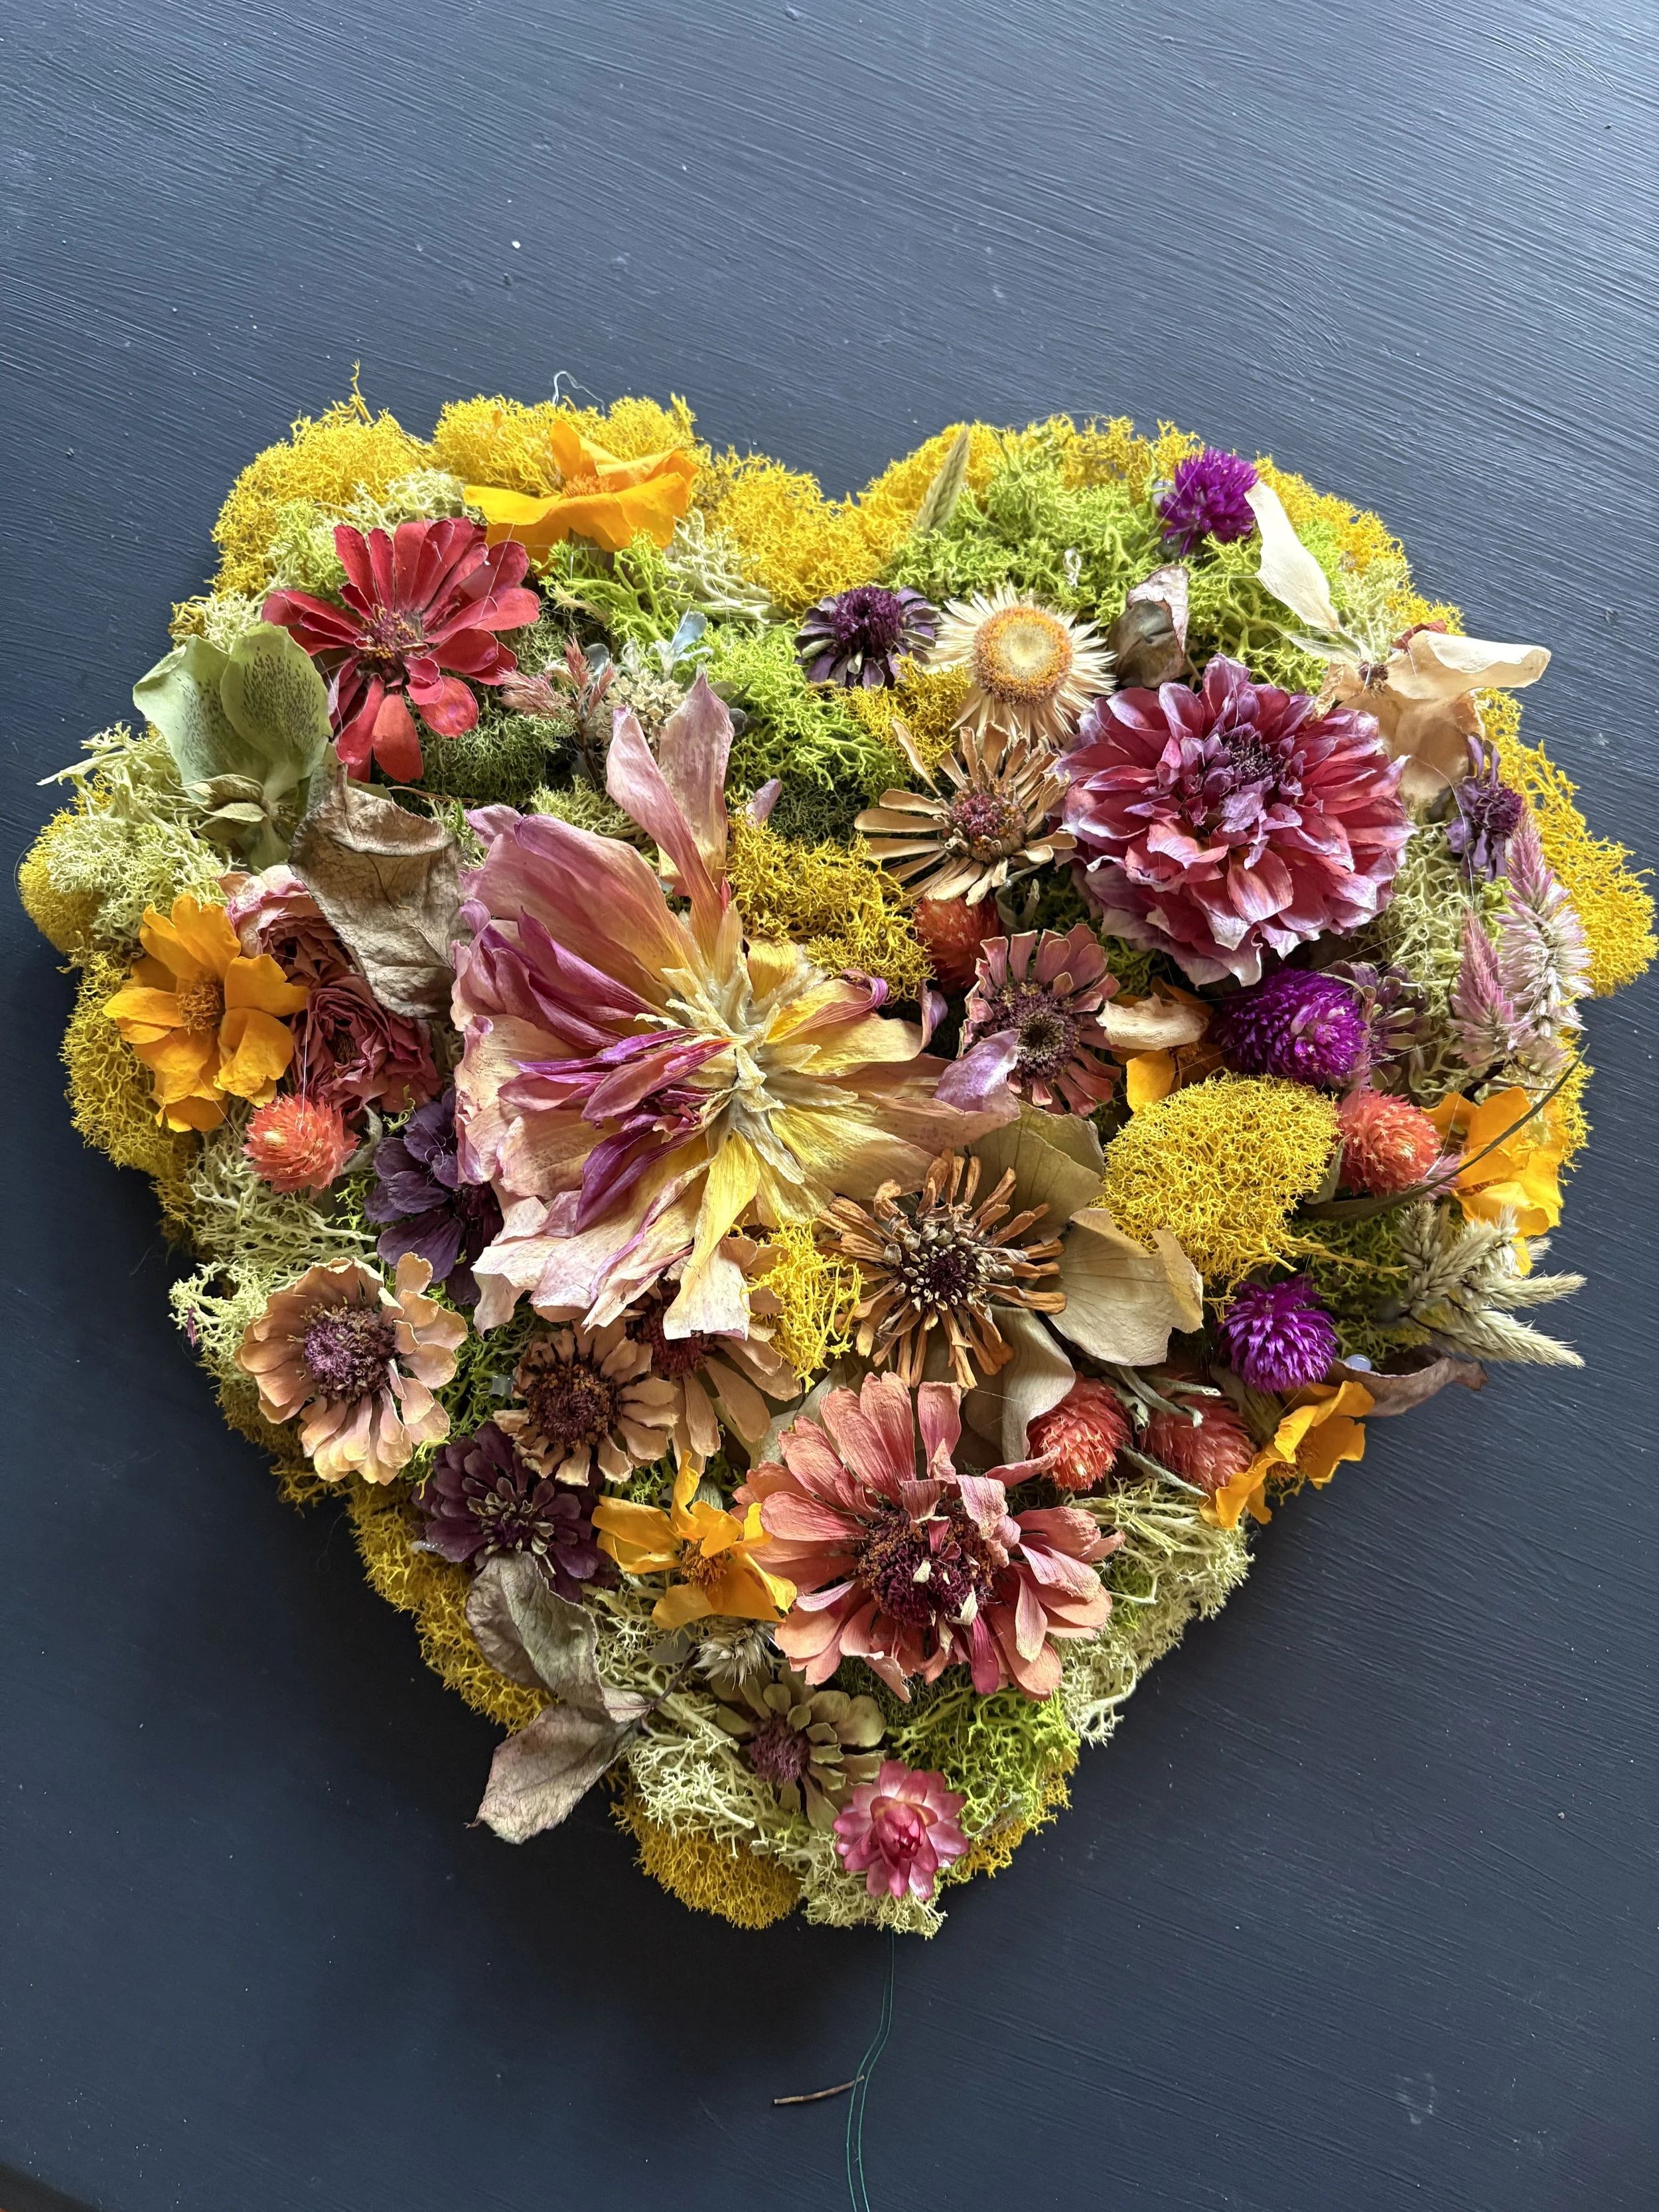
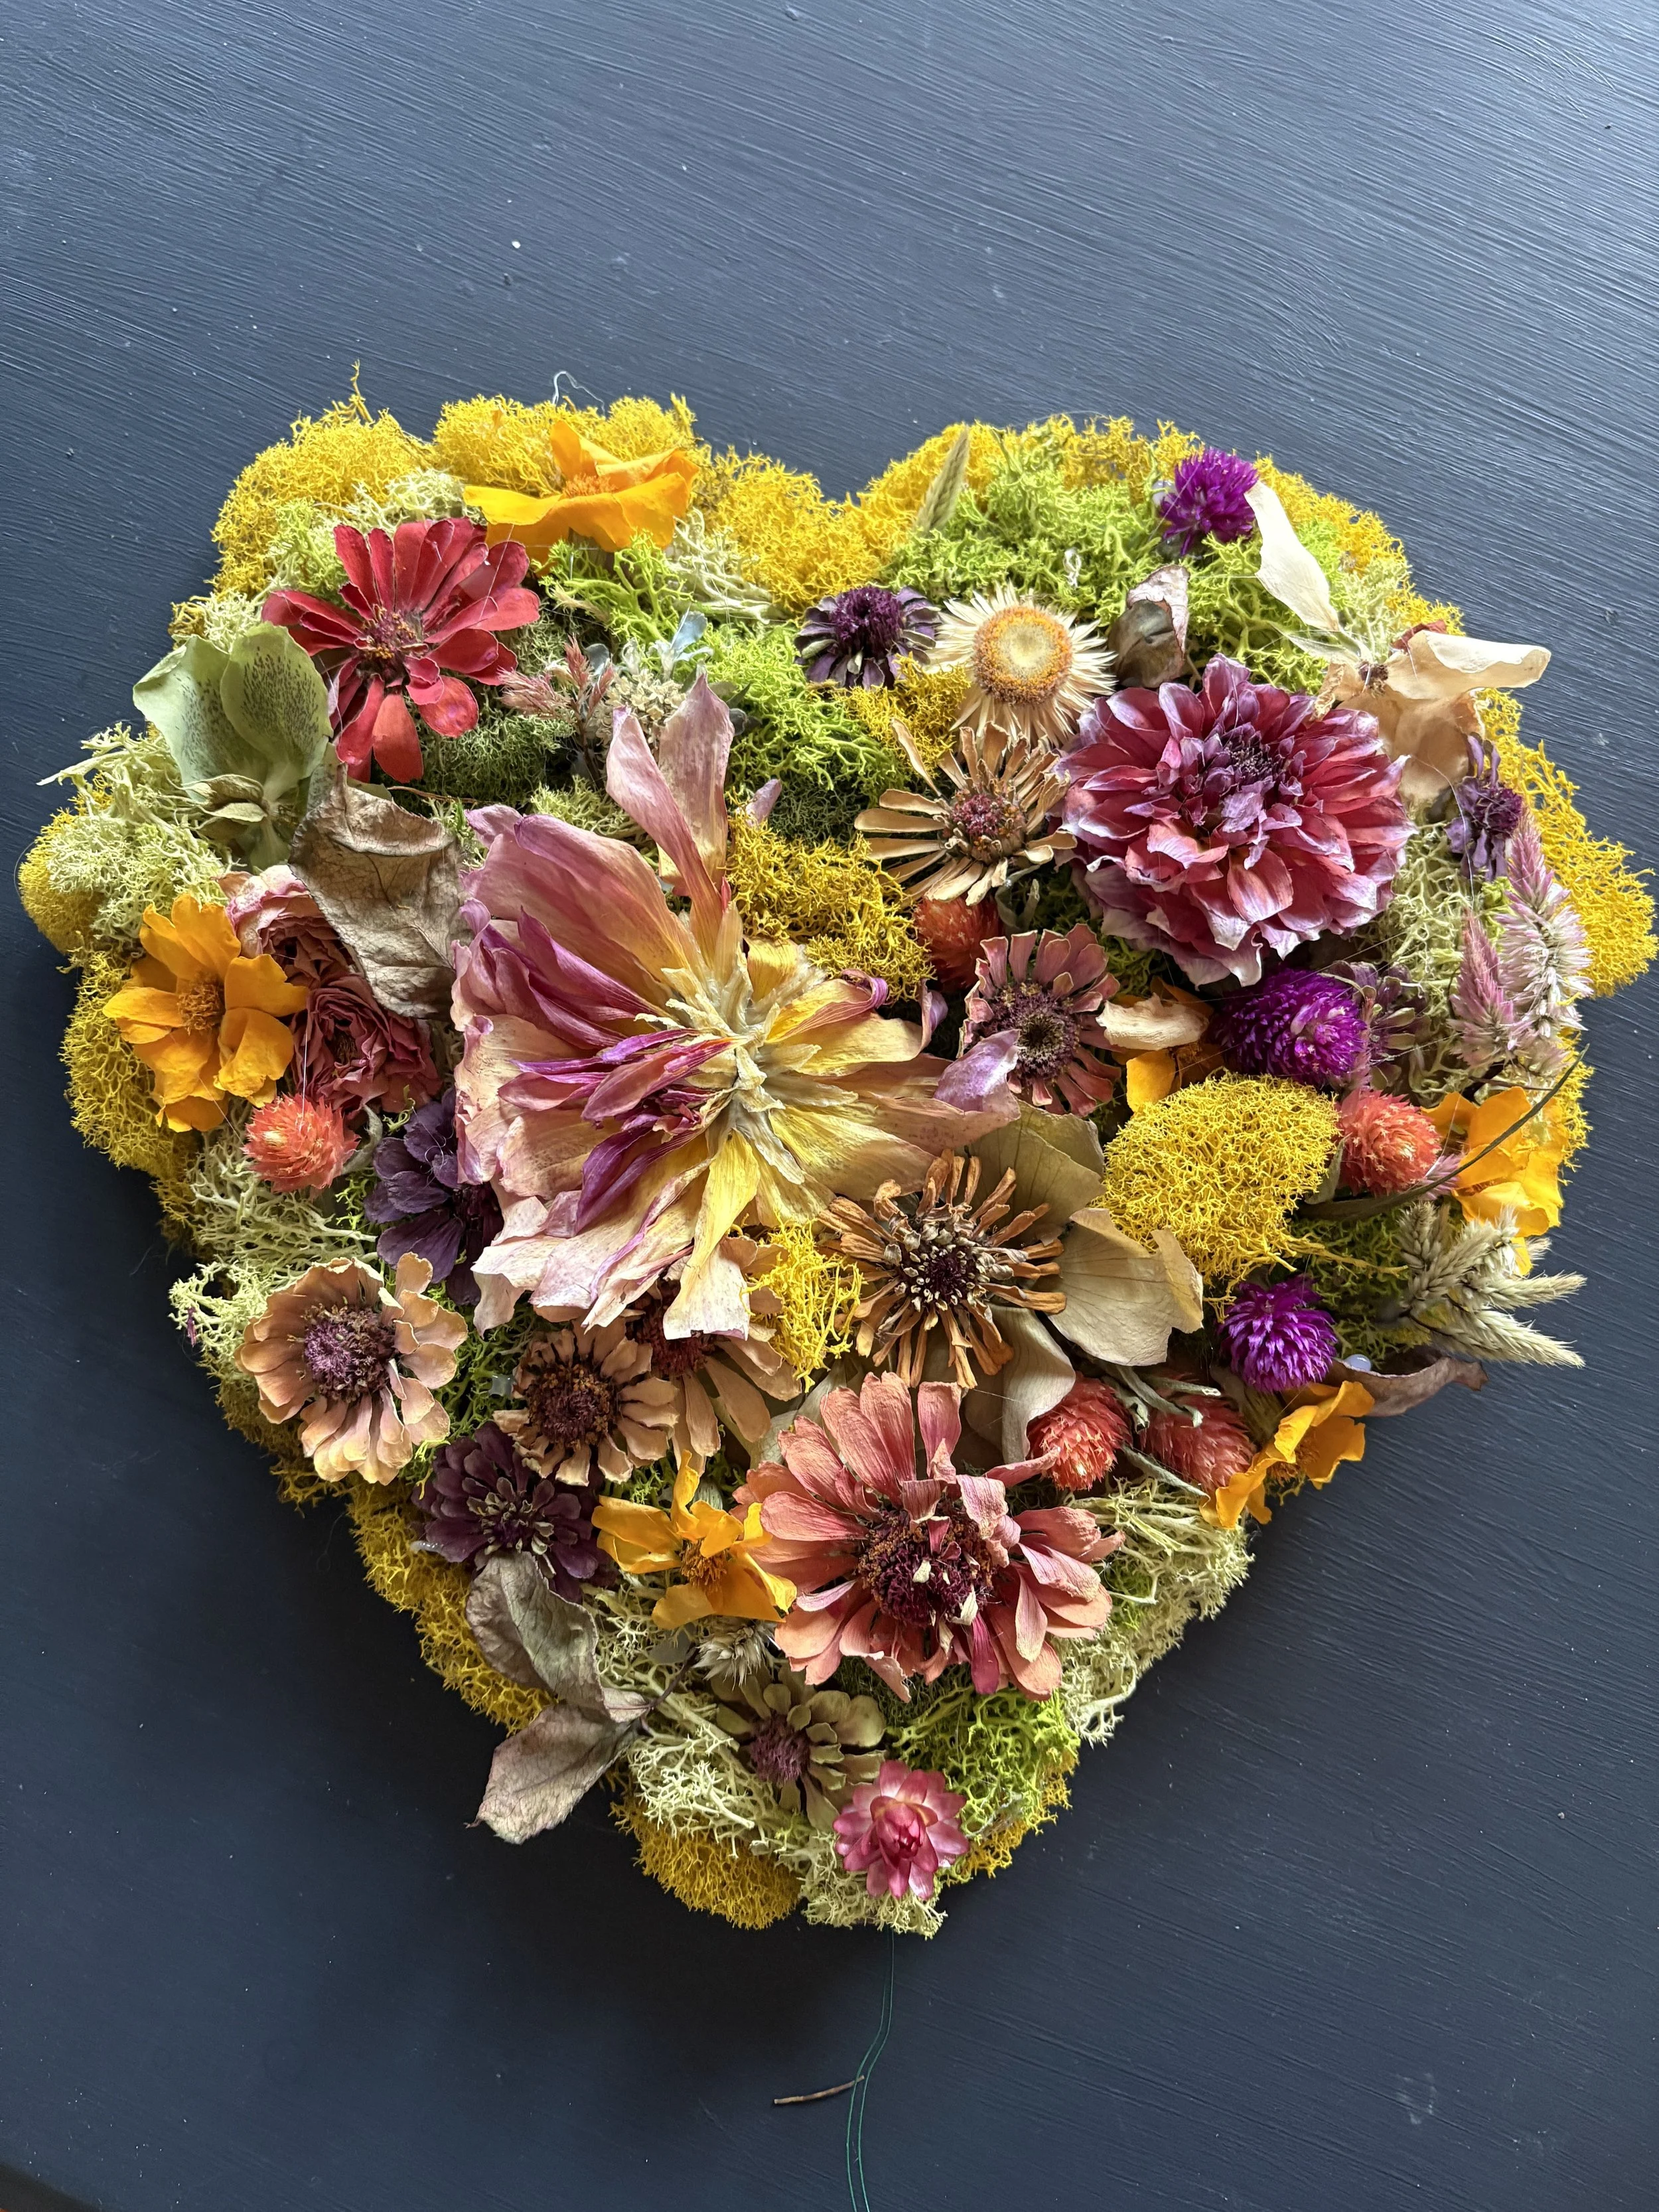
I considered keeping our glowing Moravian Star tree topper but decided that a Valentine's tree needed to better reflect Valentine’s Day. I considered a grapevine heart wreath covered in dried flowers but decided I’d like to just use found materials and make my own. This is how I did it.

Start with a basic shape
I took an old cardboard box and cut two identical free-form hearts. I then hot-glued a 10” doubled-up piece of floral wire about 4” deep inside the two panels and extended it out the bottom, so that I’d have something to wrap around the tree’s top branch. If I do it again, I will also extend the wire from each side so the heart has more stability when topping the tree.
Once the wire is secured, hot glue the hearts together. This step helps the topper to be more ridged and stable.

Designing the front of your heart topper
Start by designing one side of the heart with your dried flowers and moss. I used my professional-grade Ryobi glue gun, some reindeer moss, and the dried flowers I harvested this year. If you want to learn how to dry your own flowers, see my blog: Learn how to dry your own garden flowers. I didn’t have much of a design or plan, but I just kept filling in the cardboard as I went around the heart and eventually, one side of my heart was completely covered.

Designing side 2
When I finished side 1, I realized leaving the second side of the heart blank wouldn’t look very nice from the side view, so I cut up a coloring book, quickly glued it to the surface of the heart, and glued some leftover moss around the edges to finish it off. In retrospect, I would cover this side first with contact paper or something simple to make the job easier. You could also fill the back side with moss if you have it.

The Heart-Shaped Tree Topper
Here is the result. Not bad for a trial run. Later I’ll show you how it looks on the tree.
Hanging hearts on the Tree
Now the rest of the tree needed some LOVE-ly decor. I found these pretty heart ornaments in rose gold online. They are sold in sets of 45 so I only ordered one set. You can also get them in silver, pink, gold, red, and a pink, red & white combo.

Accenting with Vintage Valentine Cards
I also found some vintage Valentine ornaments to add some character to my tree. There are many types of interesting card ornaments to choose from on Amazon, so look around. Some are more childish which would be nice if you are creating this for your children or grandchildren.

The Unveiling
When all the little rose gold hearts and vintage Valentines were hung, I added a few large dried flowers and some colorful felt ball garlands that I had lying around.
I am very pleased with how this turned out and I’m happy I started a new tradition for our home. Don’t worry, if you’ve already removed your Christmas tree this year, you can plan for next February or grab some fallen branches from outside and place them in a garden pot to make a smaller Valentine’s Branch Tree. Anything is possible. Please share your thoughts in the comments below.


Host a Fabulous Bouquet Bar for Valentine's Day
How to host a fresh flower or bouquet bar.

Winter is the perfect time to host or plan a Bouquet Bar as the highlight of your next special event. Bridal and baby showers seem to be the most popular choices for flower fun, but you can host a Bouquet Bar anytime you want. Girlfriend getaways, book club nights, and birthday and dinner parties lend themselves nicely because no matter the occasion, everyone loves going home with fresh flowers. So since Valentine’s Day is coming up, why not invite some friends over to build pretty bouquets?
Should I D-I-Y My Bouquet Bar?
You can hire a professional to create your bouquet bar or you can D-I-Y it by following these easy steps. If you prefer this option, a professional will bring everything to your site, set up, instruct, and clean up. But if you choose to do it yourself, you only need a few things to pull off a successful bar, the most important being a reliable source of some great focal flowers and foliage.
Here is a list of everything you will need:
• A work table for guests to spread out
• A reliable water source (a sink or hose)
• Tablecloths and towels
• Vases or pretty water-tight pots for assembly
• Flower Buckets to display your greens & flowers
• Fresh Flowers and Greens
• Paper goods for refreshments

Prepare the Space
You can create your bouquet bar anywhere that works. Dining rooms, kitchens, patios, decks. Just make sure you have a source of water nearby and that cleanup will not be too difficult. If you’re creating a Bouquet Bar at work, you will probably want to choose a conference room because it will have a lot of space.
Find a good area and set up enough tablespace for everyone to work comfortably. The Bouquet Bar above hosted 11 people and the instructor. This was created in an average-sized dining room. We first placed the tablecloth and each participant received a paper towel. For a more formal party, you can also supply your guests with cloth towels and give them as favors after the event.
Tools and Vessels
It’s important to provide each guest with flower snips or sharp scissors because they will each want to trim their stems and you don’t want everyone reaching around the table sharing snips. You can buy multipacks of scissors or invest in better-quality garden snips that your guests can take home. This will depend on the size of your party and/or occasion.
As for the vessel, I always like to choose a short opaque pot that is water-tight. I think this shape and size above work well for creating an arrangement. But you can always provide tall vases if large and tall arrangements are your preference. I try to avoid clear glass only because I like it when the stems are concealed. The vessels in the photo were purchased at Michaels.

Flower Buckets for Display
Choosing your flower and foliage display buckets is a simple way to “theme up” your event. There are many buckets to choose from including a chippy farmhouse french style, formal basic black, or industrial galvanized metal. Set the buckets up on a covered buffet table or an extra folding table, and be sure to style it according to your theme.
Flowers and Foliage
In the winter months you’ll want to contact a wholesaler if you can so that you can get larger quantities to fill your display buckets. In the spring, summer and fall months I’d find a local flower farm or two and purchase your flowers from them. They will be the best quality and the growers will appreciate your business.
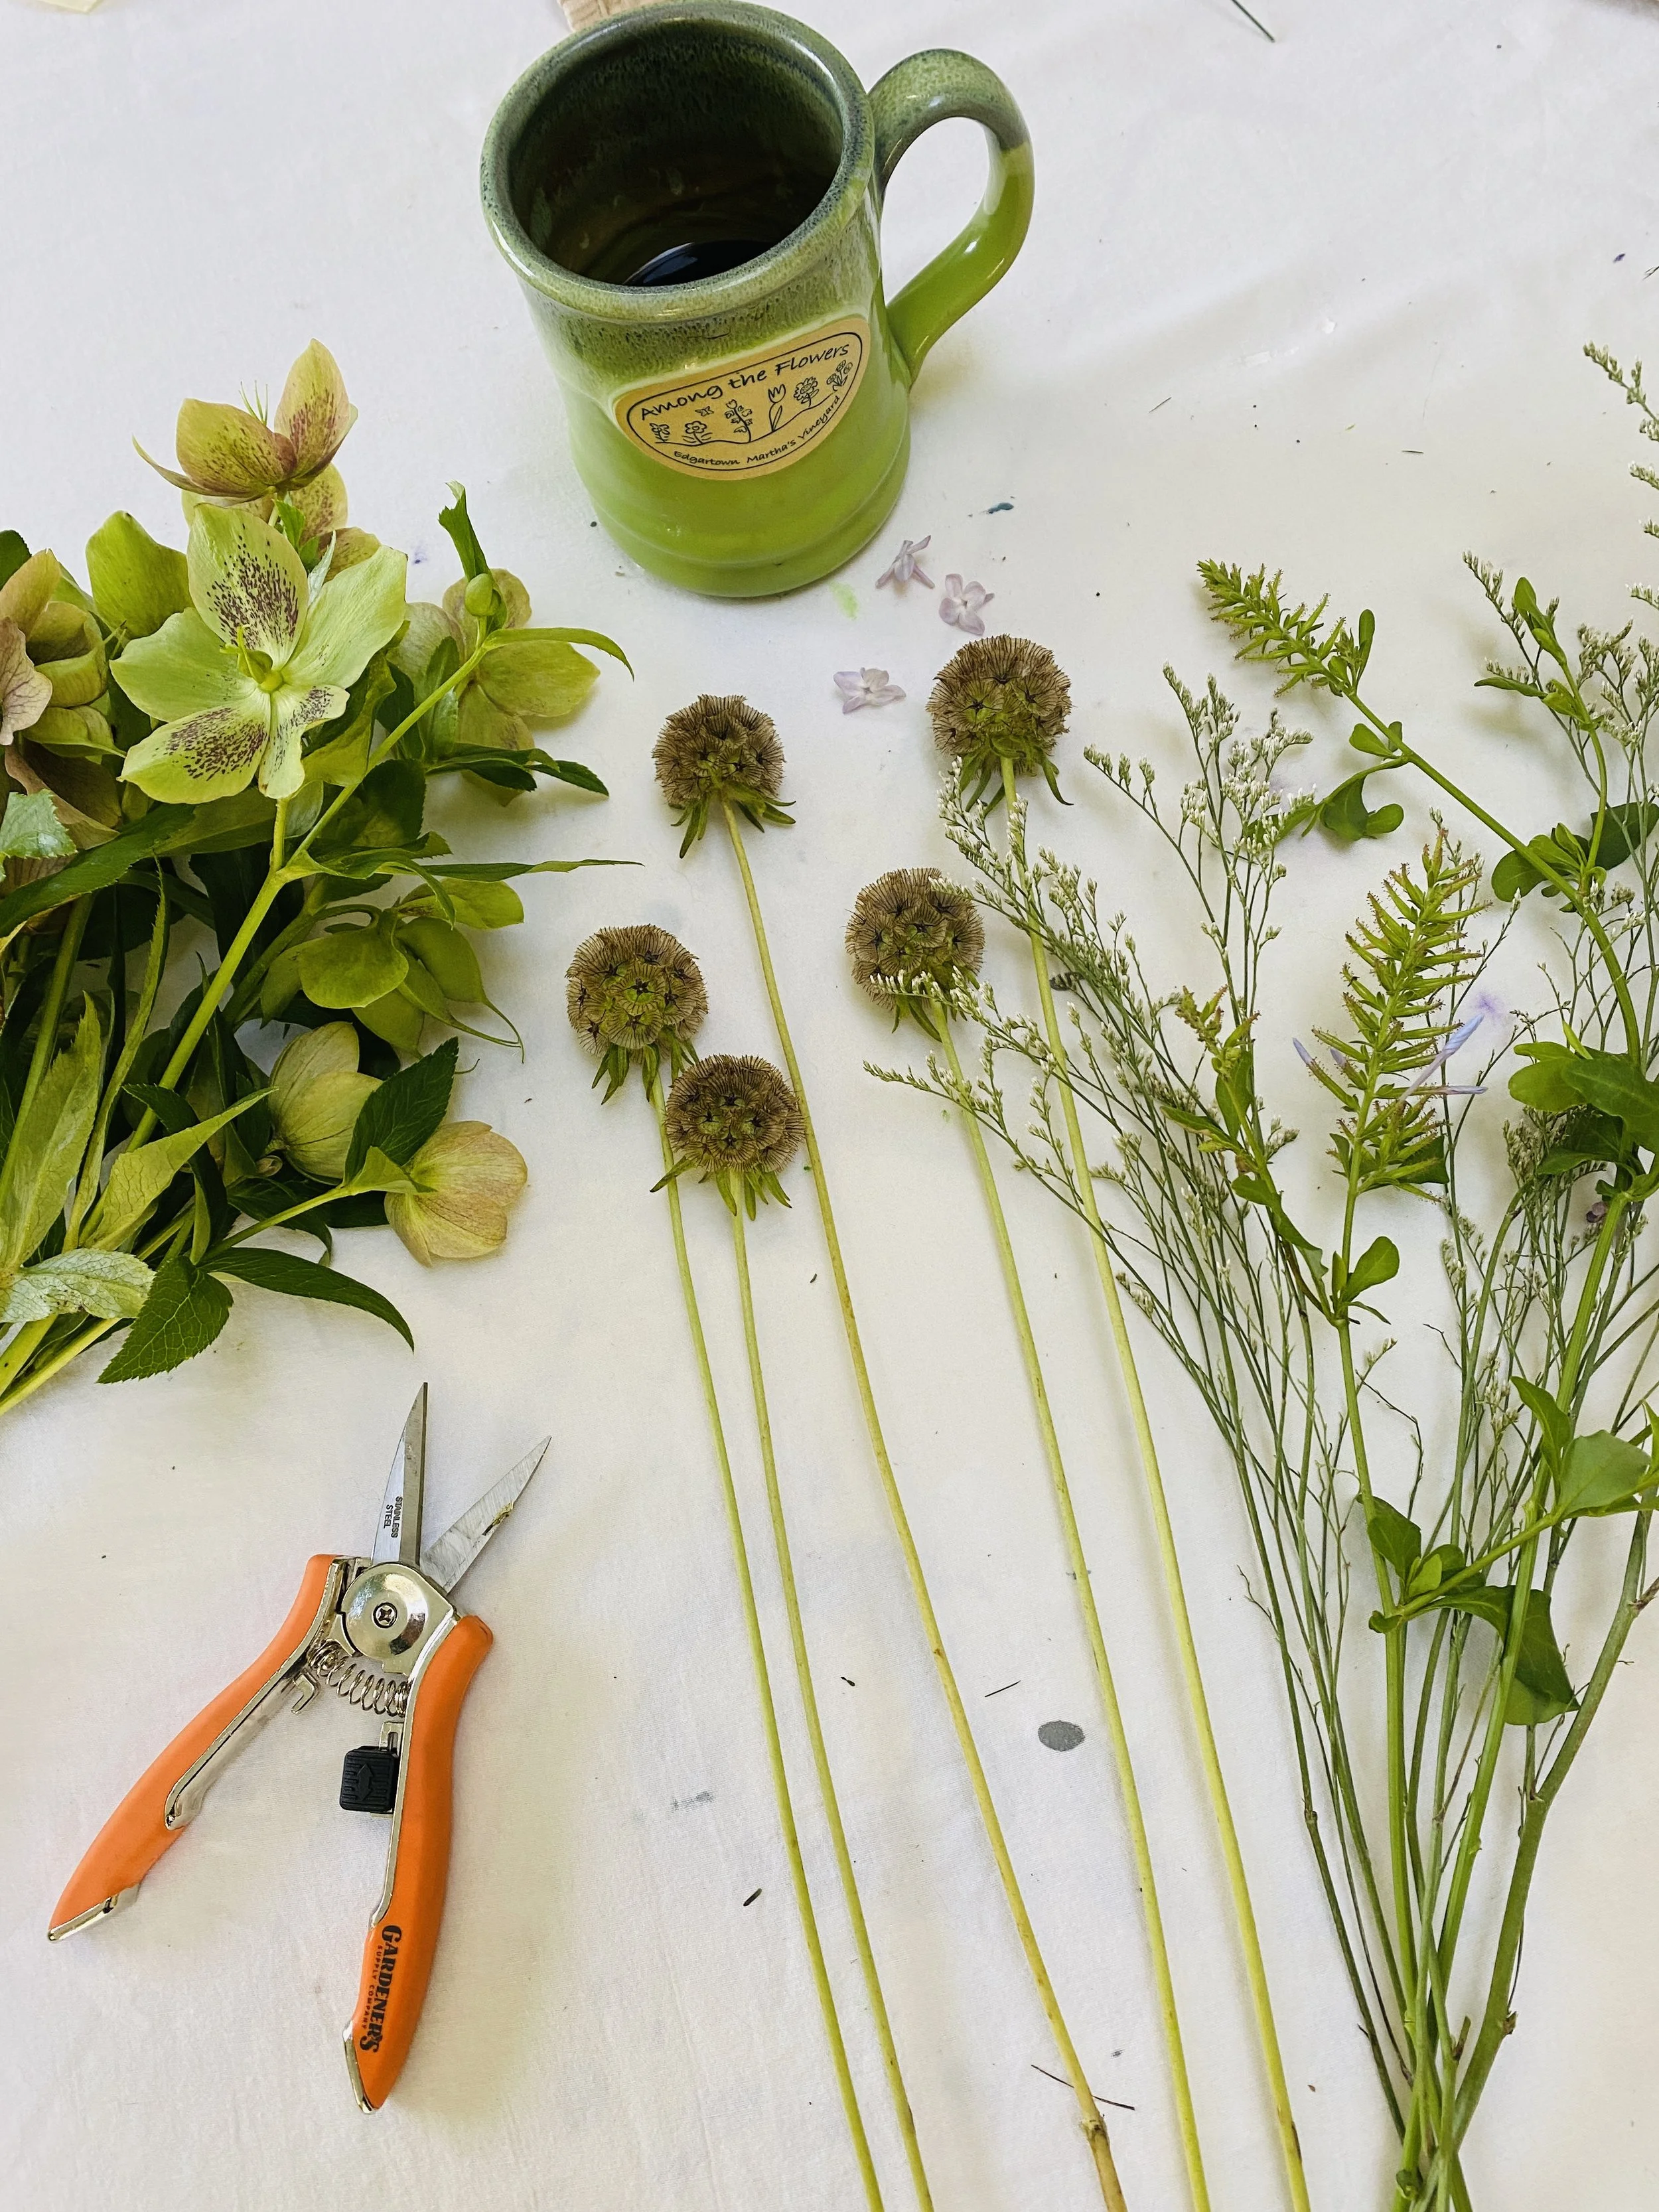
How Many Do I Buy?
Counting stems is a critical part of all of this planning. I always overbuy my flowers because I’d rather have too many than not enough. It’s a good idea to purchase an extra vessel and do a dry run arrangement with some flowers and greens. Then take it apart and count how many foliage and flower stems you used. Triple that and multiply it by the number of guests. You’ll want to have a nice variety to choose from and if you have too few of something, some arrangements may seem sparse. And remember, flowers do break in transit, during processing, and when Bouquet Bar enthusiasts get TOO ENTHUSIASTIC. So be sure to order more than you’ll need. You’ll be happy you did.
Focal flowers, filler flowers (the secondary flowers, not the primary focus) and foliage (the greens) are generally all sold in bunches of 10, so if you want only one type of focal flower, choose only that. But if you want your guests to have choices, then split up your order and buy a variety of flowers. Popular ideas for foliage and filler flowers are eucalyptus, asparagus fern, and wax flower.
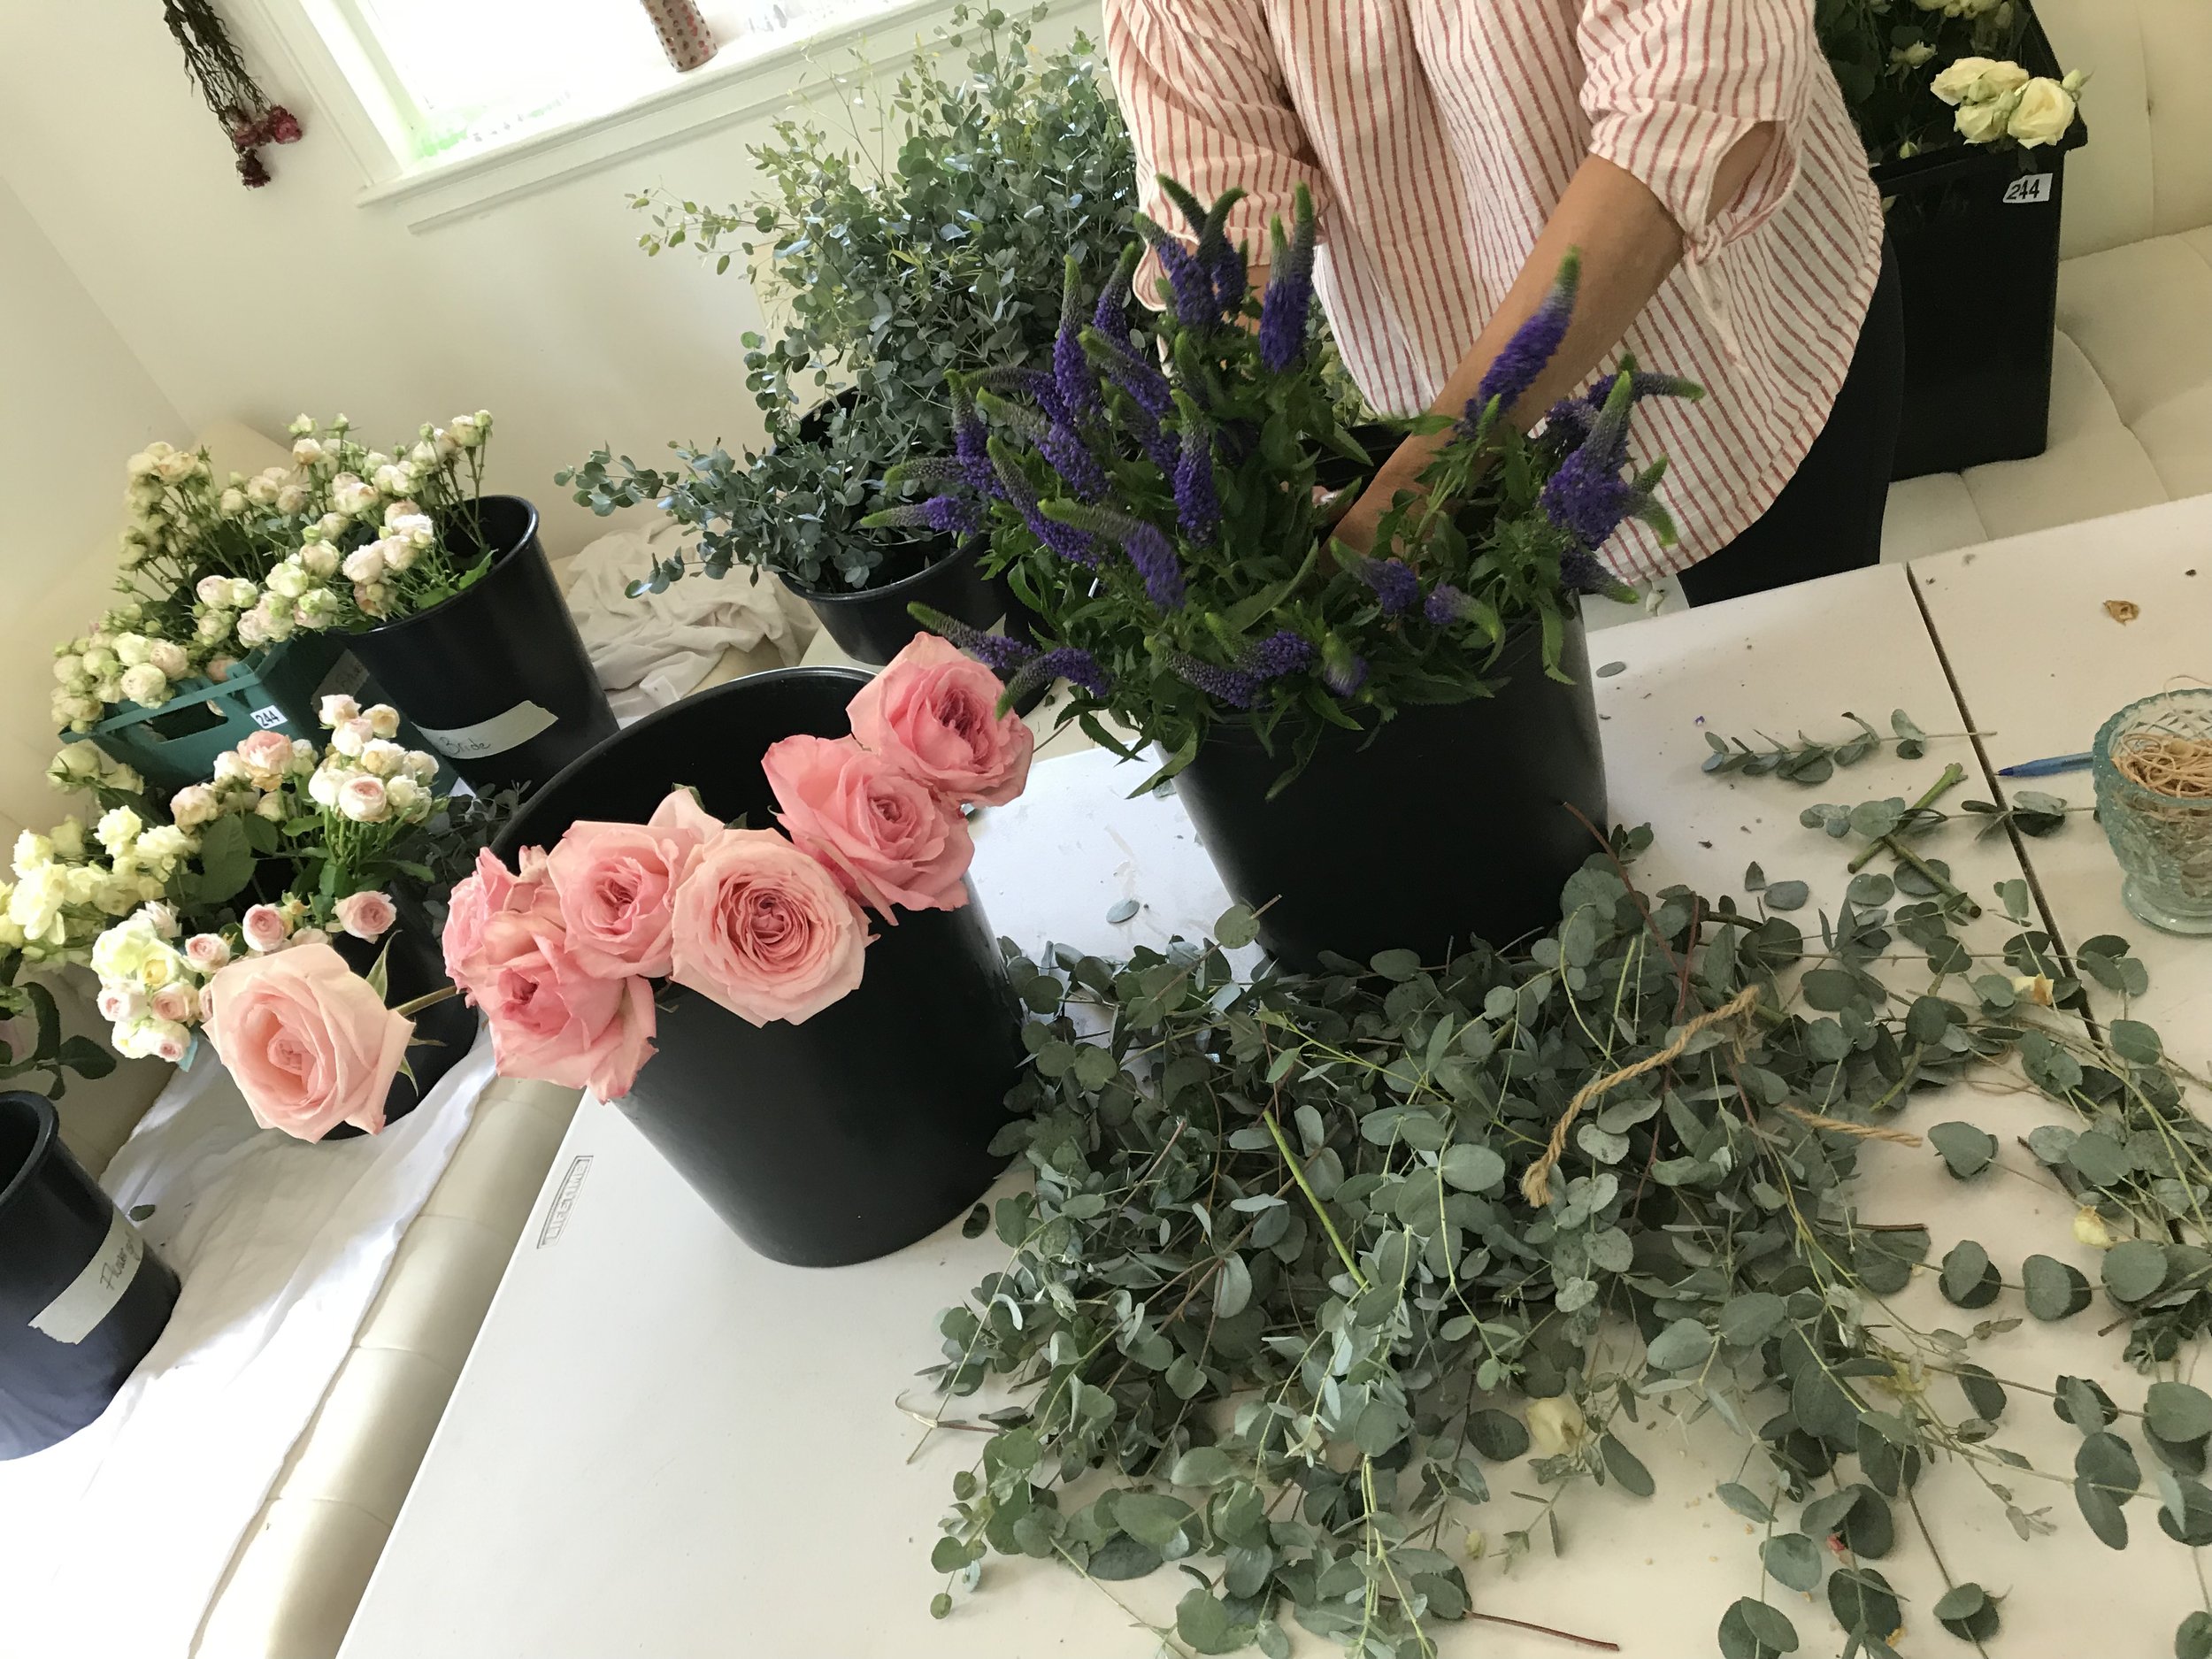
Preparing the Flowers
The day before your event, you’ll need to process all the flowers and greenery. This means, taking all the bunches out of the paper or plastic, cleaning and trimming each stem before placing it in fresh cold water with flower food. This is a good time to divide up and organize your buckets so that everything looks well-displayed.
Before trimming the bottom of each stem so that it comfortably fits into its bucket, thoroughly strip each stem of any extra greens or thorns so that leaves do not touch the water. Then store all of your buckets in a cool, dry place overnight. This step is important, as it allows the flowers and foliage to fully hydrate before becoming part of an arrangement and if you are working with tulips, they will stay closed if the space is cool and dark. Proper hydration, allows your arrangements to stay fresher longer.

Day of Event
On the day of the event, style your flower buckets any way you like. You can scatter them around the room or patio, offering different heights for interest but try to keep like things together. For instance, foliage can be in one area, focals in another. Then, set up your guest’s work table and fill each vessel halfway with water.
When the guests arrive, put on some music, explain the bouquet bar, and instruct them to consider what sort of bouquet they’d like to create.

You’ll be creating with your guests so show them how to first choose 5-7 stems of foliage (depending on the size of the vessel) to arrange as a base. Once the foliage is cut and designed in each vessel, point your guests in the direction of the filler flowers. Once the filler and foliage are styled to everyone’s tastes, have your guests choose 3, 5, or 7 focal flowers to round out their bouquet. Do not forget to stage a photo which can serve as a nice thank-you note after the event.
Bouquet Bars are always a big hit so I hope you were inspired by this post and comment about your own experiences. Thank you for visiting.

Thank you, Ileana, for the use of your photos.
How to Make Your Own Mint Tea
This summer I have 7 mint varieties and I am actively drying them to create my favorite summer iced teas.

Pineapple mint
A few years ago I began growing a few pots of mint right outside on my deck. Before long I began growing many different varieties. To prevent excessive spread, I grow all of them in pots except for Apple Mint which gets quiet tall, and some Spearmint which I scattered around as groundcover.
Mint Varieties
This past summer, I grew 7 mint varieties and I actively dried them to create delicious summer iced teas.
The mints I grow
Pineapple Mint
Apple Mint
Strawberry Mint
Spearmint
Peppermint
Chocolate Mint
Orange Mint

Strawberry Mint
Harvesting Fresh Mint
To keep things manageable, I have decided to cluster all the mint pots on the deck right outside my back door. This way they are easy to care for and simple to harvest. I find it’s important to harvest often to promote growth. The best way to harvest is to cut your mint stems just above the new, tiny leaves or buds. To do this I use this snip tool. I find it’s the best. A sharp, clean cut will strengthen the plant, keep it healthy, and encourage it to branch out in other directions.
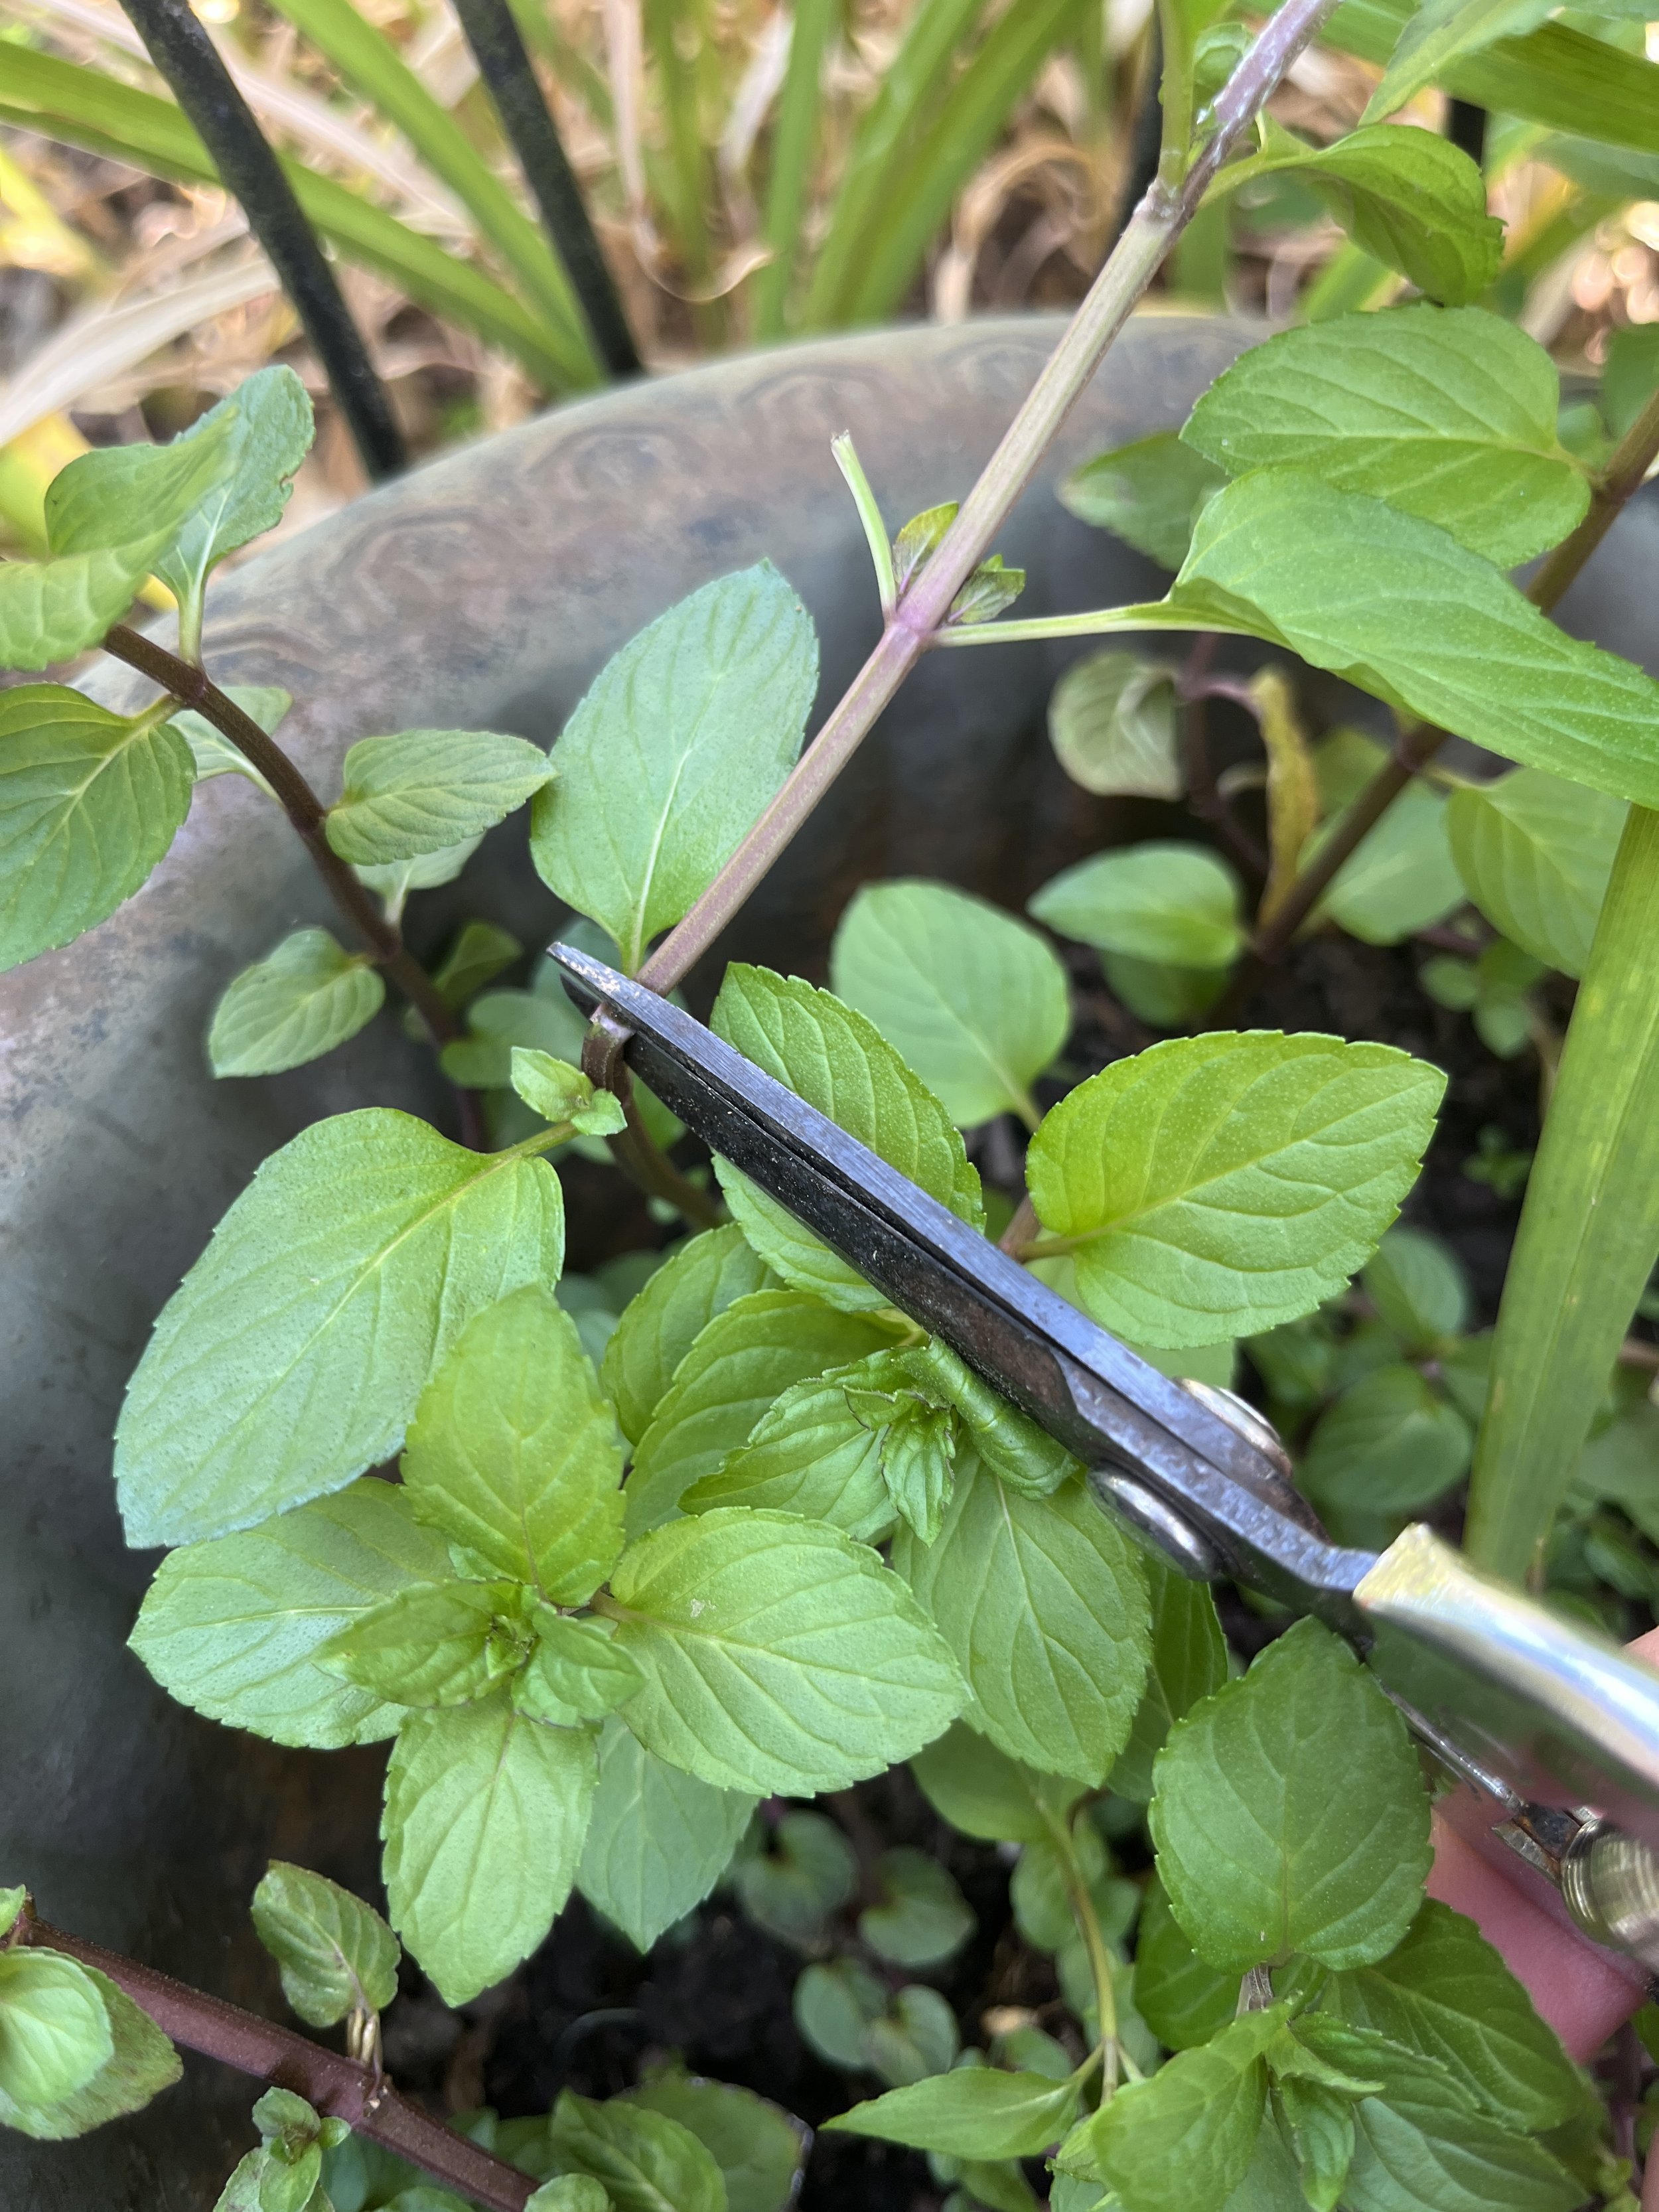
Harvesting Peppermint
Cleaning and Drying the Mint
After I snip the mint that is ready, I wash the leaves thoroughly, after I carefully remove the leaves from the stems. I find it’s easier to remove the leaves at this stage before drying because then I don’t risk getting pieces of stem in with the leaves, but you may find you like removing them after you dry your mint. It really doesn’t matter, so just do what is easiest for you. Once the leaves are clean and separated from their stems, I place them on a large serving dish or my stainless baking pans to dry. Most of the time I just let them air dry for a few days but if I am going to be home for a while I dehydrate them in my oven at 175 degrees. If you choose to put them in the oven or dehydrator, they should only take a few minutes. Thorough drying is very important because you do not want any moisture left in the leaves or they will mold when you store them.

Drying Orange Mint
Storing the Mint
Once you are sure your mint leaves are completely dry and crumbly, it’s time to store them. I like to use Mason jars just because I love the look. I created an Herb Drying Rack in my pantry and you can learn how I did that here. But be warned, last year I made the mistake of sealing the jars with traditional Mason lids and I learned that even if you have just ONE moist leaf, your entire batch will be ruined. Luckily, I found these wonderful stainless steel screen lids that fit Mason jars. These lids are great for two reasons, they allow air circulation and now a mint scent fills my pantry.

Stainless Steel Mason Lids
Chopping the Leaves
After the mints dry, I briefly run them through my coffee grinder or food processor if I have a large amount. You can also just scrunch them up in your hands. Any of these methods chops the leaves so they are small enough for the tea bags. It’s not necessary, but I like when the leaves are small because they are easier to scoop out of the mason jars with a spoon.
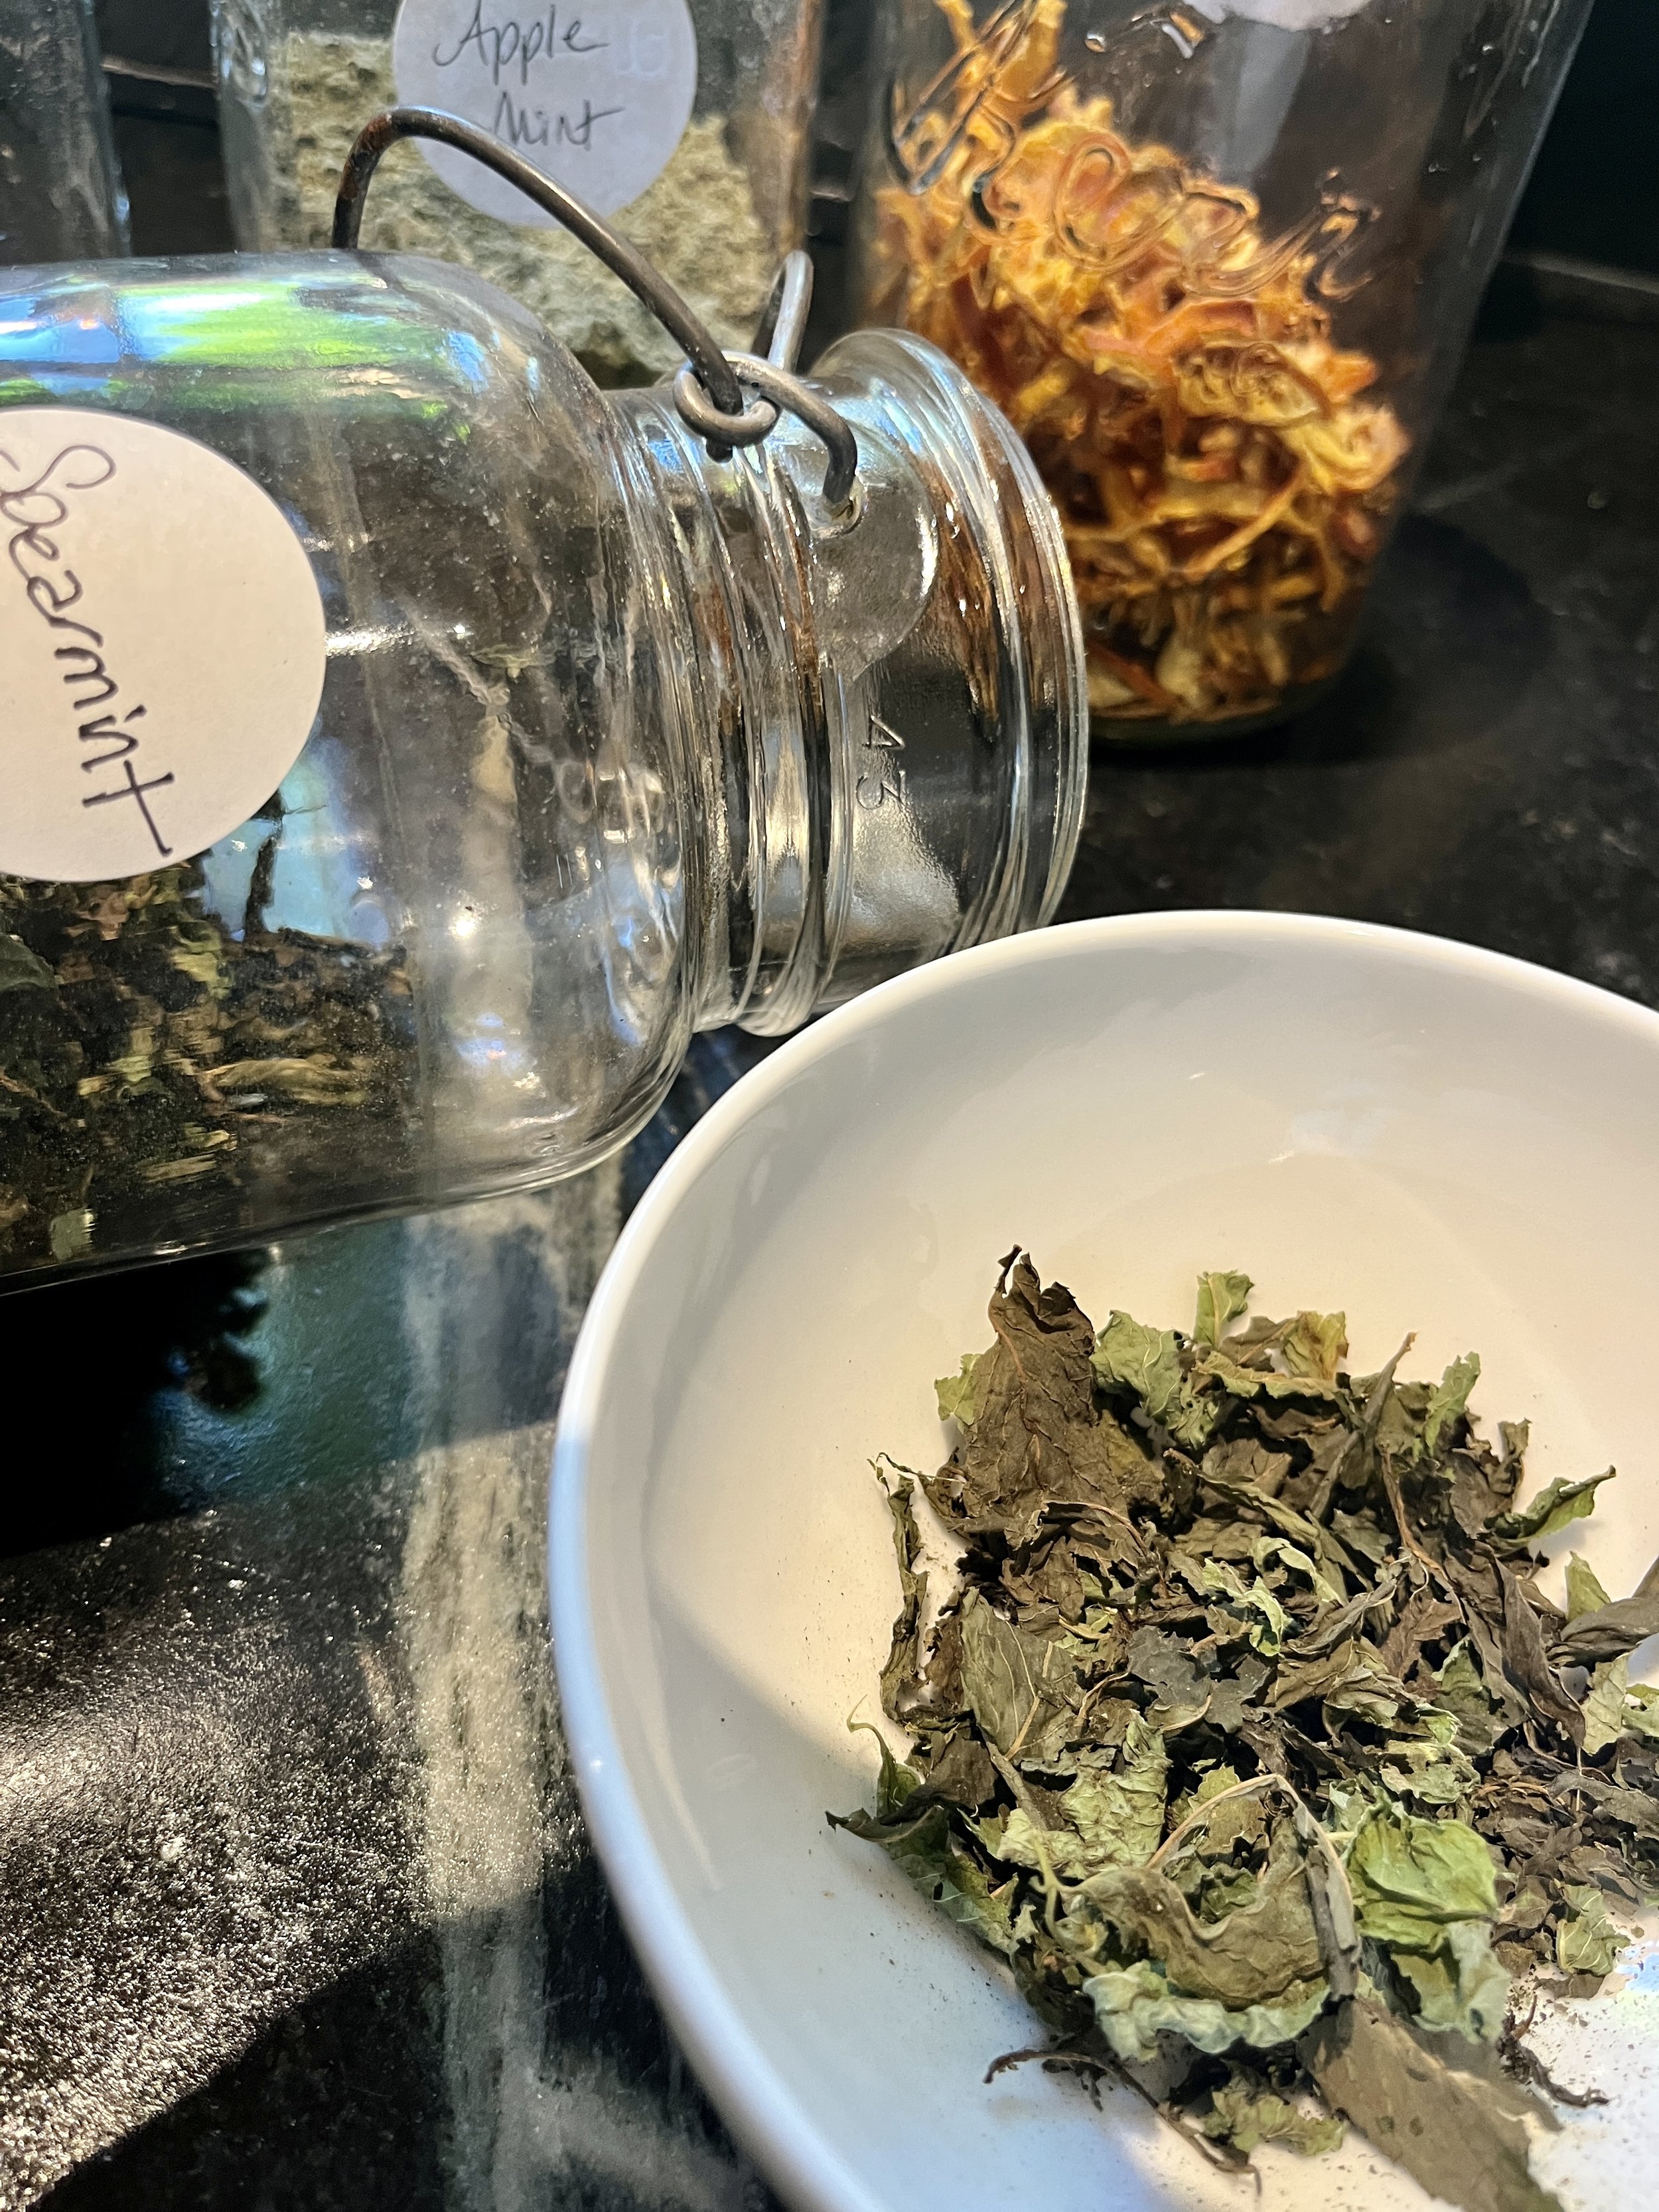
Unchopped Dried Spearmint

Chopped Dried Strawberry Mint
Making the Teabags
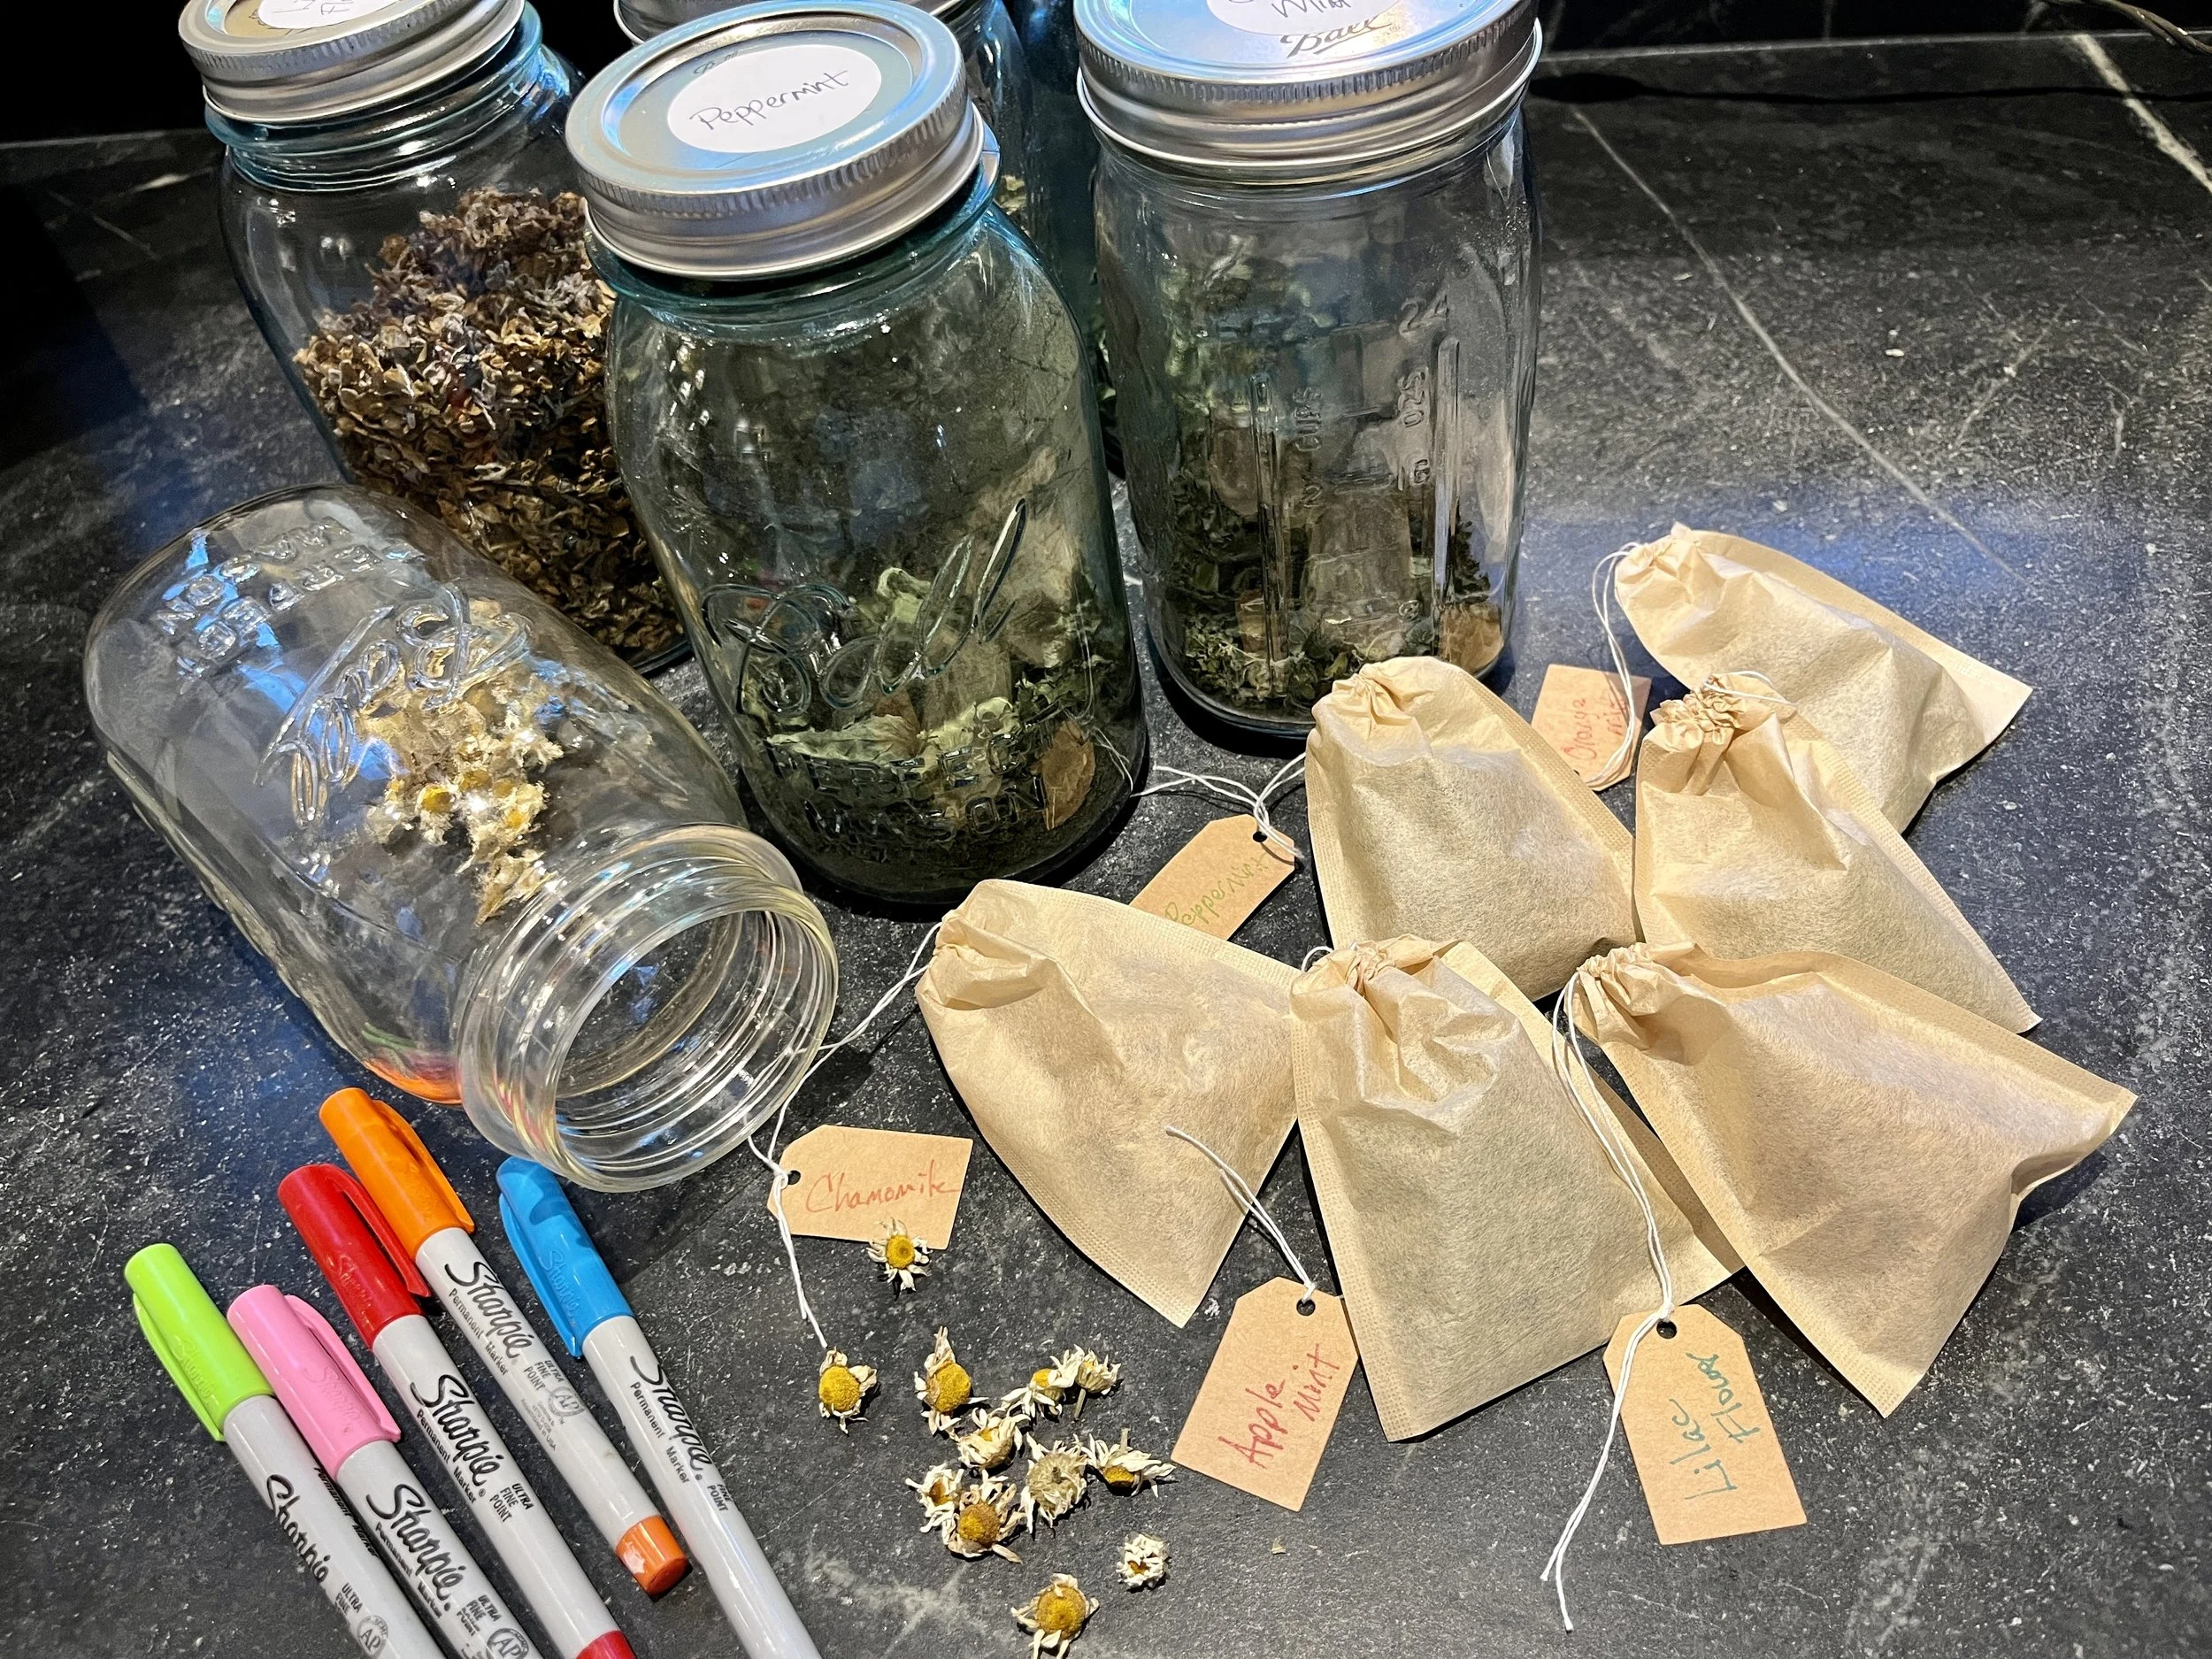
Once you have a collection of dried mints or other tea favorites like dried orange, lime or and lemon peels, echinacea petals, lavender, and chamomile it’s time to create some of your own tea bags. I use unbleached tea filter bags by Numola. What I like about them is they have a drawstring, not a staple, and they are fully compostable. I can toss them right into my countertop compost bin without worry. These filter bags do not come with label tags so I bought simple kraft hang tags which I tie on the string of the bag.
To fill I open the filter bag, fill it about halfway with one or multiple varieties of dried mint, flowers, or fruit, and then tie it securely so the mints do not escape when you place it in water. Once I’ve created a tea variety, I label the tag accordingly and tie that to the teabag. I enjoy giving these herbal & floral teabags as gifts in breakfast baskets and to make my own iced tea.

Unbleached Teabags
I hope this post inspires you to grow some mint or other tea-worthy, edible flowers like the chamomile above, and that it helps you create some warm winter sips. Please comment “MNT” if you’d like a full list of supplies for dying & storing your own mint.
How To Create A Courtyard
How to create a courtyard

The Windy Hill Courtyard Project: Is it possible to combine your love of travel with your love of home design? In this post, I'll share how we created a travel-inspired DIY courtyard on our farm at Windy Hill.
Planning our vacation
Several years ago I planned a very extensive family vacation. It’s understood that whenever I plan a vacation, I carefully consider the accommodations because, I believe, if you seek out cool spaces, where you stay, can be as interesting as the vacation itself.
So, one day as I was paging through Country Living Magazine and I came across an article about a quaint hotel in San Luis Obispo, CA, which was dubbed America's happiest town, by Oprah Winfrey. The hotel I found had a french theme and was named Petit Soleil {A Touch of European Charm in the Heart of San Luis Obispo}. It looked perfect and with a tagline like that, they had me hook line, and sinker.

find Inspirations
Upon our arrival, we were greeted at the front entrance by a sweet bicycle covered in flowers and giant pots filled with herbs. It was charming, to say the least. Inside there is a cafe that looked like a French bistro and all the rooms had creative names like La Cage Aux Folles, Chocolat, and Herb de Provence. But the space that inspired us the most was the sun-warmed garden courtyard. And because it was July, we took advantage of the courtyard’s morning French Toast and also its happy hour French wine. As we enjoyed that glass of French wine, my husband and I looked at each other and said "We should create a garden courtyard like this at home." And when we retruned we did.

Our farm’s original courtyard
Our home is in Doylestown, PA, so first of all, we get much more snow than California and we were working with a farm that was built circa 1850 and property with many overgrown gardens and herds of pesky whitetail deer. So, we had a few challenges to consider.
The space we wanted to transform into our courtyard sits between the main farmhouse and the lime-green artist cottage and this area wasn’t in the best of shape. We needed to rip out some old, weedy gardens and lay a lot of weed barrier cloth to prepare the way for the red tipple stones and large overlaying flagstones we were about to bring in.
We also needed to remove a very large, old tree that leaned precariously over the house. We have a lot of high winds here and this tree posed a danger every time it stormed, so we decided it was time to take it down, plus that would free up space and allow for more sunlight into the courtyard. This was a big undertaking, and a crane and a few professionals were called to handle the job.

Clearing the space
We first cleared all the old, weedy gardens, and removed all the broken pieces of slate. Then, we defined a circle around the tree with some rocks, because we knew as soon as the crew could remove the tree, we’d plant something new.

weed barrier mat
Once the slate and gardens were removed, we carefully lined the entire space with a weed barrier cloth, overlapping the edges so nothing could sneak through. (It still did, but that’s another story). Here our daughter’s pose for the camera, indicating they were helping me, but I am not sure that’s the case.

Red Tipple Stone
Next came the smooth spreading of red tipple stone. We chose red tipple because all of our farm driveways already used red stone, so this balanced nicely. Red Tipple is a very small stone and you can smooth it out with a metal rake. Landscapers can deliver several yards of tipple or you can also find it in bags at garden centers or at Home Depot and Lowes. For this courtyard, we had the stone delivered and used a makeshift ramp to wheelbarrow it down the step into the courtyard. As you can see, we worked night and day to finish!


Removing the old Tree
We hired a landscaping crew to remove the big, old tree. They brought in a crane and had to carefully lower and roll the pieces out of the yard. I was very nervous to do this step, but it was so big and potentially harmful, at this point, so we took it down.

Laying the Flagstones
As we neared the end of the project, we still needed to bring in the large, flat flagstones. The stones were delivered on palettes from a local stone supplier and we rolled each one into place by hand. It was a bit of a puzzle placing them on the tipple while considering our furniture and at the same time creating a little bit of space for the tucking of herbs like Creeping Mother of Thyme groundcover. We also knew we wanted a water feature someday but hadn’t found the right one yet. To prepare for this, we laid the flagstones near our house in an arch to accommodate a walking path around the “future” water feature.

Here our son, Blake, lends a hand spreading the tipple around the flagstones like a pro.

finishing touches
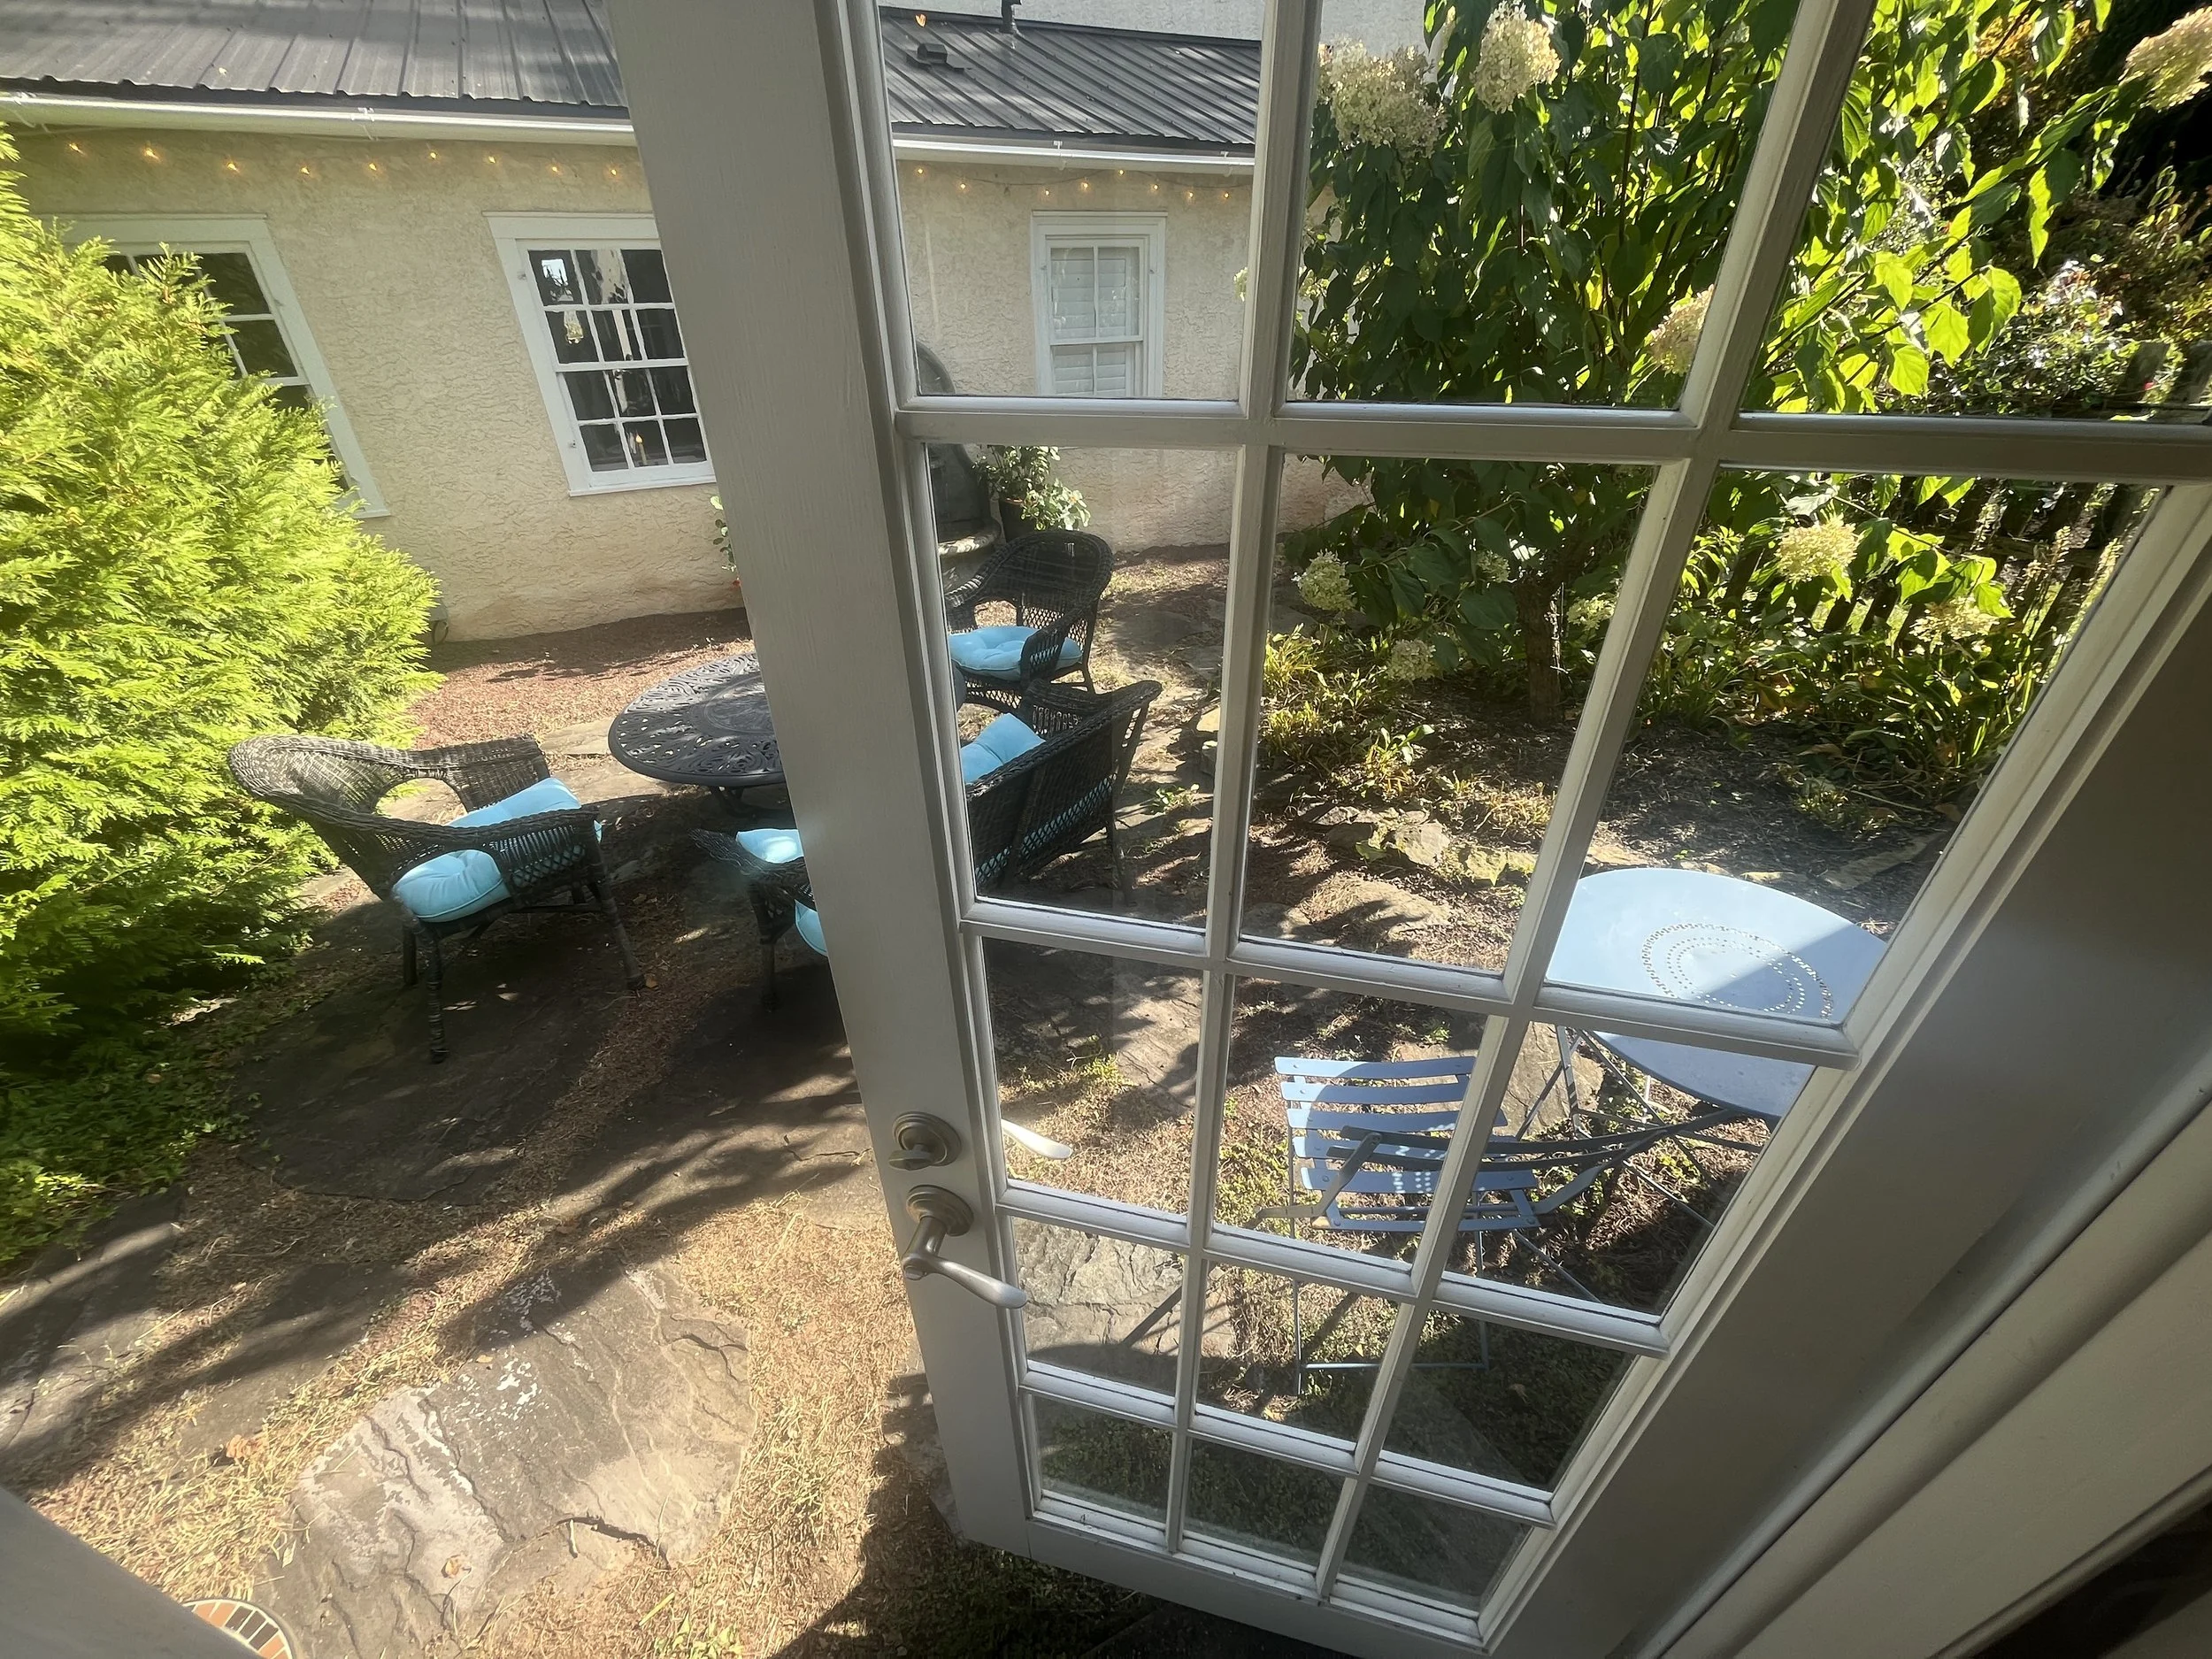
So here is the end result of all that hard work. A Pee Gee Hydrangea Tree stands right where the other tree once stood. Many rogue hostas and honeysuckle spontaneously sprung up around it over the years. The stunning stone wall fountain was eventually found at a local company called Campania and ironically was made right up the road. The circular shape was just what we wanted and it fit nicely inside our previously designed, arched flagstone path.

Courtyard Reveal
This is the view from our cottage. In the mild Pennsylvania months, it’s so nice to hear the water trickling and just enjoy this transformed space. We are so glad Petit Soleil inspired us many years ago. I’d love to hear about projects you’ve been inspired to do around your home. Please comment below.


How to Create a Stunning Centerpiece
How to create a stunning winter centerpiece

Start with a great base
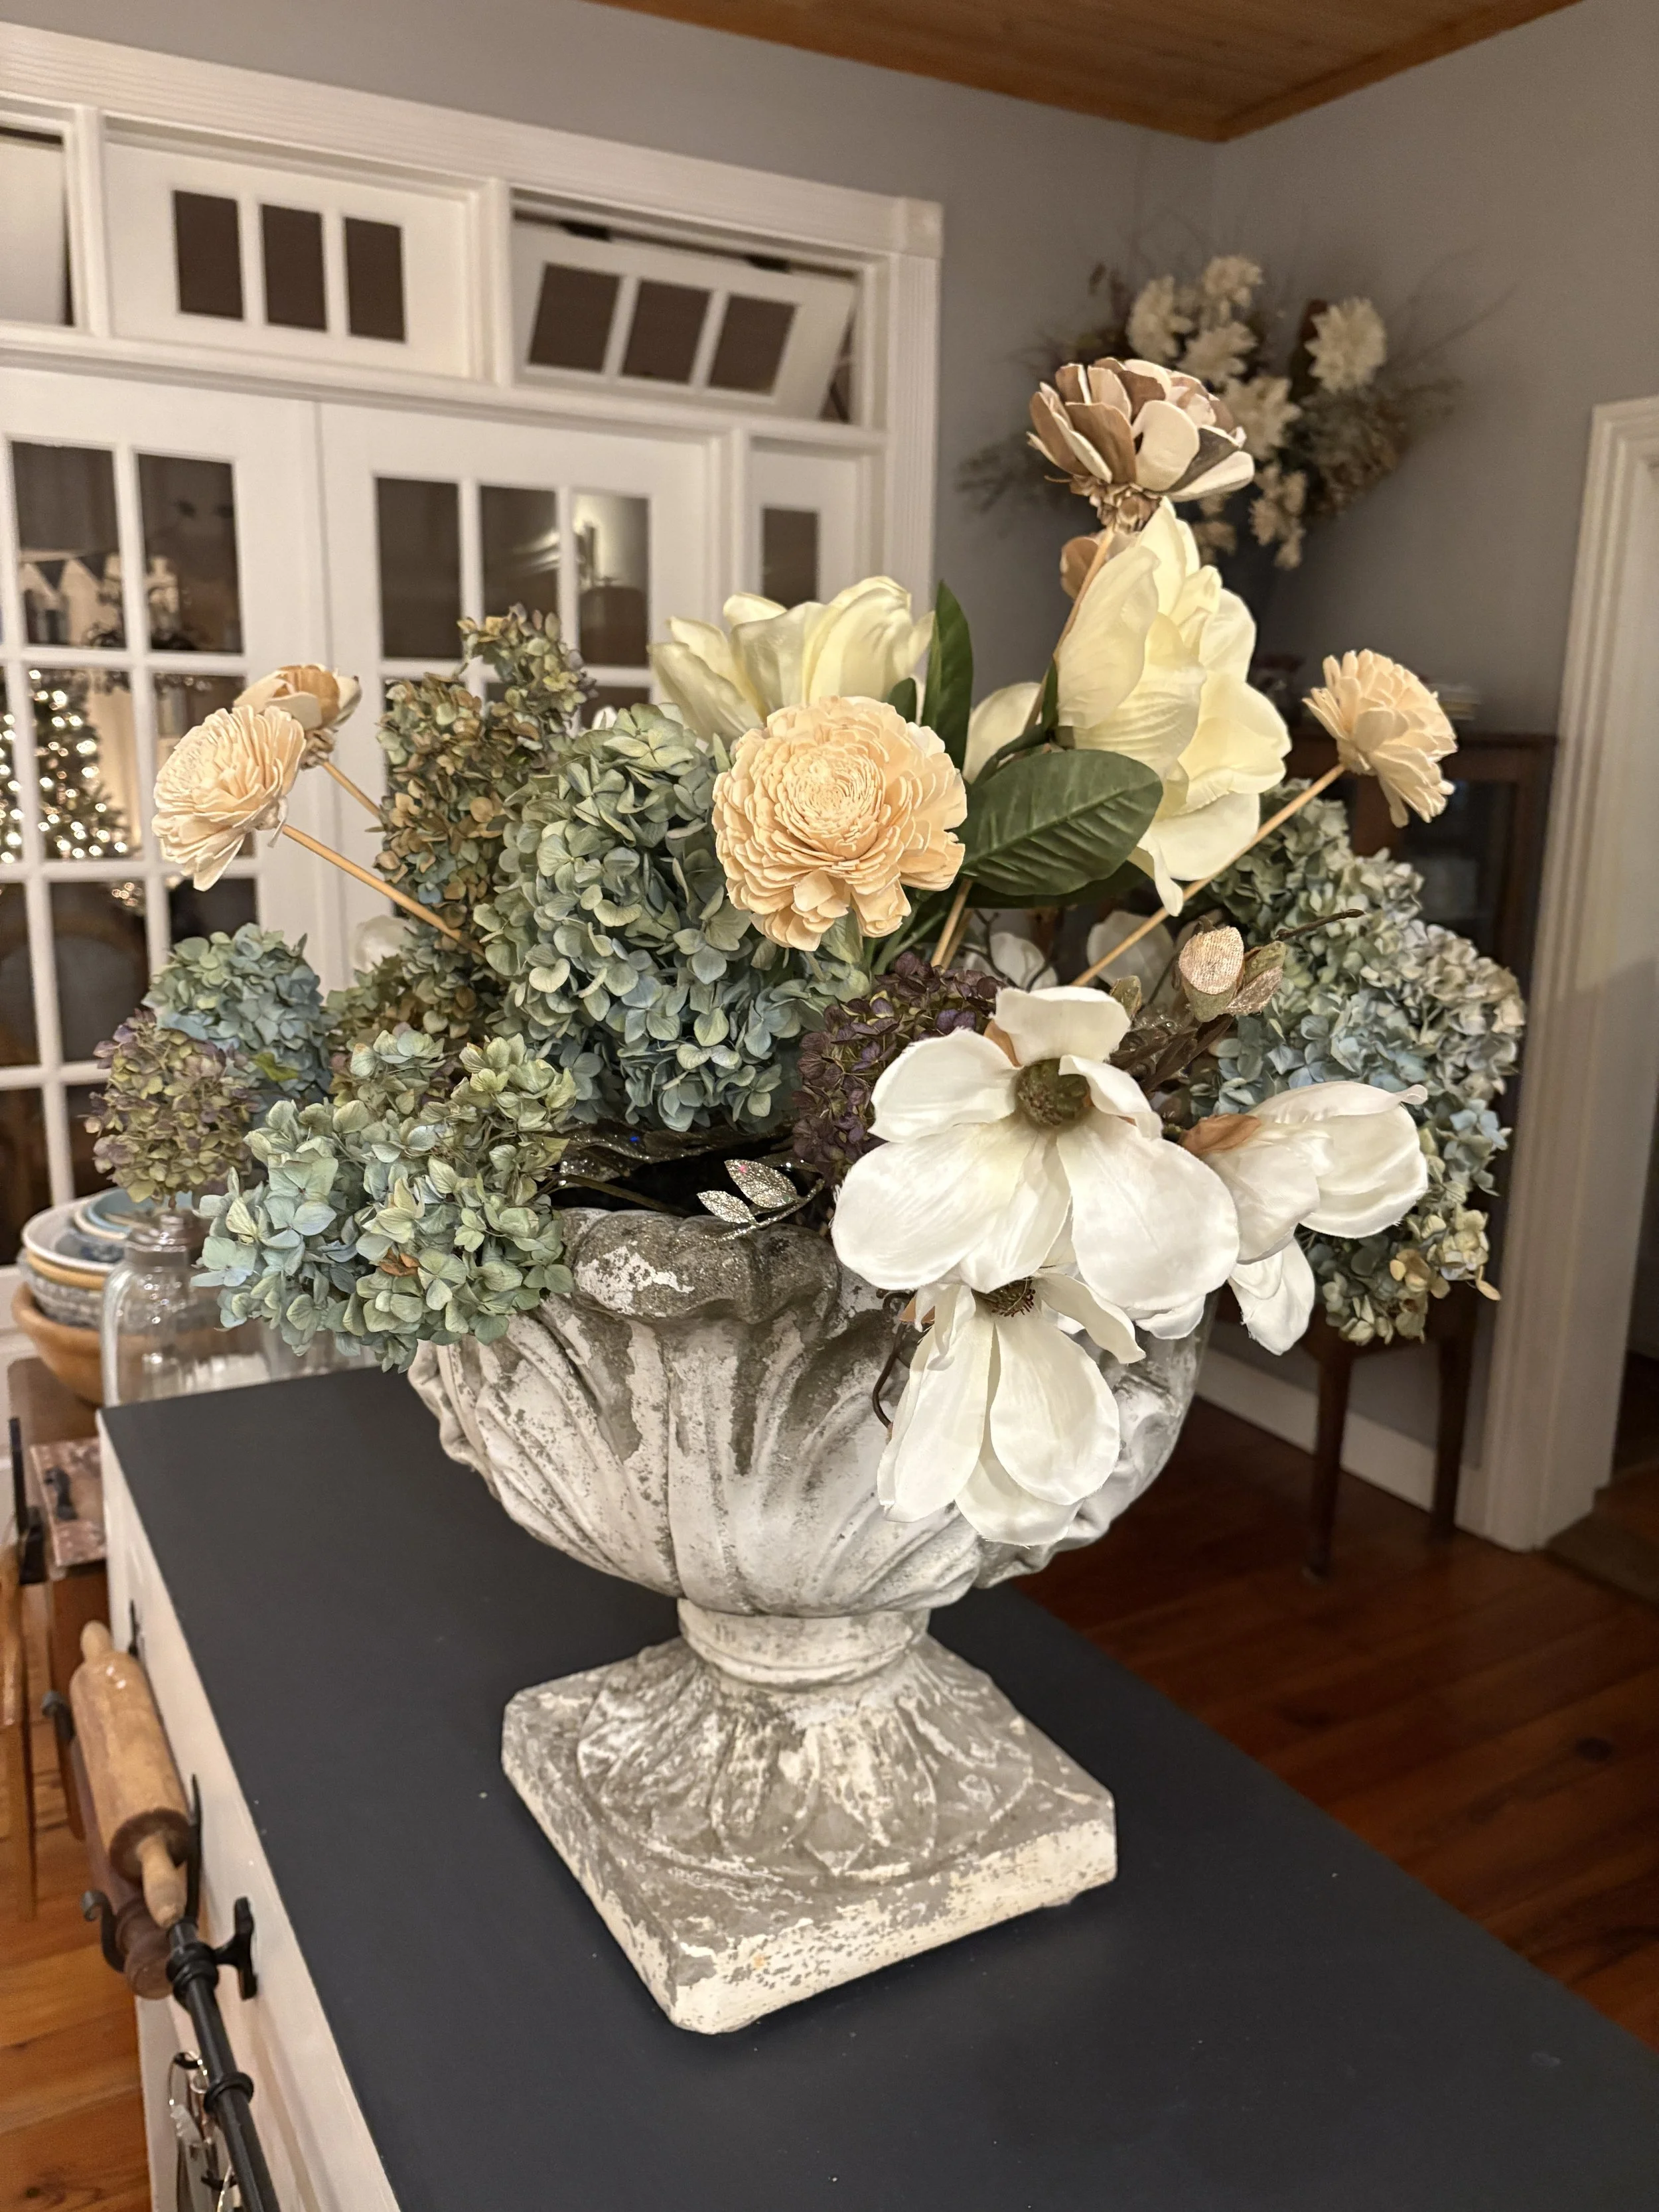
A few months ago I found this fantastic cement pedestal planter on Facebook’s Marketplace. It’s very heavy but I managed to get it into my car with a little help from the seller. I was lucky with this one because the beautiful white paint patina was only flaking off a little bit -just enough to show the age, but not enough to ruin my kitchen, where I decided to showcase this rare beauty. Look around garden centers for one of your own and if you’d like to recreate a smaller version of this, I found this replica.

Find A wreath to cover the top
I found this medium silvery wreath floating around, so I decided it would make a great base for my arrangement. It hides the chicken wire mechanics I placed inside the planter for stem stability and it covers the opening enough without hanging too far over the gorgeous, detailed edges. In hindsight, a looser green wreath would work just as well, and if you only have one that hangs over the edges a bit, that would be okay too because it would look soft and flowing. That being said, I recommend looking around your house for something that fits your decorative base well and if you can’t find something then quickly create a small wreath with wire and fresh greens, branches or even faux foliage. Here is a good starting point if you can’t find or make something. Consider pulling apart an old, worn-out wreath and filling it with something new and fresh, but be sure it will compliment your focal flower color palette nicely.

Focal Flowers
When choosing my palette for this winter arrangement, I went with creamy whites and browns so that my design could last all winter and not need to be changed out soon after the Holidays. I decided to use these faux Magnolia branches and a few off-white wooden stems I had lying around. The Magnolia stems are a mix. I found some at a home decor boutique and I found some at Michaels, The wooden flowers came from Trader Joe’s and I’ve had them for years.

The Execution
To fill in the planter, I began by placing each large Magnolia branch so that it loosely spilled out over the scalloped edges of the planter. I had to bend each long, wired stem so they’d be short enough for the planter. I didn’t want to cut them because I may use them differently next year. Once bent, I liked the way they just randomly popped out here and there on all sides.

Secondary Flowers
Next, I began anchoring the wooden flowers so they’d create height in the center. of the arrangement These stems are held up with the chicken wire inside under the wreath. This is important because, without the inside structure, I would not be able to get this grand height. You could also use floral foam, but I try to stay away from foam whenever possible.

Filler Flowers
Once all the creamy Magnolias and wooden flowers were placed where I wanted them, I grabbed a big bundle of muted dried Hydrangea that I picked from my own gardens, and began filling in the spaces. Dried Hydrangea are a bit messy, but they are so nice and fluffy and they do a great job covering up all the stems and rounding out the arrangement. And I don’t mind mixing faux, silks, and dried, as long as my color palette is pleasing and the overall aesthetic is textural and nice. And if you can’t use dried, here is a link for faux Hydrangea stems.

the End Result
So here is the result. A wintery mix of Magnolia & Hydrangea placed smack dab in the middle of my small, antique, kitchen island. It takes up most of the surface, but I love that. And my favorite part is that I do not have to disassemble after Christmas. This color scheme will take me through the winter very nicely. I hung a few dried oranges from the arrangement on Christmas Eve and I may hang a few small hearts for Valentine’s Day. Please tell me what you think. XO - Kim
Supplies for the Magnolia Cement Planter Design
Replica Pedestal Planter (small)
Wooden Flowers (I found mine at Trader Joes)


How We Transformed Our Farmhouse Kitchen by Reusing, Updating, and Thrifting: (Coffee Bar)
Since coffee is a big part of my mornings, we transformed this area into a little coffee bar. And what does every coffee bar need, but a big chunky mirror above it? This is my favorite part because the mirror I used didn't cost anything.
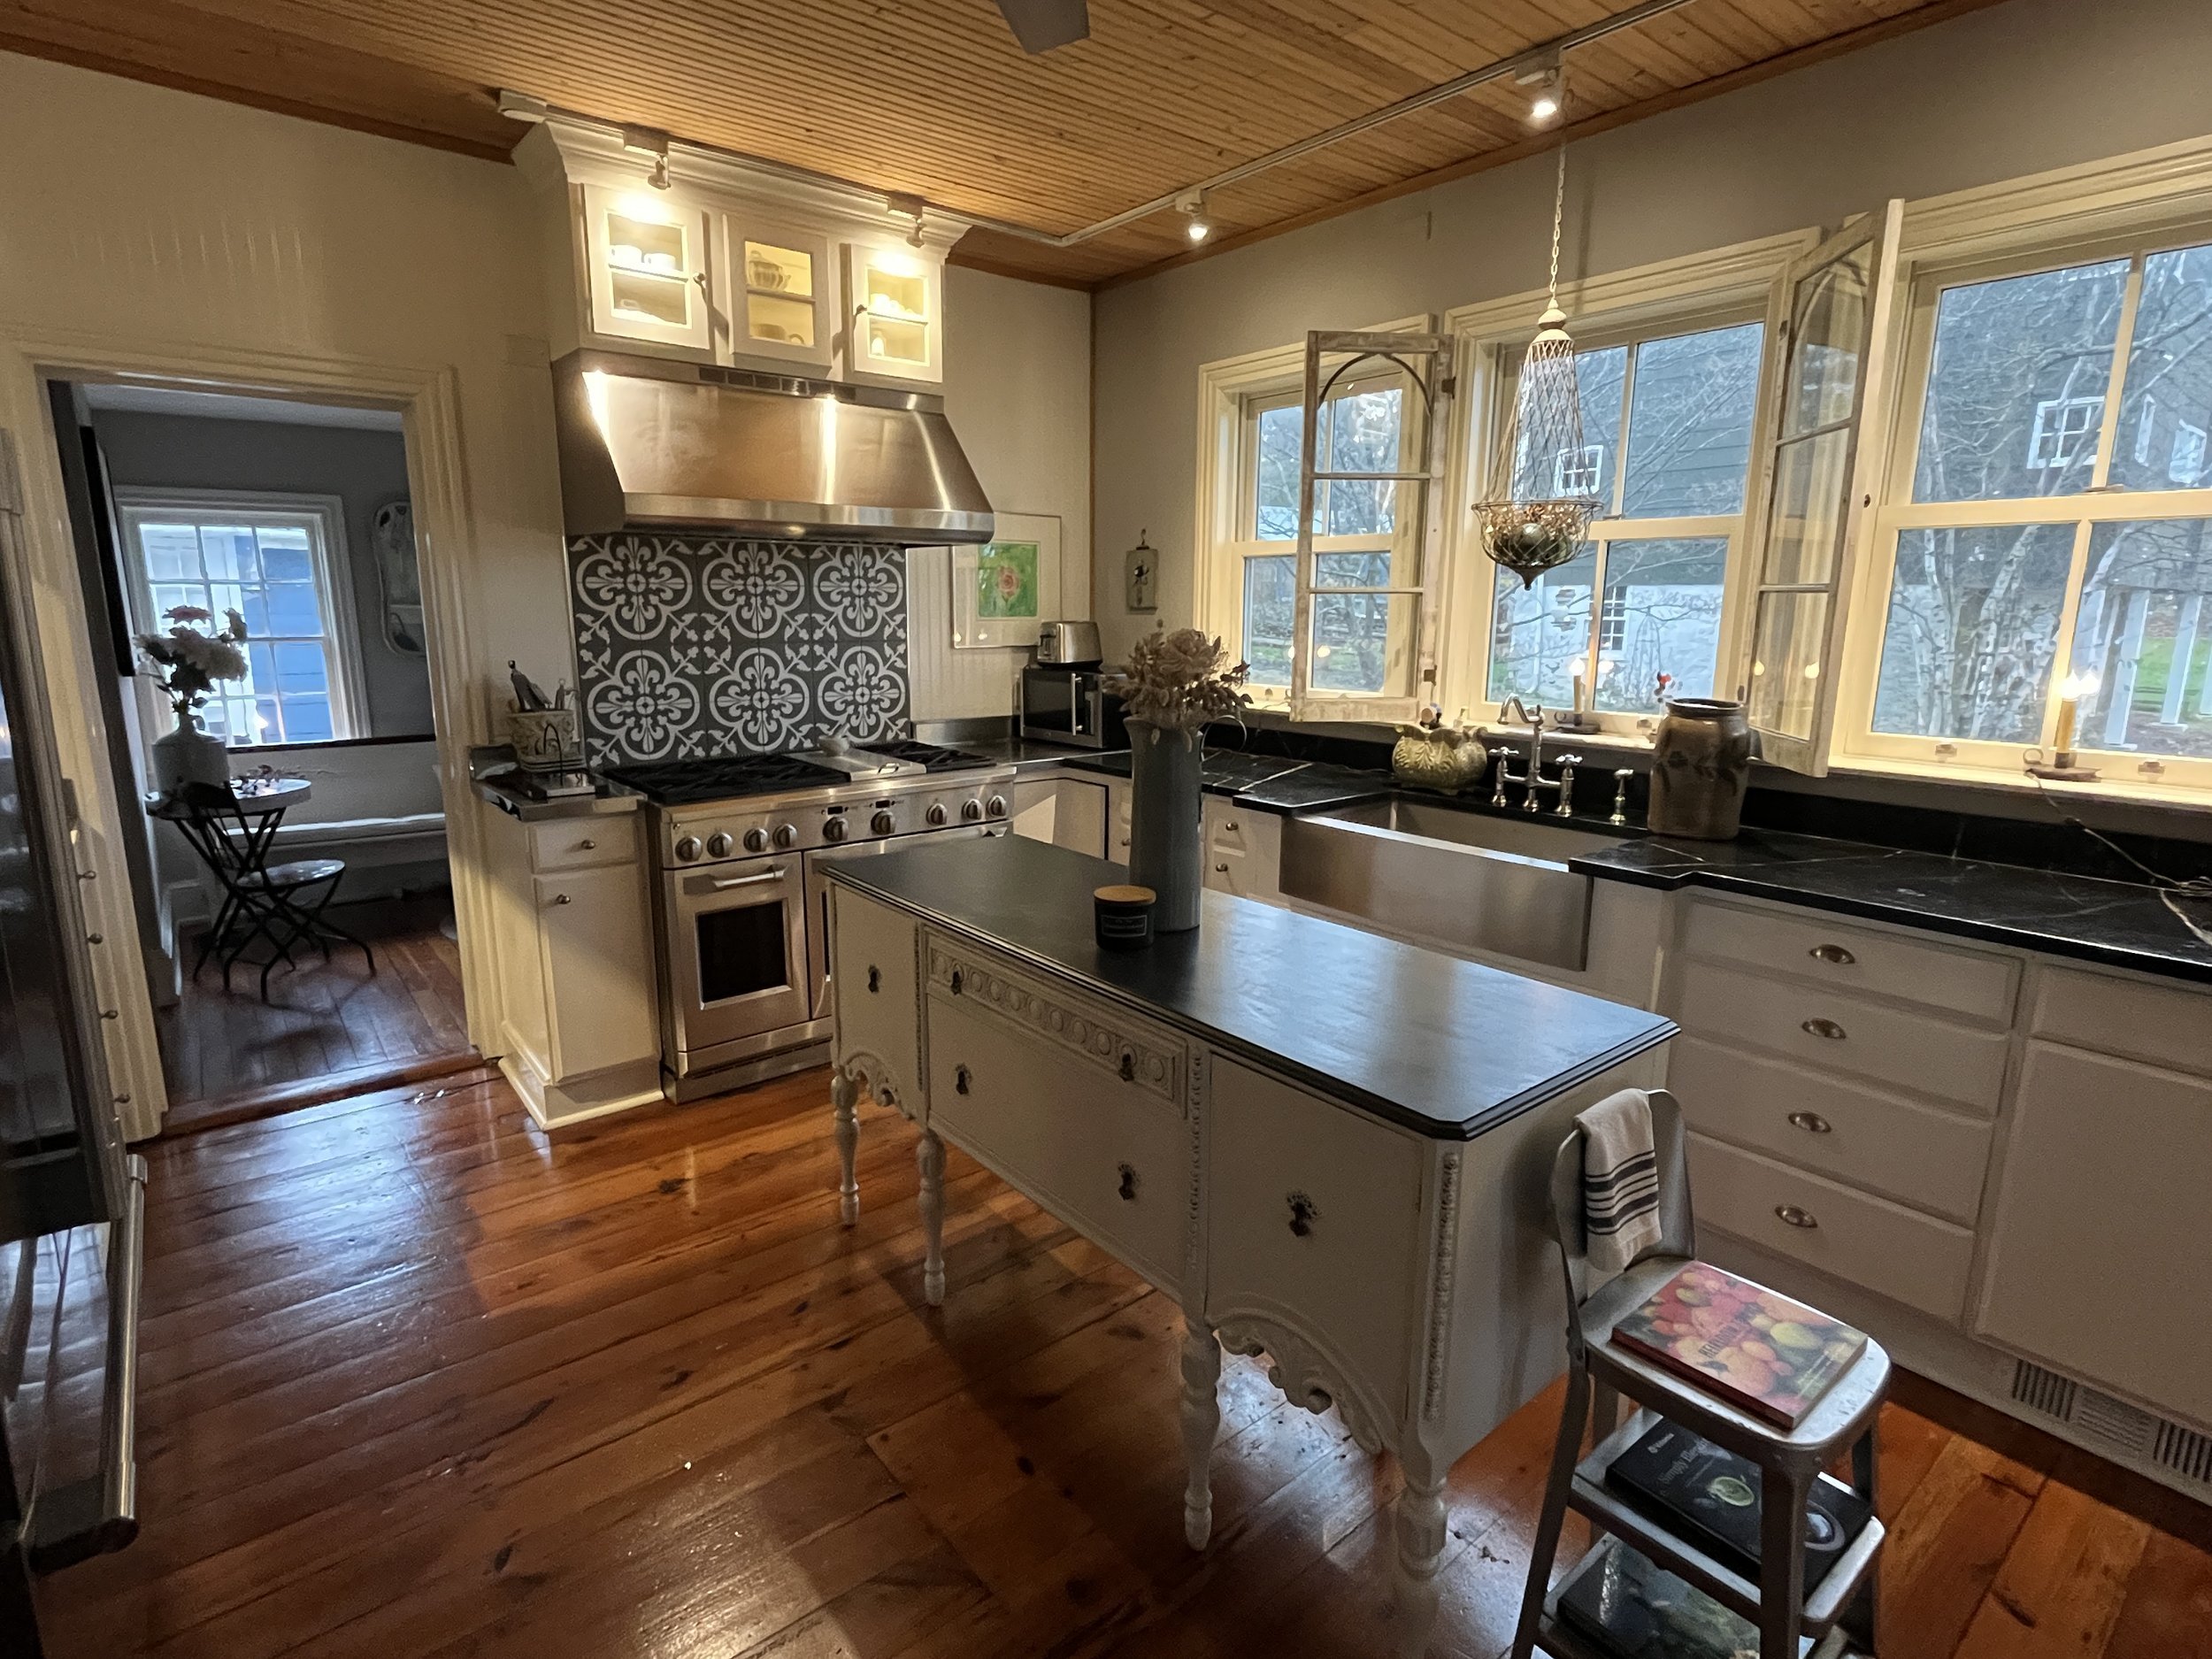
Welcome to our farmhouse kitchen. I explained in a previous blog post, why we love historic homes, so today I wanted to share with you some of our farmhouse renovation hacks we’ve used over the years. This is an excerpt from my full kitchen renovation blog that you can read here.
We began minor family-friendly renovations the minute we moved here in 2007, and we continue to make them because we are still not finished and we recently listed our farm on homeexchange.com.
As we begin this exciting journey of home exchanging for travel I thought I’d share some of the ways we previously restored rooms, gardens, and outbuildings and how we’re simplifying to make our home exchange-worthy for guests. I will break these down by project so look for them in future blogs.

Farmhouse renos can unveil difficult challenges, objects of educational interest, and even disturbing artifacts. Even a small change can prove difficult. But we didn't let that discourage us during this kitchen construction project because as we uncovered the years we looked for creative design elements and clever ways to get what we needed, disguising imperfections along the way.
making a Coffee Bar
Using found objects: One side of the kitchen came with a small clean-up sink and dishwasher. It's a great bonus space that older farmhouses usually don't enjoy. In the original kitchen, the very old double wall oven used to be on the left, but with the renovation, we moved the refrigerator to that space and kept the little sink, dishwasher, and lower cabinets much the same. If you look closely you’ll see a window peeking out of the wall. That’s the kind of surprise that’s very exciting. I spent days trying to rearrange where the fridge could go so that I could expose that window because it looks right into the refurbished pantry. Finding this was so perfect, but I could not find another space for the fridge and so we had to sacrifice the window….for now.


Since coffee is a big part of my mornings, we transformed this area into a little coffee bar. And what does every coffee bar need, but a big chunky mirror above it? This is my favorite part because the mirror I used didn't cost anything. In fact, I found the wooden frame alongside the road one day. It was just abandoned by its owner never to be used again, or so they thought. I grabbed it, cleaned it, painted it, took it to the local glass shop, and had it fitted with new antiqued mirror glass. Yes, this is something you can actually buy. I just love the way it turned out and how it fits perfectly in the space. It's a great way to repurpose an old frame that you can't part with and it’s a conversation piece for sure. Start hunting for yours.

Here are a few detailed photos of the mirror, Kingston Brass faucet, magnetic spice tins, etc. You can find links to most of these items and/or items with similar styles on Studio Sprig’s Shop My Home page.
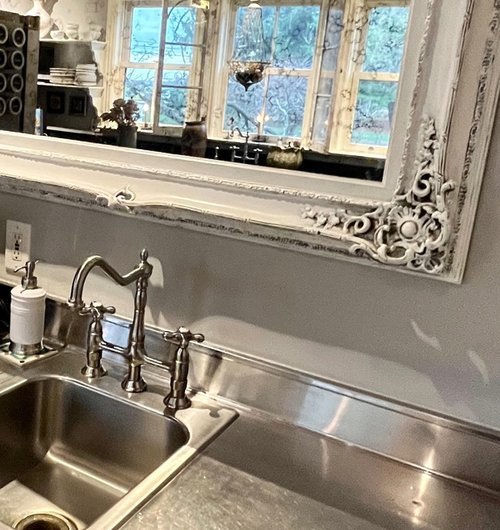
I like to keep a little vintage-style pitcher next to the coffee maker so that I can easily fill it. I store my coffee grounds in a pretty apothecary jar and I use a stainless, beaded scooper created by an artist at a craft fair. I’ve linked a really nice copper coffee scooper here. The apothecary jar and soap dispenser sit upon artistic tiles made by my children.

Thank you for visiting the coffee bar portion of my kitchen. I am happy to answer any questions you may have about the transformation if you comment below. And if you’d like to see the full kitchen transformation blog, visit here. If you’re a blogger, what’s your favorite SEO Tool? I’ve had much keyword success with RankIQ. Learn more here.

How We Transformed Our Farmhouse Kitchen by Reusing, Updating, and Thrifting
As we begin this exciting journey of home exchanging I thought I’d share some of the ways we previously renovated rooms, gardens, and outbuildings and how we’re simplifying to make our home exchange-worthy for future guests.

Welcome to our farmhouse kitchen at Windy Hill. I explained in a previous blog post, why we love historic homes, so today I wanted to share with you some of the farmhouse renovation hacks we’ve used over the years.
We began minor family-friendly renovations the minute we moved here in 2007, and we continue to make them because we are still not finished and we recently listed our farm on homeexchange.com.
As we begin this exciting journey of home exchanging for travel I thought I’d share some of the ways we previously restored rooms, gardens, and outbuildings and how we’re simplifying to make our home exchange-worthy for guests. I will break these down by project so look for them in future blogs.

Farmhouse renos can unveil difficult challenges, objects of educational interest, and sometimes disturbing artifacts. Even a small change can prove difficult. But we didn't let that discourage us during this kitchen construction project because as we uncovered the years we looked for creative design elements and clever ways to get what we wanted and needed, disguising many imperfections along the way.
Paint
Neutralize and calm: When we moved here in 2007 this kitchen was a bright and cheery, yellow and teal, "French Country", a vintage farmhouse style you see a lot. The cabinets and trim were teal, while the walls were a rag-rolling yellow. We promptly inserted our Fiestaware collection on the open shelves and lived with it for a short while. But after a few years, it was looking pretty worn and dated, so we made the decision to renovate the kitchen.

For the renovation we decided not to do traditional white walls, instead, we painted them a light gray and opted for white cabinets, white trim (to match the rest of the house), and eventually a white island piece. We chose Benjamin Moore's White Dove as it’s a soft, mellow white. The kitchen always had vintage stainless steel appliances, so as needed we slowly upgraded with new appliances and I think they complement the updated neutral colors well.
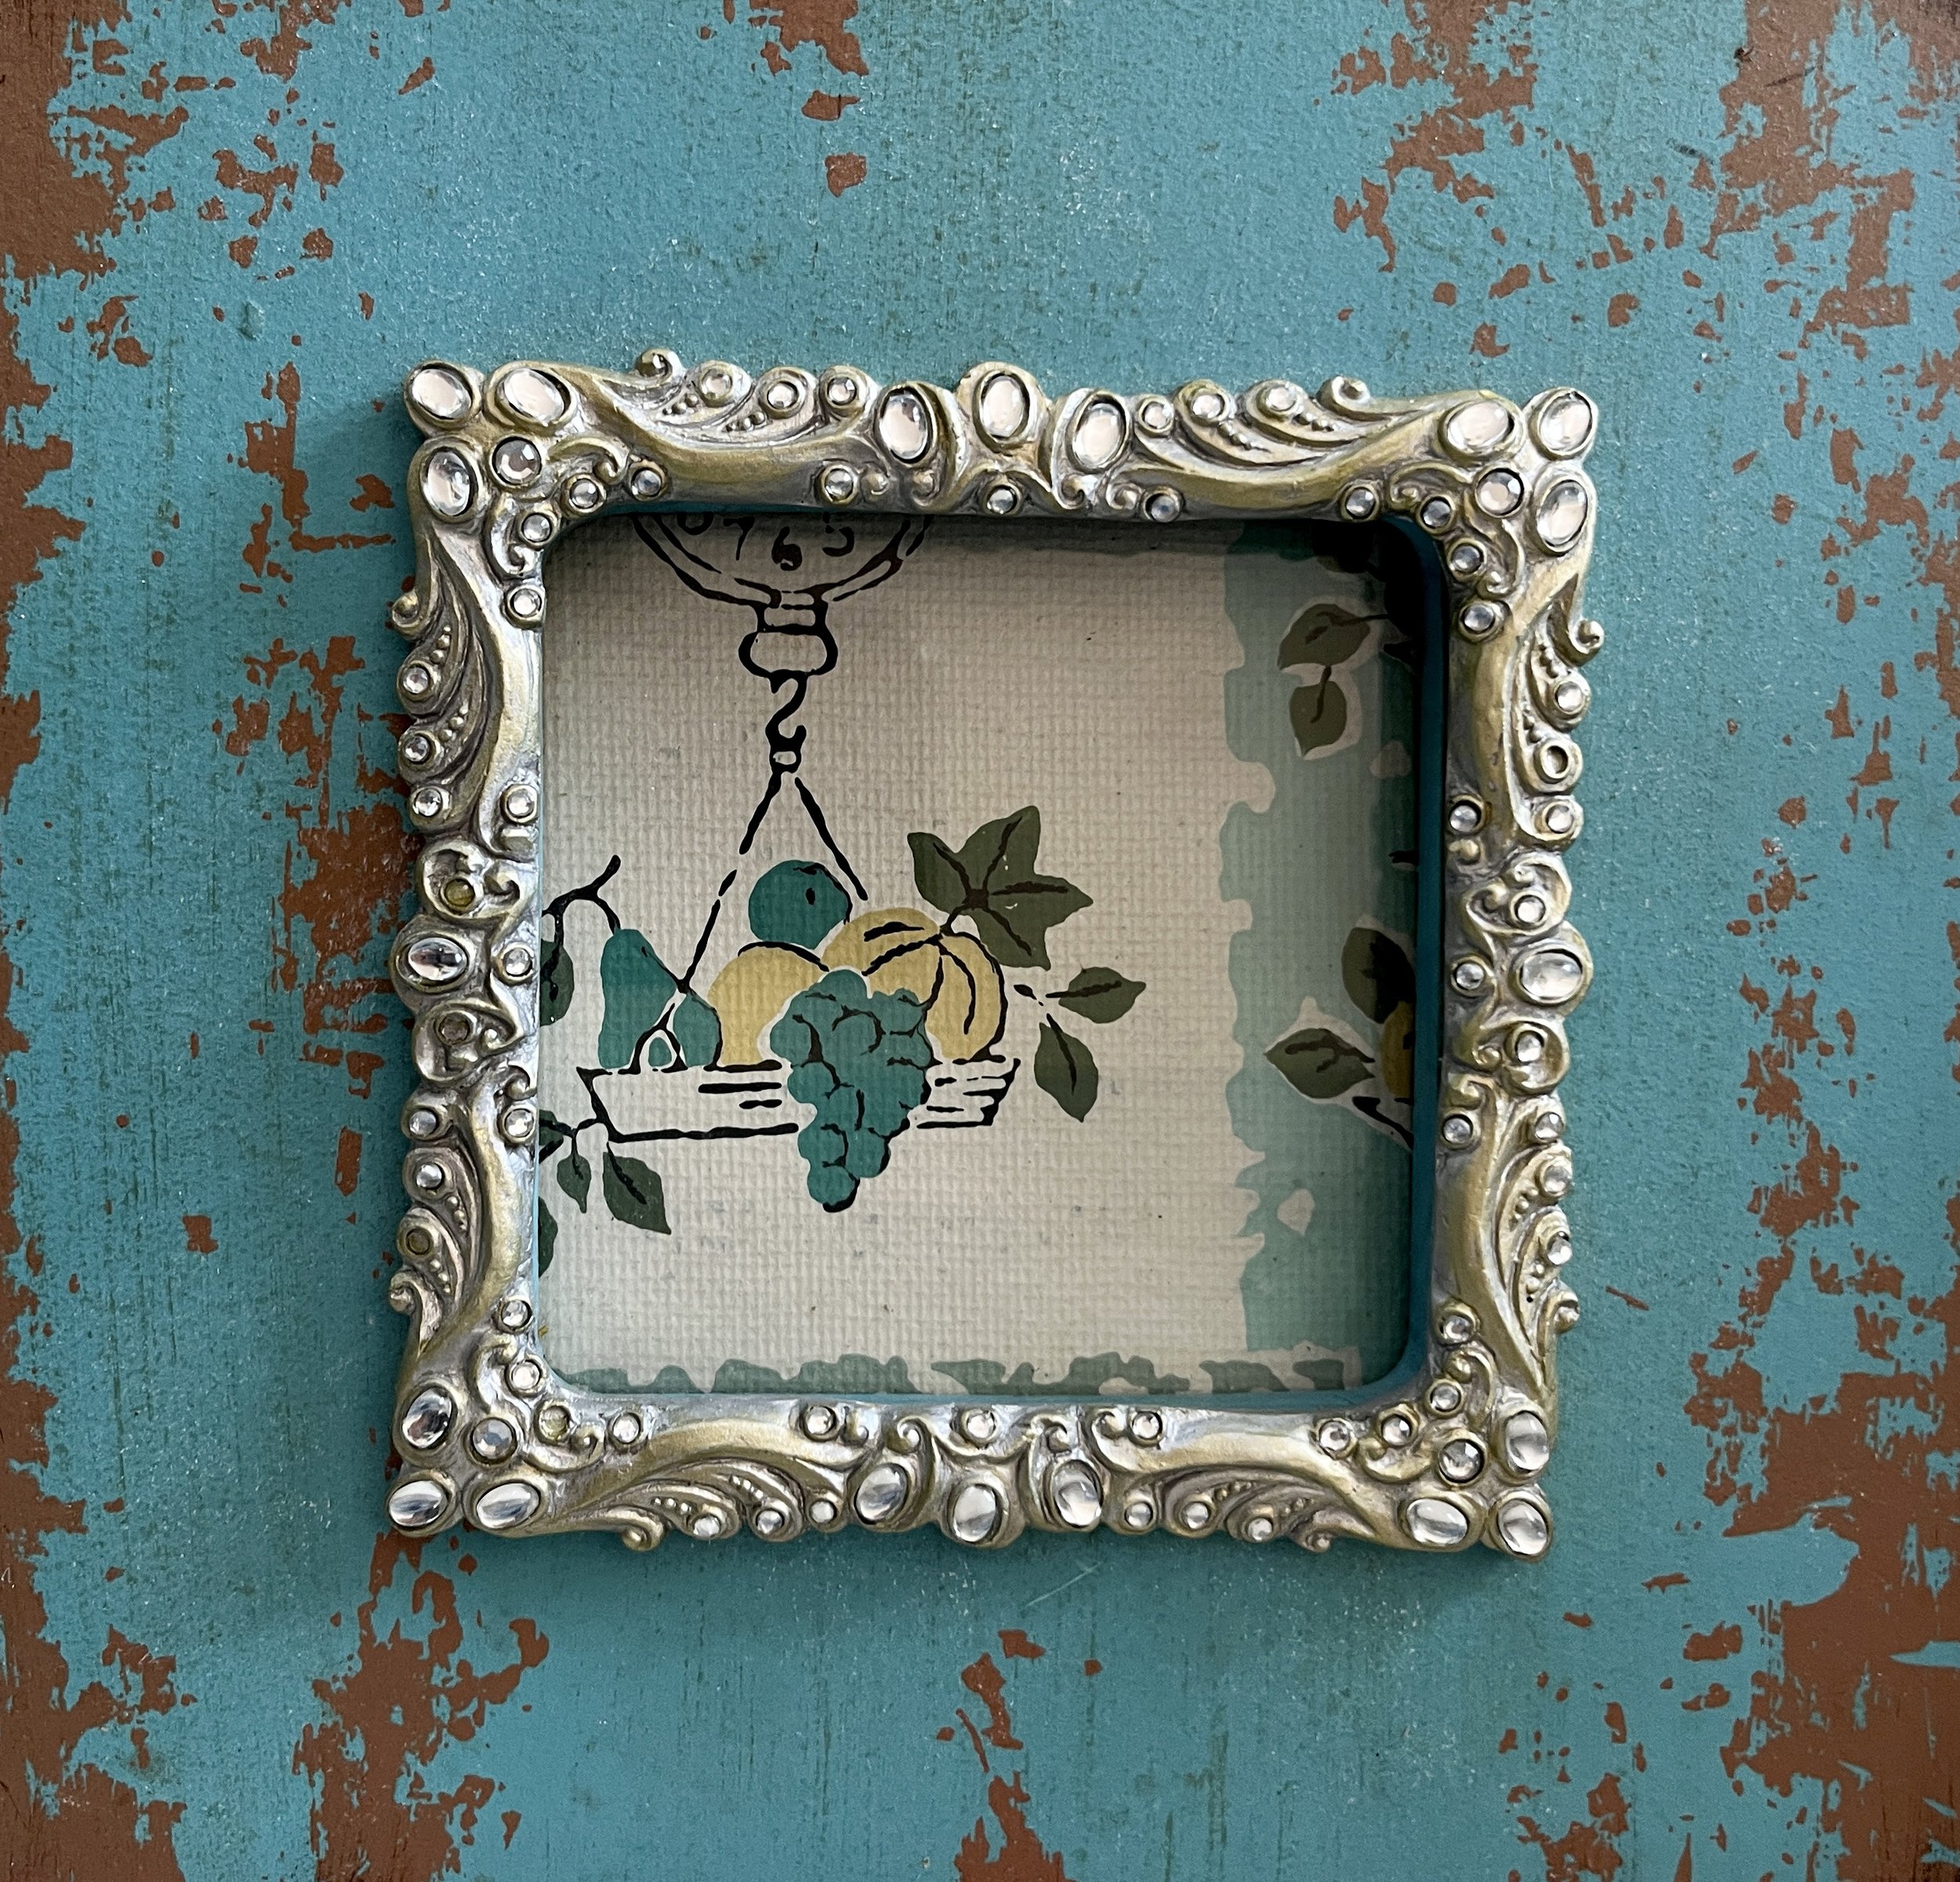
When we dug in, we found vintage wallpaper remnants under some of the upper cabinets. It was clearly a 1950s fruit pattern, so I imagine this is why the woodwork was originally painted teal even though the rest of the house trim was already painted white. As we peeled some of that old wallpaper away, I was quick to frame a small fragment.
Wall Removal
The biggest change: By far our best idea was to remove the entire wall that housed the refrigerator and a small doorway to the dining room. By far, it was the best idea for this kitchen and my husband gets all the credit for that one. In fact, he even designed the double french doors, window wall, and transom we have now.
Our contractor found horse hair used for insulation when he removed this wall and he needed to install a support beam so the rest of the house wouldn't come down. But other than that, the construction of this section went rather smoothly. We had to patch the hardwood floor in some places but opening this wall really created a new space for us which lets in much more natural light while the french doors still provide privacy when needed. If you’re thinking of doing something like this, be sure to use an insured contractor with a very good reputation, because you never know what you may find.



Kitchen IslanD
Flexible and Versitile: Because we opted for only one set of open shelves and no upper cabinets, we had to come up with farmhouse design ideas for storing unsightlies like water bottles, small dishes, and spices. This kitchen is not that big, therefore a large custom island with seating, as you see in modern kitchens, was out of the question. I wanted to find a solution that was versatile, movable, and ultimately removable if I someday grew tired of it and wanted to change my style.

So one day while thrifting with my sister-in-law, I came across an antique brown buffet that was narrow enough to fit the space but long and high enough to actually be useful. As luck would have it, it was half-price day, so I snagged it for under $200. We lived with it intact for a few years, until one day I brought out the brushes and painted the bottom white with a chalkboard painted top. The chalkboard black paint is almost the same tint as the new soapstone countertop which is from Bucks County Soapstone. I just love the way it looks plus it provides extra counter space. It’s “flexible” and it encourages much fun in the kitchen because we can write and draw on it when entertaining plus keeping the paint close at hand makes touch-ups easy. And if someday I find something better, I won’t have the price agony weighing me down.

Cabinet Repurposing
Big cost savings: We opted out of buying new custom cabinetry, and instead, reused the existing lower cabinets which originally spanned all four walls of the kitchen. However, in several places, we did have to completely disassemble some and piece them back together a little differently so that we could move around or eliminate appliances like the refrigerator and wall oven. We called it the great cabinet shuffle.

So I guess you could say we have some custom cabinetry in a sense as our contractor knocked out the rounded shelves and gave us a small storage space instead next to the range. He also rebuilt the cabinet under the main sink to accommodate the new stainless apron sink we wanted to add centered under the 3 windows (shown above) which existed before we arrived. We also repurposed some leftover upper open shelves (which were pretty ugly), transforming them into glass-fronted cabinets with crown molding as an accent above the range hood.
I found these glass doors below at an antique shop, and as I often do, I brought them home having no idea where I would use them. But when I discovered that they somehow fit the kitchen windows perfectly I used them to highlight the middle window and set it off above the sink. It reminds me of the open shutters I’ve seen in France. Some new hardware, a few antique accents, and a little white paint, and this old house was coming along nicely.

Coffee Bar
Using found objects: One side of the kitchen came with a small clean-up sink and dishwasher. It's a great bonus space that older farmhouses usually don't enjoy. In the original kitchen, the very old double wall oven used to be on the left, but with the renovation, we moved the refrigerator to that space and kept the little sink, dishwasher, and lower cabinets much the same. If you look closely you’ll see a window peeking out of the wall. That’s the kind of surprise that’s very exciting. I spent days trying to rearrange where the fridge could go so that I could expose that window because it looks right into the refurbished pantry. Finding this was so perfect, but I could not find another space for the fridge and so we had to sacrifice the window….for now.


Since coffee is a big part of my mornings, we transformed this area into a little coffee bar. And what does every coffee bar need, but a big chunky mirror above it? This is my favorite part because the mirror I used didn't cost anything. In fact, I found the wooden frame alongside the road one day. It was just abandoned by its owner never to be used again, or so they thought. I grabbed it, cleaned it, painted it, took it to the local glass shop, and had it fitted with new antiqued mirror glass. Yes, this is something you can actually buy. I just love the way it turned out and how it fits perfectly in the space. It's a great way to repurpose an old frame that you can't part with and it’s a conversation piece for sure. Start hunting for yours.
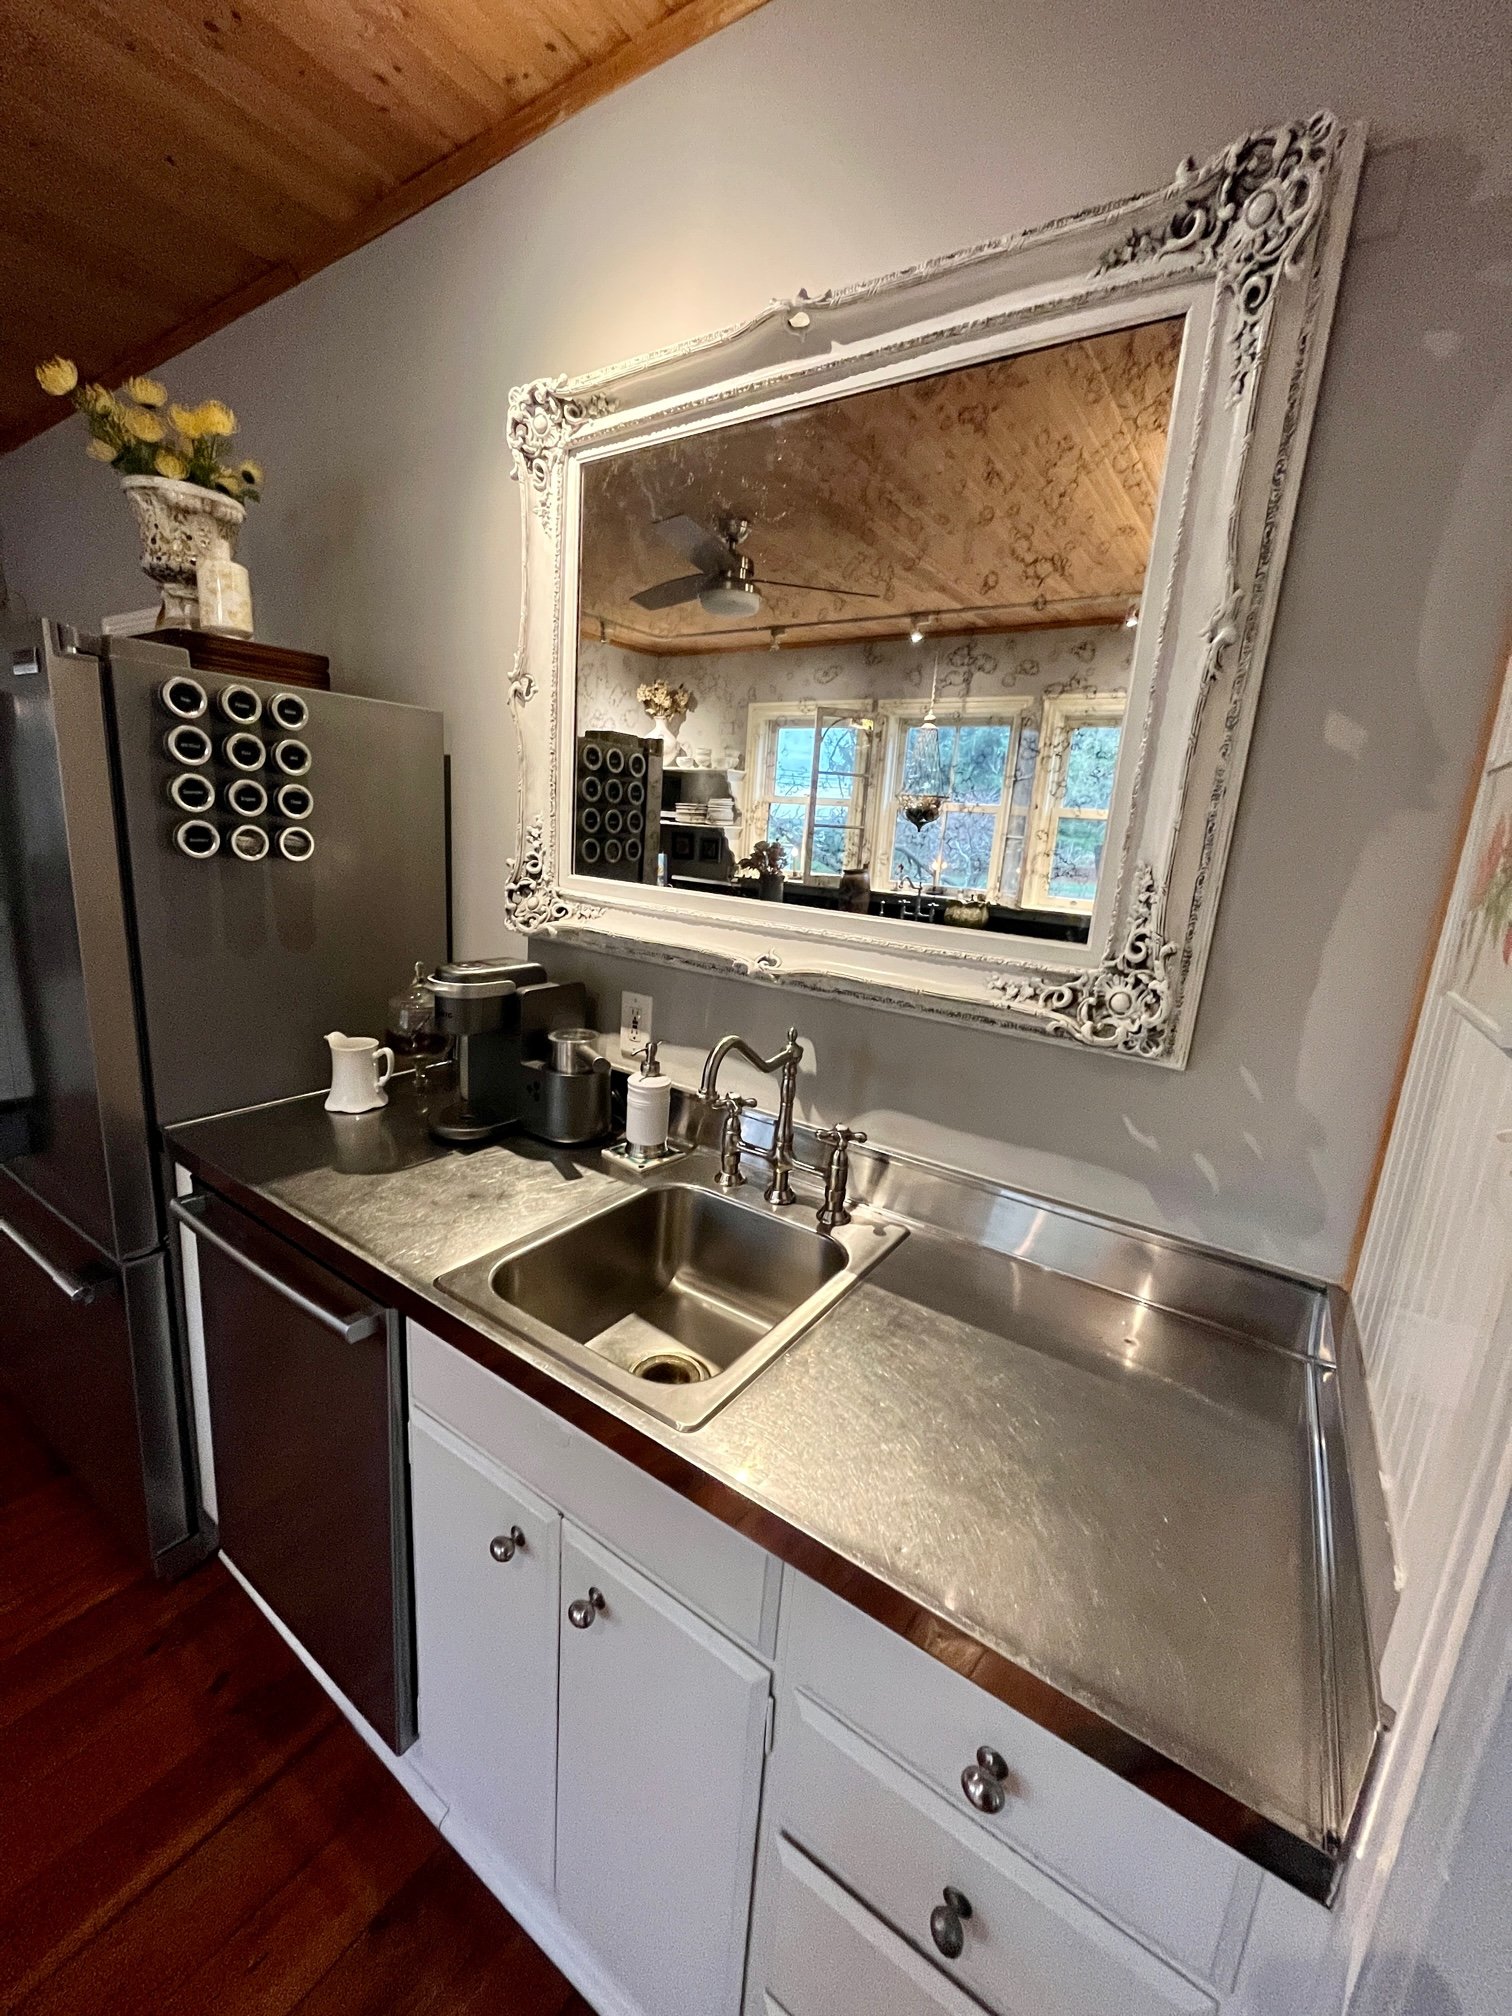
Here are a few detailed photos of the mirror, Kingston Brass faucet, magnetic spice tins, etc. You can find links to most of these items and/or items with similar styles on Studio Sprig’s Shop My Home page.

I like to keep a little vintage-style pitcher next to the coffee maker so that I can easily fill it. I store my coffee grounds in a pretty apothecary jar and I use a stainless, beaded scooper created by an artist at a craft fair. I’ve linked a really nice copper coffee scooper here. The apothecary jar and soap dispenser sit upon artistic tiles made by my children.
Glassware Storage
With the elimination of upper cabinets comes the realization that you'll need a place to put all of your glassware. Many years before purchasing this farmhouse, I purchased this delicate hutch at a yard sale. It was in great shape so I stripped the varnish and exposed the woodgrain as soon as I brought it home. It moved around inside various homes until finding a perfect vocation in this kitchen as the keeper of all things glass. Drinking glasses, glass bowls, glass dishes, and random glass items that need a place to perch.

There's a little section of wall where it fits very nicely and here it will undoubtedly remain forever, or until I change my mind. I like having all of my glassware in one perfect place and the glass doors encourage me to keep it neat and tidy.
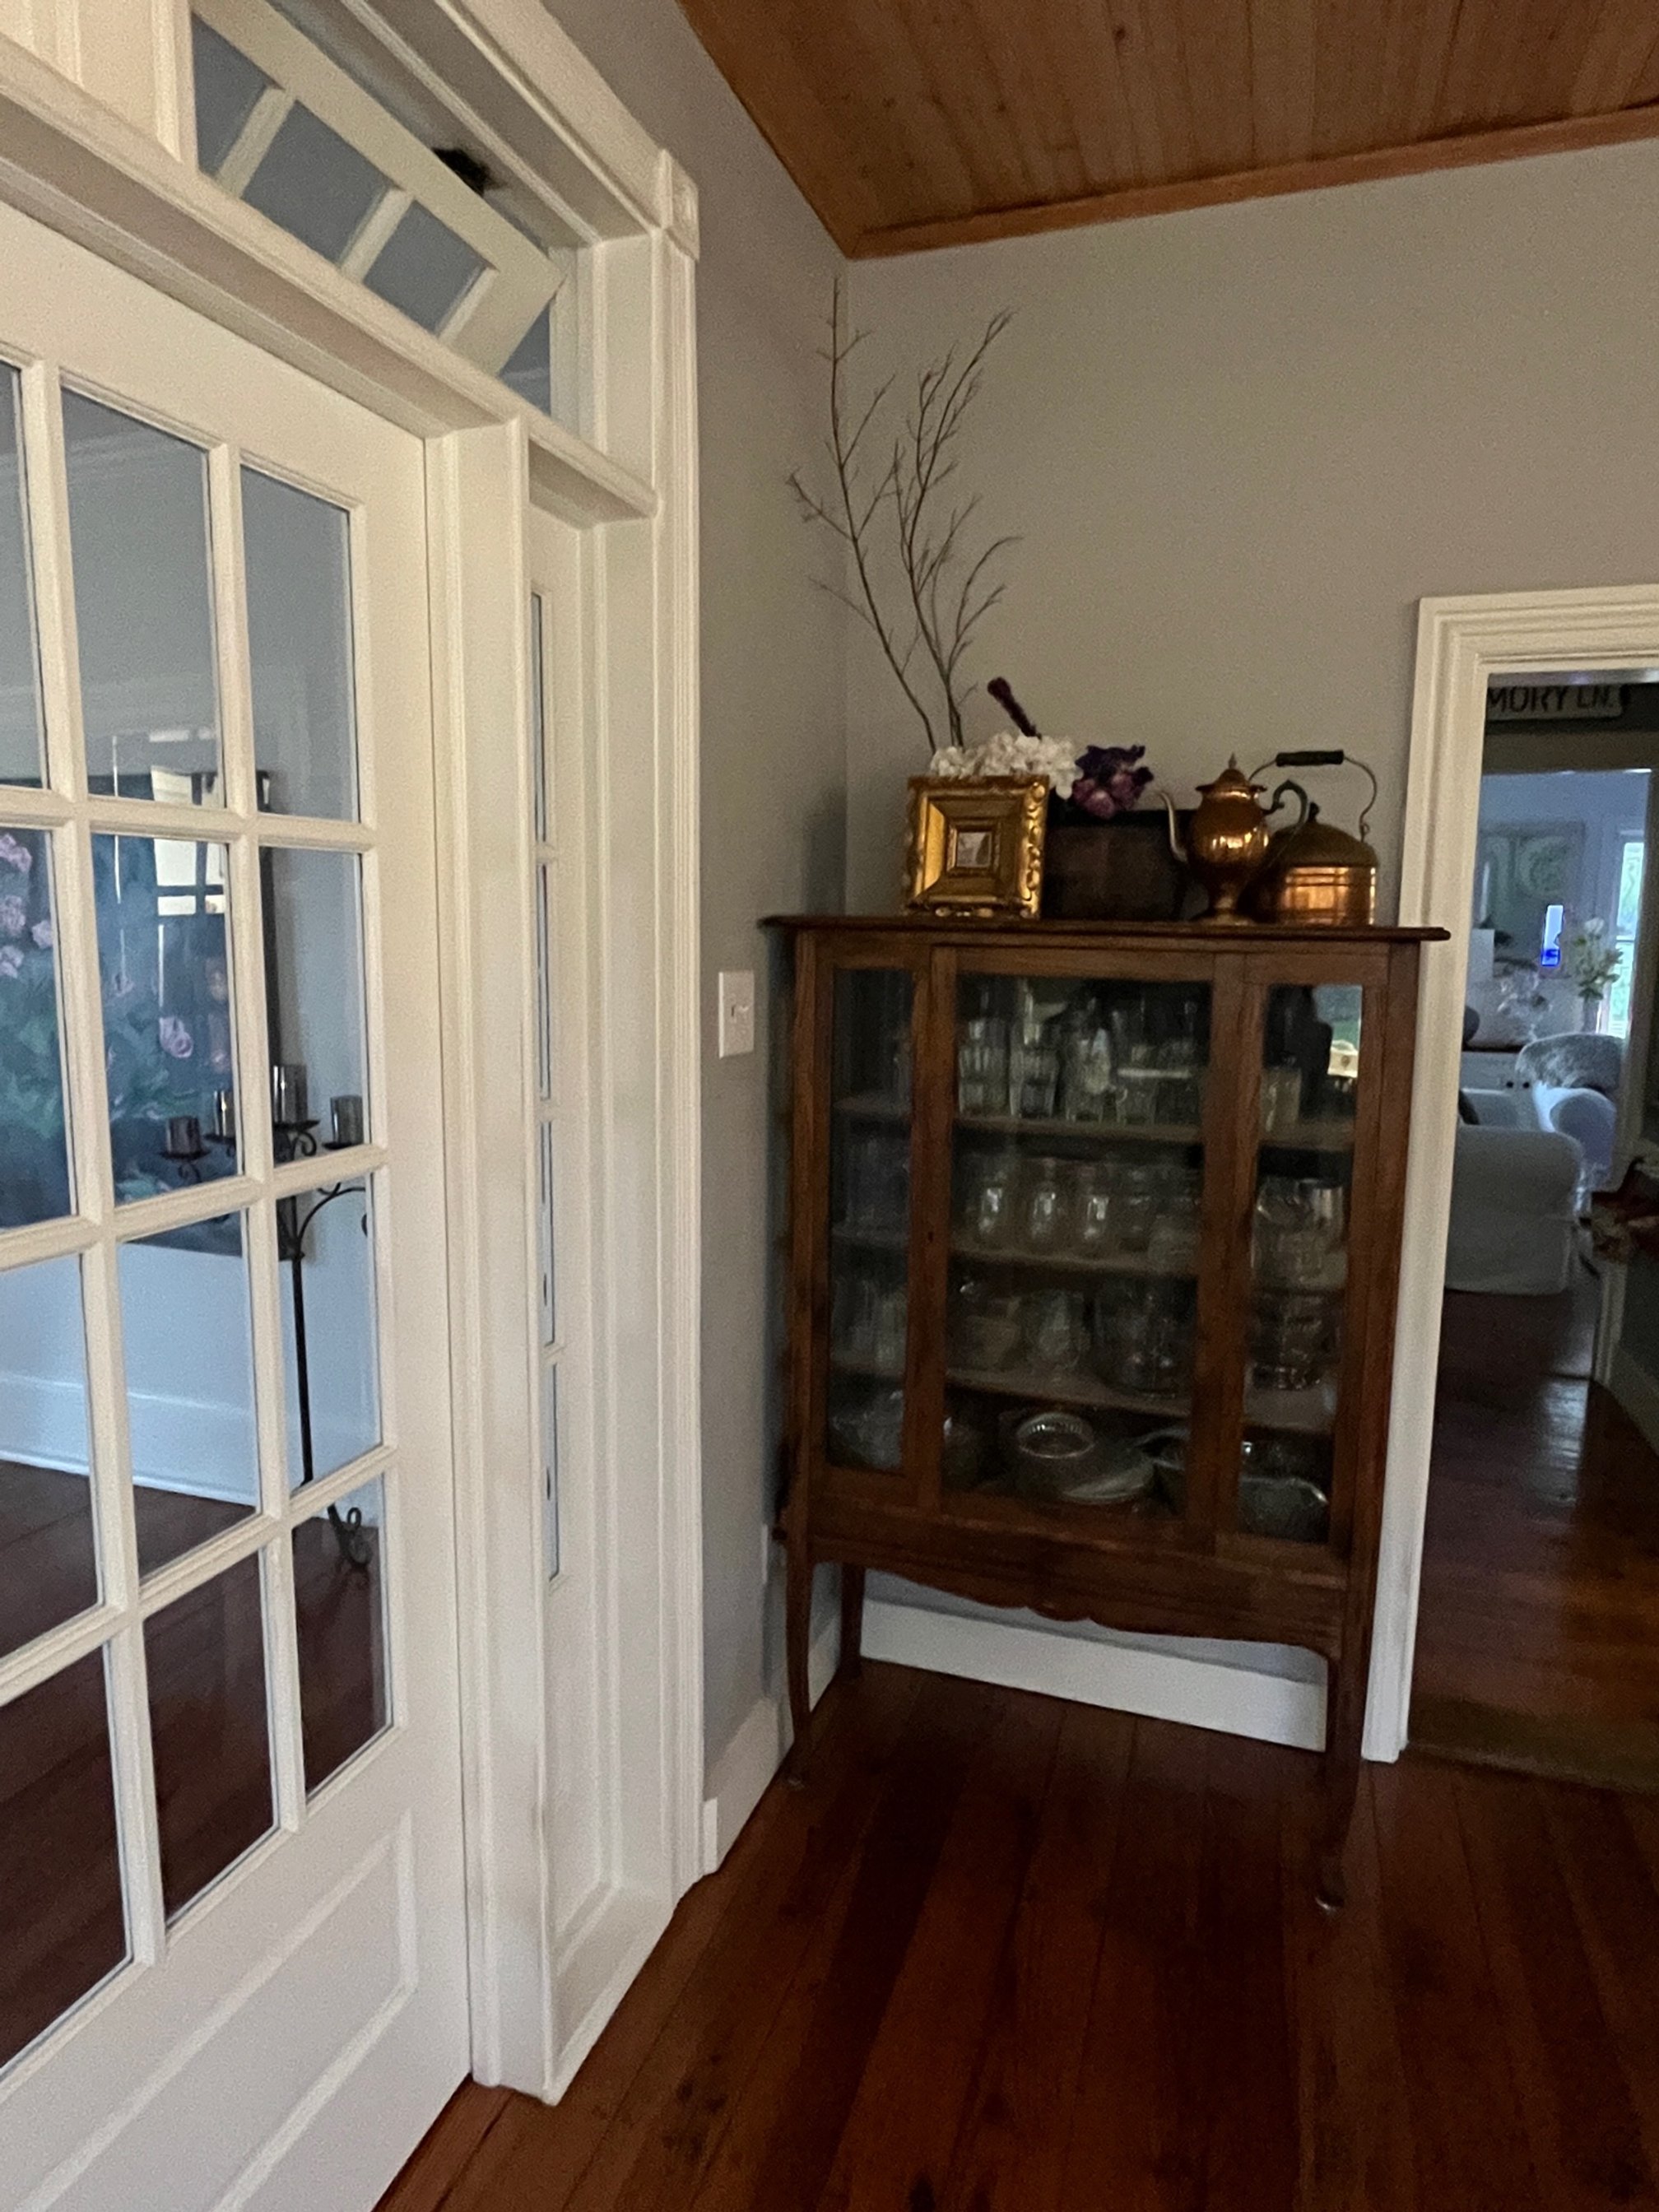
Thank you for visiting my kitchen. If you are interested in some of the products or product styles we used, here is a pretty comprehensive list with links for your convenience. Shop my home. I am happy to answer any questions you may have about the transformation if you comment below. If you’re a blogger, what’s your favorite SEO Tool? I’ve had much keyword success with RankIQ. Learn more here.
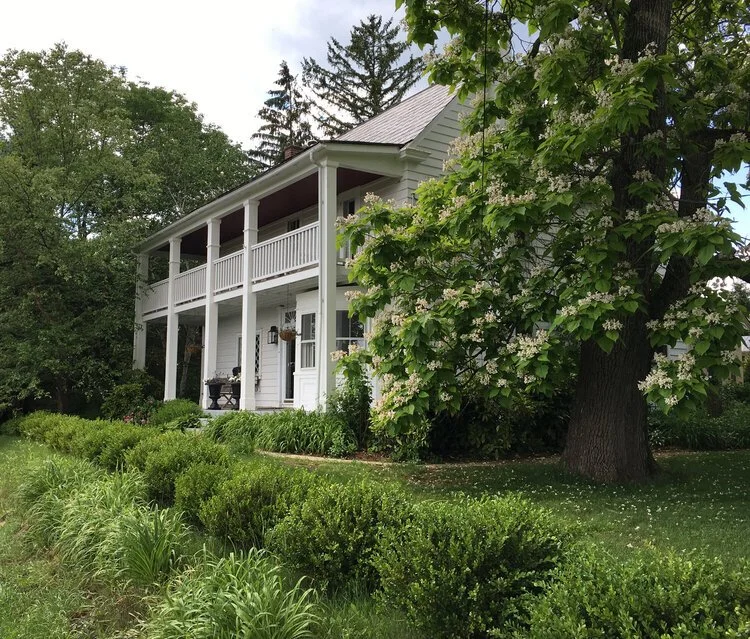
How and Why We Love Historic Homes
The first home we bought when we moved to this area was this 18th-century Stone Colonial. It was so unique, very well maintained, and quintessentially Early American.

A Little History
One of the things we love about this area of the country, Bucks County, Pennsylvania, is the availability of historic homes and properties. Bucks County boasts 12 original covered bridges and there are gorgeous barns and farms all over the place.
The first home we bought when we moved to this area was this 18th-century Stone Colonial. It was so unique, very well maintained, and quintessentially Early American. It had very uneven measurements, only 2 full bedrooms, and a little walk-through space off the master (which we quickly crafted into a nursery), a woodburning stove, a classic pie staircase, beautiful deep windowsills, a nice brick courtyard with a farm bell and climbing roses, a garden-filled yard, and a sweet little cottage (which became my studio).

Side view of stone colonial home.
Why our homes are sentimental
We lived in this home from 1998-2007 and it was our first so of course, it’s sentimental. Our young family loved and used every square inch of it because it was not very big. It was built from beautiful fieldstone and because it was well taken care of previously it did not require a lot of work or renovation which was perfect for that time of our lives. The only problem was that the home became a little too small for our growing family over time and it also sat on a busy road. This position near the road made sense when it was built in 1780 because it was built on a main road leading straight to Philadelphia, but in 2007 it was no longer a workable feature with our three young children, so we decided we needed to find something a little different. Not an easy decision as we had grown to love this little beauty.

Farm bell with climbing roses and two dancing queens.

Our family portrait in front of the Stone Colonial Home. Photo Courtesy: Catherine Byvelds
A Victorian Farmhouse up the hill
We searched for a new home for quite a while, always looking for another historic gem that we could easily call home. Eventually, we actually found a white Victorian Clapboard Farmhouse with 3 outbuildings that were literally up the hill (foreshadowing Windy Hill) from our original Stone Colonial. This worked out well because purchasing this Victorian would mean we wouldn't have to pull our children out of the primary school they were attending and could essentially stay connected to our neighborhood friends. It also had 4 massive bedrooms and a cottage apartment on the property so to us it seemed just like the Taj Mahal!!!

Windy Hill Farm in spring.
Learning about our home
Once we were certain this place was for us - but before the purchase, I made it my personal mission to befriend the current owner so that I could really get to know her, the house, and its history because I knew she had loved it for a very long time and that she felt the same way about historic properties. She told me she was searching for the perfect family to love her home. If you haven’t picked this up already, what you must know about owners of historic properties is that they are obsessed. They may be obsessed with history, architecture, farming, antiques, or ghosts, but trust me, they are in love with something like that and that is why they are drawn to care for a piece of history in the first place.

Windy Hill Farm in winter.
research with tea
So, because I am one of the obsessive types, I set up “tea dates” with the lovely woman who had owned this home for over 30 years so we could discuss all the little nuances that are so important to understand when buying an older home. She graciously filled me in on details about the gardens and the herds of yard deer (yes, that’s a thing), the neighbors, the well and water pipes, the paint colors she used and why she used them, the utility schedules, the septic system, and important details about the rental income the farm provided and how and why it would be in our best interest to keep that going.

Kids greet from the balcony.
how Rental Income sealed the deal
When purchasing a historic farm, don't underestimate the power of passive rental income. One of the reasons we chose this farm was because it came with established rental income derived from an outbuilding at the back of the property. The large outbuilding had been previously renovated and divided into 4 distinct storage-only garages: one to be used by the owner as a garage for the lawn mower, bikes, tools, and such, and the other 3 to be used for a home business or rented out if desired. There is a private driveway to this building and all access is in the back, so tenants never have to disturb the family in the main house.

Out building provides rental income.
Plant, don’t demolish
Full disclosure, at first I just wanted to demolish the building completely (I was strongly “persuaded” to plant pine trees instead) but today I’m glad we didn't demolish after all because, over the last 16 years, the building has provided a very nice passive income which took care of half of our monthly mortgage, and it has allowed us to do the many renovations and updates we've wanted to do on the original farmhouse and cottage. It also paid for exciting family vacations, and currently, it's helping to pay 3 simultaneous college tuitions. I now have more of an open mind and if you are searching for a historic property, I recommend finding a way to generate some passive income.

Kids planting first pines which will help to pay for their college!
Creative home inspirations
When we moved into the Victorian Farmhouse in the summer of 2007 we were very content with the state of the home. It had great bones, lovely updates, and many classic features. There is a main farmhouse, a big, green 4-story bank barn, a little studio cottage (perfect for my designing), and that long outbuilding above that we soon rented out. Bonus! Sure, this home would eventually need some updates, but we had three kids to raise, a lot of time, and much more energy then, so we were not in a hurry. Nevertheless, creative renovations did eventually happen everywhere (and sometimes twice) so sign up to receive alerts about the entire project and the way we did "creative home inspirations" here at Windy Hill. Below is a sampling of what is to come. If you enjoy this blog please comment below and share it with your friends. And you can subscribe here. Thank you, Kim

Side view of Windy Hill Farm.
Creative Home Inspirations….Sign up so you don’t miss them!
A Cute Courtyard & A Scary Tree
Weedy, Old Heirloom Gardens
The Cottage Becomes a Studio
A Yard Sale-Inspired Kitchen
A Wisteria-Covered Outdoor Entertainment Space
Our Peek-a-Boo Pantry
A Floral Workshop
An inviting Mudroom
The Under-the-Stair Secret Hideaway
A Lite & Bright Family Room
An Arhaus-Inspired Dining Room
A Fun & Foral Laundry Room
Our Simple and Fresh Bathrooms
The Transformable Bedrooms (Kid-to-Teen)
A Classic Living Room, Game Room & Home Office
The Marriage Marked Bank Barn
Shop the look at Windy Hill Farm! If you’re a blogger, what’s your favorite SEO Tool? I’ve had much keyword success with RankIQ. Learn more here.

Eliminate Sneaky Sugars
How to make salad dressing seasoning mixes without sugar.

Did you ever take a hard look at the ingredients in some of your favorite products?
I did. I took a close look at my go-to salad dressing. The one I drizzle over my special homemade plantwiches. This dressing is commonly known as Good Season’s Italian and it’s pretty popular because it’s fresh and light and…not creamy. In years past I vigorously purchased these little boxes, ripped open the mini packages inside, and mixed up my light and perfectly tangy dressings so that I’d have a continuous supply on hand. Today I mix up my own homemade, and here is why.
The sneaky Ingredient in this box
Sugar, Salt, Sodium Citrate, Garlic (Dried), Onions (Dried), Spice, Red Bell Peppers (Dried), Carrots (Dried), Xanthan Gum, Maltodextrin, Parsley (Dried), Guar Gum, Natural Flavor, Soy Sauce (Dried) (Wheat, Soybeans, Salt), Citric Acid.

There it is. Sugar. We’ve all heard that if the very first, or even second, ingredient on the label is Sugar back away and return it to the shelf. According to Rutger’s Center for Alcohol and Substance Abuse Study, sugar addiction is more dangerous than you think. They report that The World Health Organization (WHO) states that an adult living on a standard 2,000-calorie diet should aim to consume about 25 grams of sugar per day.
Let’s face it, if you’re not intentionally picking up a candy bar you may be eating more sugar than you’d like because sugar is constantly sneaking into food products and beverages where it really doesn’t belong. The same study tells us that “just one cup of Dannon Low-Fat Vanilla Yogurt, for example, contains a soul-crushing 34 grams of sugar. Meanwhile, VitaminWater contains 17 grams.” Vitamin Water! This Rutger’s study and many others suggest that some food companies include little bits of addictive sugar in their recipes, just to keep you coming back, not actually to enhance the taste.
Because this has been on my radar for quite a while, I’ve thought long and hard about why a fresh, herbal, olive oil-based salad dressing would need sugar at all. I can’t come up with a solid reason except for the addiction factor. This is why I first attempted to create this dressing without sugar. I am happy to share how easy it is, so you can quickly make your own.

Gather a few herbs & spices
I grow a lot of organic herbs here at Windy Hill, however, I also buy many of my spices and herbs at the grocery like everyone else. Either way, gather up what you’ve been able to dry or take this list to the store and buy the following bottles.
Parsley (2TBSP)
Onion powder (2TBSP)
Garlic powder (2TBSP)
Salt (2TBSP)
Oregano (2TBSP)
Basil (2 tsp)
Black pepper (2 tsp)
Paprika (2 tsp)
Ped pepper flakes (optional for zesty) (1 tsp)
Thyme (1/2 tsp)
Celery seed (1/2 tsp)
Of course feel free to eliminate something you don’t care for, and replace it with something you like as long as it’s not sugar. I usually add a dash of Turmeric and Cayenne pepper for health but if you love onions, add chives and if you like lemon, add dried lemon verbena. Just keep in mind, if you already like the GS Italian mix flavor, this precise list will get you there.

the best Containers
For Liquids: Years ago I purchased the standard cruet that is sold alongside the Good Season packages and I do like it for proper mixing because it has marks telling you how much extra virgin olive oil, water, and vinegar to add. I find this helpful for a consistent taste every time.
For Seasoning Mix: After you’ve combined the measured dry herbs & spices pour them into a medium mason jar. (I like to use the mason jars with glass lids - these come with air-tight seals) Then shake well so the contents are evenly distributed. When mixed scoop out 2 tablespoons and add it to the cruet which should already contain the oil, water & vinegar. Lock the cap and shake vigorously.
The dry seasoning mix will last a pretty long time in your pantry as long as there is no moisture inside the jar. I keep the cruet filled with dressing in my panty because I use it pretty quickly.

I hope this quick and easy recipe helps you eliminate those sneaky sugars that top your salads or plantwiches. There are many other processed items out there with sugar hiding somewhere. Seek, and you shall find them. If you see unwanted sugars in some of your favorite foods, google a sugar-free alternative recipe to find healthier options, or just try creating it yourself. Be sure to check out the Garden Gift Idea below in the inspire section of this blog. And I’d love to hear your comments and places you’ve found unwanted sugars lurking. Thank you for reading, Kim
Learn: NY Times: “How to stop eating sugar”
Create: Double your batch of freshly made salad dressing mix, and place about 4 tablespoons into tiny jars with little corks. Give as gifts.
Inspire: Garden Gift Idea / Place some preserved moss inside a galvanized bucket. Fill with 1 cruet, a tiny jar with your homemade seasoning mix. Be sure to label the seasoning mix with these stylish labels and also include 1 small bottle of extra virgin olive oil, and 1 small bottle of specialty vinegar.
I’m always here to help you with your creative journey. Please sign up to receive blog post notifications and follow Studio Sprig on Instagram, Facebook, and Pinterest. I look forward to connecting. If you’re a blogger, what’s your favorite SEO Tool? I’ve had much keyword success with RankIQ. Learn more here.


How to Create a Pretty Mini Bar with Items You Already Own
Creating a pretty mini bar with items you already own.

Do you find it difficult to turn away pretty decanters, cast-off crystal, or pewter candlesticks? Whether you relish rummaging thrift shops every once in a while, or you inherited your grandmother’s formal dining room and you don’t have the heart to give it all away, rest assured, you can create something fashionable and functional that will be a big hit the next time you entertain.
A few years back I hosted Christmas Eve for my extended family which, at the time, consisted of 9 very light drinkers and 10 teens and pre-teens. I needed to create a semi-dry mini bar but I wanted it to be spectacular and not just a kitchen counter filled with soda, iced tea, and fruit-infused sparkling water.
First, find a Bar
Everyone today seems to be buying stylish, rolling mini-bars. While I like the look of them, I could never seem to find space to store one in our farmhouse. And their mid-century modern style never really fit with my antiques anyway. That being said, I don’t own one, nor do I have a traditional, custom bar anywhere in this home, so when I wanted to create a holiday mini-bar, I needed to find my own way.

Tucked in a corner of my dining room is this antique dresser or bureau that I acquired from my paternal grandmother’s home. For many years I used it in an obvious space, a bedroom, but eventually, I grew tired of using it in a traditional way. So I had my son and husband move it down to the dining room where it happily lives today. I actually really like it here because its many drawers are very useful. I now have a practical space to store my vintage tablecloth collection and the many cloth napkins I keep pressed and ready for pop-up entertaining. I decided to use this as my bar. But you can virtually use anything, an existing sideboard, a built-in bookshelf (which I’ve also used), anything. I even converted an outdated corner TV hutch into a mini-bar after I saw the same thing in Pottery Barn for over 3K- but that is in another room so I’ll save that for another blog.
Look around and use your imagination instead of your wallet. You’ll find something cool at home and when you do be sure to photograph it and post it in the comment section for our idea bank.

The Embellishments
Next, I’d like to encourage you to always use what you already have around your home to create this very pretty mini bar worthy of conversation. There is no need to buy anything except maybe an inexpensive knock-out crystal piece - but if you do, be sure to get that from a thrift shop. Upcycling is better for the environment and giving a piece a “second chance” just makes the heart warmer.
So take a walk around your home. Go to your attic, basement, or anywhere you stashed all the items from your long-lost relatives that you didn’t quite know what to do with, and just couldn’t throw away. Open every hutch and sideboard, every cupboard and buffet, and see what pieces you’ve forgotten about. A few glass or pewter candlesticks? Grab them. Some mismatched crystal wine glasses? Snag them. In fact the more eclectic the pieces, the better. There is no need for a full set of anything here. You are creating the bar of misfit toys.

Fancy Decanters
If you haven’t already inherited a few of these little gems, then I suggest taking a trip to your local thrift/consignment shop. There you will find a treasure trove. Visit their glass or china section and basque in the glow of unwanted decanters.
Decanters were very popular mid-century but aren’t used very much these days. Unless you come to my home on Christmas Eve. I think it’s a shame because they are elegant and in my opinion, they display liquid beverages best.
Far back in antiquity, decanters were used to transport beverages like wine and spirits that could have lingering sediments. Decanting liquids gives the liquids room to breathe which enhances aroma and flavor. Wine and some spirits continue to be decanted to this day.
Remember, when you find your perfect-for-you decanters, be sure to give them a good cleaning. Here is a great resource for that. The decanters I am sharing are just a few that I inherited. I have some that came to me without stoppers, and I don’t let that stop me from using them. I love them just the same. But I do really embrace the ones with fancy stops.

pretty Pitchers
And as you’re probably suspecting, I also have a small collection of vintage glass pitchers. I think I only purchased one on the Facebook marketplace. All the others were entrusted to me by relatives who knew I would actually use them.
It’s true, I use them all the time because I just think they are so beautiful. For me, the glass works well because as you’ll see later I embellish my mini-bar with loads of candles, and I love the reflections in the mirror, but for you maybe pottery pitchers are more your style. That’s great. Use whatever you have that speaks to you.


Is it an Ice Bucket?
Who knows. I inherited this glass bucket from my parents who probably used it for their Swanky Sixties Soirees. I’m not sure it was an ice bucket, but I love it and use it as such. I can easily see when the ice melts and it has a handy silver handle for quick refills. Everyone has something like this around their kitchen. Any pretty glass bowl will do. And DO NOT BE AFRAID to pull out your vintage punch bowl either. I use mine all the time to actually serve punch. It’s only outdated if you care that it is. It happens to be a very pretty and effective way to serve teenagers something fancy.
toggling Tags
It’s important your guests know what they are drinking so I like to use labels.
For this occasion, I served two fancy lemonade pitchers whose content originally came in bottles from Trader Joe’s. Nothing too complicated here. I just added a little ice, a lime, and then poured in the bottles. Voila…pretty pitchers full of cheer for the kids to enjoy.
To label the pitchers and decanters, I like to sometimes make interesting theme-appropriate tags to match the occasion or you can also just keep all-occasion brown kraft tags and twine in your mini-bar drawer, as I do, so they're ready to swing whenever you are.

Add some sparkle
And to top it all off I try to keep tall and short mercury, pewter & glass candle holders around so that I can just bling up the mini-bar on demand. You can find silver or gold or even pink mercury votives here. I think having a few of each allows you to easily change your mini-bar for interest if entertaining the same friends over and over. I always have a stash of votive candles and dripless tapers in one of these drawers and I hunt for sales on pillar candles wherever I go. But the cool thing about making your own mini-bar is that you can change it up with every whim, season, or holiday. For instance, you can use black votive candles at Halloween to accent your ghoulish punch bowl or red candles on the fourth of July next to small galvanized buckets full of blue jello shots.

Thank you for reading this blog. I hope it inspired you to carve out a little unsuspecting portion of your home to create a festive corner for refreshment. I’d love to hear your ideas below.
Learn: Why do they call it mercury glass? The reason it is sometimes called Mercury Glass is that in the early days the internal coating was sometimes mercury or a mercury product. However, mercury proved unsuitable and dangerous, and today silver nitrate is used instead.
Create: Here is a lovely Virgin Blueberry Lime Cocktail recipe created by my friend Rose. Please let both of us know what you think.
Inspire: The holidays are right around the corner. While visiting family or friends, show up with a vintage decanter or fancy glass pitcher Be sure to attach a little tag and “gift them” your beverage of choice. Cheers!
I’m always here to help you with your creative journey. Please sign up to receive blog post notifications and follow Studio Sprig on Instagram, Facebook, and Pinterest. I look forward to connecting. If you’re a blogger, what’s your favorite SEO Tool? I’ve had much keyword success with RankIQ. Learn more here.

Virgin Blueberry Lime Cocktail
Friendsgiving At Our Farm
Why we started this fun Friendsgiving Tradition for our kids and how it’s impacted our lives and the lives of our children.
Tessa, Kate and Blake in Windy Hill’s dining room.
Michael and I have three great kids who are very close in age. When Kate was only two Blake was born and when she was only three, Tessa was born. I remember it like it was yesterday, sort of. The mom fog dissipated somewhere around middle school, I think.
The Social Network
As they grew we grew with them and one thing Michael and I agreed upon pretty early was the emphasis we wanted to place on fine-tuning their social skills. While so many of our friends were focusing their efforts on only academics, we felt that fantastic social skills might be even more beneficial to them as they grew. The magic sauce.
With that in mind, we heavily encouraged all three of them to go to school dances, participate in loads of extracurricular activities, volunteer, try out for many sports, and join interesting organizations. In addition, we rigorously encouraged them to invite their friends over to our farm. After all, that’s why we bought it in the first place. For them.
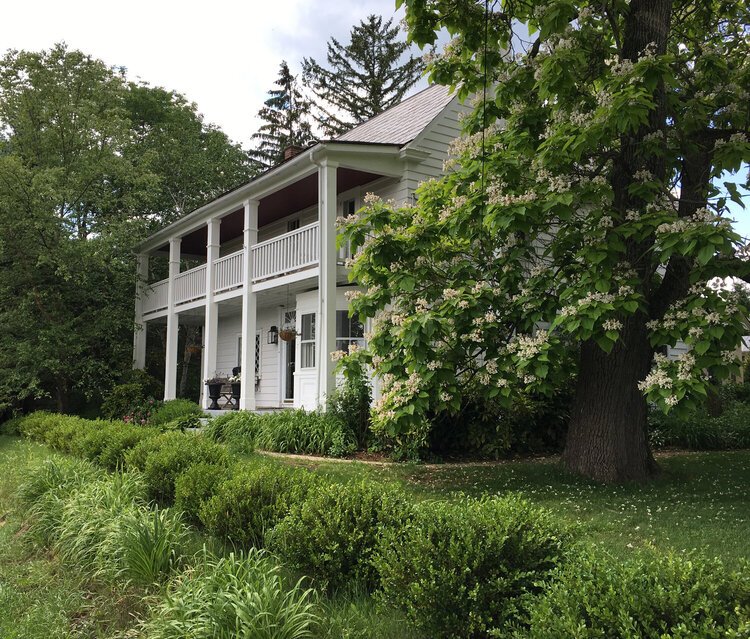
Windy Hill Farmhouse circa 1840.
Our Farm
Windy Hill is our home in Bucks County, PA. We purchased this nineteenth-century farm in 2007, just as our oldest, Kate, was entering 2nd grade. We love this place with all our hearts, and we use just about every square inch of it for grand backyard picnics, balcony firework viewing parties, holiday gatherings, campfire soirees, volleyball tournaments, movie nights, and even a college reunion a few years back.

A Pennsylvania Winter Snow at Windy Hill Farm.

College reunion backyard event. #UniversityofDelaware #VC88
So why not Host a Friendsgiving?
This old, sturdy house is truly a HOME, and here is one way we share it with others.
Back when the kids were in high school we started hosting a Windy Hill Friendsgiving. Every year since, just a day or two before Thanksgiving, we open our doors, our hearts, and every single room in our home to all 3 layers of our children’s social networks.

Kate and some old friends.
text group Planning
The planning begins about a month out and the great part is that I don’t really need to do much at all as our kids fully coordinate the day. They plan the entire menu primarily through group text chains, help with table and chair set up, and by adorning with appropriate decor. Banners are hung by the threshold with care in hopes that Friendsgiving soon will be there.

Tessa and girlfriends gather under the banner.
The homecooked Meal
Via text, each friend joining us is assigned one dish to share. It’s just an old-fashioned Potluck. Some kids choose their specialty, as is the case with Mckenna who always bakes her sought-after peanut butter cup cookies. As expected some kids like to sign up for “drinks” or “dinner rolls”, something they can grab on the way over, while others make their grandma’s homemade stuffing. It’s remarkable that all the bases are always covered, no one needs to stress, and there is plenty for everyone. So simple for me.

Elementary school friends Danny and Kyle eyeing up the meats.
Buffet Style is best
When everyone arrives the traveling casseroles are lined up all over the kitchen so that everyone can dig in buffet style. This is understandably the easiest way to host, as hungry boys line up quickly and it’s best if the food is all in one place.

Blake’s friends line up at the kitchen island.

I try to capture the happy moments as friends reunite.
Small House, Many Guests
Some years we hosted 40+ guests, from all 3 different groups of friends. Since the kids are so close in age it’s nice because everyone knows everyone all throughout the house. We try to have tables everywhere so there is plenty of seating. This is a little outdoor cafe table that I cover and set in the corner of the family room for more intimate dining. Maybe it reminds them of Paris.

Jenna, McKenna and Tristan enjoy a quiet corner.
It depends on the year, but sometimes all the guys gather to feast separately from the gals, but other times, everybody mixes up the fun. Guy-only tables can get pretty messy but I stay focused on the fun and photos, and the kids always help with clean up - they are just such a great group.

The guy table.

Gals choose the other side of the dining room.
Will I have enough space?
We only have 4 small rooms plus a mudroom on the lower level of the farmhouse, so squeezing all these kids in at once is no easy task. I’ve been known to cast our sofas onto the deck in order to set up several 8ft long tables with our flea market stash of odd wooden chairs so there is plenty of space. The kids just love it and it’s totally worth it. Memories mean a lot.

Move furniture, add tables, make memories.
Free-but-festive Centerpieces
And as the day approaches everyone helps gather pinecones and greens for the “free-but-festive” centerpieces. Unique every year. Plus each fall I bulk up on plenty of votives so there’s always a cozy glow throughout. Votives are low on the table, the candles don’t drip wax, and they are just plain easy.

Hugs and kisses everywhere.
Nothing too precious attitude
I love this tradition and I am so glad nothing was ever too precious here to prevent us from turning Windy Hill into a Friendsgiving HUB. Sharing our home in all the ways we have and taking the time to know so many of our children’s friends has helped us too.
Over the years our farm has also been the gathering spot for our friends many of whom are, not surprisingly, the parents of the kids in these photos. I think if you have a farm with this much history (the topic for another blog), it’s a good idea to continuously SHARE it, and share it well. Friendsgiving 2022 is tomorrow, so now I’ve got to go! Much love and Happy Thanksgiving all!

Tess and her clan of pals.

Kate’s friends, home from college, squeeze into the corner cafe.
Thanks for reading, I’d love to hear from you in the comments below. -Kim
If you’re a blogger, what’s your favorite SEO Tool? I’ve had much keyword success with RankIQ. Learn more here.
Learn: The earliest use of the term Friendsgiving dates back to a 2007 tweet, but some people credit the hit show Friends for inspiring the concept of spending the holiday with friends.
Create: Cultivate the “spirit” by inviting your kid’s friends to your home often.
Inspire: Host a Friendsgiving of your own soon.
I’m always here to help you with your creative journey. Please sign up to receive blog post notifications and follow Studio Sprig on Instagram, Facebook, and Pinterest. I look forward to connecting. - Kim
Shop this blog:
Friendsgiving Burlap Banner
Glass Votives
Big box of small candles
Long Tables
If you are enjoying my blog, please sign up to receive my blog updates on my homepage.
Contact Kim Bensing, Art Director, Studio Sprig
Hi, I’m Kim. Welcome to Studio Sprig.
Kim Bensing’s original watercolors and designs are now available on wallpaper and fabric. To order visit Studio Sprig’s design library on Spoonflower. Contact me if you need assistance.
-
EVENTS
22
- Oct 23, 2026 Wrapped in Wonder: The Art of Giving a Gift Oct 23, 2026
- Sep 26, 2026 Homecoming Flowers: A Beautiful Tradition Then and Now Sep 26, 2026
- Sep 23, 2026 Choose Wedding Flowers With Meaning: How to Create a Bouquet That Tells Your Love Story Sep 23, 2026
- Sep 21, 2026 The Pre-Prom Tradition Every Mom Should Try: Host a Backyard Bouquet Party Sep 21, 2026
- Sep 18, 2026 Lambertville’s Halloween Magic: A Funky, Creative Rivertown Comes Alive Sep 18, 2026
- Aug 20, 2026 How to Host a Beautiful Flower Bar: The Ultimate DIY Flower Bar Party Guide Aug 20, 2026
- Aug 19, 2026 How to Decorate Cakes with Fresh Flowers: Floral Wreaths, Crowns & More Aug 19, 2026
- Aug 19, 2026 Decorating Cakes with Fresh Flowers Aug 19, 2026
- May 18, 2025 How to Make DIY Bouquets for Prom May 18, 2025
- May 7, 2025 How to Preserve and Use Your Spring Flowers - All Year Long May 7, 2025
- Feb 27, 2025 Get Excited for The Flower Show Feb 27, 2025
- Feb 14, 2025 Historic Castles. What are they used for? Feb 14, 2025
- Jan 31, 2025 Creative Ideas For Your Valentine Jan 31, 2025
- Jan 28, 2025 How An Invitation Can Tell Your Love Story Jan 28, 2025
- Jan 23, 2025 How to Design a Valentine Tree Jan 23, 2025
- Jan 16, 2025 Host a Fabulous Bouquet Bar for Valentine's Day Jan 16, 2025
- Apr 4, 2023 Why Choose Seasonal Flowers for Your Special Occasion? Apr 4, 2023
- Feb 1, 2023 10 Ideas for an Eco-Friendly Event or Wedding Feb 1, 2023
- Nov 14, 2022 A Family Tree Inspired Wedding Invitation Nov 14, 2022
- Oct 3, 2022 How to choose flowers that have sentimental meaning Oct 3, 2022
- Nov 9, 2020 Simplified Wedding Ceremony during Covid Nov 9, 2020
- Apr 2, 2019 Why You Should Choose Seasonal Prom Flowers Apr 2, 2019
-
HOME
23
- Sep 9, 2026 How to Name a Farm: 10 Meaningful Ideas for Creating a Name With a Story Sep 9, 2026
- Sep 1, 2026 How to Preserve Flowers for Creative Projects Sep 1, 2026
- Jul 2, 2026 How to make your own flower confetti Jul 2, 2026
- Apr 22, 2025 How We Painted our Barn Apr 22, 2025
- Apr 16, 2025 What to Plant for Mesmerizing Spring Blooms Apr 16, 2025
- Apr 8, 2025 Narcissus AKA Daffodil - What's Blooming at Studio Sprig Apr 8, 2025
- Apr 1, 2025 Glory-of-the-Snow - What's Blooming at Studio Sprig Apr 1, 2025
- Mar 19, 2025 How we turned an Artist Studio into a Weekend Retreat Mar 19, 2025
- Mar 12, 2025 The Mighty Crocus - First to Bloom - What's Blooming at Studio Sprig Mar 12, 2025
- Jan 23, 2025 How to Design a Valentine Tree Jan 23, 2025
- Jan 16, 2025 Host a Fabulous Bouquet Bar for Valentine's Day Jan 16, 2025
- Jan 9, 2025 How to Make Your Own Mint Tea Jan 9, 2025
- Jan 7, 2025 How To Create A Courtyard Jan 7, 2025
- Jan 2, 2025 How to Create a Stunning Centerpiece Jan 2, 2025
- Mar 27, 2023 How We Transformed Our Farmhouse Kitchen by Reusing, Updating, and Thrifting: (Coffee Bar) Mar 27, 2023
- Mar 27, 2023 How We Transformed Our Farmhouse Kitchen by Reusing, Updating, and Thrifting Mar 27, 2023
- Mar 1, 2023 How and Why We Love Historic Homes Mar 1, 2023
- Jan 3, 2023 Eliminate Sneaky Sugars Jan 3, 2023
- Dec 14, 2022 How to Create a Pretty Mini Bar with Items You Already Own Dec 14, 2022
- Nov 21, 2022 Friendsgiving At Our Farm Nov 21, 2022
- Nov 9, 2022 Herbs: How to Grow, Harvest and Dry Your Own Nov 9, 2022
- Nov 9, 2022 DIY Herb Drying Rack: Herb Drying at Home Nov 9, 2022
- Oct 12, 2022 Have you ever thought about creating a beautiful water feature? Oct 12, 2022
-
STYLE
27
- Oct 6, 2026 Where Flowers Become Art, Experiences & Memories Oct 6, 2026
- Sep 1, 2026 How to Preserve Flowers for Creative Projects Sep 1, 2026
- Aug 20, 2026 How to Host a Beautiful Flower Bar: The Ultimate DIY Flower Bar Party Guide Aug 20, 2026
- Aug 19, 2026 How to Decorate Cakes with Fresh Flowers: Floral Wreaths, Crowns & More Aug 19, 2026
- Aug 19, 2026 Decorating Cakes with Fresh Flowers Aug 19, 2026
- Jul 2, 2026 How to make your own flower confetti Jul 2, 2026
- Nov 3, 2025 Creating a Pressed Flower Frame Nov 3, 2025
- May 7, 2025 How to Preserve and Use Your Spring Flowers - All Year Long May 7, 2025
- Jan 28, 2025 How An Invitation Can Tell Your Love Story Jan 28, 2025
- Jan 23, 2025 How to Design a Valentine Tree Jan 23, 2025
- Jan 6, 2025 How to Create Oyster Shell Necklaces Jan 6, 2025
- Jan 2, 2025 How to Create a Stunning Centerpiece Jan 2, 2025
- Mar 14, 2023 How to Make Sentimental Easter Eggs Mar 14, 2023
- Mar 6, 2023 How to Enjoy The PHS Philadelphia Flower Show Mar 6, 2023
- Feb 13, 2023 Let's Save The Bees Feb 13, 2023
- Feb 1, 2023 10 Ideas for an Eco-Friendly Event or Wedding Feb 1, 2023
- Jan 12, 2023 A Great Way to Help Kids with Cancer (PENN STATE) Jan 12, 2023
- Dec 14, 2022 How to Create a Pretty Mini Bar with Items You Already Own Dec 14, 2022
- Nov 29, 2022 Lunch and Dinner -Studio Sprig Style Micro Blog Nov 29, 2022
- Nov 14, 2022 A Family Tree Inspired Wedding Invitation Nov 14, 2022
- Nov 9, 2022 DIY Herb Drying Rack: Herb Drying at Home Nov 9, 2022
- Oct 30, 2022 Lambertville, Nj , A Funky, Cool Rivertown You Must Visit on Halloween. Oct 30, 2022
- Oct 19, 2022 How to choose an interesting place to stay when you travel or go on vacation Oct 19, 2022
- Oct 12, 2022 Have you ever thought about creating a beautiful water feature? Oct 12, 2022
- Oct 3, 2022 How to choose flowers that have sentimental meaning Oct 3, 2022
- Feb 1, 2021 How to design marketing materials for your small business Feb 1, 2021
- Oct 29, 2020 Surprise the bride when you can't come to her wedding Oct 29, 2020